
Looking for a tasty side dish that steals the show? Garlic Herb Butter Roasted Carrots are packed with flavor and easy to make. In this post, I’ll guide you through each step, from selecting fresh carrots to perfecting the garlic herb butter. Plus, I’ll share tips on how to adjust flavors and storage options, ensuring you enjoy this vibrant dish again and again. Let’s turn your next meal into a delightful experience!
Why I Love This Recipe
- Simple Preparation: This recipe requires minimal effort, making it perfect for busy weeknights or special occasions.
- Flavorful Combination: The garlic and herbs elevate the natural sweetness of the carrots, creating a deliciously balanced dish.
- Versatile Side Dish: These roasted carrots pair well with a variety of main courses, from roasted meats to vegetarian dishes.
- Healthy and Nutritious: Carrots are packed with vitamins and are a great way to add more veggies to your meal.
Ingredients
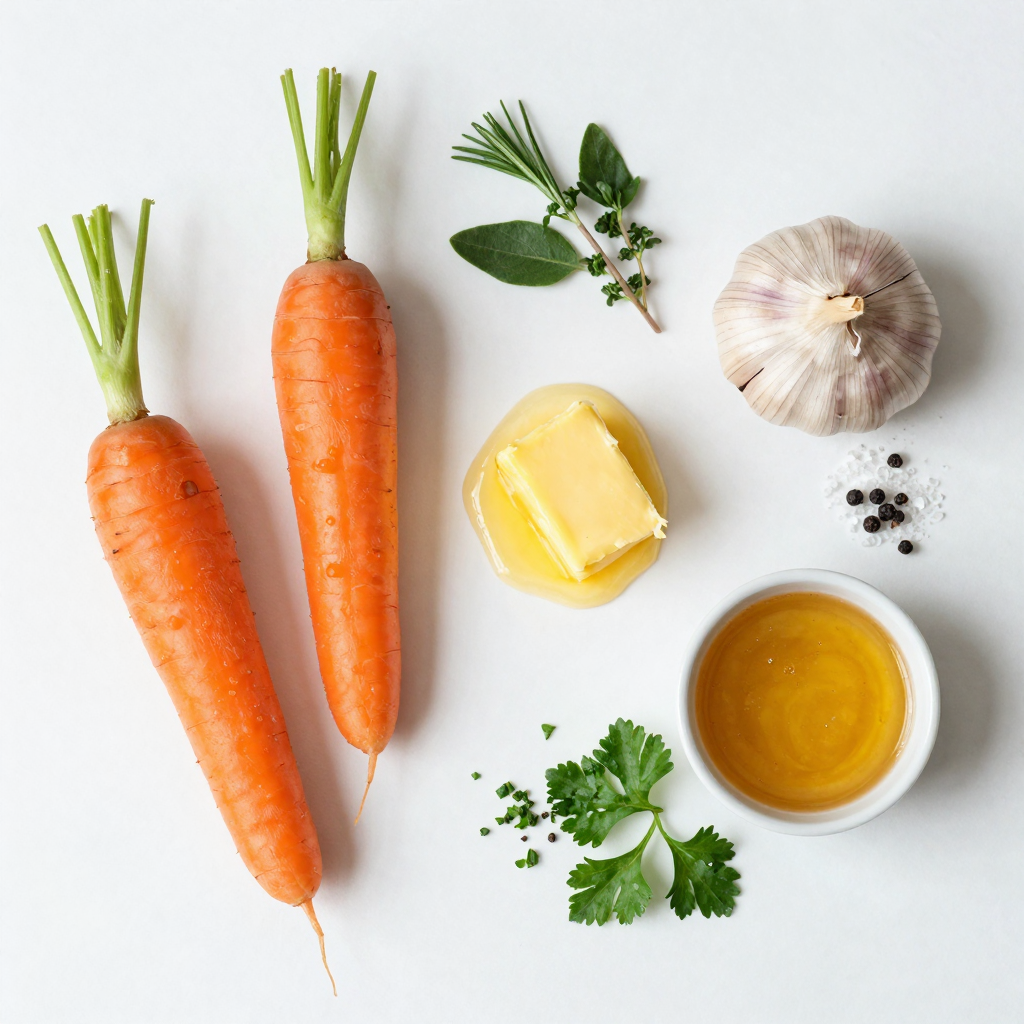
List of Ingredients
– 1 pound baby carrots (or regular carrots, cut into sticks)
– 4 tablespoons unsalted butter, melted
– 4 cloves garlic, minced
– 1 teaspoon fresh thyme leaves (or ½ teaspoon dried thyme)
– 1 teaspoon fresh rosemary, chopped (or ½ teaspoon dried rosemary)
– Salt and pepper, to taste
– 1 tablespoon honey (optional, for added sweetness)
– Fresh parsley, chopped (for garnish)
Substitutions and Options
You can switch baby carrots for regular ones. Just cut them into sticks. Use olive oil instead of butter for a vegan option. If you don’t have thyme or rosemary, try using oregano or basil. They add great flavor too! For added sweetness, you can use maple syrup instead of honey.
Health Benefits of Carrots
Carrots are not just tasty; they are also good for you. They are high in vitamin A, which helps your eyes. Carrots also have fiber, which aids digestion. Eating carrots can boost your immune system and promote healthy skin. Plus, they are low in calories, making them a great choice for snacks!
Step-by-Step Instructions
Preheating the Oven
First, you need to preheat your oven to 400°F (200°C). This step is very important. A hot oven helps the carrots roast evenly. It also makes them caramelize nicely.
Preparing the Garlic Herb Butter Mixture
Next, grab a mixing bowl. In this bowl, pour in 4 tablespoons of melted unsalted butter. Then add 4 minced garlic cloves. Garlic gives a strong flavor that plays well with the carrots. Now, toss in 1 teaspoon of fresh thyme leaves and 1 teaspoon of chopped fresh rosemary. If you don’t have fresh herbs, you can use dried ones. Just use half the amount. Finally, add salt and pepper to taste. If you want a touch of sweetness, mix in 1 tablespoon of honey. Whisk all these ingredients together until they blend well.
Coating and Arranging the Carrots
Now it’s time for the carrots. You can use 1 pound of baby carrots or cut regular carrots into sticks. Add the carrots to your garlic herb butter mixture. Toss them gently until each carrot is coated well. This step ensures every bite is flavorful. Then, take a baking sheet and line it with parchment paper. Spread the coated carrots in a single layer on the sheet. Make sure they have some space between them.
Roasting Tips
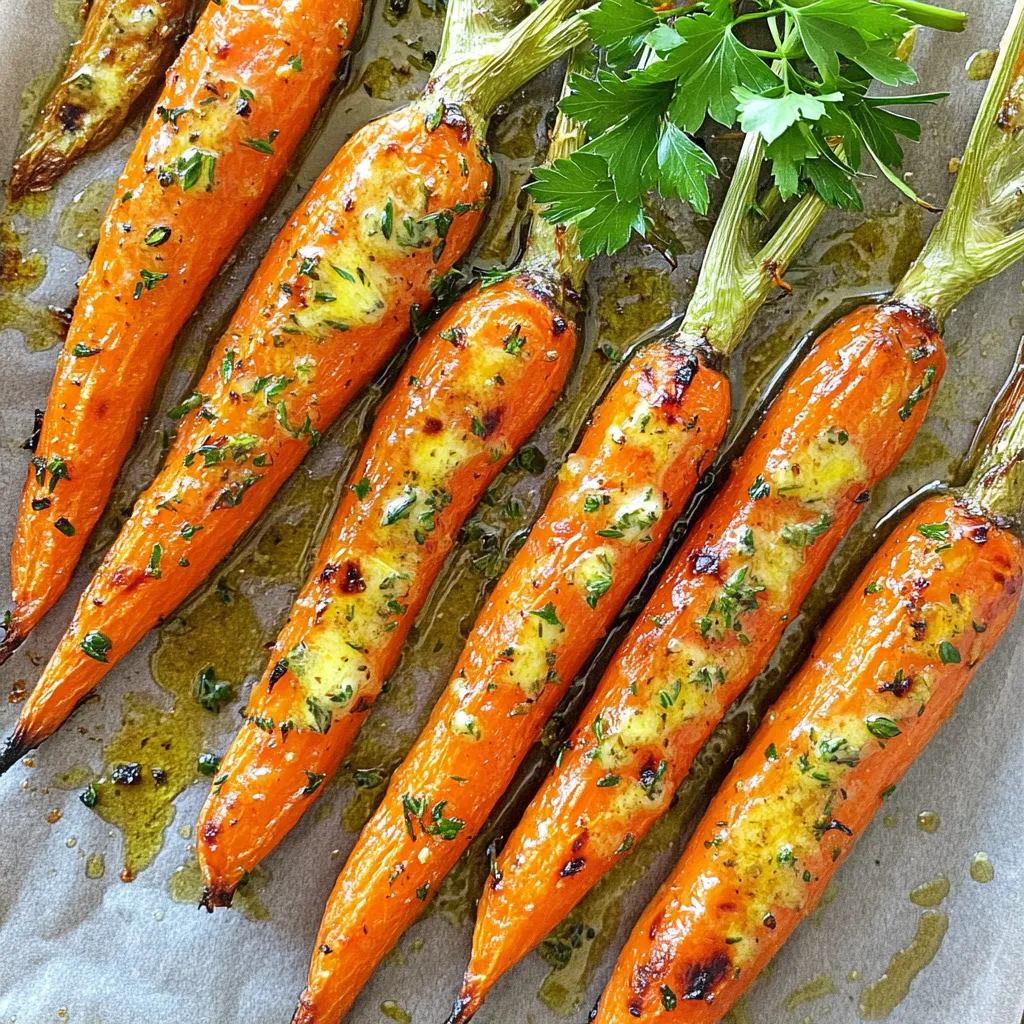
Place the baking sheet in the oven and roast the carrots for 25 to 30 minutes. Halfway through roasting, stir the carrots to make sure they cook evenly. You will know they are done when they are tender and have a nice caramelized color. After removing them from the oven, sprinkle fresh parsley on top for a bright touch. Enjoy these tasty carrots as a side dish!
Pro Tips
- Choose the Right Carrots: Using baby carrots will give you a sweet and tender texture, but regular carrots cut into sticks also work beautifully.
- Don’t Skip the Honey: A tablespoon of honey adds a delightful sweetness that balances the savory garlic and herbs perfectly.
- Stir Halfway Through: To ensure even roasting and caramelization, stir the carrots halfway through the cooking time.
- Garnish for Freshness: Adding fresh parsley at the end not only enhances the dish’s appearance but also adds a burst of fresh flavor.
Tips & Tricks
How to Achieve Perfectly Roasted Carrots
To get the best roasted carrots, start with fresh baby carrots. They are sweeter and cook evenly. If you use regular carrots, cut them into sticks that are the same size. This helps them cook at the same rate. Make sure to coat them well with the garlic herb butter. This adds flavor and helps with browning. Stir the carrots halfway through roasting to ensure they cook evenly.
Adjusting Flavor Profiles
You can change the flavors to suit your taste. If you want more zest, add lemon juice or zest before serving. For a spicy kick, sprinkle red pepper flakes on the carrots. You can also swap herbs. Try dill or basil for a fresh twist. Adding honey gives a nice sweetness, but it’s optional. Taste the butter mixture before coating the carrots. Adjust salt and pepper as needed for your liking.
Serving Suggestions
Garlic herb butter roasted carrots are great with many dishes. They pair well with chicken, fish, or beef. Serve them alongside rice or quinoa for a complete meal. You can also mix them into salads for added crunch and flavor. Top with extra parsley or a sprinkle of feta for a gourmet touch. These carrots are not just a side; they can shine as a main dish in a veggie platter too.
Variations
Herb Alternatives
You can change the herbs to suit your taste. Try using basil or oregano. These herbs add a nice twist. If you want a bolder flavor, add sage. Fresh herbs always give the best taste. Dried herbs work too, just use less.
Adding Other Vegetables
Carrots are great, but other veggies are fun too. You can mix in baby potatoes or parsnips. These cook well and add different flavors. Bell peppers and zucchini also roast nicely. Just cut them to a similar size as the carrots. This helps them cook evenly.
Sweetening Options
If you want a sweeter taste, honey is a good choice. You can use maple syrup for a different flavor. Brown sugar also works well for caramelization. Just be careful not to add too much. A little sweetness balances the savory garlic and herb taste.
Storage Info
Storing Leftovers
Store your leftover Garlic Herb Butter Roasted Carrots in a sealed container. Use an airtight container to keep them fresh. Make sure to cool the carrots to room temperature before storing. This step helps prevent moisture build-up.
Reheating Instructions
To reheat, place the carrots in a microwave-safe dish. Cover the dish with a lid or damp paper towel. Heat them in short bursts, about 30 seconds at a time. Stir between intervals until they are warm. You can also reheat them in the oven. Preheat to 350°F (175°C) and warm for about 10 minutes.
How Long Do They Last?
When stored properly, the roasted carrots last up to 3 days in the fridge. After that, they may lose their taste and texture. If you notice any signs of spoilage, it is best to discard them. Enjoy your flavorful side dish while it’s fresh!
FAQs
Can I use frozen carrots?
Yes, you can use frozen carrots. They will need a longer roasting time. Check them often to avoid overcooking. Frozen carrots may lack some crispness compared to fresh ones.
Can I make this recipe dairy-free?
You can easily make this recipe dairy-free. Replace the butter with olive oil or a plant-based butter. The flavor will still be great, and your carrots will roast beautifully.
What main dishes pair well with Garlic Herb Butter Roasted Carrots?
These carrots go well with many main dishes. They are great with roasted chicken or grilled steak. They also complement fish and vegetarian dishes. Try them with quinoa or lentil salads for a healthy touch.
How do I know when the carrots are done roasting?
Check the carrots after 25 minutes. They should be tender when pierced with a fork. A little caramelization on the edges means they are done. If they need more time, roast for another 5 minutes.
Can I prepare the carrots ahead of time?
Yes, you can prep the carrots ahead. Toss them in the garlic herb butter mixture. Store them in the fridge for up to 24 hours. Just roast them when you’re ready to serve.
We explored how to roast carrots with garlic herb butter. You learned the best ingredients, health benefits, and tips for perfect roasting. I shared ways to adjust flavors and offered serving ideas to impress your guests. Remember, you can mix in other veggies or use different herbs. Store leftovers properly to enjoy them later, too. Roasting carrots can be simple and tasty. Get ready to enjoy a delicious side dish that’s good for you!


