Garlic Herb Pull Apart Rolls Festive and Flavorful Delight

To make Garlic Herb Pull Apart Rolls, you need these main ingredients: - 3 cups all-purpose flour - 1 packet (2 ¼ tsp) active dry yeast - 1 teaspoon sugar - 1 teaspoon salt - 1 cup warm milk (110°F/45°C) - ¼ cup unsalted butter, melted - 2 tablespoons olive oil - 4 cloves garlic, minced - 1 tablespoon fresh rosemary, chopped - 1 tablespoon fresh thyme, chopped - 2 tablespoons fresh parsley, chopped - ½ teaspoon black pepper - 1 tablespoon melted butter (for brushing) These ingredients create soft, flavorful rolls that pull apart easily. You will need a few simple tools to make these rolls: - Mixing bowls - Whisk - Measuring cups and spoons - Baking dish - Clean cloth - Rolling pin - Oven Having the right tools makes the process smoother and more fun. If you want to change things up, you can substitute some ingredients. Here are a few ideas: - Use whole wheat flour instead of all-purpose flour for a healthier option. - Coconut milk or almond milk can replace regular milk. - Use garlic powder if you don’t have fresh garlic. - Other herbs like oregano or basil can replace rosemary, thyme, or parsley. - You can use margarine instead of butter if you need a dairy-free option. These swaps can help you customize the rolls to your taste. Enjoy experimenting! {{ingredient_image_1}} Start by mixing warm milk, sugar, and yeast in a small bowl. Use around 110°F (45°C) for the milk. Let it sit for 5 to 10 minutes. You want it to become frothy. This shows the yeast is active. If it does not foam, the yeast may be old. In a large mixing bowl, combine 3 cups of flour and 1 teaspoon of salt. Make a well in the center. Pour in your frothy yeast mixture along with ¼ cup of melted butter and 2 tablespoons of olive oil. Mix it all together until a soft dough forms. Knead the dough on a lightly floured surface for about 8 to 10 minutes. You want it smooth and elastic. Once you have your dough, place it in a greased bowl. Cover it with a clean cloth. Let it rise in a warm spot for about 1 hour until it doubles in size. After the dough has risen, preheat your oven to 375°F (190°C). Punch down the dough to release air. Divide it into 12 equal pieces and roll each into a ball. Now, in a small bowl, mix 4 minced garlic cloves, 1 tablespoon of chopped rosemary, 1 tablespoon of chopped thyme, 2 tablespoons of chopped parsley, and ½ teaspoon of black pepper. Dip each dough ball into this herb mix. Make sure they are well-coated. Arrange the coated balls in a greased baking dish, clustering them together. Cover the dish with a cloth again. Let them rise for another 30 minutes. Brush the tops with melted butter before baking. Bake for 20 to 25 minutes until they turn golden brown. Remove them from the oven and brush with more melted butter if you like. Serve them warm for a delightful treat! To ensure your dough rises well, use warm milk. The milk should be around 110°F (45°C). This heat wakes up the yeast. Mix the warm milk with sugar and yeast. Let it sit until frothy. This may take about 5-10 minutes. If the yeast doesn’t bubble, it’s not active. You may need fresh yeast. Place the dough in a warm spot. Cover it with a cloth to keep it warm and cozy. For a golden crust, watch the baking time. Bake at 375°F (190°C) for 20-25 minutes. Check for a rich, golden color. Brush the tops with melted butter before baking. This adds flavor and helps with browning. If the rolls brown too fast, cover them with foil. This helps cook the inside without burning the top. One mistake is not kneading the dough enough. Knead for about 8-10 minutes until it’s smooth. Another mistake is skipping the second rise. Letting the dough rise again helps it become fluffy. Don't pack the dough balls too tightly in the baking dish. They need space to expand. Lastly, avoid opening the oven door too often. This lets the heat out and can cause uneven baking. Pro Tips Proof Your Yeast: Always check that your yeast is active by letting it sit in warm milk with sugar until frothy. If it doesn't foam, your yeast may be dead, and you should replace it. Knead for Texture: Knead the dough until it is smooth and elastic to ensure your rolls have the perfect texture. This usually takes about 8-10 minutes. Herb Variations: Feel free to experiment with different herbs like basil or oregano for unique flavors. Just make sure they are fresh for the best taste. Storage Tips: Store leftover rolls in an airtight container at room temperature for up to two days. Reheat in the oven for a few minutes to regain their freshness. {{image_2}} You can easily change the herbs in these rolls. Try using basil for a sweet flavor. Oregano adds a nice Italian touch. For a bold taste, use sage or dill. Mix and match herbs to suit your taste. Just remember to keep the garlic. It adds a lovely kick that everyone loves. If you love cheese, this is for you. Add mozzarella or cheddar to the dough. After rolling the dough balls, place a small piece of cheese inside each. This way, you get a cheesy surprise when you pull a roll apart. Brush with garlic butter before baking for extra flavor. For a sweet twist, swap garlic for cinnamon. Use brown sugar instead of salt. Add raisins or chopped nuts for texture. Brush the rolls with melted butter and sprinkle with sugar. These sweet rolls make a great breakfast or dessert. Enjoy them warm with a hot drink. To keep your leftover Garlic Herb Pull Apart Rolls fresh, place them in an airtight container. This will help them stay soft. You can also wrap them in plastic wrap. They will last for up to three days at room temperature. If you want to keep them longer, consider freezing them. To freeze your rolls, first let them cool completely. Then, wrap each roll in plastic wrap. Next, place the wrapped rolls in a freezer-safe bag or container. Label it with the date. They can stay in the freezer for up to three months. When you're ready to eat, just thaw them in the fridge overnight. To reheat your rolls, you can use an oven or microwave. For the oven, preheat it to 350°F (175°C). Place the rolls on a baking sheet and cover them with aluminum foil. Bake for about 10-15 minutes until warm. In the microwave, heat them for about 15 seconds each. Just be careful not to overheat, as they can get tough. Enjoy your rolls warm and soft! Yes, you can make these rolls ahead of time. Prepare the dough and let it rise. After the first rise, you can shape the rolls and place them in the baking dish. Cover and refrigerate overnight. Before baking, let them sit at room temperature for about 30 minutes. This will help them rise again and get fluffy. Garlic Herb Pull Apart Rolls pair well with many dishes. You can serve them with soups, stews, or salads. They also go great with pasta or roasted meats. For a fun twist, try them with a cheese dip or marinara sauce. These rolls are versatile and can fit any meal. To check if the rolls are done, look for a golden brown color. They should feel firm to the touch. You can also tap the bottom of the pan; it should sound hollow. If you have a kitchen thermometer, the inside temperature should be around 190°F (88°C). This ensures they are fully cooked and safe to eat. Garlic Herb Pull Apart Rolls are tasty and fun to make. You learned about the key ingredients, the right equipment, and how to shape the dough. We discussed helpful tips to ensure your rolls turn out perfect. You can explore fun variations like cheesy or sweet rolls. Plus, I covered storage ideas to keep your rolls fresh. Enjoy baking these rolls to impress your friends and family. Happy baking!

WANT TO SAVE THIS RECIPE?

Are you ready to impress your friends and family with a tasty treat? Garlic Herb Pull Apart Rolls are easy to make and packed with flavor! These soft, buttery rolls pull apart into warm, savory bites that everyone will love. In this blog, I’ll share simple steps to make these delightful rolls, plus helpful tips to avoid common mistakes. Let’s dive in and get baking!

Why I Love This Recipe

  1. Easy to Make: This recipe is straightforward and doesn’t require advanced baking skills, making it perfect for beginners.
  2. Flavorful Herbs: The combination of garlic and fresh herbs adds a delightful aroma and taste, elevating the rolls to a gourmet level.
  3. Perfect for Sharing: These pull-apart rolls are ideal for gatherings, allowing everyone to enjoy them easily and interactively.
  4. Delightful Texture: The soft, fluffy texture makes these rolls irresistible, perfect for soaking up sauces or enjoying on their own.

Ingredients

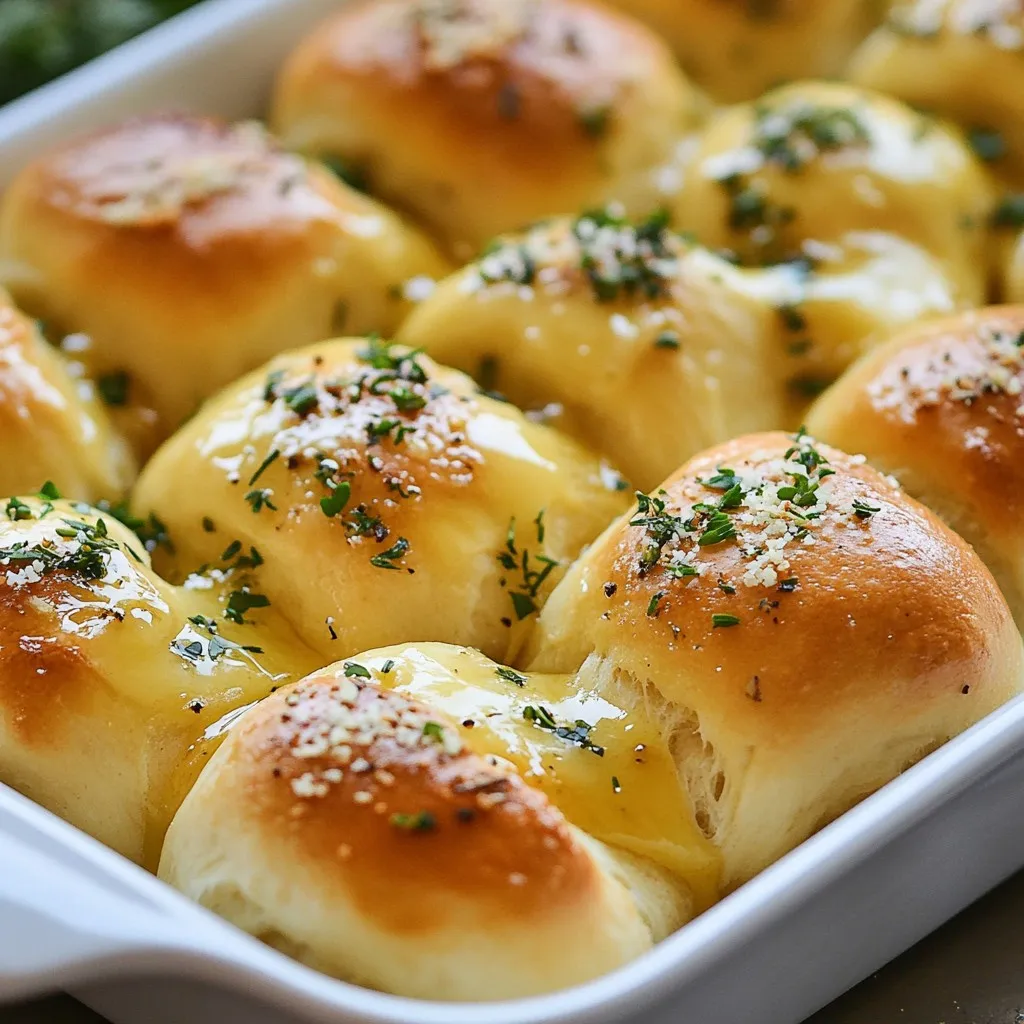
Main ingredients for Garlic Herb Pull Apart Rolls

To make Garlic Herb Pull Apart Rolls, you need these main ingredients:

  • 3 cups all-purpose flour
  • 1 packet (2 ¼ tsp) active dry yeast
  • 1 teaspoon sugar
  • 1 teaspoon salt
  • 1 cup warm milk (110°F/45°C)
  • ¼ cup unsalted butter, melted
  • 2 tablespoons olive oil
  • 4 cloves garlic, minced
  • 1 tablespoon fresh rosemary, chopped
  • 1 tablespoon fresh thyme, chopped
  • 2 tablespoons fresh parsley, chopped
  • ½ teaspoon black pepper
  • 1 tablespoon melted butter (for brushing)

These ingredients create soft, flavorful rolls that pull apart easily.

Equipment needed

You will need a few simple tools to make these rolls:

  • Mixing bowls
  • Whisk
  • Measuring cups and spoons
  • Baking dish
  • Clean cloth
  • Rolling pin
  • Oven

Having the right tools makes the process smoother and more fun.

Possible ingredient substitutions

If you want to change things up, you can substitute some ingredients. Here are a few ideas:

  • Use whole wheat flour instead of all-purpose flour for a healthier option.
  • Coconut milk or almond milk can replace regular milk.
  • Use garlic powder if you don’t have fresh garlic.
  • Other herbs like oregano or basil can replace rosemary, thyme, or parsley.
  • You can use margarine instead of butter if you need a dairy-free option.

These swaps can help you customize the rolls to your taste. Enjoy experimenting!

Step-by-Step Instructions

Preparing the yeast mixture

Start by mixing warm milk, sugar, and yeast in a small bowl. Use around 110°F (45°C) for the milk. Let it sit for 5 to 10 minutes. You want it to become frothy. This shows the yeast is active. If it does not foam, the yeast may be old.

Making the dough

In a large mixing bowl, combine 3 cups of flour and 1 teaspoon of salt. Make a well in the center. Pour in your frothy yeast mixture along with ¼ cup of melted butter and 2 tablespoons of olive oil. Mix it all together until a soft dough forms. Knead the dough on a lightly floured surface for about 8 to 10 minutes. You want it smooth and elastic.

Once you have your dough, place it in a greased bowl. Cover it with a clean cloth. Let it rise in a warm spot for about 1 hour until it doubles in size.

Shaping and coating the dough

After the dough has risen, preheat your oven to 375°F (190°C). Punch down the dough to release air. Divide it into 12 equal pieces and roll each into a ball.

Now, in a small bowl, mix 4 minced garlic cloves, 1 tablespoon of chopped rosemary, 1 tablespoon of chopped thyme, 2 tablespoons of chopped parsley, and ½ teaspoon of black pepper. Dip each dough ball into this herb mix. Make sure they are well-coated.

Arrange the coated balls in a greased baking dish, clustering them together. Cover the dish with a cloth again. Let them rise for another 30 minutes. Brush the tops with melted butter before baking.

Bake for 20 to 25 minutes until they turn golden brown. Remove them from the oven and brush with more melted butter if you like. Serve them warm for a delightful treat!

Tips & Tricks

Ensuring the dough rises properly

To ensure your dough rises well, use warm milk. The milk should be around 110°F (45°C). This heat wakes up the yeast. Mix the warm milk with sugar and yeast. Let it sit until frothy. This may take about 5-10 minutes. If the yeast doesn’t bubble, it’s not active. You may need fresh yeast. Place the dough in a warm spot. Cover it with a cloth to keep it warm and cozy.

Achieving the perfect golden crust

For a golden crust, watch the baking time. Bake at 375°F (190°C) for 20-25 minutes. Check for a rich, golden color. Brush the tops with melted butter before baking. This adds flavor and helps with browning. If the rolls brown too fast, cover them with foil. This helps cook the inside without burning the top.

Common mistakes to avoid

One mistake is not kneading the dough enough. Knead for about 8-10 minutes until it’s smooth. Another mistake is skipping the second rise. Letting the dough rise again helps it become fluffy. Don’t pack the dough balls too tightly in the baking dish. They need space to expand. Lastly, avoid opening the oven door too often. This lets the heat out and can cause uneven baking.

Pro Tips

  1. Proof Your Yeast: Always check that your yeast is active by letting it sit in warm milk with sugar until frothy. If it doesn’t foam, your yeast may be dead, and you should replace it.
  2. Knead for Texture: Knead the dough until it is smooth and elastic to ensure your rolls have the perfect texture. This usually takes about 8-10 minutes.
  3. Herb Variations: Feel free to experiment with different herbs like basil or oregano for unique flavors. Just make sure they are fresh for the best taste.
  4. Storage Tips: Store leftover rolls in an airtight container at room temperature for up to two days. Reheat in the oven for a few minutes to regain their freshness.

Variations

Herb variations for different flavors

You can easily change the herbs in these rolls. Try using basil for a sweet flavor. Oregano adds a nice Italian touch. For a bold taste, use sage or dill. Mix and match herbs to suit your taste. Just remember to keep the garlic. It adds a lovely kick that everyone loves.

Cheesy garlic pull-apart rolls

If you love cheese, this is for you. Add mozzarella or cheddar to the dough. After rolling the dough balls, place a small piece of cheese inside each. This way, you get a cheesy surprise when you pull a roll apart. Brush with garlic butter before baking for extra flavor.

Sweet pull-apart rolls option

For a sweet twist, swap garlic for cinnamon. Use brown sugar instead of salt. Add raisins or chopped nuts for texture. Brush the rolls with melted butter and sprinkle with sugar. These sweet rolls make a great breakfast or dessert. Enjoy them warm with a hot drink.

Storage Info

How to store leftover rolls

To keep your leftover Garlic Herb Pull Apart Rolls fresh, place them in an airtight container. This will help them stay soft. You can also wrap them in plastic wrap. They will last for up to three days at room temperature. If you want to keep them longer, consider freezing them.

Freezing instructions

To freeze your rolls, first let them cool completely. Then, wrap each roll in plastic wrap. Next, place the wrapped rolls in a freezer-safe bag or container. Label it with the date. They can stay in the freezer for up to three months. When you’re ready to eat, just thaw them in the fridge overnight.

Reheating tips

To reheat your rolls, you can use an oven or microwave. For the oven, preheat it to 350°F (175°C). Place the rolls on a baking sheet and cover them with aluminum foil. Bake for about 10-15 minutes until warm. In the microwave, heat them for about 15 seconds each. Just be careful not to overheat, as they can get tough. Enjoy your rolls warm and soft!

FAQs

Can I make Garlic Herb Pull Apart Rolls in advance?

Yes, you can make these rolls ahead of time. Prepare the dough and let it rise. After the first rise, you can shape the rolls and place them in the baking dish. Cover and refrigerate overnight. Before baking, let them sit at room temperature for about 30 minutes. This will help them rise again and get fluffy.

What can I serve with pull apart rolls?

Garlic Herb Pull Apart Rolls pair well with many dishes. You can serve them with soups, stews, or salads. They also go great with pasta or roasted meats. For a fun twist, try them with a cheese dip or marinara sauce. These rolls are versatile and can fit any meal.

How do I know when the rolls are fully baked?

To check if the rolls are done, look for a golden brown color. They should feel firm to the touch. You can also tap the bottom of the pan; it should sound hollow. If you have a kitchen thermometer, the inside temperature should be around 190°F (88°C). This ensures they are fully cooked and safe to eat.

Garlic Herb Pull Apart Rolls are tasty and fun to make. You learned about the key ingredients, the right equipment, and how to shape the dough. We discussed helpful tips to ensure your rolls turn out perfect. You can explore fun variations like cheesy or sweet rolls. Plus, I covered storage ideas to keep your rolls fresh. Enjoy baking these rolls to impress your friends and family. Happy bakin

To make Garlic Herb Pull Apart Rolls, you need these main ingredients: - 3 cups all-purpose flour - 1 packet (2 ¼ tsp) active dry yeast - 1 teaspoon sugar - 1 teaspoon salt - 1 cup warm milk (110°F/45°C) - ¼ cup unsalted butter, melted - 2 tablespoons olive oil - 4 cloves garlic, minced - 1 tablespoon fresh rosemary, chopped - 1 tablespoon fresh thyme, chopped - 2 tablespoons fresh parsley, chopped - ½ teaspoon black pepper - 1 tablespoon melted butter (for brushing) These ingredients create soft, flavorful rolls that pull apart easily. You will need a few simple tools to make these rolls: - Mixing bowls - Whisk - Measuring cups and spoons - Baking dish - Clean cloth - Rolling pin - Oven Having the right tools makes the process smoother and more fun. If you want to change things up, you can substitute some ingredients. Here are a few ideas: - Use whole wheat flour instead of all-purpose flour for a healthier option. - Coconut milk or almond milk can replace regular milk. - Use garlic powder if you don’t have fresh garlic. - Other herbs like oregano or basil can replace rosemary, thyme, or parsley. - You can use margarine instead of butter if you need a dairy-free option. These swaps can help you customize the rolls to your taste. Enjoy experimenting! {{ingredient_image_1}} Start by mixing warm milk, sugar, and yeast in a small bowl. Use around 110°F (45°C) for the milk. Let it sit for 5 to 10 minutes. You want it to become frothy. This shows the yeast is active. If it does not foam, the yeast may be old. In a large mixing bowl, combine 3 cups of flour and 1 teaspoon of salt. Make a well in the center. Pour in your frothy yeast mixture along with ¼ cup of melted butter and 2 tablespoons of olive oil. Mix it all together until a soft dough forms. Knead the dough on a lightly floured surface for about 8 to 10 minutes. You want it smooth and elastic. Once you have your dough, place it in a greased bowl. Cover it with a clean cloth. Let it rise in a warm spot for about 1 hour until it doubles in size. After the dough has risen, preheat your oven to 375°F (190°C). Punch down the dough to release air. Divide it into 12 equal pieces and roll each into a ball. Now, in a small bowl, mix 4 minced garlic cloves, 1 tablespoon of chopped rosemary, 1 tablespoon of chopped thyme, 2 tablespoons of chopped parsley, and ½ teaspoon of black pepper. Dip each dough ball into this herb mix. Make sure they are well-coated. Arrange the coated balls in a greased baking dish, clustering them together. Cover the dish with a cloth again. Let them rise for another 30 minutes. Brush the tops with melted butter before baking. Bake for 20 to 25 minutes until they turn golden brown. Remove them from the oven and brush with more melted butter if you like. Serve them warm for a delightful treat! To ensure your dough rises well, use warm milk. The milk should be around 110°F (45°C). This heat wakes up the yeast. Mix the warm milk with sugar and yeast. Let it sit until frothy. This may take about 5-10 minutes. If the yeast doesn’t bubble, it’s not active. You may need fresh yeast. Place the dough in a warm spot. Cover it with a cloth to keep it warm and cozy. For a golden crust, watch the baking time. Bake at 375°F (190°C) for 20-25 minutes. Check for a rich, golden color. Brush the tops with melted butter before baking. This adds flavor and helps with browning. If the rolls brown too fast, cover them with foil. This helps cook the inside without burning the top. One mistake is not kneading the dough enough. Knead for about 8-10 minutes until it’s smooth. Another mistake is skipping the second rise. Letting the dough rise again helps it become fluffy. Don't pack the dough balls too tightly in the baking dish. They need space to expand. Lastly, avoid opening the oven door too often. This lets the heat out and can cause uneven baking. Pro Tips Proof Your Yeast: Always check that your yeast is active by letting it sit in warm milk with sugar until frothy. If it doesn't foam, your yeast may be dead, and you should replace it. Knead for Texture: Knead the dough until it is smooth and elastic to ensure your rolls have the perfect texture. This usually takes about 8-10 minutes. Herb Variations: Feel free to experiment with different herbs like basil or oregano for unique flavors. Just make sure they are fresh for the best taste. Storage Tips: Store leftover rolls in an airtight container at room temperature for up to two days. Reheat in the oven for a few minutes to regain their freshness. {{image_2}} You can easily change the herbs in these rolls. Try using basil for a sweet flavor. Oregano adds a nice Italian touch. For a bold taste, use sage or dill. Mix and match herbs to suit your taste. Just remember to keep the garlic. It adds a lovely kick that everyone loves. If you love cheese, this is for you. Add mozzarella or cheddar to the dough. After rolling the dough balls, place a small piece of cheese inside each. This way, you get a cheesy surprise when you pull a roll apart. Brush with garlic butter before baking for extra flavor. For a sweet twist, swap garlic for cinnamon. Use brown sugar instead of salt. Add raisins or chopped nuts for texture. Brush the rolls with melted butter and sprinkle with sugar. These sweet rolls make a great breakfast or dessert. Enjoy them warm with a hot drink. To keep your leftover Garlic Herb Pull Apart Rolls fresh, place them in an airtight container. This will help them stay soft. You can also wrap them in plastic wrap. They will last for up to three days at room temperature. If you want to keep them longer, consider freezing them. To freeze your rolls, first let them cool completely. Then, wrap each roll in plastic wrap. Next, place the wrapped rolls in a freezer-safe bag or container. Label it with the date. They can stay in the freezer for up to three months. When you're ready to eat, just thaw them in the fridge overnight. To reheat your rolls, you can use an oven or microwave. For the oven, preheat it to 350°F (175°C). Place the rolls on a baking sheet and cover them with aluminum foil. Bake for about 10-15 minutes until warm. In the microwave, heat them for about 15 seconds each. Just be careful not to overheat, as they can get tough. Enjoy your rolls warm and soft! Yes, you can make these rolls ahead of time. Prepare the dough and let it rise. After the first rise, you can shape the rolls and place them in the baking dish. Cover and refrigerate overnight. Before baking, let them sit at room temperature for about 30 minutes. This will help them rise again and get fluffy. Garlic Herb Pull Apart Rolls pair well with many dishes. You can serve them with soups, stews, or salads. They also go great with pasta or roasted meats. For a fun twist, try them with a cheese dip or marinara sauce. These rolls are versatile and can fit any meal. To check if the rolls are done, look for a golden brown color. They should feel firm to the touch. You can also tap the bottom of the pan; it should sound hollow. If you have a kitchen thermometer, the inside temperature should be around 190°F (88°C). This ensures they are fully cooked and safe to eat. Garlic Herb Pull Apart Rolls are tasty and fun to make. You learned about the key ingredients, the right equipment, and how to shape the dough. We discussed helpful tips to ensure your rolls turn out perfect. You can explore fun variations like cheesy or sweet rolls. Plus, I covered storage ideas to keep your rolls fresh. Enjoy baking these rolls to impress your friends and family. Happy baking!

Garlic Herb Pull Apart Rolls

Delicious pull-apart rolls infused with garlic and fresh herbs.
Prep Time 20 minutes
Cook Time 25 minutes
Total Time 2 hours
Course Appetizer
Cuisine American
Servings 12
Calories 150 kcal

Ingredients
  

  • 3 cups all-purpose flour
  • 1 packet active dry yeast (2 ¼ tsp)
  • 1 teaspoon sugar
  • 1 teaspoon salt
  • 1 cup warm milk (110°F/45°C)
  • 0.25 cup unsalted butter, melted
  • 2 tablespoons olive oil
  • 4 cloves garlic, minced
  • 1 tablespoon fresh rosemary, chopped
  • 1 tablespoon fresh thyme, chopped
  • 2 tablespoons fresh parsley, chopped
  • 0.5 teaspoon black pepper
  • 1 tablespoon melted butter (for brushing)

Instructions
 

  • In a small bowl, combine warm milk, sugar, and yeast. Let it sit for about 5-10 minutes until it becomes frothy.
  • In a large mixing bowl, combine flour and salt. Make a well in the center and pour in the yeast mixture along with melted butter and olive oil.
  • Mix until a soft dough forms. Knead the dough on a lightly floured surface for about 8-10 minutes until it is smooth and elastic.
  • Place the dough in a greased bowl, cover with a clean cloth, and let it rise in a warm place for about 1 hour, or until doubled in size.
  • Once the dough has risen, preheat your oven to 375°F (190°C).
  • Punch down the dough and divide it into 12 equal pieces. Roll each piece into a ball.
  • In a small bowl, mix together the minced garlic, chopped herbs, and black pepper.
  • Dip each dough ball into the herb mixture, ensuring they are well-coated.
  • Arrange the coated dough balls in a greased baking dish, clustering them together.
  • Cover the dish with a cloth and let them rise again for about 30 minutes.
  • Brush the tops with the remaining melted butter before placing them in the oven.
  • Bake for 20-25 minutes or until golden brown and cooked through.
  • Remove from the oven and brush with more melted butter if desired.
  • Serve warm and enjoy the delightful pull-apart texture!

Notes

Serve warm for the best texture.
Keyword baking, garlic, herbs, rolls

WANT TO SAVE THIS RECIPE?

Related Posts