

Are you ready to elevate your snacking game? These Garlic Parmesan Stuffed Biscuits are fluffy, tasty, and easy to make! Whether you’re hosting a party or enjoying a quiet night at home, these biscuits will impress. In this post, I’ll share all the tips, variations, and storage advice you need. Get ready to enjoy a warm, cheesy delight that will have you coming back for more!
Why I Love This Recipe
- Delicious Flavor Combination: The blend of garlic and Parmesan creates an irresistible flavor that pairs perfectly with the flaky biscuit texture.
- Easy to Make: This recipe comes together quickly, making it a perfect option for busy weeknights or last-minute gatherings.
- Versatile Dish: These stuffed biscuits can be served as a side, appetizer, or even a snack, catering to various occasions.
- Fun to Customize: Feel free to add your favorite herbs or spices to the cheese filling for a personal touch!
Ingredients
List of Ingredients
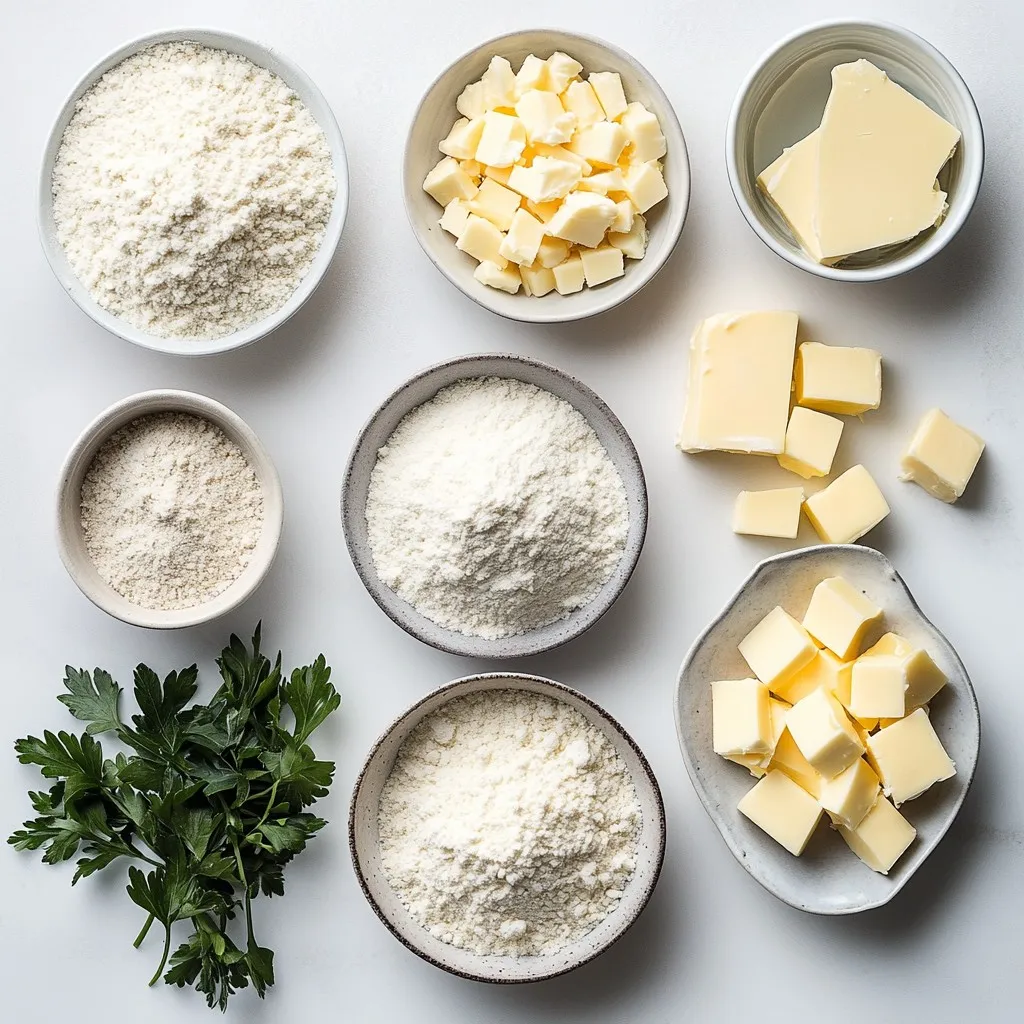
– 2 cups all-purpose flour
– 1 tablespoon baking powder
– 1 teaspoon salt
– 1/2 teaspoon black pepper
– 1/4 cup cold unsalted butter, cubed
– 3/4 cup milk
– 1 cup shredded mozzarella cheese
– 1/2 cup grated Parmesan cheese
– 2 tablespoons fresh parsley, chopped
– 1 tablespoon garlic powder
– 2 tablespoons melted butter (for brushing)
– Extra parsley for garnish
Measurement Tips
To get the best results, measure flour correctly. Use a spoon to scoop flour into a dry measuring cup. Then, level it off with a knife. This method helps avoid too much flour in your biscuits. For the butter, it should be cold for a flaky texture. You can cut it into small cubes for easier mixing.
When measuring liquids like milk, use a liquid measuring cup. Look at the measurement at eye level for accuracy. Fresh parsley should be finely chopped. This will release its flavor without overpowering the cheese.
Recommended Ingredient Brands
For the best flavor, I suggest using King Arthur Flour for all-purpose flour. It has great quality and texture. For butter, Kerrygold is a favorite for its rich taste. When it comes to cheese, I love using Polly-O mozzarella and Grana Padano for Parmesan. Both brands melt wonderfully and enhance the flavors in your biscuits.
Step-by-Step Instructions
Preparing the Biscuit Dough
To make the dough, start by mixing your dry ingredients. In a large bowl, add 2 cups of all-purpose flour, 1 tablespoon of baking powder, 1 teaspoon of salt, and 1/2 teaspoon of black pepper. Whisk them together well. Next, add in 1/4 cup of cold, cubed unsalted butter. Use your fingers or a pastry cutter to blend the butter into the flour. It should look like coarse crumbs.
Now, pour in 3/4 cup of milk. Stir it gently until everything combines. Don’t worry if it looks a bit lumpy; that’s normal! Once mixed, take the dough to a floured surface. Roll it out into a rectangle about 1/2 inch thick.
Making the Garlic Parmesan Filling
For the filling, grab a separate bowl. Mix together 1 cup of shredded mozzarella cheese, 1/2 cup of grated Parmesan cheese, 1 tablespoon of garlic powder, and 2 tablespoons of fresh parsley that you chopped. This mix will bring a tasty burst of flavor to your biscuits.
Stuffing and Baking the Biscuits
Now it’s time to stuff your biscuits. Cut the rolled dough into squares, about 3×3 inches. In the center of each square, place a generous spoonful of the cheese mixture. Fold the corners of the dough over the filling to form a pocket. Make sure to seal it well to keep the filling inside.
Place the stuffed biscuits seam-side down on your lined baking sheet. Brush the tops with 2 tablespoons of melted butter. This will help them get that nice golden color. Bake them in your preheated oven at 425°F for 15-18 minutes. When they puff up and turn golden brown, they are ready!
Once they’re done, let them cool a bit. Brush them again with some melted butter and sprinkle extra parsley on top for a pretty finish. Enjoy your delicious Garlic Parmesan Stuffed Biscuits!
Tips & Tricks
Achieving Fluffy Biscuits
To make light and fluffy biscuits, you need cold butter. When you mix the butter with flour, it should be cold. This helps create steam as they bake. Steam makes the biscuits puff up. Also, do not overmix the dough. Mix until just combined. A few lumps are okay. This keeps the texture nice and fluffy.
Perfecting the Filling Ratio
The filling is key to great flavor. Use a generous spoonful of cheese mix for each biscuit. If you add too much, the biscuits may burst open. If you add too little, they won’t be as tasty. Aim for about two tablespoons of the filling. This amount gives you a nice balance of biscuit and cheese.
Serving Suggestions
Serve these biscuits warm for the best taste. They pair well with soups and salads. Try them with a side of marinara sauce for dipping. You can also sprinkle extra parsley on top for a fresh look. These biscuits make a great snack or appetizer. Enjoy them with friends and family!
Pro Tips
- Chill Your Butter: Cold butter creates a flakier biscuit. Make sure your butter is really cold before cutting it into the flour mixture.
- Don’t Overmix: Overmixing can lead to tough biscuits. Mix until just combined for the best texture.
- Seal Well: Ensure the corners of the dough are sealed tightly around the filling to prevent leakage during baking.
- Customize Your Cheese: Feel free to experiment with different cheeses like cheddar or gouda for a unique flavor twist.
Variations
Cheesy Herb Variations
You can change the herbs in the filling. Try using thyme or rosemary. Fresh herbs add bright flavor. You can also mix cheeses. Cheddar or gouda will work well. This makes your biscuits more fun and tasty. Experiment with different herb and cheese combos. Each bite can be a surprise.
Adding Spices or Heat
Want a kick? Add red pepper flakes to the filling. Just a pinch can add heat. You can also mix in jalapeños for a bold twist. If you like smoky flavors, try adding smoked paprika. Adjust the spice level to fit your taste. These small changes can make a big impact.
Gluten-Free Alternatives
You can still enjoy these biscuits if you’re gluten-free! Use gluten-free flour blends. Make sure to check the mix for baking powder. It should not contain gluten. The texture may change, but the flavor stays great. Follow the same steps to create that fluffy goodness. Enjoy your tasty treats without worry.
Storage Info
How to Store Leftover Biscuits
To keep your leftover biscuits fresh, place them in an airtight container. Let them cool completely first. Store them at room temperature for up to two days. For longer storage, put them in the fridge. They will stay good for up to a week. Just remember, the fresher, the better!
Reheating Instructions
When you want to enjoy your leftover biscuits, reheating is key. Preheat your oven to 350°F (175°C). Place the biscuits on a baking sheet. Heat them for about 10 minutes. This will help them regain their fluffy texture. You can also use a microwave. Just heat them for about 15-20 seconds. However, this might make them a bit chewy.
Freezing Recommendations
Freezing these biscuits is a great option. First, let them cool completely. Then, wrap each biscuit tightly in plastic wrap. Place the wrapped biscuits in a freezer-safe bag. They will stay fresh for up to three months. When you’re ready to eat them, thaw them overnight in the fridge. Reheat as mentioned above for the best taste!
FAQs
Can I use different cheeses for the filling?
Yes, you can use different cheeses. Cheddar and gouda work well. You can mix cheeses too. This adds layers of flavor. Just ensure the cheese melts nicely. Pairing mozzarella with a sharper cheese gives a great taste.
How can I make these biscuits ahead of time?
You can prepare the dough in advance. Wrap it tightly in plastic wrap and chill. You can also stuff the biscuits ahead. Just keep them in the fridge. Bake them when you’re ready to eat. This way, you have warm biscuits fast!
What can I serve with Garlic Parmesan Stuffed Biscuits?
These biscuits pair well with soup. Try them with tomato soup for a classic combo. You can also serve them with a fresh salad. They add a tasty touch to any meal. For a fun snack, serve them with marinara sauce.
In this post, I covered how to make delicious Garlic Parmesan Stuffed Biscuits. You learned about the key ingredients, easy steps, and useful tips. I shared ways to vary the recipe and how to store leftovers.
These biscuits can impress anyone. Try making them for your next meal or snack. Enjoy experimenting with flavors and sharing those tasty results! Cooking is fun, and these biscuits are a great star


