Healthy Blueberry Oat Muffins for Nutritious Snacking

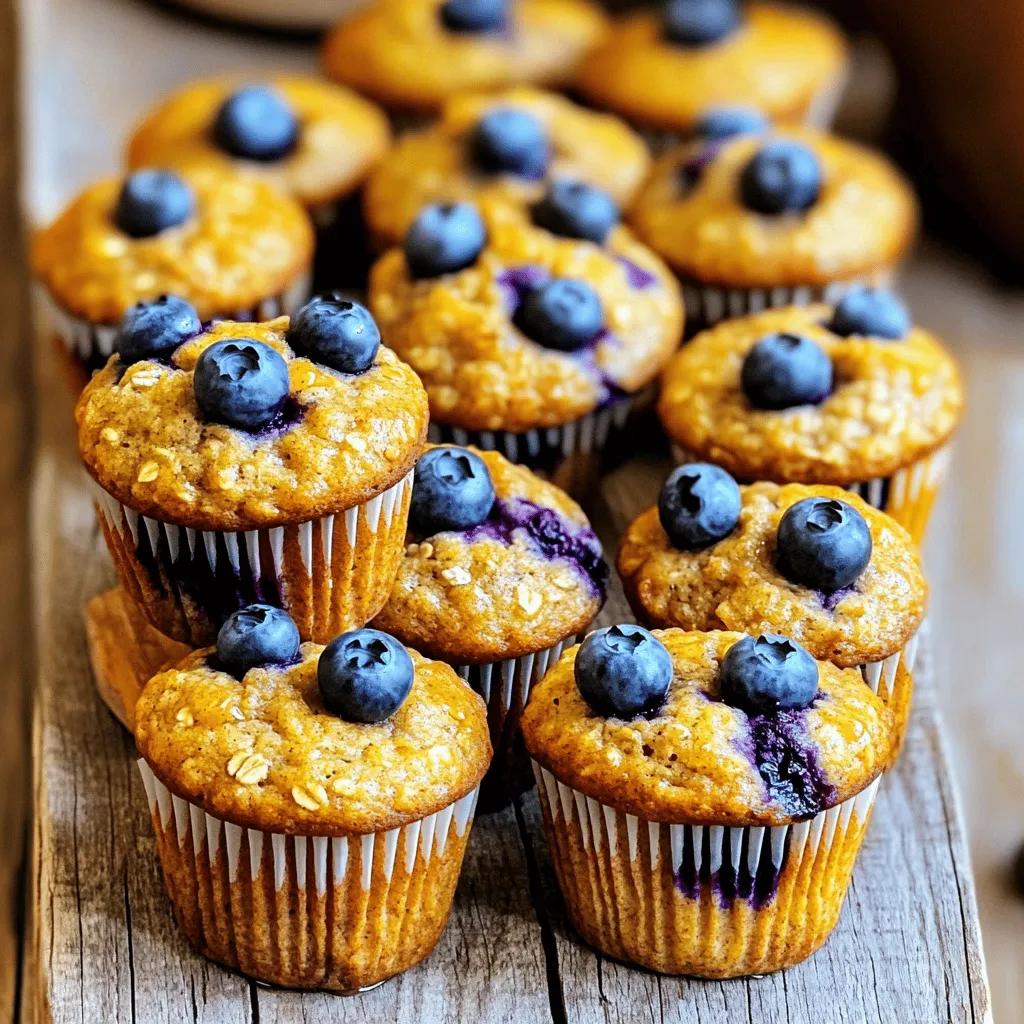
Looking for a tasty snack that’s also good for you? Healthy blueberry oat muffins are perfect for any time of day! Packed with nutrients and bursting with flavor, these muffins are simple to make and deliciously satisfying. In this post, I’ll share easy steps, ingredient tips, and fun variations, so you can enjoy guilt-free treats while keeping your health goals in check. Let’s bake a batch together!
Why I Love This Recipe
- Healthy Ingredients: This recipe utilizes wholesome ingredients like oats, whole wheat flour, and fresh blueberries, making it a nutritious choice for breakfast or a snack.
- Quick and Easy: With a prep time of just 15 minutes, these muffins are perfect for busy mornings or when you need a quick treat.
- Versatile Flavors: Feel free to customize with different fruits or spices, such as adding nuts or swapping blueberries for raspberries.
- Deliciously Satisfying: These muffins are not only healthy but also moist and flavorful, ensuring they’ll be a hit with everyone!
Ingredients
Complete List of Ingredients
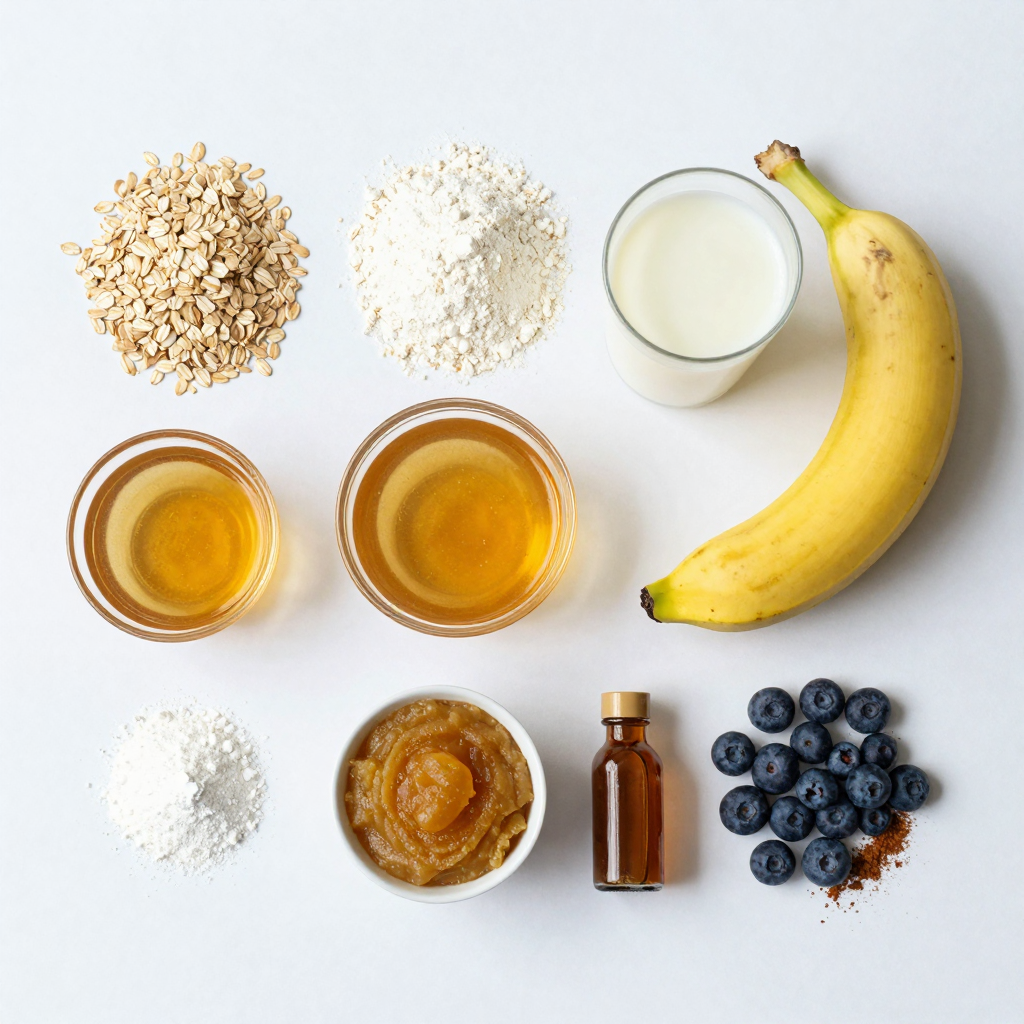
To make these healthy blueberry oat muffins, gather the following ingredients:
- 1 cup rolled oats
- 1 cup whole wheat flour
- 1/2 cup almond milk (or any milk of choice)
- 1/3 cup honey or maple syrup
- 1 ripe banana, mashed
- 1/4 cup unsweetened applesauce
- 1 teaspoon baking powder
- 1/2 teaspoon baking soda
- 1/2 teaspoon salt
- 1 teaspoon vanilla extract
- 1 cup fresh or frozen blueberries
- Optional: 1/4 teaspoon cinnamon
These simple ingredients work together to create muffins that are tasty and nutritious.
Nutritional Information
Each muffin is packed with healthy ingredients. Here’s a quick breakdown of the nutrition:
- Calories: About 120 per muffin
- Protein: 3 grams
- Fiber: 3 grams
- Sugar: 5 grams (natural sugars from honey and banana)
- Healthy fats: Minimal, as these muffins are low in added fats
These muffins are great for a snack. They provide energy without the sugar crash.
Substitution Options
You can easily swap some ingredients if needed:
- Use oat milk or soy milk instead of almond milk.
- Replace honey with agave syrup for a vegan option.
- If you don’t have whole wheat flour, use all-purpose flour instead.
- You can add nuts or seeds for extra crunch.
These swaps let you customize the muffins to fit your taste. Enjoy experimenting!

Step-by-Step Instructions
Prepping the Muffin Mixture
Start by preheating your oven to 350°F (175°C). This step makes sure the muffins bake evenly. Grab a muffin tin and line it with paper liners, or grease it lightly. Next, in a large bowl, mix together the dry ingredients. Combine 1 cup of rolled oats, 1 cup of whole wheat flour, 1 teaspoon of baking powder, 1/2 teaspoon of baking soda, and 1/2 teaspoon of salt. If you like, add 1/4 teaspoon of cinnamon for extra flavor. Stir well to blend everything.
Mixing Wet and Dry Ingredients
Now, let’s focus on the wet mix. In another bowl, combine 1/2 cup of almond milk, 1/3 cup of honey or maple syrup, 1 ripe banana (mashed), 1/4 cup of unsweetened applesauce, and 1 teaspoon of vanilla extract. Mix these until smooth. Once ready, pour the wet ingredients into the dry ones. Gently fold them together until they just combine. Be careful not to overmix; you want your muffins fluffy. Lastly, fold in 1 cup of blueberries, being gentle to keep them whole.
Baking and Cooling Directions
Distribute the muffin batter evenly into the prepared tin. Fill each cup about 3/4 full. Place the tin in the preheated oven and bake for 18-20 minutes. Check your muffins by inserting a toothpick in the center. If it comes out clean, they are done! Take them out and let them cool in the tin for a few minutes. After that, transfer them to a wire rack to cool completely. Enjoy your Healthy Blueberry Oat Muffins as a tasty snack!
Pro Tips
- Use Ripe Bananas: The riper the banana, the sweeter and more flavorful your muffins will be. Look for bananas with plenty of brown spots for the best results.
- Mix Gently: When combining wet and dry ingredients, mix just until incorporated. Overmixing can lead to dense muffins.
- Freeze for Later: These muffins freeze well! Store them in an airtight container or freezer bag for up to three months for a quick and healthy snack.
- Experiment with Add-ins: Feel free to customize your muffins by adding nuts, seeds, or other fruits for different flavors and textures.
Tips & Tricks
How to Enhance Flavor
To make your muffins shine, consider adding a bit of zest. Lemon or orange zest can brighten the taste. You can also add a pinch of cinnamon for warmth. If you love nuts, walnuts or almonds add crunch. Try mixing in some chopped dark chocolate for a sweet surprise.
Healthier Ingredient Alternatives
Swap honey or maple syrup for a natural sweetener like agave syrup. You can use oat milk instead of almond milk if you prefer. For a nut-free option, try coconut milk. If you want to boost fiber, add a tablespoon of chia seeds to the batter.
Avoiding Common Baking Mistakes
Do not overmix the batter. This keeps your muffins light and fluffy. Always check your baking powder and baking soda freshness. Old leavening agents make dense muffins. Remember to fill muffin cups only 3/4 full. This allows room for rising without spilling over.
These tips can help you create delicious healthy blueberry oat muffins.

Variations
Add-ins for Extra Flavor
You can make your blueberry oat muffins even tastier by adding fun ingredients. Try mixing in chopped nuts, like walnuts or almonds, for a nice crunch. You can also add seeds, such as chia or flaxseeds, to boost nutrition. If you love chocolate, consider adding dark chocolate chips. They add sweetness and richness to each bite. Dried fruits, like cranberries or apricots, can also bring a new flavor profile. Each add-in changes the taste and makes your muffins unique.
Gluten-Free Options
If you need a gluten-free option, swap the whole wheat flour for a gluten-free blend. Many brands offer all-purpose gluten-free flour. This will keep the texture light and fluffy. You can also use almond flour for a nutty flavor and added protein. When using gluten-free flour, watch the baking time closely. Gluten-free muffins may need a few more minutes to bake fully. Always check with a toothpick to ensure they are done.
Different Sweeteners to Use
You have many choices when it comes to sweeteners. Honey or maple syrup works great, but you can also try agave syrup. For a lower-calorie option, consider using stevia or monk fruit sweetener. These options can keep your muffins sweet without adding much sugar. Just remember to adjust the amount based on the sweetener you choose. Each sweetener brings its own taste, so feel free to experiment. You’ll find the perfect balance for your muffins.Enjoy your baking!
Storage Info
Best Practices for Storing Muffins
To keep your healthy blueberry oat muffins fresh, store them in an airtight container. Make sure they cool completely before sealing. If you want to keep them for a few days, place a paper towel inside the container. This helps absorb moisture and keeps the muffins soft. Store them at room temperature for up to three days. If you want to save them longer, freezing is a great option.
Reheating Instructions
When you’re ready to enjoy your muffins again, reheating is simple. You can use the microwave or oven. For the microwave, place a muffin on a plate and heat for about 10-15 seconds. If you prefer the oven, preheat it to 350°F (175°C). Place the muffins on a baking sheet and warm them for about 5-7 minutes. This brings back their fresh-baked taste.
Freezing for Future Enjoyment
Freezing muffins is easy and great for meal prep. To freeze, wrap each muffin in plastic wrap. Then, place them in a freezer-safe bag or container. Label it with the date to keep track. You can freeze them for up to three months. When you want one, remove it from the freezer and let it thaw in the fridge overnight. For a quick option, microwave it straight from the freezer. Enjoy your tasty snack anytime!
FAQs
How do I make healthy blueberry oat muffins moist?
To keep your muffins moist, use ripe bananas and applesauce. These ingredients add natural sweetness and moisture. Avoid overmixing the batter. Overmixing can create dense muffins. Also, bake them just until a toothpick comes out clean. This helps keep them soft and fluffy.
Can I use frozen blueberries?
Yes, you can use frozen blueberries! They work great in the recipe. Just fold them into the batter gently. Do not thaw them before adding. This keeps the muffins bright and fresh. Frozen berries may release some juice, so expect a slightly different look.
What are the benefits of using whole wheat flour?
Whole wheat flour adds fiber and nutrients to your muffins. It helps keep you full for longer. It also has a nuttier flavor than white flour. This can enhance the taste of your muffins. Plus, using whole wheat flour is a simple way to make a healthier choice.
We covered the key ingredients and steps to make delicious blueberry oat muffins. You learned how to prep, mix, bake, and cool, along with tips to enhance flavor and avoid mistakes. Exploring variations, you can customize your muffins to fit dietary needs. Storage tips ensure your muffins stay fresh longer. Keep trying new ideas to make each batch special. Enjoy your baking journey and share your creations with others!

Healthy Blueberry Oat Muffins
Ingredients
1 cup rolled oats
1 cup whole wheat flour
1/2 cup almond milk (or any milk of choice)
1/3 cup honey or maple syrup
1 ripe banana, mashed
1/4 cup unsweetened applesauce
1 teaspoon baking powder
1/2 teaspoon baking soda
1/2 teaspoon salt
1 teaspoon vanilla extract
1 cup fresh or frozen blueberries
Optional: 1/4 teaspoon cinnamon
Instructions
Preheat your oven to 350°F (175°C) and line a muffin tin with paper liners or lightly grease it with cooking spray.
In a large mixing bowl, combine the rolled oats, whole wheat flour, baking powder, baking soda, salt, and optional cinnamon. Stir well to combine.
In another bowl, mix together the almond milk, honey (or maple syrup), mashed banana, applesauce, and vanilla extract until smooth.
Pour the wet ingredients into the dry ingredients and gently fold them together until just combined—do not overmix.
Carefully fold in the blueberries, taking care not to squish them.
Evenly distribute the batter into the prepared muffin tin, filling each mold about 3/4 full.
Bake in the preheated oven for 18-20 minutes, or until a toothpick inserted in the center comes out clean.
Allow the muffins to cool in the tin for a few minutes before transferring them to a wire rack to cool completely.
Prep Time, Total Time, Servings: 15 min | 30 min | 12 muffins
– Presentation Tips: Serve the muffins warm or at room temperature, dusted with a little extra cinnamon or a drizzle of honey on top for a touch of sweetness. Place them on a wooden board or a colorful plate for an inviting display. Enjoy your healthy treat!

Healthy Blueberry Oat Muffins
Ingredients
- 1 cup rolled oats
- 1 cup whole wheat flour
- 0.5 cup almond milk (or any milk of choice)
- 0.33 cup honey or maple syrup
- 1 medium ripe banana, mashed
- 0.25 cup unsweetened applesauce
- 1 teaspoon baking powder
- 0.5 teaspoon baking soda
- 0.5 teaspoon salt
- 1 teaspoon vanilla extract
- 1 cup fresh or frozen blueberries
- 0.25 teaspoon cinnamon (optional)
Instructions
- Preheat your oven to 350°F (175°C) and line a muffin tin with paper liners or lightly grease it with cooking spray.
- In a large mixing bowl, combine the rolled oats, whole wheat flour, baking powder, baking soda, salt, and optional cinnamon. Stir well to combine.
- In another bowl, mix together the almond milk, honey (or maple syrup), mashed banana, applesauce, and vanilla extract until smooth.
- Pour the wet ingredients into the dry ingredients and gently fold them together until just combined—do not overmix.
- Carefully fold in the blueberries, taking care not to squish them.
- Evenly distribute the batter into the prepared muffin tin, filling each mold about 3/4 full.
- Bake in the preheated oven for 18-20 minutes, or until a toothpick inserted in the center comes out clean.
- Allow the muffins to cool in the tin for a few minutes before transferring them to a wire rack to cool completely.
- Serve the muffins warm or at room temperature, dusted with a little extra cinnamon or a drizzle of honey on top for a touch of sweetness. Place them on a wooden board or a colorful plate for an inviting display.


![- 2 cups grated zucchini (about 2 medium zucchinis) - 1 ½ cups all-purpose flour - 1 teaspoon baking soda - 1 teaspoon baking powder - ½ teaspoon salt - 1 teaspoon ground cinnamon - ½ teaspoon nutmeg - ½ cup granulated sugar - ½ cup brown sugar, packed - ½ cup vegetable oil (or melted coconut oil) - 2 large eggs - 1 teaspoon vanilla extract - ½ cup chopped walnuts (optional) - ½ cup raisins or chocolate chips (optional) To make classic zucchini muffins, you need fresh ingredients. Grated zucchini adds moisture and a soft texture. You can use about two medium zucchinis for this. All-purpose flour gives structure to the muffins. Baking soda and baking powder help them rise, so they become fluffy. The spices bring warmth and flavor. Salt enhances sweetness while cinnamon and nutmeg add depth. You’ll want both granulated and brown sugars for the best taste. Granulated sugar is sweet, while brown sugar adds richness. Oil keeps the muffins moist. You can choose between vegetable oil or melted coconut oil. Eggs bind everything together and add richness. Vanilla extract boosts the overall flavor. For extra crunch or sweetness, add walnuts, raisins, or chocolate chips. These optional add-ins make the muffins even more enjoyable. Check the [Full Recipe] for all the steps to bring these ingredients together. 1. Preheat your oven to 350°F (175°C). This ensures even baking. 2. Grate two medium zucchinis. Place them in a bowl and add a pinch of salt. Let them sit for about 10 minutes. This draws out extra moisture. 3. Use a clean kitchen towel to squeeze out the moisture from the zucchini. This step keeps your muffins from being soggy. 4. In a large bowl, whisk together the dry ingredients: all-purpose flour, baking soda, baking powder, salt, ground cinnamon, and nutmeg. This mix adds flavor and structure to the muffins. 1. In another bowl, mix the wet ingredients. Combine granulated sugar, brown sugar, vegetable oil, eggs, and vanilla extract. Stir until everything is well blended. 2. Gently fold the grated zucchini into your wet mixture. This step adds moisture and flavor to your muffins. 3. Gradually add the dry ingredients to the wet mix. Stir until just combined. A few lumps are fine; avoid overmixing. If you want, fold in chopped walnuts and raisins or chocolate chips for extra texture. 1. Divide the batter evenly among the muffin cups. Fill each cup about two-thirds full. 2. Bake your muffins for 18 to 22 minutes. They are ready when a toothpick comes out clean from the center. 3. After baking, let the muffins cool in the tin for five minutes. Then, transfer them to a wire rack to cool completely. This process gives you moist, flavorful muffins. For the full recipe, check the details above. Enjoy the delightful taste of classic zucchini muffins! To avoid soggy muffins with zucchini, start by squeezing out the excess moisture. After grating the zucchini, add a pinch of salt and let it rest for 10 minutes. Then, use a clean towel to squeeze the moisture out. This simple step makes a big difference. Do not overmix your batter. When you combine the dry and wet ingredients, stir until just mixed. A few lumps are okay. Overmixing leads to tough muffins, and we want them soft and fluffy. For garnishing, dust the muffins with powdered sugar right before serving. This adds a nice touch. You can also place a small mint leaf on top for color and freshness. Choose a beautiful serving platter to showcase your muffins. A white or pastel plate works well. It highlights the muffins’ golden-brown tops and makes them look even more inviting. {{image_2}} You can easily change the flavor of your zucchini muffins. A simple way is to add spices like ginger or cloves. Just a pinch will give your muffins a warm kick. You can mix in different nuts too. Walnuts are great, but pecans or almonds work well too. Each nut brings its own crunch and taste. If you need gluten-free muffins, swap the all-purpose flour for a gluten-free blend. You can find many good options at the store. For those who want vegan muffins, replace the eggs with flax eggs. Mix one tablespoon of ground flaxseed with three tablespoons of water. Let it sit for a few minutes to thicken. For dairy-free options, use almond milk or coconut milk instead of regular milk. These changes make the muffins fit many diets. For the full recipe, check out Classic Zucchini Muffins. To keep your classic zucchini muffins fresh, store them on the countertop. Place them in an airtight container. This helps keep moisture in while keeping air out. If you do not have a container, wrap them in plastic wrap. They will stay soft for about three days. Avoid direct sunlight, as this can dry them out. For long-term storage, freezing muffins works great. First, let the muffins cool completely. Wrap each muffin tightly in plastic wrap. Then, place them in a freezer bag or container. Label the bag with the date. They can stay fresh for up to three months. When you want to enjoy one, simply take it out and let it thaw at room temperature. You can also reheat it in the oven or microwave. Enjoy your delicious treat anytime! For the full recipe, check the details above. Can I use frozen zucchini? Yes, you can use frozen zucchini. Just thaw it first and squeeze out any extra water. This helps keep your muffins from getting soggy. Fresh zucchini is great too, but frozen works in a pinch. How do I know when the muffins are done? Your muffins are done when a toothpick inserted in the center comes out clean. They should also look golden on top. If the toothpick has wet batter, bake them a bit longer. What can I substitute for sugar? You can use honey or maple syrup as a substitute for sugar. Adjust the liquid in the recipe if using these. For a lower-calorie option, try using a sugar substitute like stevia. How do I make mini zucchini muffins? To make mini zucchini muffins, just use a mini muffin tin. Fill each cup about halfway. Bake them for about 10-15 minutes. Check with a toothpick to be sure they are done. For more tips, check the Full Recipe for Classic Zucchini Muffins! You now have a complete guide for making classic zucchini muffins. From gathering your ingredients to baking and storing, I covered it all. Remember to squeeze out excess moisture from the zucchini. This keeps your muffins from getting soggy. Have fun experimenting with flavors and variations, like adding nuts or trying gluten-free options. These muffins are not only tasty but also versatile. With the right tips and tricks, your baking will be a success. Enjoy the process and the delicious results!](https://dailydishlab.com/wp-content/uploads/2025/07/9e9b63d2-13fb-4728-9235-22db9d4cda68-768x768.webp)
![- 1 cup ricotta cheese - 2 large eggs - 1/4 cup granulated sugar - Zest of 1 lemon - 1/4 cup fresh lemon juice I love using ricotta cheese in these pancakes. It makes them soft and creamy. The eggs add richness and help the pancakes rise. Granulated sugar gives just the right hint of sweetness. Zest and juice from the lemon bring a bright, fresh flavor. - 1 cup all-purpose flour - 2 teaspoons baking powder - 1/4 teaspoon salt All-purpose flour gives the pancakes structure. Baking powder lifts the batter and keeps it light. A pinch of salt balances the sweetness and enhances the lemon's flavor. - 1/4 cup milk (or a dairy-free alternative) - Butter or oil for cooking Milk helps adjust the batter's consistency. You can use dairy-free milk if you prefer. Butter or oil is essential for cooking the pancakes. It prevents sticking and adds a nice golden color. For the full recipe, check out the details above. To start, grab a large mixing bowl. Add 1 cup of ricotta cheese, 2 large eggs, and 1/4 cup of granulated sugar. Use a whisk to mix these until smooth. It's important to blend well so your pancakes turn out fluffy. Next, add the zest of 1 lemon and 1/4 cup of fresh lemon juice. The zest gives a bright flavor, while the juice adds a nice tang. Mix again until everything is well combined. Now, take another bowl for the dry mix. Combine 1 cup of all-purpose flour, 2 teaspoons of baking powder, and 1/4 teaspoon of salt. Stir until it looks even. This blend helps the pancakes rise and stay light. Gradually add the dry mix to the wet mix. Use a spatula to fold the ingredients together. Be careful not to over-mix; some lumps are okay. If the batter seems too thick, pour in 1/4 cup of milk. This will help reach the right consistency for pouring. It's time to cook! Preheat a non-stick skillet over medium heat. Lightly grease it with butter or oil. Pour about 1/4 cup of batter for each pancake onto the skillet. Cook for 2-3 minutes. You'll see small bubbles form on the surface when they're ready to flip. Carefully turn the pancakes and cook for another 2-3 minutes until golden brown and fluffy. Repeat this with the remaining batter. Enjoy your Lemon Ricotta Pancakes warm! For the full recipe, check the section above. To make the best Lemon Ricotta Pancakes, start with the right skillet temperature. Preheat your non-stick skillet over medium heat. This helps the pancakes cook evenly and become fluffy. If the skillet is too hot, the pancakes can burn on the outside while staying raw inside. Next, avoid over-mixing your batter. Gently fold the wet and dry ingredients together until just combined. A few lumps are okay. Over-mixing can make the pancakes tough instead of light and airy. When it comes to toppings, get creative! Fresh fruit like berries or sliced bananas pairs well with the zesty lemon flavor. You can also drizzle maple syrup or honey on top for added sweetness. For an appealing look, stack the pancakes high on a plate. Add a dollop of whipped cream and sprinkle powdered sugar on top. This adds a nice touch and makes them even more tempting. If you need a gluten-free option, swap out the all-purpose flour for a gluten-free blend. Many brands offer good alternatives that work just as well. For a dairy-free version, use a plant-based ricotta and a non-dairy milk. Almond or oat milk works great here. These changes still keep the pancakes tasty and fluffy. For the full recipe, check the previous section. {{image_2}} You can make these pancakes even better with some fun additions. Try adding blueberries or chocolate chips to the batter before cooking. This small change adds bursts of flavor and sweetness to each bite. Another option is to switch up the citrus flavor. Instead of lemon, you can use orange zest. This will give your pancakes a bright and fresh taste, perfect for a sunny breakfast. Garnishing your pancakes can take them to the next level. Fresh fruits like strawberries, bananas, or raspberries pair nicely. Just slice them up and place them on top for a colorful look. Drizzling maple syrup or honey adds a nice touch of sweetness. You can also add a dollop of whipped cream for some extra creaminess. It makes your pancakes look fancy and taste even better. You can serve these pancakes in different ways. Stacking them high on a plate looks impressive and makes for a fun meal. Don’t forget to add your favorite toppings! If you want to try something new, consider a pancake waffle hybrid. Use the batter in a waffle maker instead. This gives you a crispy outside and fluffy inside, making for a great breakfast treat. For the full recipe, check out the detailed steps above. Enjoy these tasty lemon ricotta pancakes! To keep your pancakes fresh, follow these steps: - Refrigeration: Place leftover pancakes in an airtight container. They stay good for 3-4 days in the fridge. You can also stack them with parchment paper between layers to prevent sticking. - Freezer Tips: For long-term storage, freeze pancakes in a single layer first. Then, transfer them to a freezer bag or container. They can last up to 2 months. Label the bag with the date for easy tracking. You have a couple of options for reheating: - Microwave: This method is quick. Just place a pancake on a microwave-safe plate. Heat for 20-30 seconds. Add a damp paper towel on top to keep them moist. - Stovetop Reheating: This keeps the texture better. Heat a skillet over low heat. Add a small amount of butter or oil, then place the pancake in the skillet. Heat for about 1-2 minutes on each side until warm. To maintain the fluffy texture, avoid overheating. Check often to prevent drying out. Enjoy your pancakes warm! To make Lemon Ricotta Pancakes from scratch, you need simple ingredients. Here’s what you need: - 1 cup ricotta cheese - 2 large eggs - 1/4 cup granulated sugar - 1 teaspoon vanilla extract - Zest of 1 lemon - 1/4 cup fresh lemon juice - 1 cup all-purpose flour - 2 teaspoons baking powder - 1/4 teaspoon salt - 1/4 cup milk (or a dairy-free alternative) - Butter or oil for the skillet Start by whisking the ricotta, eggs, sugar, vanilla, lemon zest, and juice until smooth. In another bowl, mix the flour, baking powder, and salt. Combine the wet and dry ingredients gently to keep the batter light. If the batter is thick, add milk until it feels right. For the cooking, heat a skillet, pour the batter, and cook until fluffy. Check the [Full Recipe] for exact steps! Yes, you can substitute ricotta cheese. Some good options include: - Cottage cheese (blend for a smoother texture) - Cream cheese (soften it first) - Greek yogurt (adds protein and tang) These alternatives will change the flavor slightly but can still taste great. You can make Lemon Ricotta Pancakes even better with fun mix-ins and toppings. Consider these ideas: - Fresh blueberries or raspberries - Chocolate chips for sweetness - Chopped nuts for crunch - Honey or maple syrup for drizzling You can also top them with whipped cream, fresh fruit, or a sprinkle of powdered sugar. To keep your pancakes fluffy, follow these tips: - Avoid over-mixing the batter; lumps are okay. - Use a light hand when folding in the dry ingredients. - Ensure your skillet is at the right temperature; too hot can burn them. - Let the batter rest for a few minutes before cooking. These steps will help you achieve fluffy and light pancakes every time. In this post, we covered how to make delicious Lemon Ricotta Pancakes. You learned about the key ingredients, like ricotta, eggs, and sugar, and how to prepare them. I shared tips on cooking, serving, and even storing leftover pancakes. You can mix in fruits or switch up flavors to make them your own. Remember, with the right cooking methods, you can create light and fluffy pancakes every time. Enjoy your cooking adventure; these pancakes are sure to impress!](https://dailydishlab.com/wp-content/uploads/2025/06/08a6d73f-3236-4643-afc4-ab19070334e6-768x768.webp)
