Healthy Chocolate Zucchini Bread Simple and Tasty Recipe

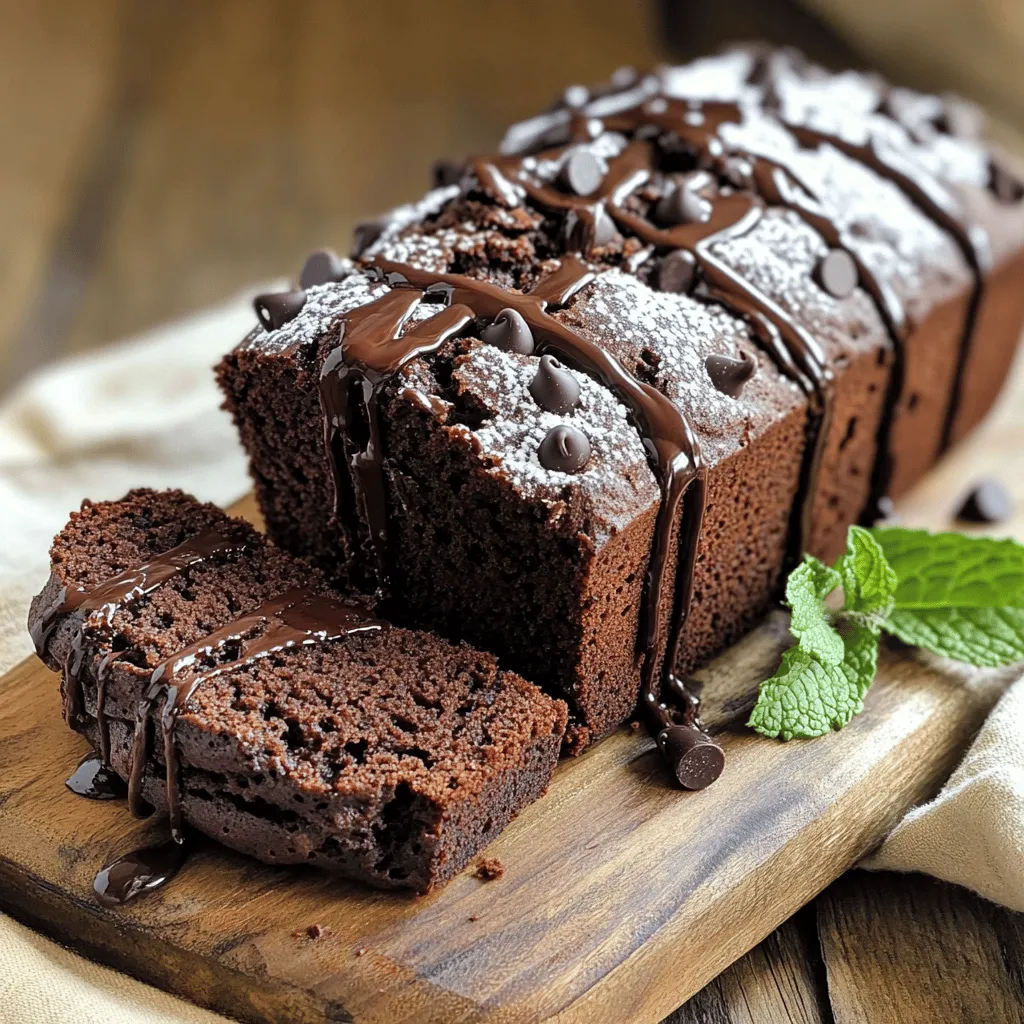
Looking for a fun way to sneak veggies into your diet? This Healthy Chocolate Zucchini Bread is the answer! It’s simple, tasty, and uses wholesome ingredients like whole wheat flour and natural sweeteners. You’ll love how the rich chocolate flavor hides the nutritious zucchini. In this post, I’ll guide you through easy steps and tips to make the perfect loaf. Let’s get baking and enjoy a guilt-free treat together!
Why I Love This Recipe
- Healthier Alternative: This recipe uses whole wheat flour and natural sweeteners, making it a guilt-free treat.
- Moist and Flavorful: The addition of zucchini ensures the bread remains moist while adding subtle flavor.
- Easy to Make: With just a few simple steps and ingredients, this bread comes together quickly.
- Perfect for Any Occasion: Great for breakfast, snacks, or dessert, it’s versatile and loved by all.
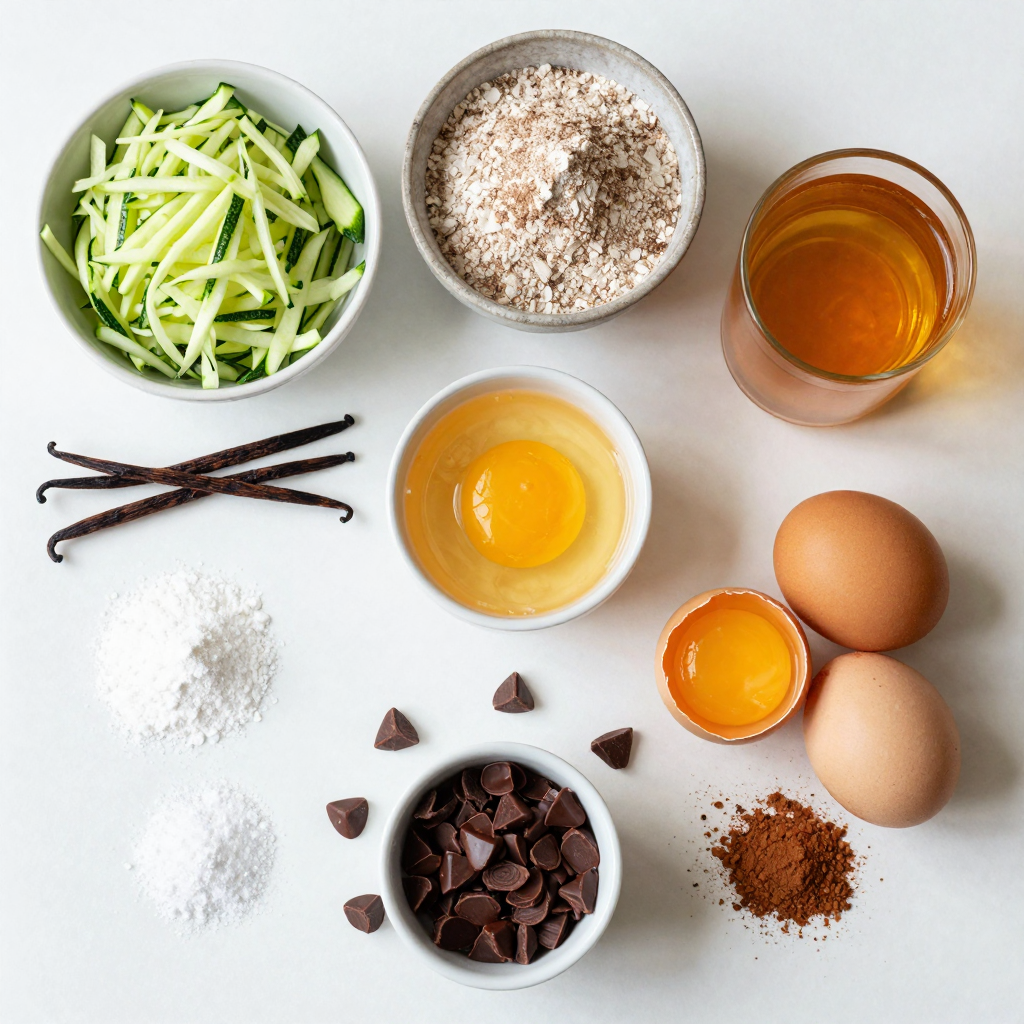
Ingredients
Detailed list of ingredients
- 1 medium zucchini, grated: Zucchini adds moisture without extra fat. It keeps the bread soft and tender. Using about one cup of grated zucchini helps maintain a rich texture.
- Whole wheat flour and its benefits: Whole wheat flour is a great choice. It has more fiber than white flour. This fiber aids digestion and keeps you full longer. It also adds a nutty flavor that pairs well with chocolate.
- Natural sweeteners used (maple syrup/honey): I often use maple syrup or honey instead of white sugar. These natural sweeteners add a depth of flavor and moisture. They also provide minerals and antioxidants, making your bread healthier. Maple syrup gives a nice caramel tone while honey adds a floral hint.

Step-by-Step Instructions
Preparation of wet ingredients
Start by grating one medium zucchini. You want about one cup of it. Place the grated zucchini in a large bowl. Next, add half a cup of maple syrup or honey. This will sweeten your bread naturally. Then, include one-fourth cup of unsweetened applesauce. Applesauce adds moisture and flavor. Crack in two large eggs and pour in one teaspoon of vanilla extract. Mix all these wet ingredients well. Make sure everything combines nicely.
Preparation of dry ingredients
In a separate bowl, take one cup of whole wheat flour and half a cup of unsweetened cocoa powder. These are your main dry ingredients. Add one teaspoon of baking powder, half a teaspoon of baking soda, one-fourth teaspoon of salt, and half a teaspoon of ground cinnamon. Sift these together. Sifting helps to mix them well and avoids clumps. Now, when you add the dry mix to the wet mix, do it gradually. Fold them together gently. This step is key; do not overmix. If you overmix, your bread can turn out tough.
Baking process
Once your batter is ready, pour it into a greased 9×5 inch loaf pan. Smooth the top with a spatula. Preheat your oven to 350°F (175°C). Bake for 45 to 50 minutes. Check for doneness with a toothpick. Insert it into the center; it should come out clean. When done, cool the bread in the pan for about 10 minutes. Then, carefully transfer it to a wire rack to cool completely. Enjoy the lovely smell while it cools!
Pro Tips
- Use Fresh Zucchini: For the best flavor and texture, use fresh, firm zucchini. Older zucchini can be watery and less flavorful.
- Don’t Overmix: When combining the wet and dry ingredients, mix until just combined to ensure a light and fluffy bread.
- Store Properly: Keep any leftover bread in an airtight container at room temperature for up to 3 days, or refrigerate for up to a week.
- Experiment with Add-ins: Feel free to add nuts, seeds, or dried fruits to the batter for added texture and flavor.
Tips & Tricks
How to choose the right zucchini
To make the best chocolate zucchini bread, start with fresh zucchini. Look for zucchini that is firm and smooth. Avoid any that have soft spots or wrinkles. A fresh zucchini will have a shiny skin and a vibrant green color.
For baking, choose medium-sized zucchini. They are easier to grate and provide the right moisture. If the zucchini is too large, it may have too many seeds and be less tasty.
Enhancing flavor and texture
You can make your bread even better with some fun mix-ins. Consider adding nuts like walnuts or pecans for crunch. Seeds like chia or flax seeds can add nutrition and texture too.
For a richer chocolate flavor, try adding an extra 1/4 cup of cocoa powder. You can also add a pinch of espresso powder. This will boost the chocolate taste without changing the sweetness.
Achieving perfect doneness
To check if your bread is done, use a toothpick. Insert it into the center of the loaf. If it comes out clean, your bread is ready. Avoid opening the oven too early, as this can cause the bread to sink.
If the top looks too dark but the inside is not done, cover it loosely with foil. This will prevent burning while it finishes baking. Enjoy the process, and trust your instincts!

Variations
Dietary modifications
You can easily adapt this recipe to meet your dietary needs.
- Gluten-free options: Use a gluten-free flour mix instead of whole wheat flour. Almond flour or coconut flour works well. Just adjust the liquid if needed, as these flours absorb moisture differently.
- Vegan substitutions: Replace the eggs with flax eggs. Mix one tablespoon of ground flaxseed with three tablespoons of water. Let it sit for five minutes to thicken. You can also swap maple syrup for agave nectar or another liquid sweetener.
Flavor variations
Adding different spices can change the taste and make it more exciting.
- Adding different spices: Try adding nutmeg or ginger for a warm flavor. A pinch of cayenne can add a surprising kick.
- Incorporating fruits like banana or apples: You can mash one ripe banana into the batter for extra sweetness. Grated apples can also add a nice texture and moisture.
Serving suggestions
Enjoy this bread in many ways.
- Best ways to enjoy the bread: Slice it warm and serve it fresh. You can also toast it lightly for added crunch.
- Pairing with spreads or toppings: Cream cheese or almond butter pairs well with the chocolate flavor. You can also add a layer of nutella for a rich treat.
Storage Info
How to properly store the bread
To keep your Healthy Chocolate Zucchini Bread fresh, wrap it in plastic wrap or foil. This helps to keep moisture in. You can also place it in an airtight container. At room temperature, the bread stays good for about 3 days. If you place it in the fridge, it can last up to a week.
Freezing tips
Freezing is a great way to save slices for later. First, let the bread cool completely. Then, slice it into pieces. Wrap each slice in plastic wrap or foil, then put them in a freezer bag. This way, they won’t stick together. To thaw, take out a slice and leave it at room temperature for about 30 minutes. You can also use the microwave for quick thawing.
Reheating best practices
To regain freshness, reheat your Zucchini Bread in the oven. Preheat the oven to 350°F (175°C). Place the slice on a baking sheet and heat for about 10 minutes. This warms the bread evenly and keeps it soft. You can also use a microwave for a quick fix. Heat for about 15-20 seconds, but be careful not to dry it out. Enjoy your warm, tasty bread!
FAQs
What are the health benefits of zucchini in baking?
Zucchini is low in calories and high in water. This makes it a great choice for baking. It adds moisture without a lot of extra fat. Zucchini is also rich in vitamins A and C. These vitamins help support your immune system. Using whole ingredients like zucchini boosts the nutritional value of your bread. It helps you feel full while enjoying a tasty treat.
Can I substitute other flours?
Yes, you can use different flours. Almond flour gives a nutty taste. Coconut flour absorbs more moisture. If you choose gluten-free flour, check the mix. Each flour type changes the texture and taste. Whole wheat flour keeps it hearty and healthy. Experiment to find your favorite blend.
How long does Healthy Chocolate Zucchini Bread last?
Healthy Chocolate Zucchini Bread lasts about 3 days at room temperature. Store it in an airtight container to keep it fresh. You can also refrigerate it for up to a week. Look for signs of spoilage like mold or a sour smell. If it feels dry or hard, it’s time to toss it.
Is this recipe suitable for kids?
Yes, this recipe is great for kids! You can add fun mix-ins like nuts or dried fruit. Use less sugar or a natural sweetener to make it healthier. This bread packs a good balance of nutrients. It’s a tasty way to sneak in veggies. Kids will love the chocolate flavor!
This post shared a simple, healthy recipe for chocolate zucchini bread. We covered ingredients, mixing methods, and baking tips. You learned how to choose the best zucchini, enhance flavor, and explore variations. Proper storage and reheating methods keep your bread fresh. Remember, this recipe is versatile and kid-friendly. I hope you feel excited to bake your own chocolate zucchini bread, enjoying all its delicious benefits. Grab your ingredients and get started!

Healthy Chocolate Zucchini Bread
Ingredients
1 medium zucchini, grated (about 1 cup)
1 cup whole wheat flour
1/2 cup unsweetened cocoa powder
1/2 cup maple syrup or honey
1/4 cup unsweetened applesauce
2 large eggs
1 teaspoon vanilla extract
1 teaspoon baking powder
1/2 teaspoon baking soda
1/4 teaspoon salt
1/2 cup dark chocolate chips (optional)
1/2 teaspoon ground cinnamon
Instructions
Preheat the oven to 350°F (175°C) and grease a 9×5 inch loaf pan.
In a large bowl, combine the grated zucchini, maple syrup (or honey), applesauce, eggs, and vanilla extract. Mix until well combined.
In another bowl, whisk together the whole wheat flour, cocoa powder, baking powder, baking soda, salt, and cinnamon.
Gradually fold the dry ingredients into the wet mixture until just combined; do not overmix.
Gently fold in the dark chocolate chips, if using.
Pour the batter into the prepared loaf pan and smooth the top.
Bake for 45-50 minutes, or until a toothpick inserted into the center comes out clean.
Allow the bread to cool in the pan for 10 minutes, then transfer to a wire rack to cool completely.
Prep Time: 15 minutes | Total Time: 1 hour (including baking) | Servings: 8 slices
– Presentation Tips: Once cooled, slice the bread and serve it on a rustic wooden board. Drizzle a little extra melted dark chocolate on top or dust with powdered sugar for a nice touch. Consider garnishing with a sprig of mint for a pop of color!

Healthy Chocolate Zucchini Bread
Ingredients
- 1 medium zucchini, grated (about 1 cup)
- 1 cup whole wheat flour
- 0.5 cup unsweetened cocoa powder
- 0.5 cup maple syrup or honey
- 0.25 cup unsweetened applesauce
- 2 large eggs
- 1 teaspoon vanilla extract
- 1 teaspoon baking powder
- 0.5 teaspoon baking soda
- 0.25 teaspoon salt
- 0.5 cup dark chocolate chips (optional)
- 0.5 teaspoon ground cinnamon
Instructions
- Preheat the oven to 350°F (175°C) and grease a 9x5 inch loaf pan.
- In a large bowl, combine the grated zucchini, maple syrup (or honey), applesauce, eggs, and vanilla extract. Mix until well combined.
- In another bowl, whisk together the whole wheat flour, cocoa powder, baking powder, baking soda, salt, and cinnamon.
- Gradually fold the dry ingredients into the wet mixture until just combined; do not overmix.
- Gently fold in the dark chocolate chips, if using.
- Pour the batter into the prepared loaf pan and smooth the top.
- Bake for 45-50 minutes, or until a toothpick inserted into the center comes out clean.
- Allow the bread to cool in the pan for 10 minutes, then transfer to a wire rack to cool completely.


![To make a tasty Mint Chocolate Chip Cheesecake, you need these main items: - 16 oz cream cheese, softened - 1 cup granulated sugar - 2 large eggs - 1 teaspoon peppermint extract These ingredients create a rich and creamy filling. The cream cheese gives the cheesecake its smooth texture. Sugar adds sweetness, while eggs help it set. Peppermint extract brings that fresh mint taste. The crust is simple and delicious. For it, gather: - 1 ½ cups chocolate sandwich cookie crumbs - ½ cup unsalted butter, melted Combining these makes a crunchy base. The chocolate crumbs add flavor, and the melted butter helps bind them together. You can add a few fun touches if you want: - Green food coloring (optional, for a minty hue) - Whipped cream (for topping) The green food coloring makes your cheesecake look extra festive. Whipped cream adds a nice finish on top, making it even more appealing. You can use the full recipe to guide you in making this delightful dessert. Start by preheating your oven to 325°F (160°C). In a medium bowl, combine 1 ½ cups of chocolate sandwich cookie crumbs with ½ cup of melted unsalted butter. Mix until the crumbs are coated well. Press this mixture evenly into the bottom of a 9-inch springform pan. Bake the crust for 10 minutes. Once done, take it out and let it cool. In a large mixing bowl, beat 16 ounces of softened cream cheese with a hand mixer until smooth. Gradually add 1 cup of granulated sugar, mixing until combined. Next, add 1 teaspoon of vanilla extract and 1 teaspoon of peppermint extract. If you want a fun minty color, add a few drops of green food coloring. Mix for another minute. Now, add 2 large eggs one at a time. Mix just until combined after each egg. Be careful not to overmix. Then, add 1 cup of sour cream and mix until smooth. Gently fold in 1 cup of mini chocolate chips. Pour the cheesecake mixture over the cool crust. Smooth the top with a spatula. Bake it in your preheated oven for 45-50 minutes. Look for the edges to be set, while the center has a slight jiggle. After baking, turn off the oven and crack the door. Let the cheesecake cool gradually for about an hour. Once it cools, cover it with plastic wrap. Refrigerate for at least 4 hours, or overnight for the best flavor and texture. Before serving, top with whipped cream and sprinkle more mini chocolate chips on top. Enjoy your Mint Chocolate Chip Cheesecake! For the complete recipe, check out the [Full Recipe]. To get a smooth texture, start with room temperature ingredients. Cold cream cheese can clump up. Mix the cream cheese slowly. Avoid overmixing. If you mix too fast, air bubbles can form. Those bubbles can crack your cheesecake. When baking, look for a slight jiggle in the center. This means it's not overcooked. Use an oven thermometer to check the heat. Ovens can be off by a few degrees. If you bake at the wrong temp, your cheesecake may not set right. Serve your cheesecake with a swirl of whipped cream. Sprinkle extra mini chocolate chips on top. This makes your cake look fancy and delicious. You can also add fresh mint leaves for a pop of color. Enjoy every creamy bite! For the full recipe, revisit the ingredients and instructions above. {{image_2}} You can make your mint chocolate chip cheesecake even better by adding extra flavors. A drop of vanilla or almond extract can change the taste. Vanilla adds warmth and depth, while almond gives a nice nutty touch. Use about half a teaspoon to start. Taste as you go to find your perfect mix. If you want a different crust, try using graham cracker crumbs instead of chocolate cookies. This gives a nice contrast to the minty filling. For gluten-free options, use gluten-free cookie crumbs. Just make sure the crumbs are finely crushed, so they hold together well. You can even use nuts for a crunchy and fun twist. Serving your cheesecake can be as fun as making it! Instead of cutting it into slices, try serving it in individual cups. This makes for a cute and easy dessert for parties. You can also use decorative plates. Add a sprig of mint or a drizzle of chocolate sauce on top for a fancy touch. These small details can impress your guests and make your dessert stand out. For the full recipe, check the link above. To keep your Mint Chocolate Chip Cheesecake fresh, cover it tightly. Use plastic wrap or foil. This keeps moisture in and prevents odors from other foods. Store it in the fridge for up to five days. The cheesecake tastes best after it chills overnight. This time lets the flavors blend well. You can freeze slices of cheesecake for later. Wrap each slice in plastic wrap. Then, place the wrapped slices in a freezer bag. Press out as much air as you can. This helps avoid freezer burn. To enjoy, thaw the slices in the fridge overnight. This keeps the texture smooth and creamy. In the fridge, your cheesecake lasts about five days. In the freezer, it can last up to three months. After this time, the taste and texture may change. Enjoy your Mint Chocolate Chip Cheesecake while it’s fresh for the best flavor. Making Mint Chocolate Chip Cheesecake takes about 5 hours in total. This includes: - Prep time: 30 minutes to gather and mix ingredients. - Bake time: 45-50 minutes in the oven. - Cooling time: 1 hour in the oven after baking. - Chilling time: At least 4 hours in the fridge for the best flavor. This breakdown helps you plan your day for this creamy delight. Yes, you can make this cheesecake in advance! In fact, it tastes better after chilling overnight. Here are some benefits of making it ahead: - Flavor develops: Chilling allows the mint and chocolate flavors to blend. - Convenience: You can serve it fresh without last-minute stress. - Storage: Wrap it well in plastic wrap to keep it fresh in the fridge. You can make this cheesecake up to 2 days ahead of when you plan to serve it. If you need a cream cheese substitute, you have options! Here are some alternatives: - Greek yogurt: Use plain Greek yogurt for a tangy flavor and creamy texture. - Ricotta cheese: This gives a lighter texture but still creamy. - Tofu: Silken tofu can work for a dairy-free option. Blend until smooth. Each option changes the taste a bit, but they all work in this recipe. This blog post covered how to make a delicious Mint Chocolate Chip Cheesecake. We explored the ingredients needed, including cream cheese and chocolate cookies. You learned the step-by-step method, from prepping the crust to baking and cooling. We shared tips for a smooth texture and perfect bake. Consider trying different flavors or crusts for variety. Lastly, we discussed how to store your cheesecake for freshness. Enjoy your homemade treat, and impress friends with your baking skills!](https://dailydishlab.com/wp-content/uploads/2025/07/65fe9dc3-6e9f-4190-956f-c2db90901af1-768x768.webp)


