Herb Butter Roasted Chicken Thighs Tasty and Simple Meal

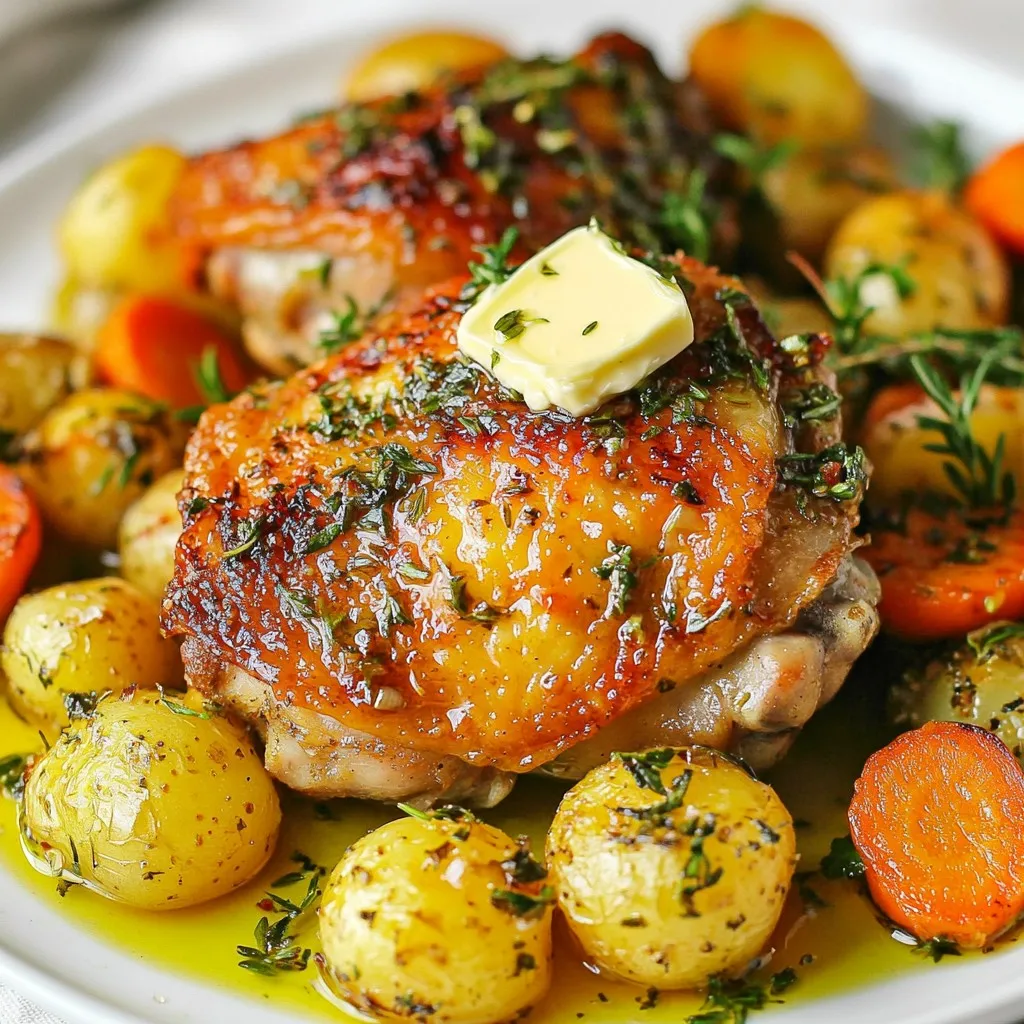
If you’re looking for a simple yet tasty meal, you’ve found it! Herb Butter Roasted Chicken Thighs are juicy and full of flavor. In this article, I’ll guide you through every step to make this dish. We’ll use fresh herbs, butter, and simple veggies for a delightful meal. Whether you’re a beginner or an expert, you’ll love this easy recipe. Let’s get cooking and savor the deliciousness!
Why I Love This Recipe
- Flavorful Herb Butter: The herb butter adds an incredible depth of flavor, making each bite of chicken juicy and delicious.
- Easy Preparation: This recipe is simple to follow, requiring minimal prep time while still delivering impressive results.
- Perfectly Roasted Vegetables: The baby carrots and potatoes roast beautifully in the same pan, soaking up all the savory juices from the chicken.
- Great for Meal Prep: This dish is perfect for meal prepping, as it can be made in advance and reheated while maintaining its flavor and moisture.
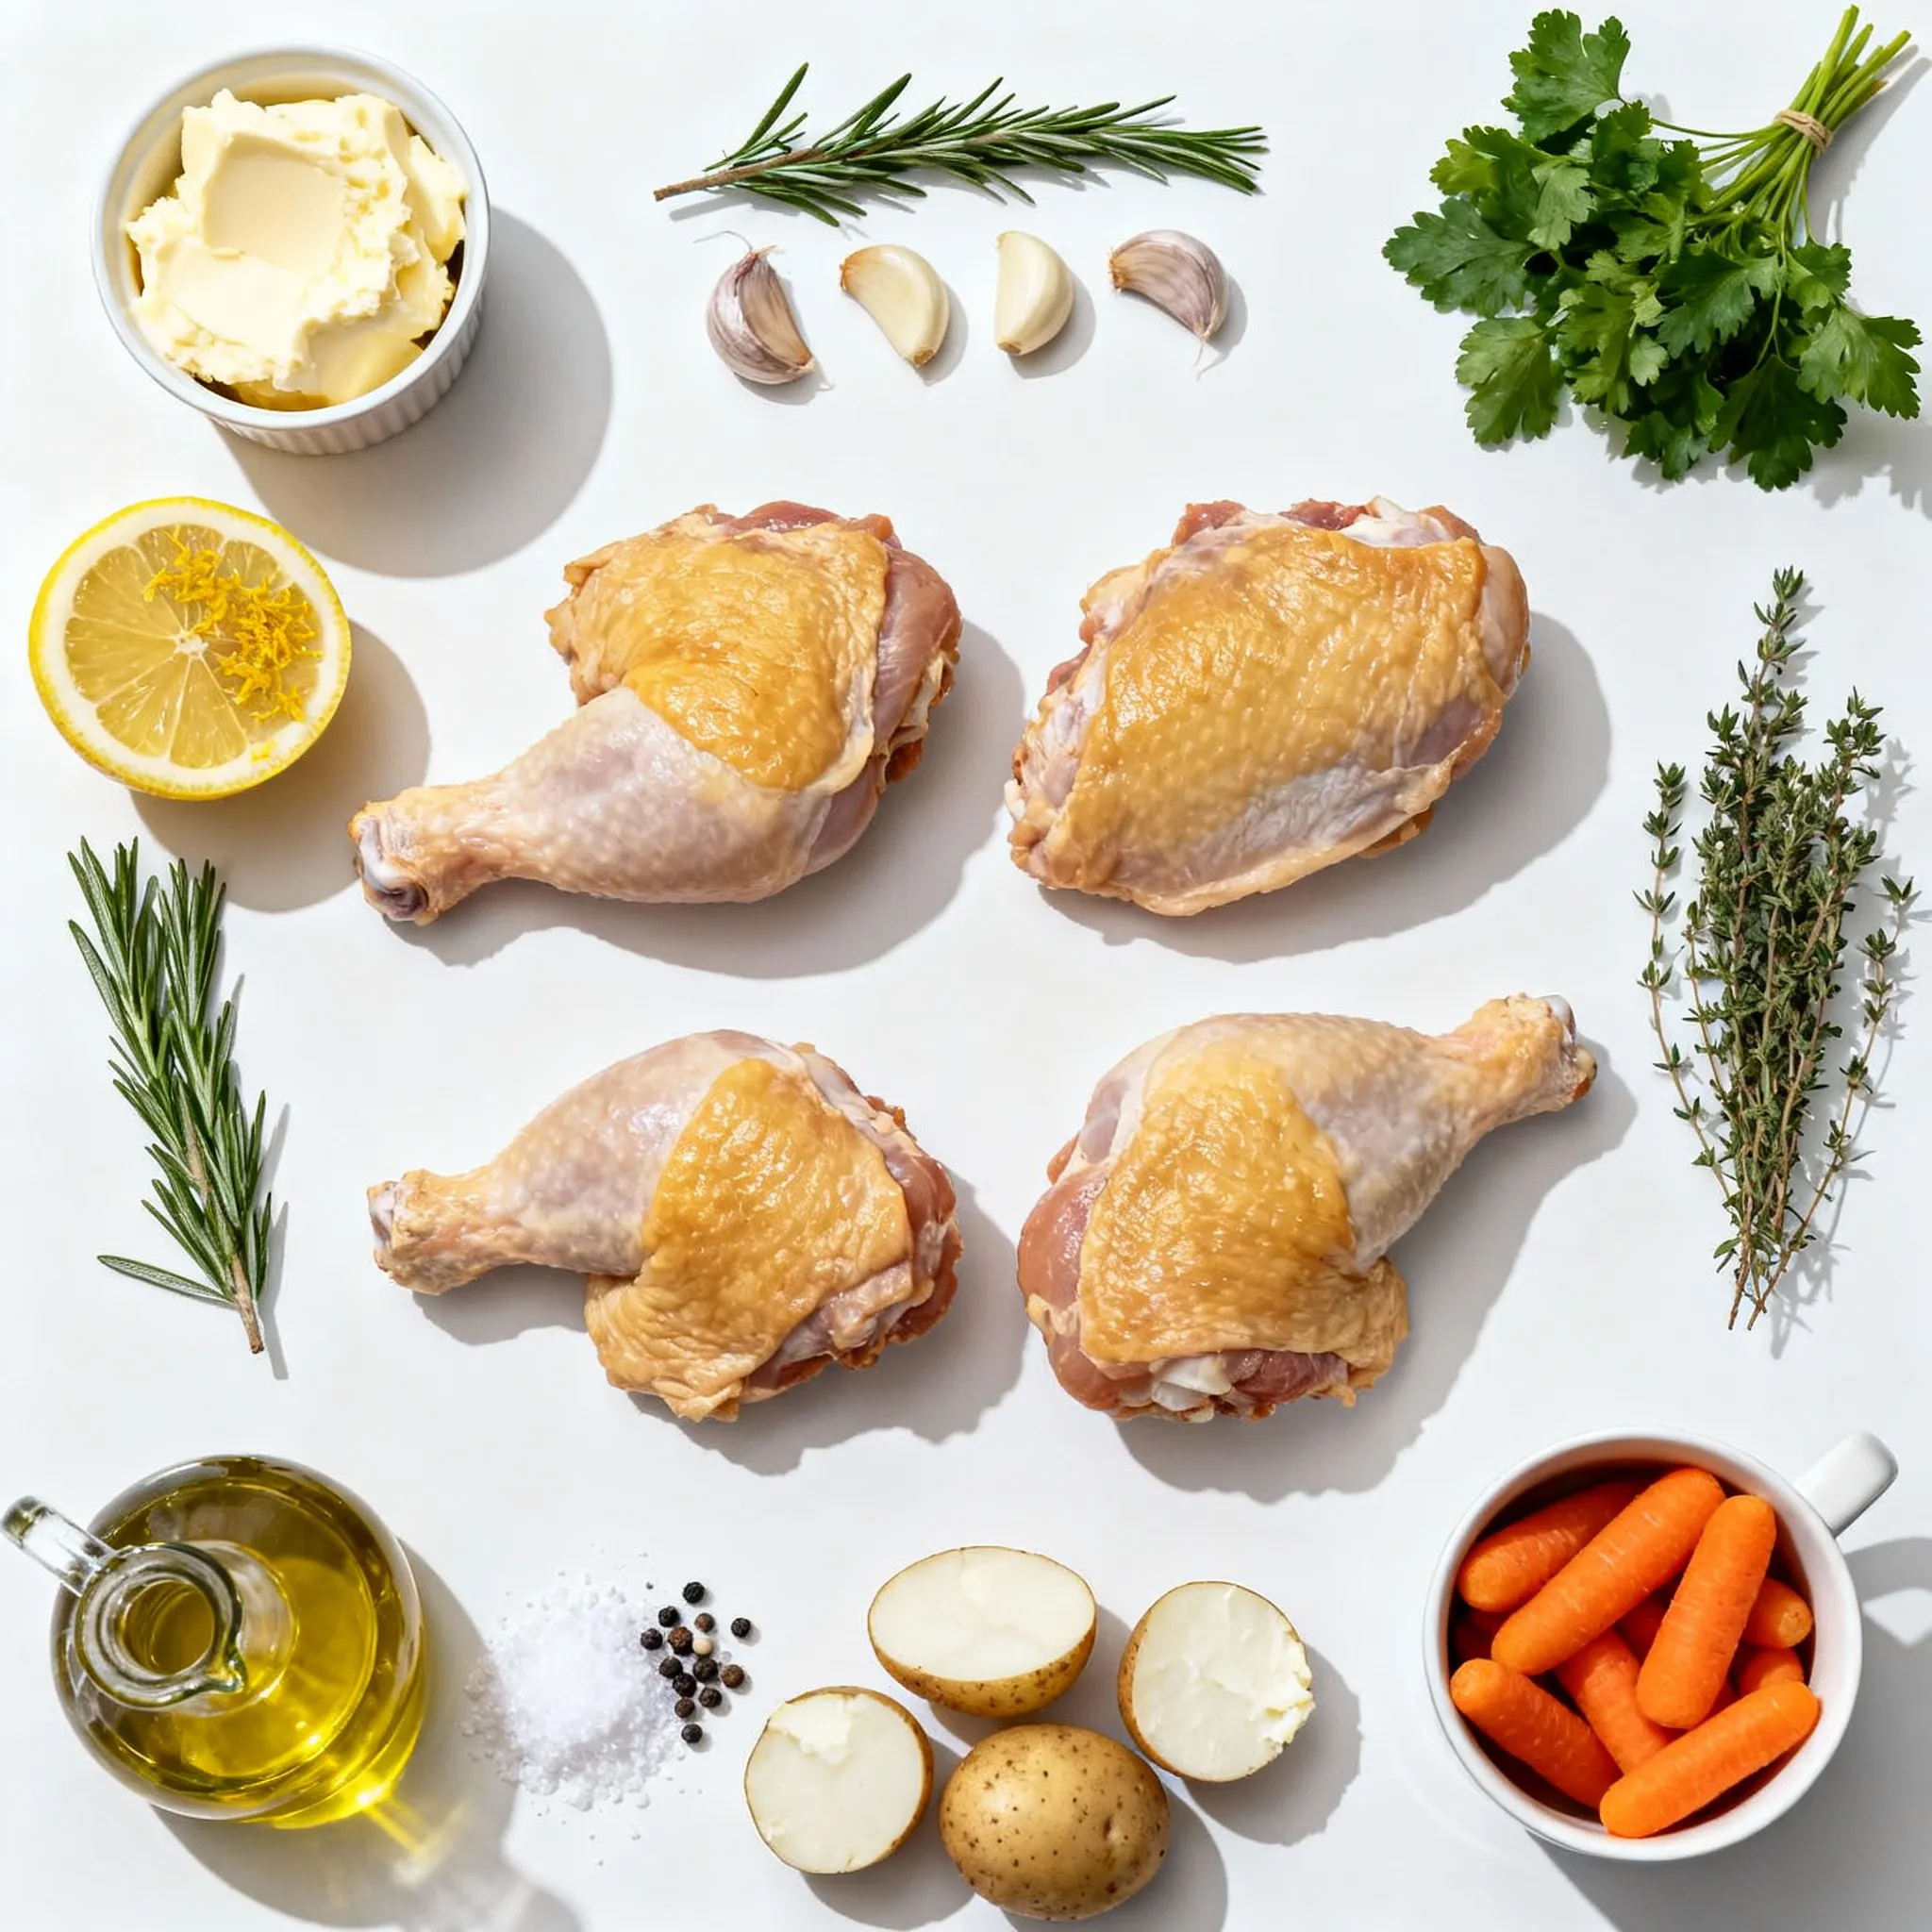
Ingredients
Main Ingredients
- 4 bone-in chicken thighs, skin-on
- 1/2 cup unsalted butter, softened
- 2 tablespoons fresh rosemary, finely chopped
- 2 tablespoons fresh thyme, finely chopped
- 1 tablespoon fresh parsley, finely chopped
Additional Ingredients
- 1 lemon, zested and juiced
- 4 cloves garlic, minced
- 1 cup baby carrots
- 1 cup baby potatoes, halved
Step-by-Step Instructions
Preparation
First, I preheat the oven to 425°F (220°C). This step is key for crispy skin. Next, I mix the softened butter, minced garlic, chopped herbs, lemon zest, lemon juice, salt, and pepper in a medium bowl. I blend it well to create a tasty herb butter.
Seasoning the Chicken
I pat the chicken thighs dry with paper towels. This helps the skin get crispy. Then, I carefully loosen the skin on each thigh with my fingers. I make sure not to tear it. I take about half of the herb butter and smear it under the skin. This adds flavor right where it counts. I rub the rest of the herb butter over the skin. Finally, I season the outside with salt and pepper.
Roasting Process
In a large roasting pan, I toss the baby carrots and halved baby potatoes with a drizzle of olive oil, salt, and pepper. I arrange the seasoned chicken thighs on top of the veggies. Then, I roast it all in the preheated oven for 35-40 minutes. I look for golden brown skin and check that the internal temperature reaches 165°F (75°C). After cooking, I let the chicken rest for 5-10 minutes to keep it juicy. I serve the chicken over the roasted vegetables and drizzle with pan juices.

Tips & Tricks
Ensuring Juicy Chicken
Letting the chicken rest is key to keeping it juicy. After roasting, set the chicken aside for 5-10 minutes. This helps the juices move back into the meat. If you skip this step, the juices will run out when you cut it.
Always check the internal temperature. Use a meat thermometer to ensure it reads 165°F (75°C). This marks the chicken as safe to eat. Plus, it helps you avoid overcooking the meat.
Enhancing Flavor
Try adding more herbs and spices to the mix. Fresh basil or oregano can add a new twist. You can also experiment with spices like paprika or cumin. This lets you create a unique taste that suits your mood.
Using compound butter variations can also boost flavor. Mix in some chili flakes for heat or a pinch of smoked paprika for depth. This simple change can turn a good dish into a great one.
Variations
Substitutes for Chicken Thighs
If you prefer chicken breasts, you can use them instead. They will cook faster, so adjust the time accordingly. Drumsticks are another great option, providing a different texture and flavor.
Vegetable Options
You can roast other vegetables with the chicken too. Consider bell peppers, zucchini, or onions. They add color and taste while cooking in the same pan. This also makes cleanup a breeze.
Storage Info
Storing Leftovers
For leftover chicken, cool it down first. Store it in an airtight container in the fridge. It should last about 3-4 days. If you want to keep it longer, consider freezing.
To freeze, wrap the chicken tightly in foil or plastic wrap. Then place it in a freezer bag. This way, it can last up to 3 months.
Reheating Tips
When reheating, keep the chicken moist. Use the oven at 350°F (175°C) and cover it with foil. This helps trap steam and keeps it juicy. Heat for about 15-20 minutes, checking until it’s warm throughout.
Nutritional Information
Calculating Nutritional Values
Each serving of herb butter roasted chicken thighs provides:
- Calories: About 480
- Total Fat: 33g
- Saturated Fat: 14g
- Protein: 30g
- Carbohydrates: 12g
This breakdown shows how tasty and filling this dish is. Chicken thighs are a great source of protein. Butter adds flavor and healthy fats. The veggies contribute some carbs and fiber, making it a balanced meal.
Health Benefits
Using fresh herbs in cooking is a smart choice. They add flavor without extra salt. Fresh herbs also provide vitamins and antioxidants. Rosemary, thyme, and parsley are great for boosting your immune system.
Chicken thighs have their own health perks. They are rich in protein, which helps build muscles. The skin adds some healthy fats, which can keep you full. Plus, they have iron, which is good for your blood. This meal is both delicious and good for you!
Pro Tips
- Use Fresh Herbs: Fresh herbs provide the best flavor. If possible, use them straight from the garden for maximum aroma and taste.
- Let the Butter Soften: Ensure your butter is softened at room temperature to make it easier to mix with herbs and spread under the chicken skin.
- Check the Internal Temperature: Use a meat thermometer to check that the internal temperature of the chicken reaches at least 165°F (75°C) for safe consumption.
- Rest the Chicken: Allow the chicken to rest for 5-10 minutes after roasting. This helps retain the juices and keeps the meat moist.

FAQs
Common Cooking Questions
Can I use frozen chicken thighs?
Yes, you can use frozen chicken thighs. Just remember to thaw them first. Thaw them in the fridge overnight for the best results. If you cook them from frozen, increase the cooking time by about 50%. This helps ensure they cook through safely.
How can I tell when the chicken is done cooking?
To check if the chicken is done, use a meat thermometer. The internal temperature should reach 165°F (75°C). You can also cut into the thickest part of the thigh. The juices should run clear, and the meat should not be pink.
Recipe Adjustments
How to adjust for larger servings?
To serve more people, simply double or triple the recipe. Use more chicken thighs and add extra butter and herbs. Make sure your roasting pan is large enough. You may need to roast in batches if it gets crowded.
Can I make this recipe in a slow cooker?
Yes, you can use a slow cooker. Prepare the herb butter as directed. Then smear it under the skin. Place the chicken in the slow cooker with the veggies. Cook on low for 6-8 hours or high for 3-4 hours. This method makes the chicken very tender.
Ingredient Substitutions
What can I substitute for unsalted butter?
If you need a substitute for unsalted butter, try using olive oil or coconut oil. These will change the flavor slightly but add a nice richness. You could also use margarine if preferred.
Are there alternatives to fresh herbs?
Yes, you can use dried herbs instead of fresh. Use about 1 teaspoon of dried herbs for every tablespoon of fresh. Just remember that dried herbs are more potent, so start small and adjust to your taste.
This blog post covered how to make juicy roasted chicken thighs with fresh herbs and vegetables. We explored key ingredients, step-by-step instructions, and helpful tips. You learned how to enhance the flavor with herb butter and choose the right veggies. Plus, I shared storage and reheating tips for your leftovers.
Remember, fresh herbs and patience help create a tasty dish. Enjoy making this meal easy and health

Herb Butter Roasted Chicken Thighs
Ingredients
- 4 pieces bone-in chicken thighs, skin-on
- 0.5 cup unsalted butter, softened
- 4 cloves garlic, minced
- 2 tablespoons fresh rosemary, finely chopped
- 2 tablespoons fresh thyme, finely chopped
- 1 tablespoon fresh parsley, finely chopped
- 1 piece lemon, zested and juiced
- to taste salt and pepper
- for drizzling olive oil
- 1 cup baby carrots
- 1 cup baby potatoes, halved
Instructions
- Preheat your oven to 425°F (220°C).
- In a medium bowl, combine the softened butter, minced garlic, chopped rosemary, thyme, parsley, lemon zest, lemon juice, salt, and pepper. Mix until well blended to create the herb butter.
- Pat the chicken thighs dry with paper towels. Carefully loosen the skin on each thigh with your fingers, being careful not to tear it.
- Take about half of the herb butter and smear it directly under the skin of the chicken thighs, ensuring it’s evenly distributed.
- Rub the remaining herb butter all over the skin of the chicken thighs, then season the outside generously with salt and pepper.
- In a large roasting pan, toss the baby carrots and halved baby potatoes with a drizzle of olive oil, salt, and pepper. Arrange the chicken thighs on top of the vegetables.
- Roast in the preheated oven for 35-40 minutes, or until the chicken skin is golden brown and crispy, and the internal temperature reaches 165°F (75°C).
- Once done, let the chicken rest for 5-10 minutes before serving to allow the juices to redistribute.
- Serve the chicken thighs over the roasted vegetables, drizzled with any pan juices for extra flavor.


![To make a delicious Lemon Herb Quinoa Salad, you need a few key items: - 1 cup quinoa, rinsed - 2 cups vegetable broth or water - 1 large cucumber, diced - 1 cup cherry tomatoes, halved - 1 bell pepper (any color), diced - 1/4 red onion, finely chopped - 1/4 cup fresh parsley, chopped - 1/4 cup fresh mint, chopped - Juice of 2 lemons - 3 tablespoons olive oil - Salt and pepper to taste - 1/2 teaspoon garlic powder (optional) These ingredients create a fresh and vibrant taste. Quinoa adds protein, while vegetables give color and crunch. You can boost your salad with some optional ingredients: - Avocado, diced - Feta cheese, crumbled - Chickpeas, rinsed and drained - Nuts or seeds, like almonds or sunflower seeds These additions bring extra flavors and textures. They make the salad more filling and fun to eat. To prepare your Lemon Herb Quinoa Salad, you will need: - A medium saucepan for cooking quinoa - A large mixing bowl for the salad - A whisk for mixing the dressing - A cutting board and knife for chopping veggies Having the right tools makes cooking easier. This way, you can focus on making a tasty dish. For the full recipe, refer to the section provided above. To cook quinoa, start with rinsing 1 cup of quinoa under cold water. This step removes any bitter taste. In a medium saucepan, combine the rinsed quinoa with 2 cups of vegetable broth or water. Bring this mixture to a boil over high heat. Once it boils, lower the heat to a simmer. Cover the pot and let it cook for about 15 minutes. You’ll know it’s done when the liquid is absorbed, and the quinoa is fluffy. After cooking, let it sit covered for 5 more minutes. Then, fluff it with a fork and set it aside to cool. While the quinoa cools, you can prepare the fresh vegetables. Take a large cucumber and dice it. Halve 1 cup of cherry tomatoes. Dice 1 bell pepper, any color you like. Finely chop 1/4 of a red onion. These veggies add color and crunch to the salad. Place them all in a large mixing bowl. Their freshness really makes this salad special. Now it’s time to bring everything together. Add the cooled quinoa to your bowl of vegetables. In a small bowl, whisk the juice of 2 lemons with 3 tablespoons of olive oil. If you like, add 1/2 teaspoon of garlic powder for more flavor. Season with salt and pepper to taste. Pour this dressing over the quinoa and veggies. Toss gently to combine. Finally, fold in 1/4 cup each of chopped parsley and mint. These herbs add a bright, fresh taste. Taste your salad and adjust the seasoning if needed. You can find the full recipe for this Lemon Herb Quinoa Salad in the article. To make quinoa fluffy, rinse it well before cooking. This removes extra starch. Use two cups of liquid for every cup of quinoa. Bring it to a boil, then lower the heat to simmer. Cover it and let it cook for about 15 minutes. After cooking, let it sit covered for five more minutes. Finally, fluff it with a fork. This method gives you light and airy quinoa for your salad. You can change the dressing to add more flavor. Try adding a teaspoon of Dijon mustard for a tangy kick. You could also use balsamic vinegar instead of lemon juice for a sweeter taste. For a spicy touch, add a pinch of red pepper flakes. Mix and match these ideas to find your favorite! I love serving this salad chilled or at room temperature. It looks great in a big bowl or individual cups. You can add lemon slices on top for a bright look. If you're hosting, pair it with grilled chicken or fish. It’s also perfect as a side dish at picnics. For a quick lunch, pack it in a jar for easy transport. This salad is fresh and full of flavor, making it a hit at any meal! For the full recipe, check the recipe section above. {{image_2}} You can easily boost the protein in your Lemon Herb Quinoa Salad. Adding chicken, chickpeas, or tofu makes it heartier. Grilled chicken works well; just slice it and toss it in. For a vegetarian option, try chickpeas. They add nice texture and flavor. Simply rinse and drain canned chickpeas, then mix them in. Tofu is another great option. Use firm tofu, cube it, and pan-fry until golden. This adds a delicious crunch. This salad is perfect for any season! In summer, add fresh corn or diced avocado. Both bring a creamy texture and sweetness. You can even include fruits like diced mango or strawberries for a fun twist. In winter, think about adding roasted vegetables. Try sweet potatoes, Brussels sprouts, or beets. They give warmth and depth to your salad. Adjust your herbs too. In winter, use sage or thyme for a cozy flavor. Dietary needs can change, and this salad is flexible. If you're gluten-free, quinoa is a great choice! However, if quinoa doesn't suit you, try brown rice or millet. For a lighter option, you could use cauliflower rice. If you're avoiding oil, substitute with avocado or Tahini for creaminess. Need a nut-free option? Just leave out the nuts or seeds if you add them. You can still enjoy a fresh, tasty salad! For the full recipe, check out the detailed instructions and enjoy this healthy dish! To keep your Lemon Herb Quinoa Salad fresh, place it in an airtight container. Make sure to seal it tightly. Store it in the fridge. It will stay good for up to five days. The flavors will blend more as it sits. This makes it taste even better! You can freeze quinoa salad, but it may change texture. To freeze, scoop the salad into freezer-safe bags. Remove as much air as possible. Label the bags with the date. When you're ready to eat, thaw it in the fridge overnight. Enjoy it within three months for the best taste. For the best taste, serve your quinoa salad chilled or at room temperature. If it was in the fridge, take it out and let it sit for a bit. This will help the flavors pop! You can also add a splash of lemon juice before serving to brighten it up. Lemon Herb Quinoa Salad is packed with nutrients. Quinoa offers protein, fiber, and essential amino acids. Each serving has about: - 220 calories - 8 grams of protein - 4 grams of fat - 38 grams of carbs - 5 grams of fiber The fresh veggies boost vitamins and minerals, making it a healthy choice. Yes, you can prepare Lemon Herb Quinoa Salad ahead. It stays fresh in the fridge for up to three days. Just store it in an airtight container. The flavors deepen as it sits, which is a bonus! If you lack parsley or mint, try these herbs: - Cilantro - Basil - Dill - Chives Each adds a unique taste. Feel free to mix and match based on what you like best! For the full recipe and more tips, check the [Full Recipe]. In this blog post, we explored how to create a delicious lemon herb quinoa salad. We covered essential and optional ingredients that can boost flavor. I also shared tips for cooking quinoa perfectly and preparing fresh veggies. You learned different ways to enhance the dish, like adding protein or modifying for seasons. Remember to store leftovers well and reheat properly for best taste. Enjoy making this salad your own with easy swaps and additions!](https://dailydishlab.com/wp-content/uploads/2025/07/7d74a881-4284-4d62-884c-d248237a5ed2-768x768.webp)


