Are you ready for a creamy, dreamy treat that packs a punch of protein? My High-Protein Chocolate Peanut Butter Smoothie Bowl Delight delivers rich chocolate and nutty flavors in a fun bowl format. It’s quick to make and perfect for breakfast or a snack. Dive into deliciousness as we explore easy ingredients, tasty toppings, and simple instructions to whip up this wholesome delight. Let’s blend your new favorite dish!
Why I Love This Recipe
- Deliciously Indulgent: This smoothie bowl combines the rich flavors of chocolate and peanut butter, making it feel like a treat while still being healthy.
- High in Protein: With the addition of chocolate protein powder and peanut butter, this recipe packs a protein punch to keep you satisfied.
- Customizable Toppings: You can personalize your bowl with a variety of toppings, from fruits to nuts, allowing for creativity and nutrition.
- Quick and Easy: This recipe takes only 5 minutes to prepare, making it a perfect option for busy mornings or a quick snack.
Ingredients
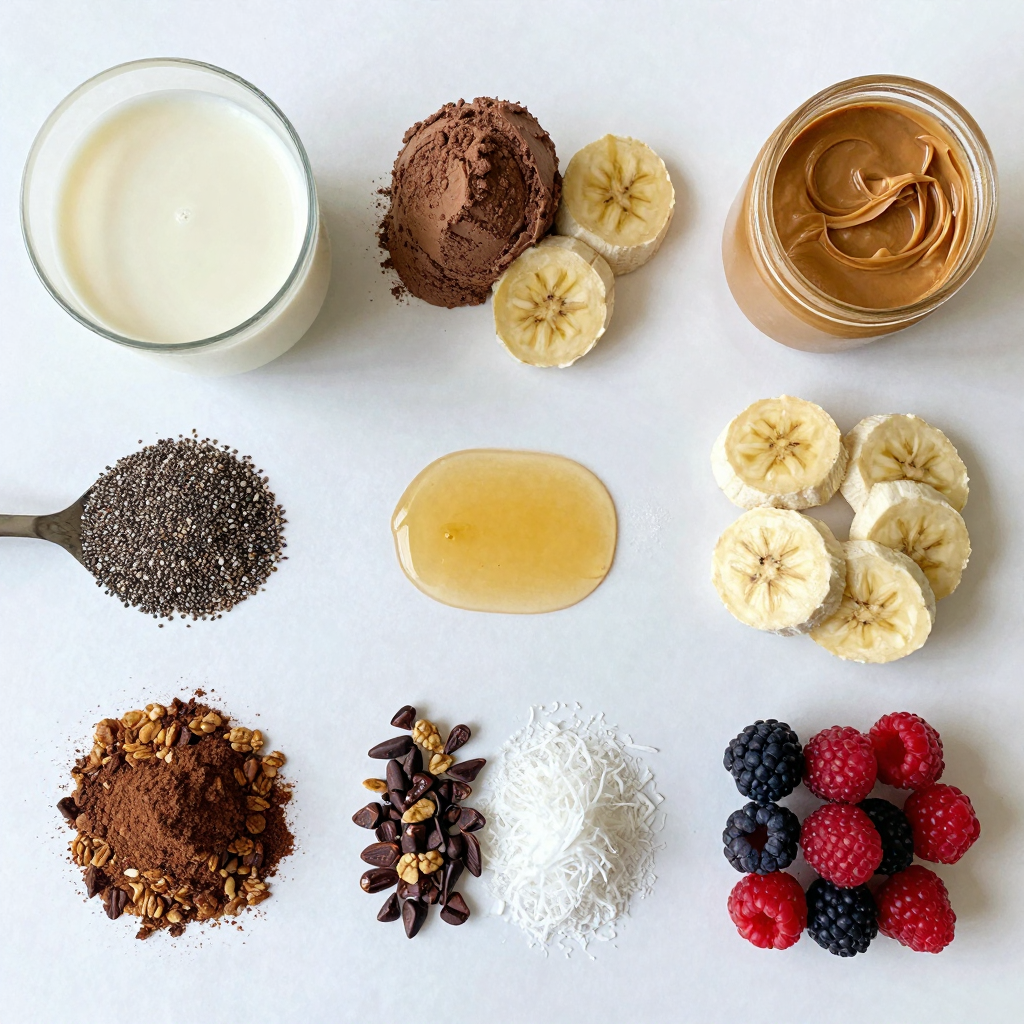
Main Ingredients
– 1 frozen banana, sliced
– 1 cup unsweetened almond milk (or milk of choice)
– 2 tablespoons natural peanut butter
– 1 scoop chocolate protein powder
– 1 tablespoon cocoa powder
Optional Ingredients
– 1 tablespoon honey or maple syrup (for sweetness)
– 1 tablespoon chia seeds
– A pinch of salt
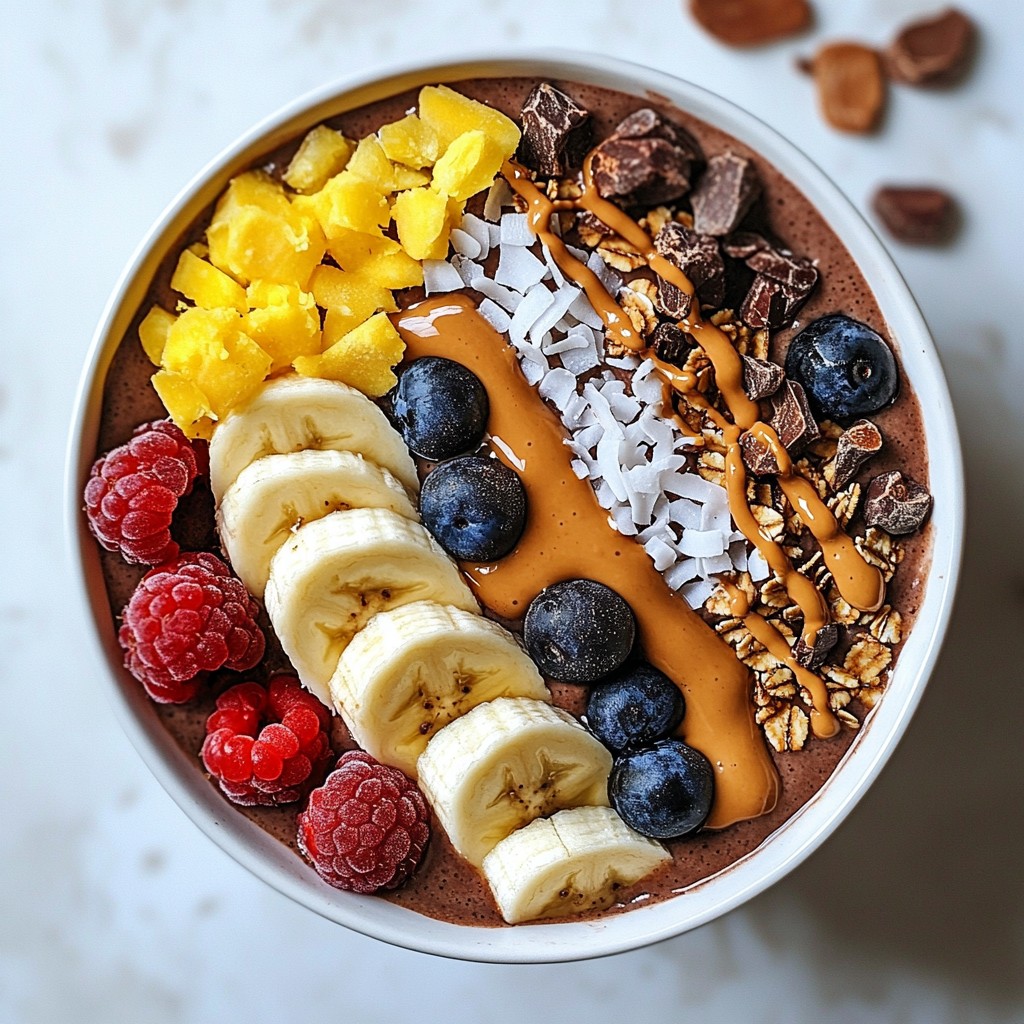
Toppings Suggestions
– Sliced bananas
– Granola
– Cacao nibs
– Shredded coconut
– Fresh berries
The main ingredients create a rich and creamy smoothie bowl. The frozen banana gives a nice texture. Unsweetened almond milk adds creaminess without extra sugar. Natural peanut butter brings a nutty flavor and healthy fats. The chocolate protein powder boosts protein and taste. Cocoa powder adds a rich chocolate flavor.
For sweetness, you can add honey or maple syrup. Chia seeds offer extra nutrition and thickness. A pinch of salt enhances the flavors.
Toppings make your smoothie bowl fun and colorful. Sliced bananas add freshness. Granola gives crunch. Cacao nibs provide intense chocolate flavor. Shredded coconut adds chewiness. Fresh berries brighten the bowl and add antioxidants.
Feel free to mix and match these ingredients. You can create a bowl that suits your taste. Enjoy this delicious and healthy treat any time of day!
Step-by-Step Instructions
Preparation Steps
– First, gather all your ingredients.
– Slice your frozen banana.
– In your blender, combine:
– 1 sliced frozen banana
– 1 cup unsweetened almond milk
– 2 tablespoons natural peanut butter
– 1 scoop chocolate protein powder
– 1 tablespoon cocoa powder
– 1 tablespoon chia seeds
– Optional: 1 tablespoon honey or maple syrup
– A pinch of salt
– Blend on high until smooth and creamy.
Consistency Adjustments
– If your smoothie bowl is thick, add more almond milk.
– Pour in one tablespoon at a time.
– Blend again until you reach your desired thickness.
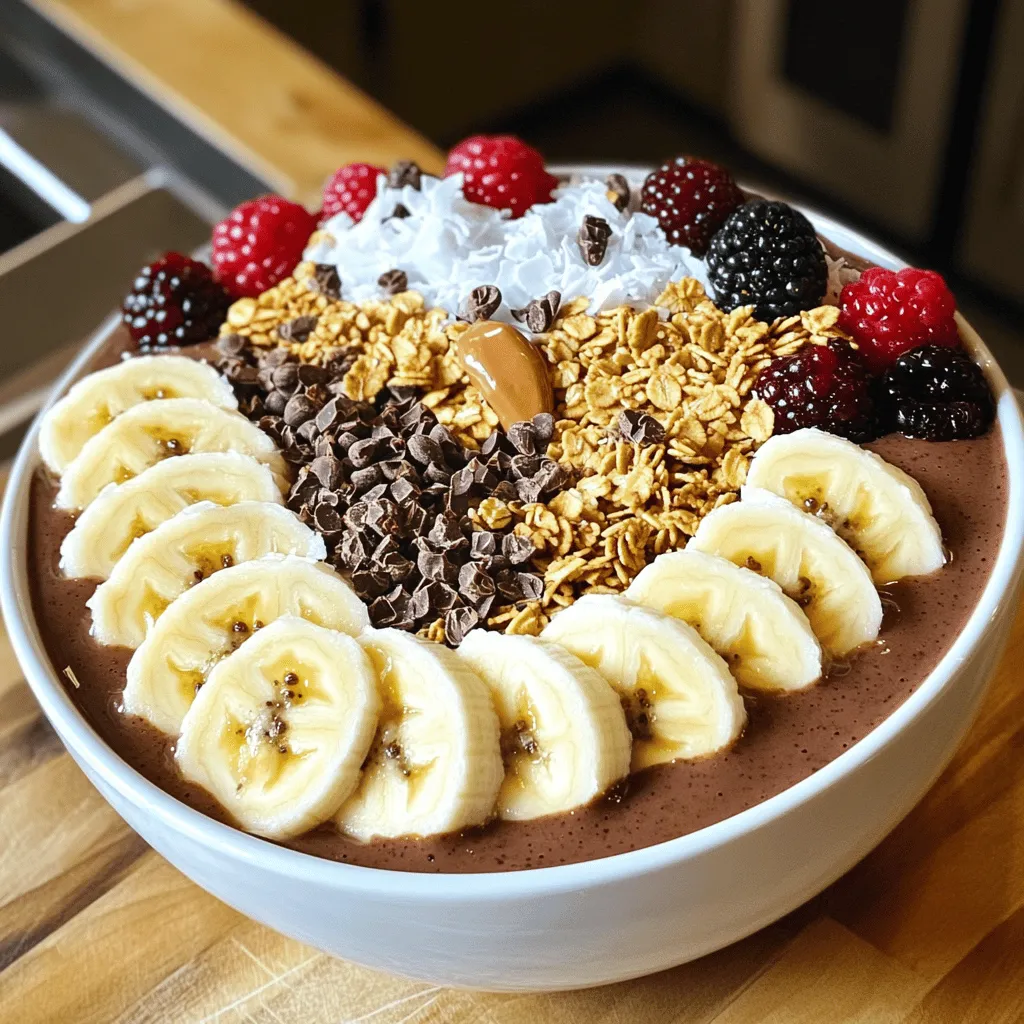
Serving Suggestions
– Once blended, pour the smoothie into a bowl.
– Now it’s time to decorate!
– Top with your favorites:
– Sliced bananas
– Granola
– Cacao nibs
– Shredded coconut
– Fresh berries
– Serve immediately and enjoy every bite!
Pro Tips
- Choose the Right Banana: Make sure your banana is fully ripe before freezing; it will enhance the sweetness and flavor of your smoothie bowl.
- Adjust Consistency: If you prefer a thinner smoothie, gradually add more almond milk until you achieve your desired texture.
- Protein Powder Variations: Experiment with different flavors of protein powder, such as vanilla or chocolate, to change the flavor profile of your smoothie bowl.
- Top It Off: Don’t hesitate to get creative with your toppings; consider adding nuts, seeds, or your favorite fruits for extra texture and nutrition.
Tips & Tricks
Enhancing Flavor
To change up the taste, try different nut butters. Almond or cashew butter can work well too. If you want it sweeter, add honey or maple syrup. Start with a small amount and taste it. You can always add more if needed.
Consistency Tips
To make your smoothie bowl creamy, blend well. Use frozen bananas; they add thickness. If it’s too thick, add more almond milk. You can also use coconut milk or oat milk for a twist. These can change the flavor, so pick what you like best.
Efficient Preparation
Prep your ingredients ahead of time for quick meals. Slice bananas and store them in the freezer. Measure out your protein powder and cocoa, too. You can use meal prep jars to keep everything ready. This makes your morning routine smooth and easy.
Variations
Protein Sources
You can swap the protein sources to fit your needs. Non-dairy protein powders work great. Look for options like pea or rice protein. These choices keep it plant-based and tasty. Adding Greek yogurt gives a creamy texture. It also boosts protein and adds probiotics for gut health.
Flavor Enhancements
You can enhance flavors in many ways. Adding a splash of vanilla extract makes it sweeter. You can also blend in different fruits, like strawberries or mangoes. Each fruit adds its unique taste and nutrients. Experiment to find your favorite mix!
Dietary Modifications
If you want vegan options, use plant-based milk and protein powder. This keeps your smoothie bowl cruelty-free. For nut-free versions, try sunflower seed butter instead of peanut butter. This way, you can still enjoy the creaminess without the nuts.
Storage Info
Short-term Storage
After making your smoothie bowl, you may want to save leftovers. Place any extra smoothie in an airtight container. Store it in the fridge for up to two days. Keep in mind that the texture may change slightly. If it thickens, just stir in a bit of almond milk before enjoying.
Freezing Options
You can freeze smoothie bowls for later. Pour the leftover smoothie into freezer-safe containers. Leave some space at the top for expansion. Seal tightly, and freeze for up to one month. When ready to eat, thaw in the fridge overnight.
Reheating Recommendations
Smoothie bowls are best enjoyed cold, but you can still savor them after storage. If your frozen smoothie is too thick, blend it with a splash of almond milk. For refrigerated bowls, just stir and enjoy. Add fresh toppings for added flavor and crunch.
FAQs
What is a smoothie bowl?
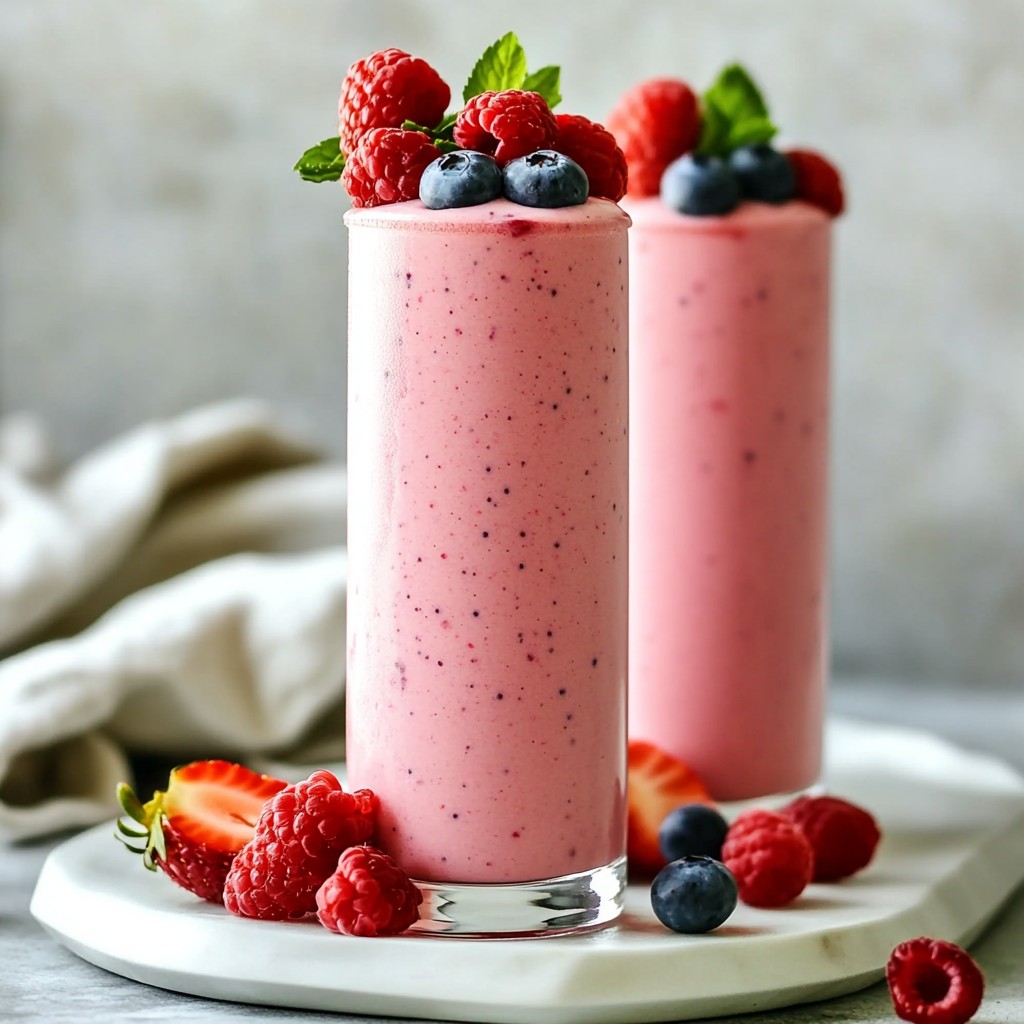
A smoothie bowl is a thick smoothie served in a bowl. You can eat it with a spoon. It usually has fruits, yogurt, or milk blended together. You can top it with various goodies like nuts, seeds, and fruits. This makes it fun and tasty. It’s a great breakfast or snack choice. You can customize it based on your favorite flavors.
How can I increase the protein content?
To boost protein in your smoothie bowl, try these tips:
– Add Greek yogurt for creamy texture.
– Use more protein powder, like whey or plant-based.
– Toss in some nuts or seeds, like almonds or sunflower seeds.
– Blend in silken tofu for a smooth finish.
– Consider adding nut butter for flavor and protein.
These options make your smoothie bowl even more filling and nutritious.
Can I make this ahead of time?
Yes, you can prepare your smoothie bowl in advance! Here are some steps:
– Blend the smoothie mix as usual.
– Instead of serving right away, pour it into an airtight container.
– Store it in the fridge for up to 24 hours.
When you’re ready to eat, just stir it up and add your favorite toppings. If it thickens too much, add a splash of almond milk to loosen it.
In this post, I explored the great world of smoothie bowls. We covered key ingredients like frozen banana, almond milk, and peanut butter. I shared tips for blending, serving, and storing these delicious bowls. You can personalize your smoothie bowl with toppings and variations to fit your taste.
Smoothie bowls are not just tasty; they are easy to make. You have the power to adapt these recipes to your needs. Enjoy the journey of blending flavors and creating your perfect bowl!