Honey Garlic Chicken Simple and Flavorful Delight

Craving a dish that bursts with flavor yet is simple to make? Look no further! My Honey Garlic Chicken recipe is both easy and delicious, perfect for a busy weeknight or a cozy dinner. With just a few key ingredients like chicken thighs, honey, and garlic, you can whip up a meal that impresses everyone at your table. Let’s dive into this scrumptious delight and elevate your cooking game!
Ingredients
Main Ingredients
- 4 boneless chicken thighs
- 1/4 cup honey
- 1/4 cup low-sodium soy sauce
Additional Flavorings
- 4 cloves garlic, minced
- 1 teaspoon fresh ginger, grated
- 1 tablespoon sesame oil
- 1 tablespoon olive oil
Seasoning and Garnishes
- Salt and freshly ground black pepper to taste
- 2 green onions, sliced (for garnish)
- Sesame seeds (for garnish)
When you gather these ingredients, you set the stage for a great dish. The chicken thighs are juicy and tender, and they soak up the sweet and savory marinade. Honey adds a nice touch of sweetness, while soy sauce brings depth. Don’t skip the garlic and ginger; they boost the flavor.
The sesame oil and olive oil mix well, giving the chicken a rich taste. The seasonings are simple, just salt and pepper, but they make a big difference. For garnish, green onions and sesame seeds add a fresh crunch and a pop of color.
This simple list makes cooking fun. You can find these ingredients at any grocery store. As you prepare, think about how these flavors will blend together. It’s a delightful experience.
Step-by-Step Instructions
Preparing the Marinade
To start, grab a medium bowl. In it, whisk together the honey, low-sodium soy sauce, minced garlic, and grated ginger. This mixture creates a sweet and savory marinade that makes the chicken shine. Ensure it’s mixed well, as this is where the magic begins.
Seasoning the Chicken
Next, take your chicken thighs and sprinkle salt and freshly ground black pepper on both sides. This step is crucial for flavor. Now, place the chicken in a large zip-top bag or a shallow dish. Pour the prepared marinade over the chicken, ensuring it’s coated well. Seal the bag or cover the dish tightly. For the best taste, let it sit in the fridge for at least 30 minutes, or up to 2 hours if you can wait.
Cooking the Chicken
Heat sesame oil and olive oil in a large skillet over medium-high heat. Wait until the oils shimmer, which should take a minute or two. Once hot, remove the chicken from the marinade, saving the leftover marinade for later. Carefully place the chicken in the skillet. Cook for about 5-7 minutes on each side, until the chicken turns golden brown and reaches an internal temperature of 165°F. This will give you a crunchy exterior.
Making the Sauce
After cooking the chicken, take it out of the skillet and let it rest on a plate. Now, pour the reserved marinade into the same skillet. Bring it to a gentle simmer over medium heat. Let it cook for about 3-4 minutes until it reduces slightly and thickens. This creates a rich sauce that will coat your chicken perfectly.
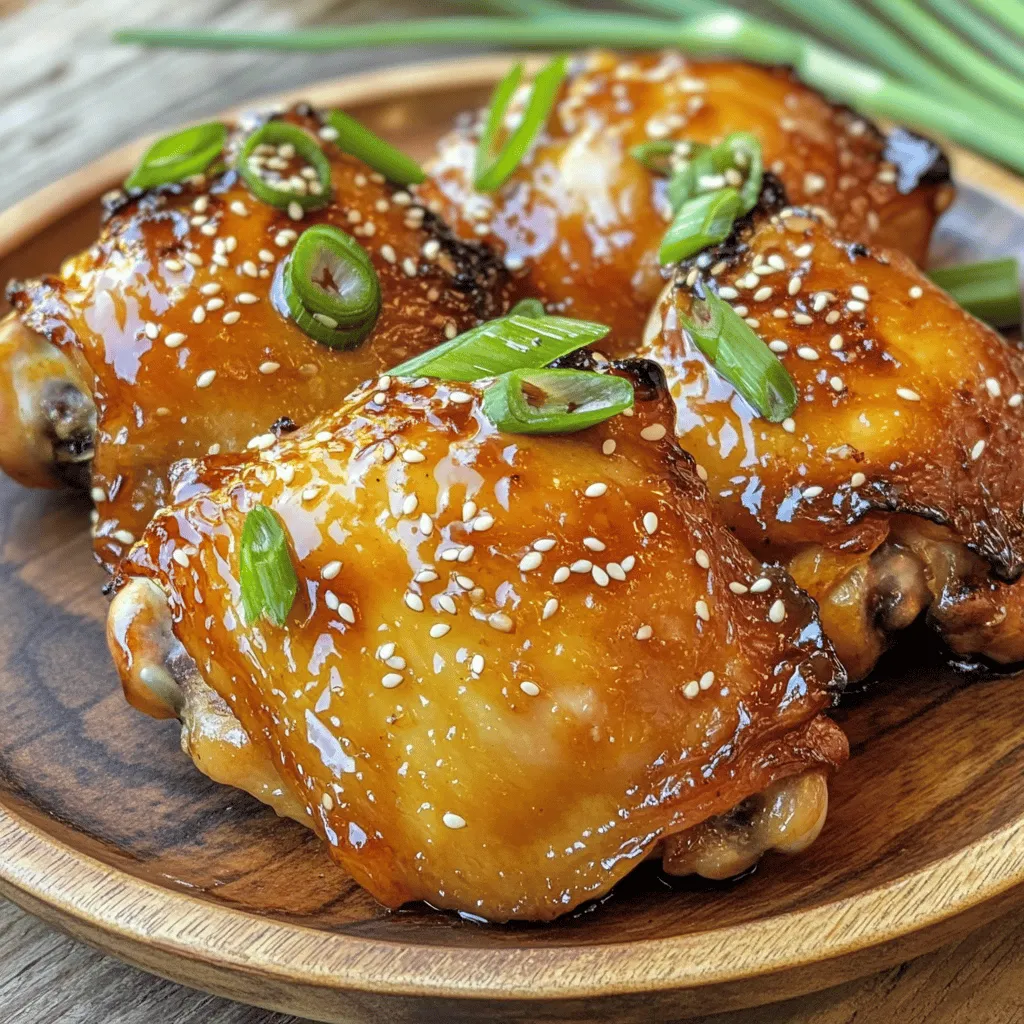
Glazing and Serving
Return the cooked chicken to the skillet. Make sure each piece is well-coated in the thickened sauce. Cook for an additional 1-2 minutes to meld the flavors. Finally, transfer the Honey Garlic Chicken to a serving platter or individual plates. Garnish with sliced green onions and a sprinkle of sesame seeds for a nice crunch. This dish is not just tasty; it’s also beautiful!Enjoy your cooking!
Tips & Tricks
Marination Tips
Marinating the chicken makes it juicy and full of flavor. I recommend marinating for at least 30 minutes. For even better taste, aim for 2 hours. This longer time helps the chicken soak up the honey and garlic flavors.
Cooking Techniques
To get that perfect golden-brown crust, heat the oils well before adding the chicken. Make sure your skillet is hot when you place the chicken inside. Cook it in batches if your skillet is small. This way, the chicken cooks evenly. Flip it only once or twice to keep that crust nice and intact.
Flavor Enhancements
To make your honey garlic chicken even better, try adding spices. A pinch of red pepper flakes gives it a nice kick. If you love citrus, some fresh lime juice adds brightness. You can also toss in some chopped fresh herbs like cilantro for a fresh twist. Each of these will enhance the dish and make it your own.
{{image_4}}
Variations
Honey Garlic Chicken with Vegetables
You can add seasonal vegetables to your honey garlic chicken. Try bell peppers, broccoli, or snap peas. Chop them into bite-sized pieces. Sauté them in the skillet before adding the chicken. This gives your dish color and crunch. You can also steam the veggies and serve them on the side.
Spicy Honey Garlic Chicken
If you like heat, make spicy honey garlic chicken. Add chili flakes or a splash of sriracha to the marinade. Start with a small amount and taste as you go. This will give your dish a nice kick. The sweetness of the honey balances the heat well. You’ll enjoy the flavor contrast!
Honey Garlic Chicken Stir-Fry
To turn this dish into a stir-fry, cut the chicken into strips. Marinate them as usual. Heat a wok or large skillet over high heat. Add a bit more oil for frying. Toss the chicken strips in the hot oil until they are golden. Add your favorite vegetables during cooking. Serve it over rice or noodles for a complete meal. These variations keep the dish fresh and fun!
Storage Info
Refrigeration Guidelines
To store your honey garlic chicken, let it cool first. Place it in an airtight container. This will keep it fresh. Enjoy your leftovers within three to four days. You can also use the original marinade as a dipping sauce.
Freezing Instructions
If you want to freeze honey garlic chicken, first let it cool completely. Place it in a freezer-safe bag or container. Make sure to remove as much air as possible. It can stay in the freezer for up to three months. When you’re ready to eat, thaw it in the fridge overnight. Reheat it in a skillet over medium heat until hot.
Shelf Life
Honey garlic chicken is safe to eat for three to four days when refrigerated. If frozen, use it within three months for best taste. Always check for any off smells or changes in texture before eating. This will ensure your meal remains safe and delicious.
FAQs
What can I serve with Honey Garlic Chicken?
You can pair Honey Garlic Chicken with many tasty sides. Here are some great options:
- Steamed jasmine rice
- Stir-fried vegetables
- Roasted broccoli
- Garlic mashed potatoes
- Simple green salad
- Sweet potato fries
These sides complement the sweet and savory flavors of the chicken well.
Can I use chicken breast instead of thighs?
Yes, you can use chicken breast. It will cook faster than thighs. Make sure to adjust the cooking time. Cook breast pieces for about 5-6 minutes on each side. This will keep them juicy and tender.
How do I make Honey Garlic Chicken in an Instant Pot?
To make Honey Garlic Chicken in an Instant Pot, follow these steps:
1.
2. Season the chicken and add it to the pot.
3. Pour the marinade over the chicken.
4. Seal the lid and set to cook on high pressure for 8 minutes.
5. Allow natural release for 5 minutes, then quick release the rest.
This method makes the chicken tender and packed with flavor.
What are some restaurant recommendations for Honey Garlic Chicken?
Here are some great places to enjoy Honey Garlic Chicken:
- Panda Express: Their version is popular and has a good balance of sweet and savory.
- Hibachi Grill: Known for their fresh ingredients and bold flavors.
- Local Asian bistros: Many small restaurants offer great homemade styles.
These spots often serve delicious Honey Garlic Chicken that you can enjoy when dining out.
You learned how to make Honey Garlic Chicken with simple ingredients and clear steps. This dish blends sweet and savory flavors, making it a favorite in many homes. Remember to marinate the chicken for best taste and feel free to experiment with added spices or veggies. Store leftovers properly to keep them fresh longer. With these tips and tricks, you’re ready to impress everyone at your next meal. Enjoy your cooking adventure!


. 1. First, preheat your oven to 400°F (200°C). This helps the meatballs cook evenly. 2. Next, line a baking sheet with parchment paper. This makes for easy cleanup later. 3. In a large bowl, combine the ground turkey, breadcrumbs, grated Parmesan, minced garlic, grated ginger, egg, black pepper, and salt. Mix gently until everything is just combined. 4. Using your hands, form the mixture into meatballs. Aim for about 1 to 1.5 inches in diameter. Place them on the prepared baking sheet. 1. In a small bowl, whisk together the honey, soy sauce, and sesame oil. This will be your tasty honey garlic sauce. 2. Brush or drizzle half of the honey garlic sauce over the meatballs. Ensure each meatball gets a good coat. 1. Now, bake the meatballs in the oven for 15 minutes. This helps them cook through. 2. After 15 minutes, take the meatballs out. Drizzle the remaining honey garlic sauce over them. 3. Return the meatballs to the oven for another 10 minutes. They should be golden brown and fully cooked. 4. Once done, remove the meatballs from the oven. Let them rest for a few minutes. 5. Before serving, garnish with chopped cilantro and sprinkle sesame seeds on top for a nice touch. For the full experience of these flavors, check out the Full Recipe. Enjoy your cooking! Choosing the right ground turkey is key. Use lean ground turkey for juicy meatballs. Look for a blend that is 93% lean or higher. This gives a nice balance of flavor and moisture. Mixing techniques matter too. Use your hands, but don’t overmix. Overmixing can make the meatballs tough. Just mix until all the ingredients hold together. This keeps them light and tender. Ensure even cooking by placing meatballs apart on the baking sheet. This allows heat to flow around each one. You can also turn them halfway through baking for a nice brown color all over. Adjusting sweetness and saltiness can enhance your dish. If you like it sweeter, add more honey. For more salt, increase the soy sauce. Taste as you go to get it just right. Try alternative sauces for a twist. You can use teriyaki sauce for a richer taste. Or mix in some sriracha for a spicy kick. These changes can make the meatballs feel new and exciting. Using gluten-free substitutes is easy. Swap regular soy sauce with tamari. This keeps all the great flavor while making it gluten-free. Plus, you can use gluten-free breadcrumbs for the same tasty meatballs. For the full recipe, check the earlier section of this article. {{image_2}} You can easily swap turkey for other meats. Chicken and beef work well in this recipe. They both give great flavor. Just keep the cooking times in mind. If you want a vegetarian option, try plant-based meatballs. They are tasty and healthy. Use lentils or chickpeas as the base. You can also find many brands ready to cook. Experiment with herbs for different flavors. Add basil, parsley, or oregano to mix it up. Each herb brings a new taste to the dish. The air fryer is a quick way to cook these meatballs. Set it to 375°F (190°C). Cook for about 12 minutes, turning halfway. This gives them a nice crispy outside. You can also use a slow cooker. Place the meatballs in the cooker and pour the honey garlic sauce over them. Cook on low for 4 hours. The meatballs will be juicy and full of flavor. Grilling adds a smoky taste. Preheat your grill and cook for about 10 minutes. Turn them often to avoid burning. This method gives a nice char and enhances the flavor even more. For the full recipe, check out the complete guide above. Store your leftover honey garlic turkey meatballs in the fridge. Use an airtight container to keep them fresh. They can last for about 3 to 4 days in the refrigerator. When you want to eat them, simply reheat in the microwave or warm them on the stove. You can freeze these meatballs for later use. Let them cool completely after cooking. Place them in a single layer on a baking sheet. Freeze for about an hour until firm. Then, transfer the meatballs to a freezer-safe bag or container. Label the bag with the date. They should stay good for about 3 months. When you want to enjoy them, take out the meatballs and let them thaw in the fridge overnight. For reheating, you can bake them in the oven at 350°F (175°C) for about 15 minutes. This will help them stay juicy and flavorful. For more details and the full recipe, check out the entire guide! How do I know when turkey meatballs are cooked? Turkey meatballs are done when they reach an internal temperature of 165°F (74°C). Use a meat thermometer to check. The outside should also be golden brown for best taste. Can I make honey garlic turkey meatballs ahead of time? Yes, you can prepare the meatballs ahead of time. Shape them and store them in the fridge for up to 24 hours. This saves time on busy days. What can I serve with honey garlic turkey meatballs? These meatballs pair well with jasmine rice, steamed veggies, or a fresh salad. You can also serve them as appetizers with toothpicks. Is this recipe suitable for meal prep? Absolutely! The meatballs store well in airtight containers. They can last in the fridge for 3 to 4 days, making them perfect for meal prep. Can I substitute honey for another sweetener? Yes, you can use maple syrup or agave nectar. They will give a similar sweetness without the honey flavor. How can I make these meatballs spicier? Add red pepper flakes or sriracha to the meatball mix. You can also drizzle hot sauce over the meatballs before serving for an extra kick. In this post, I shared a simple recipe for honey garlic turkey meatballs. We covered the key ingredients, from ground turkey to delicious sauce options. You learned how to prepare, bake, and store your meatballs. With tips on perfecting texture and flavor, plus variations for all diets, you can make this dish your own. Enjoy making these meatballs and impress your family with your cooking skills!](https://dailydishlab.com/wp-content/uploads/2025/07/69b29533-6935-43ed-a652-e91bcda4bd1d-768x768.webp)
![- 1 lb ground chicken - 1 bell pepper (red or yellow), diced - 1 cup carrots, julienned - 1 cup snap peas, trimmed - 3 cloves garlic, minced - 1 tablespoon ginger, freshly grated - 3 tablespoons soy sauce (low sodium) - 1 tablespoon hoisin sauce - 1 tablespoon sesame oil - 1 head of butter lettuce or iceberg lettuce, leaves separated - 2 green onions, sliced (for garnish) - Sesame seeds (for garnish) - Salt and pepper to taste To make great lettuce wraps, you need fresh, high-quality ingredients. Start with ground chicken. Look for lean meat with a light pink color. This gives a nice taste and texture. Next, pick a firm bell pepper. Red or yellow works best. They add color and sweetness to your dish. For crunch, use fresh snap peas. They should feel crisp and bright green. Carrots are another key part. Julienne them thinly for easy eating. Garlic and ginger add flavor, so choose fresh ones. Fresh herbs and spices make your dish pop. When you gather your ingredients, don’t forget the sauces. Low sodium soy sauce and hoisin sauce work well together. They add depth and a sweet touch. Sesame oil gives a nutty flavor and aroma. Finally, get butter or iceberg lettuce. The leaves should be crisp and intact for wrapping. These fresh ingredients will make your Simple Chicken Stir Fry Lettuce Wraps shine. For the complete recipe, check out the Full Recipe section. - Prepare all vegetables by washing, peeling, and cutting as needed. - Measure out sauces and spices. Start by washing your bell pepper, carrots, and snap peas. Peel the carrots and cut them into thin strips, called julienne. Dice the bell pepper into small pieces. Trim the snap peas by removing their ends. This makes them easy to eat. Measure out the soy sauce, hoisin sauce, and sesame oil. Having everything ready helps the cooking go faster. - Heat sesame oil in the skillet. - Cook garlic and ginger until fragrant. - Brown ground chicken, add vegetables, and cook until tender. Next, heat a large skillet or wok over medium-high heat. Add the sesame oil and let it warm up. Then, toss in the minced garlic and freshly grated ginger. Cook them for about 30 seconds. You will smell a lovely aroma. Now, add the ground chicken. Use a spatula to break it apart. Cook until it turns brown and is no longer pink. This should take about 5 to 7 minutes. Now, stir in the diced bell pepper, julienned carrots, and snap peas. Cook for another 3 to 5 minutes. You want the veggies to be tender but still a little crisp. Pour in the soy sauce and hoisin sauce. Mix everything well and cook for 2 more minutes. Taste and add salt and pepper if needed. - Spoon the mixture into lettuce leaves. - Garnish and serve on a platter. Once the mixture cools for a minute, it’s time to serve. Take a lettuce leaf and spoon some of the chicken and veggie mix into it. Fold the leaf around the filling to make a wrap. Place the wraps on a large platter. Garnish with sliced green onions and a sprinkle of sesame seeds. This makes your dish look extra special. You can also serve a small bowl of extra soy sauce or hoisin sauce for dipping. Enjoy your tasty creation! For the full recipe, check [Full Recipe]. - To get the best texture in your chicken stir fry, use high heat. - Make sure to cut your vegetables small. This helps them cook quickly. - Stir the chicken often while it cooks. This keeps it from sticking. - Avoid overcooking the veggies. They should stay crisp and bright. - To prevent soggy lettuce wraps, dry the lettuce leaves well. - Serve the filling warm, not hot, to keep the lettuce fresh. - You can make the chicken stir fry ahead of time. Store it in an airtight container. - Let the stir fry cool before refrigerating. This keeps the lettuce crisp. - Chop your veggies a day before. Store them in a sealed bag. - Prepare the sauces and keep them separate until serving time. - For side dishes, serve with rice or quinoa. They pair well with the wraps. - You can also add a fresh salad on the side for extra crunch. - For dips, try a soy sauce or hoisin sauce. They enhance the flavor. - Sriracha or chili garlic sauce adds a nice kick if you like spice. For the [Full Recipe](#), follow these tips to make your chicken stir fry lettuce wraps shine! {{image_2}} You can swap chicken for turkey or beef. Turkey has a similar taste but is leaner. Beef adds a rich flavor, perfect for a hearty meal. For vegetarians, tempeh or tofu works great. Tempeh has a nutty flavor, while tofu absorbs sauces well. Want some heat? Add chili flakes or a splash of sriracha. Both give a nice kick to your wraps. You can also change up the sauces. Try teriyaki for a sweet touch or peanut sauce for something creamy and rich. Use seasonal veggies for the best taste. In spring, add asparagus or snap peas. In summer, try bell peppers or zucchini. These fresh ingredients make your wraps even more vibrant. Customize your wraps based on what's in season. This keeps your meals exciting and tasty. For the full recipe, check out the link provided. To store leftover chicken stir fry, let it cool first. Place it in an airtight container. This helps keep the flavors fresh. You can keep it in the fridge for up to three days. For the lettuce wraps, store the chicken mix and lettuce separately. This keeps the lettuce crisp. Wrap the leaves in a damp paper towel to maintain moisture. Use a zip-top bag for easy access. Yes, you can freeze cooked chicken stir fry. Let it cool completely before freezing. Use a freezer-safe container or bag. It can last up to three months in the freezer. When you’re ready to eat, thaw it in the fridge overnight. For reheating, warm it in a skillet over low heat. Add a splash of water to keep it moist. These wraps last about three days in the fridge. Check for any signs of spoilage. If the chicken looks or smells off, throw it away. Slimy or discolored lettuce also means it's no longer good. Always trust your senses when it comes to food safety. It takes about 20 minutes in total. You need 10 minutes to prep. The cooking time is about 10 minutes. This quick meal fits well into busy days. Yes, you can make these wraps ahead. Cook the chicken stir fry and cool it. Store it in an airtight container in the fridge for up to three days. When ready to eat, just reheat the filling and serve in fresh lettuce. If you want alternatives, try using rice paper wrappers or collard greens. You can also serve the stir fry over rice or quinoa. Each option gives a unique twist to the meal. Yes, but check your sauces. Use gluten-free soy sauce and hoisin sauce. This way, you can enjoy the meal without worry if you have gluten sensitivity. These chicken stir fry lettuce wraps are simple and delicious. We covered all ingredients, equipment, and tips needed for perfect wraps. You can customize them easily with different proteins and flavors. Meal prep makes these wraps a great choice for busy days. Remember, fresh ingredients lead to the best taste. Enjoy creating your unique version of this recipe, and don’t forget to share with friends!](https://dailydishlab.com/wp-content/uploads/2025/06/ecf7ad89-f46b-423b-a9d0-b97a9473e493-768x768.webp)


