
Are you ready to elevate your dinner table with a tasty side dish? Honey garlic green beans are not just simple; they’re packed with flavor that will impress everyone. In this post, you’ll discover the best ingredients, cooking tips, and variations to customize this dish. Let’s dive in and make your next meal unforgettable with this perfectly flavorful side!
Why I Love This Recipe
- Quick and Easy: This recipe takes just 20 minutes to prepare, making it perfect for busy weeknights or last-minute gatherings.
- Flavorful Combination: The mix of sweet honey and savory garlic creates a delicious contrast that elevates simple green beans to a new level.
- Healthy Side Dish: Packed with vitamins and nutrients, these green beans are a great way to add more veggies to your meals without sacrificing taste.
- Versatile Serving Options: These honey garlic green beans can be served as a side dish or over rice for a light and satisfying main course.
Ingredients
List of Ingredients
– 1 pound fresh green beans, trimmed
– 3 tablespoons honey
– 2 tablespoons soy sauce
– 3 cloves garlic, minced
– 2 tablespoons olive oil
– 1 tablespoon sesame seeds
– Salt and pepper to taste
Ingredient Substitutions
You can swap honey for maple syrup or agave nectar if needed. For a low-sodium option, try low-sodium soy sauce. If you don’t have fresh garlic, use garlic powder, but reduce the amount.
Tips for Selecting Ingredients
When choosing fresh green beans, look for ones that are bright and firm. Avoid any that are limp or have brown spots. For soy sauce, brands like Kikkoman or San-J are great choices. Fresh garlic packs more flavor than jarred garlic, so opt for fresh whenever possible.

Step-by-Step Instructions
Preparing the Green Beans
To start, we need to blanch the green beans. Blanching means cooking them in boiling water for a short time. This helps keep their bright color and crisp texture.
1. Fill a large pot with water and add a good amount of salt.
2. Bring the water to a boil.
3. Add the trimmed green beans and let them cook for about 3 minutes.
4. You want them to be bright green and slightly tender.
Next, we need an ice bath. An ice bath stops the cooking process. It keeps the beans crunchy.
1. Prepare a bowl with ice and cold water.
2. Once the beans are blanched, drain them.
3. Quickly transfer the beans to the ice bath.
4. Let them cool for a few minutes, then drain again.
Making the Honey Garlic Sauce
Now, let’s whip up the honey garlic sauce. This sauce is the star of the dish. It brings sweet and savory flavors together.
1. In a small bowl, combine the honey, soy sauce, and minced garlic.
2. Add a pinch of black pepper for a little extra flavor.
3. Use a whisk to mix everything well until smooth.
You can adjust the sauce to your taste. If you like it sweeter, add more honey. For a saltier kick, add a bit more soy sauce.
Cooking and Combining
Cooking the green beans and sauce together is where the magic happens. This step gives the beans a nice texture and flavor.
1. Heat olive oil in a large skillet over medium heat.
2. Add the blanched green beans to the skillet.
3. Sauté them for about 5 minutes, stirring often. You want them to crisp slightly.
After sautéing, pour the honey garlic sauce over the green beans. Toss them to coat evenly.
1. Cook for an additional 2-3 minutes.
2. You’ll notice the sauce thickens and glazes the beans.
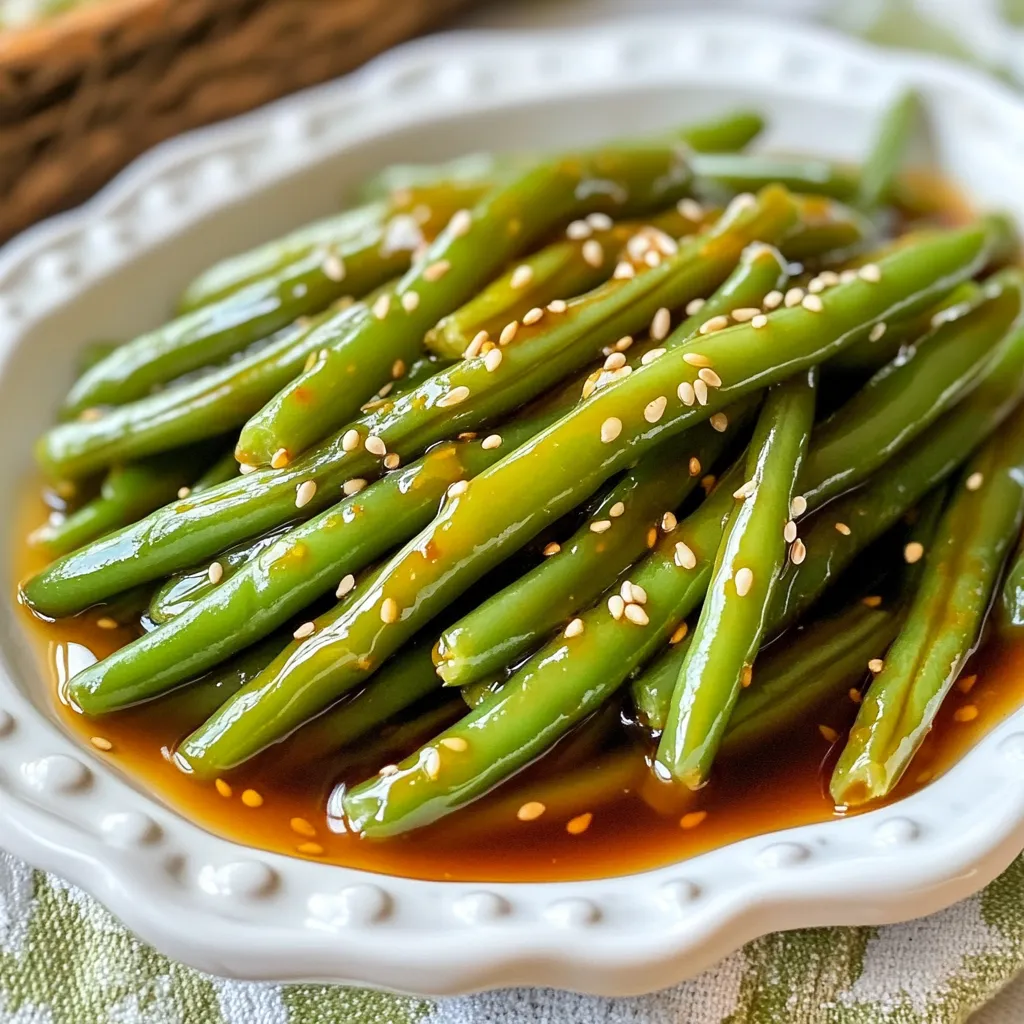
Finally, sprinkle sesame seeds over the beans. Toss gently to mix. Cook for one more minute to toast the seeds slightly.
Now, your honey garlic green beans are ready to enjoy!
Tips & Tricks
Enhancing Flavor
To boost flavor in honey garlic green beans, try adding a few extra spices. A pinch of red pepper flakes adds heat. A dash of ginger gives a fresh zing. You can also add black sesame seeds for a nutty touch.
Fresh herbs can brighten the dish. Chopped cilantro or basil works well. They add a lovely aroma and color. Try adding them right before serving for the best flavor.
Cooking Methods
You can cook these green beans in different ways. Roasting them in the oven gives a nice crisp. Toss them in olive oil and seasonings before roasting. This method brings out their natural sweetness.
Grilling is another fun option. It adds a smoky flavor that pairs well with honey. Just be sure to watch the cooking time. Aim for a tender but firm texture.
Serving Suggestions
Honey garlic green beans pair well with many main dishes. They complement grilled chicken or salmon perfectly. Serve them alongside rice for a great meal.
For a pretty presentation, use a large serving platter. Drizzle any leftover sauce over the beans. Garnish with sesame seeds and chopped green onions for a pop of color.
Pro Tips
- Blanching for Bright Color: Blanching the green beans in salted water helps maintain their vibrant color and crisp texture, making for an appealing dish.
- Honey for Sweetness: Adjust the amount of honey according to your taste preference. You can also use maple syrup for a different flavor profile.
- Garlic Flavor Boost: For a stronger garlic flavor, you can sauté the minced garlic in the olive oil before adding the green beans.
- Serving Suggestions: Serve the honey garlic green beans over rice or quinoa for a light, healthy main course or as a vibrant side dish.
Variations
Ingredient Swaps
You can mix it up with different veggies. Try asparagus or broccoli instead of green beans. Each choice brings a new taste and texture. Just remember to blanch them the same way.
If you want protein, add chicken or tofu. Cook chicken pieces until golden, then toss them in with the beans. For tofu, use firm tofu and sauté it until crispy before mixing it in.
Flavor Variations
Want to spice things up? Add red pepper flakes for heat. A little goes a long way. You can also add fresh ginger for a zingy twist.
You can switch between sweet and savory flavors too. If you prefer less sweetness, cut back on honey. For extra sweetness, add a touch more honey or even some brown sugar.
Dietary Adaptations
Need a gluten-free dish? Use gluten-free soy sauce instead of regular. It tastes just as good and keeps the dish safe for those avoiding gluten.
If you want a vegan option, skip the honey. Use maple syrup or agave nectar instead. Both will give you that sweet flavor without animal products.
Storage Info
Refrigeration Guidelines
To store leftovers, let the honey garlic green beans cool completely. Place them in an airtight container. This keeps them fresh for up to three days. You can use glass or plastic containers. Both work well and help lock in flavor.
Reheating Tips
The best way to reheat is on the stove. Heat a skillet over medium heat. Add a splash of water or a bit of olive oil. This helps keep the green beans crisp. Stir gently until heated through, about 3-5 minutes. Avoid the microwave if you can. It may make the beans soggy.
Freezing Instructions
Yes, you can freeze honey garlic green beans. However, they taste best fresh. To freeze, cool the beans completely. Place them in a freezer-safe bag or container. Remove as much air as possible. When ready to eat, thaw in the fridge overnight. Reheat in a skillet for the best texture.
FAQs
What is the best way to blanch green beans?
To blanch green beans, follow these steps:
1. Boil Water: Fill a large pot with water and add salt. Bring it to a rolling boil.
2. Add Beans: Carefully add the trimmed green beans to the boiling water.
3. Cook: Boil for about 3 minutes. The beans should turn bright green and be slightly tender.
4. Ice Bath: Quickly drain the beans and transfer them into a bowl of ice water. This stops cooking and keeps the beans crunchy.
5. Drain Again: After a few minutes, drain the beans from the ice bath. Your beans are now ready for cooking!
Can I make honey garlic green beans ahead of time?
Yes, you can make honey garlic green beans ahead of time. Here are tips for storage and reheating:
– Storage: Keep the green beans in an airtight container in the fridge. They stay fresh for about 3 days.
– Reheating: To reheat, warm them in a skillet over low heat. Add a splash of water to keep them moist. Stir gently until heated through.
How do I make honey garlic sauce thicker?
To thicken your honey garlic sauce, try these methods:
– Simmer Longer: Cook the sauce longer on medium heat, allowing it to reduce. It becomes thicker as it simmers.
– Cornstarch Slurry: Mix 1 tablespoon of cornstarch with 1 tablespoon of cold water. Stir this mixture into the sauce and cook for a minute until thickened.
Can I use frozen green beans for this recipe?
Yes, you can use frozen green beans, but here are some tips:
– Thaw First: Thaw the beans in the fridge overnight or use the microwave.
– Blanching: You may skip the blanching step since frozen beans are often pre-blanched. Just sauté them directly.
– Cooking Time: Frozen beans may need a bit longer to cook than fresh ones, so watch for doneness.
What nutrients are in honey garlic green beans?
Honey garlic green beans provide several health benefits:
– Vitamins: They are rich in vitamins A, C, and K.
– Fiber: Green beans offer dietary fiber that aids digestion.
– Low Calorie: This dish is low in calories and fat, making it a healthy side.
Enjoy the taste and health benefits of this simple yet flavorful side!
In this blog post, we explored how to make delicious honey garlic green beans. We covered essential ingredients, alternative options, and tips for selecting quality items. You learned the step-by-step process to prepare and cook, plus suggestions for enhancing flavor and serving.
As you create this dish, remember to experiment with your favorite vegetables and proteins. With a few simple tweaks, you can make this recipe your own. Enjoy the cooking process and the tasty result


