Lemon Garlic Shrimp Risotto Creamy and Rich Delight

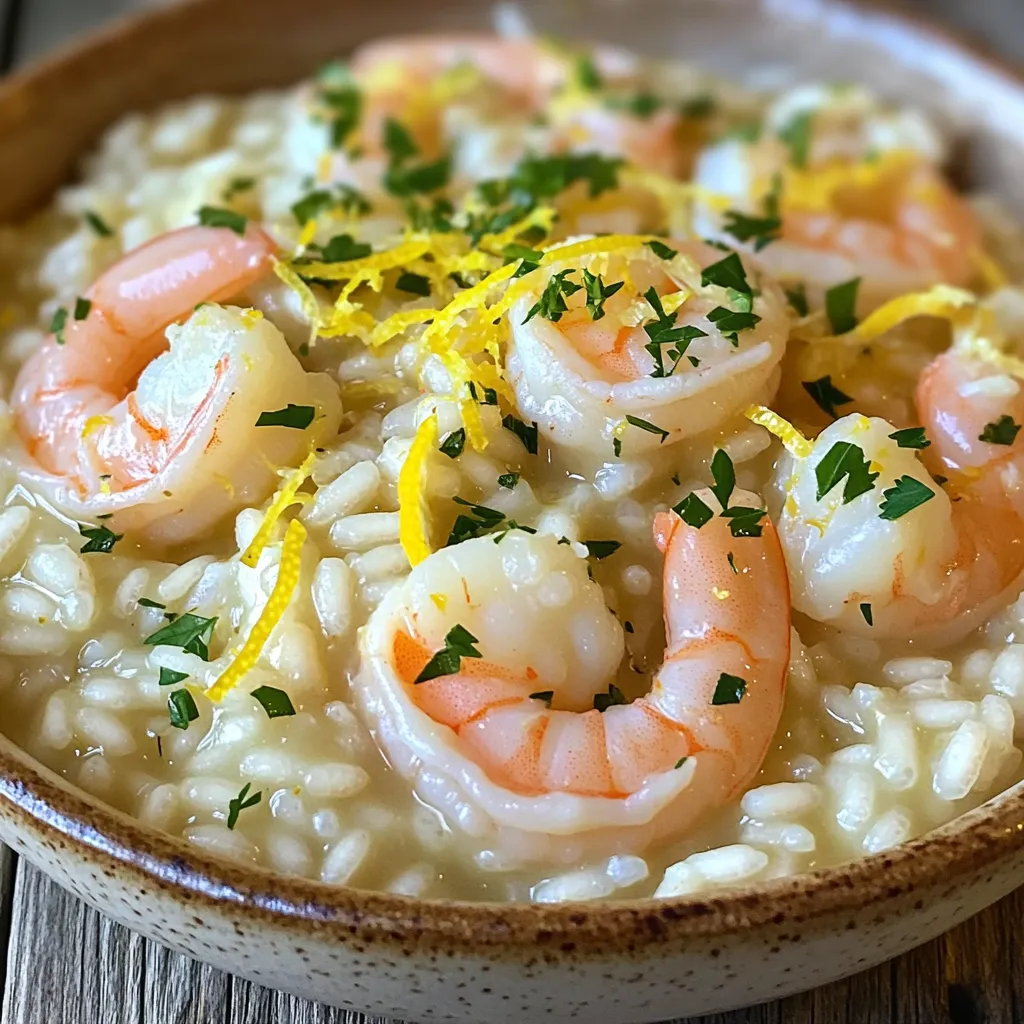
Imagine a dish that bursts with fresh flavor and a creamy texture. That’s what you get with Lemon Garlic Shrimp Risotto! This recipe combines tender shrimp, zesty lemon, and rich Parmesan to create a meal that will impress anyone at your table. I’ll guide you through each step, sharing tips to elevate your risotto game. Ready to dive into this delicious adventure? Let’s make magic happen in your kitchen!
Why I Love This Recipe
- Delicious Flavor Combination: The bright lemon and savory garlic complement the shrimp perfectly, creating a dish that’s both refreshing and rich.
- Comfort Food with a Twist: This risotto is creamy and comforting, yet the seafood adds an elegant touch that makes it suitable for any occasion.
- Quick and Easy to Prepare: With a total cooking time of just 30 minutes, this dish is simple enough for a weeknight dinner but impressive enough for guests.
- Customizable: You can easily adjust the ingredients by adding your favorite vegetables or using different proteins, making it versatile for various tastes.
Ingredients
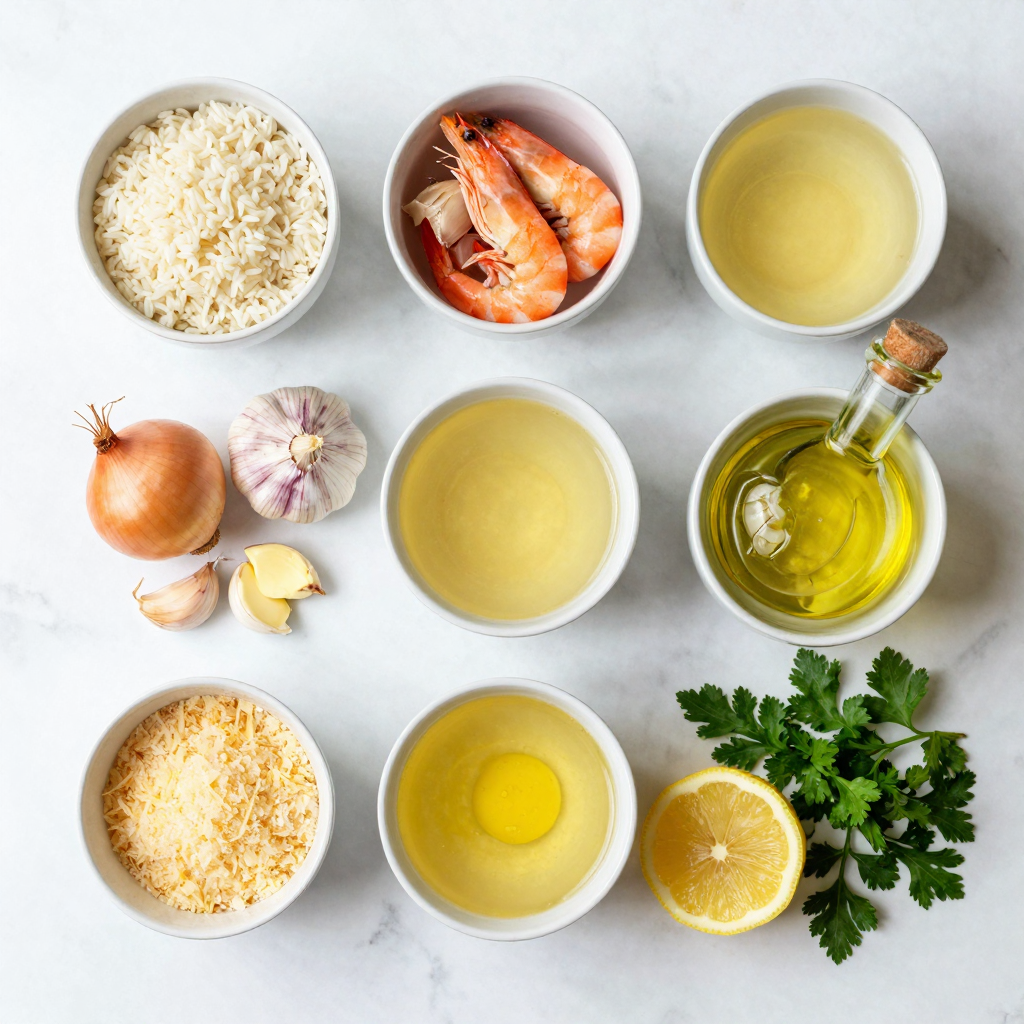
In this section, I will outline the key ingredients you need for Lemon Garlic Shrimp Risotto. Each item plays a vital role in creating a rich and creamy dish that bursts with flavor.
- 1 cup Arborio rice
- 1 lb shrimp, peeled and deveined
- 4 cups chicken or vegetable broth
- 1 small onion, finely chopped
- 3 cloves garlic, minced
- 1 tablespoon olive oil
- 2 tablespoons butter
- Zest and juice of 1 lemon
- ½ cup grated Parmesan cheese
- Fresh parsley, chopped (for garnish)
- Salt and pepper to taste
Arborio rice is essential for risotto. It has a high starch content, which makes the dish creamy. The shrimp adds a nice protein element. I always choose fresh shrimp for the best taste.
Using chicken or vegetable broth enriches the flavor. I recommend making your broth or using a good store-bought option. The onion and garlic provide a savory base. Sauté these until fragrant to enhance the overall taste.
Lemon zest and juice give a bright flavor. They balance the richness of the butter and cheese. Parmesan cheese adds a savory depth that complements the shrimp perfectly.
Finally, fresh parsley not only brightens the dish but adds a pop of color. Salt and pepper are necessary to enhance all the flavors in this dish.
With these ingredients ready, you can create a delightful meal that impresses everyone at the table.

Step-by-Step Instructions
Preparing the Broth
Heat your chicken or vegetable broth in a saucepan over low heat. Keep it warm. This helps the rice cook evenly. Using warm broth is key. It stops the cooking from slowing down.
Cooking the Base
In a large skillet, heat the olive oil with one tablespoon of butter over medium heat. Add the finely chopped onion. Cook until it is soft and clear, about three to four minutes. Then, stir in the minced garlic. Sauté for one minute until it smells great.
Add the Arborio rice to the skillet. Cook it for one to two minutes. Stir constantly until the rice looks slightly toasted and is coated with oil.
Incorporating the Broth
Start adding your warm broth, one ladle at a time. Stir often as you add it. Let the rice soak up most of the liquid before adding the next ladle. Repeat this process for about 18 to 20 minutes. The rice will become creamy and firm but tender.
Cooking the Shrimp
While the risotto cooks, heat another tablespoon of butter in a separate pan over medium-high heat. Add the shrimp, and sprinkle with salt and pepper. Cook until the shrimp turns pink and opaque, about two to three minutes.
Final Mixing
Once the risotto is creamy and the rice is tender, mix in the lemon zest, lemon juice, and cooked shrimp. Add the grated Parmesan cheese. Stir well to blend everything. Finally, taste and adjust the seasoning with salt and pepper as needed.
Pro Tips
- Tip 1: Use Fresh Shrimp: Fresh shrimp will give your risotto a superior flavor and texture compared to frozen shrimp.
- Tip 2: Stir Constantly: Stirring frequently while adding the broth helps release the starches in the Arborio rice, creating a creamy texture.
- Tip 3: Use Warm Broth: Keeping the broth warm while you cook the risotto ensures the cooking process isn’t interrupted, leading to even cooking.
- Tip 4: Adjust Consistency: If the risotto becomes too thick, you can add a bit more warm broth to reach your desired creaminess.
Tips & Tricks
Perfection Tips
- How to know when risotto is ready: Risotto is ready when it is creamy and the rice is tender yet slightly firm. Taste a spoonful to check the texture. It should have a slight bite but not be crunchy.
- Best practices for creamy risotto: For creamy risotto, stir often and add broth slowly. This helps the rice release its starches, creating a nice creamy texture. Using warm broth is key to keep the cooking process smooth.
Common Mistakes to Avoid
- Overcooking shrimp: Shrimp cooks quickly. Sauté it for just 2-3 minutes until it turns pink. If you cook it too long, it may become tough and rubbery.
- Skipping the gradual broth addition: Adding too much broth at once can lead to mushy rice. Always add one ladle at a time. Allow each addition to be mostly absorbed before adding more. This slow process is what makes risotto special.
Serving Suggestions
- Presentation tips for risotto: Serve the risotto in shallow bowls for a beautiful look. Top it with fresh parsley and a sprinkle of lemon zest. This adds color and freshness.
- Pairing ideas for a complete meal: Pair this dish with a light salad or steamed vegetables. A glass of white wine, like Pinot Grigio, complements the shrimp and lemon flavor well.

Variations
Ingredient Swaps
You can easily switch up the proteins in this dish. If you want, try chicken or scallops. Both options work well with the creamy risotto and bright lemon flavor.
Adding vegetables can also enhance your dish. Spinach or peas bring color and nutrition. Just toss them in during the final stages of cooking. They’ll cook quickly and add a nice touch.
Flavor Enhancements
To elevate the flavor, consider adding herbs and spices. Fresh basil or thyme can add a wonderful aroma. A pinch of red pepper flakes brings a bit of heat, too.
You may want to swap out the cheese as well. If you prefer, try feta for a tangy twist. Goat cheese can also add creaminess in a unique way.
Dietary Modifications
For a gluten-free version, replace Arborio rice with quinoa or a gluten-free grain. Just adjust cooking times as needed.
If you want a vegan option, skip the shrimp and cheese. Use a plant-based broth and add more veggies. Mushrooms can add a meaty texture that works great in risotto.
Storage Info
How to Store Leftovers
To keep your Lemon Garlic Shrimp Risotto fresh, store it in the fridge. Use an airtight container. This helps keep out air and moisture. Leftovers are best eaten within 2-3 days. Label the container with the date, so you know when to use it.
Reheating Instructions
When you reheat risotto, you want to keep it creamy. Use a skillet for best results. Add a splash of broth or water to help it stay moist. Heat it on low and stir often. Avoid the microwave if you can; it may make the risotto mushy.
Freezing Tips
Yes, you can freeze Lemon Garlic Shrimp Risotto. But it’s best to freeze it without shrimp. Cooked shrimp can become rubbery when thawed. Use a freezer-safe container and leave some space for expansion. Thaw it in the fridge overnight before reheating. This keeps the texture nice and creamy.
FAQs
What is the best rice for risotto?
The best rice for risotto is Arborio rice. This rice has a high starch content. This starch helps create a creamy texture. Arborio rice absorbs liquid well without losing shape. You can also try Carnaroli or Vialone Nano for great results.
How do I prevent risotto from becoming gummy?
To prevent gummy risotto, follow these steps:
- Use the right rice, like Arborio.
- Stir gently but frequently.
- Add broth slowly and in small amounts.
- Don’t rush the cooking time; give the rice time to absorb.
These steps will keep your risotto creamy and smooth.
Can I make this recipe ahead of time?
You can prepare the risotto base ahead of time. Cook the rice until it’s just al dente. Cool it quickly and store it in the fridge. When ready to serve, reheat it slowly and add the shrimp, lemon, and cheese. This method keeps the risotto fresh.
Is it necessary to add wine to risotto?
Adding wine to risotto is not necessary, but it adds flavor. If you choose to use wine, use dry white wine. It enhances the dish’s taste and gives depth. If you prefer to skip it, simply use more broth. Your risotto will still be delicious.
How can I make my risotto more flavorful?
To boost the flavor of your risotto, try these tips:
- Use homemade broth instead of store-bought.
- Add fresh herbs like basil or thyme.
- Stir in different cheeses such as goat cheese or feta.
- Include sautéed vegetables for added taste and texture.
These ideas will take your risotto to the next level.
This blog post covered how to make a great Lemon Garlic Shrimp Risotto. We discussed the ingredient list, from Arborio rice to shrimp and seasonings. You learned the step-by-step cooking process to create the perfect texture. I shared tips to avoid common mistakes and offered storage information.
For your next meal, try this dish. It’s simple, adaptable, and sure to impress. Enjoy experimenting with flavors and make this recipe your own!

Lemon Garlic Shrimp Risotto
Ingredients
1 cup Arborio rice
1 lb shrimp, peeled and deveined
4 cups chicken or vegetable broth
1 small onion, finely chopped
3 cloves garlic, minced
1 tablespoon olive oil
2 tablespoons butter
Zest and juice of 1 lemon
½ cup grated Parmesan cheese
Fresh parsley, chopped (for garnish)
Salt and pepper to taste
Instructions
In a saucepan, heat the chicken or vegetable broth over low heat. Keep it warm throughout the cooking process.
In a large skillet, heat the olive oil and 1 tablespoon of butter over medium heat. Add the chopped onion and cook until softened and translucent, about 3-4 minutes.
Stir in the minced garlic and sauté for 1 minute until fragrant.
Add the Arborio rice to the skillet and cook for 1-2 minutes, stirring constantly until the rice is lightly toasted and coated.
Start adding the warm broth, one ladle at a time, stirring frequently. Allow the rice to absorb most of the liquid before adding the next ladle. Continue this process for approximately 18-20 minutes, or until the rice is creamy and al dente.
While the risotto is cooking, heat an additional tablespoon of butter in a separate pan over medium-high heat. Add the shrimp, season with salt and pepper, and sauté until they turn pink and opaque, about 2-3 minutes.
Once the risotto is creamy and the rice is tender, stir in the lemon zest, lemon juice, the cooked shrimp, and the grated Parmesan cheese. Mix well to combine.
Adjust seasoning with salt and pepper as needed.
Prep Time: 10 minutes | Total Time: 30 minutes | Servings: 4
– Presentation Tips: Serve the risotto in shallow bowls, topped with freshly chopped parsley and a sprinkle of additional lemon zest for a vibrant finish.

Lemon Garlic Shrimp Risotto
Ingredients
- 1 cup Arborio rice
- 1 lb shrimp, peeled and deveined
- 4 cups chicken or vegetable broth
- 1 small onion, finely chopped
- 3 cloves garlic, minced
- 1 tablespoon olive oil
- 2 tablespoons butter
- 1 whole lemon, zest and juice
- 0.5 cup grated Parmesan cheese
- to taste salt and pepper
- for garnish fresh parsley, chopped
Instructions
- In a saucepan, heat the chicken or vegetable broth over low heat. Keep it warm throughout the cooking process.
- In a large skillet, heat the olive oil and 1 tablespoon of butter over medium heat. Add the chopped onion and cook until softened and translucent, about 3-4 minutes.
- Stir in the minced garlic and sauté for 1 minute until fragrant.
- Add the Arborio rice to the skillet and cook for 1-2 minutes, stirring constantly until the rice is lightly toasted and coated.
- Start adding the warm broth, one ladle at a time, stirring frequently. Allow the rice to absorb most of the liquid before adding the next ladle. Continue this process for approximately 18-20 minutes, or until the rice is creamy and al dente.
- While the risotto is cooking, heat an additional tablespoon of butter in a separate pan over medium-high heat. Add the shrimp, season with salt and pepper, and sauté until they turn pink and opaque, about 2-3 minutes.
- Once the risotto is creamy and the rice is tender, stir in the lemon zest, lemon juice, the cooked shrimp, and the grated Parmesan cheese. Mix well to combine.
- Adjust seasoning with salt and pepper as needed.
- Presentation Tips: Serve the risotto in shallow bowls, topped with freshly chopped parsley and a sprinkle of additional lemon zest for a vibrant finish.


![- Eggplants: You need 2 medium eggplants. Slice them into 1/4-inch rounds. This helps them cook evenly. - Marinara Sauce: Use 2 cups of marinara sauce. You can make it fresh or use store-bought. It adds rich flavor. - Cheese Types: You will need 2 cups of shredded mozzarella cheese and 1 cup of grated Parmesan cheese. These cheeses melt well and create a creamy texture. - Breading Components: Gather 1 cup of all-purpose flour, 3 large eggs (beaten), and 2 cups of breadcrumbs. Italian-style breadcrumbs add great taste. - Seasonings and Garnish: Use 1 teaspoon of dried oregano and 1 teaspoon of garlic powder. These spices boost the flavor. For garnish, fresh basil leaves add color and freshness. Don’t forget olive oil for frying and salt and pepper for taste. With these ingredients, you will create a layered delight that is both tasty and satisfying. For the complete recipe, check the Full Recipe section. Preparing the Eggplant First, slice your eggplants into 1/4-inch rounds. Lay them on a clean towel. Sprinkle salt over the slices and let them sit for 30 minutes. This helps draw out moisture and bitterness. After 30 minutes, rinse the eggplants and pat them dry with a paper towel. This step is key for tasty eggplant. Setting Up a Breading Station Now, gather three bowls for breading. In the first bowl, add all-purpose flour. In the second bowl, beat three large eggs. In the third bowl, mix breadcrumbs with one teaspoon of dried oregano, one teaspoon of garlic powder, salt, and pepper. This setup speeds up the process and keeps things neat. Frying the Eggplant Heat olive oil in a large skillet over medium heat. Take each eggplant slice and dip it into the flour, shaking off excess. Next, dip it into the beaten eggs, then coat it well with the breadcrumb mix. Fry the breaded slices in batches until they turn golden brown and crisp. This should take about 3-4 minutes on each side. Once done, drain them on paper towels to remove extra oil. Assembling the Layers Grab a greased baking dish to start layering. Spread a thin layer of marinara sauce on the bottom. Place a third of the fried eggplant slices over the sauce. Add half of the marinara sauce on top, followed by a third of the mozzarella cheese and half of the Parmesan cheese. Repeat these layers. Finish with a final layer of eggplant, then top it off with the remaining marinara sauce and cheeses. Baking Directions Preheat your oven to 375°F (190°C). Cover the baking dish with foil and bake it for 25 minutes. After that, remove the foil and bake it for another 15-20 minutes. You want the cheese to be bubbly and golden brown. Resting Time Once the baking is done, let the Eggplant Parmesan rest for about 10 minutes. This helps it set and makes it easier to serve. Enjoy the delicious layers of flavor and texture! If you want the full recipe, check the [Full Recipe]. Drawing Out Moisture To make your eggplant perfect, start by drawing out moisture. Slice the eggplants into 1/4-inch rounds. Lay them on a clean towel and sprinkle salt over them. Let them sit for about 30 minutes. This step helps to reduce bitterness and makes them less soggy. After 30 minutes, rinse and pat them dry with a paper towel. This process is key for a great texture. Achieving Optimal Crispiness For a crispy texture, make sure to coat the eggplant well. First, dip each slice in flour, then in beaten eggs, and finally in breadcrumbs. Use Italian-style breadcrumbs for extra flavor. Fry them in hot olive oil until they are golden brown. Frying in batches helps keep the oil hot. This step ensures every piece of eggplant turns out crispy and delicious. Pairing with Side Dishes Eggplant Parmesan pairs well with many sides. A fresh green salad with a lemon vinaigrette adds brightness. Garlic bread brings a nice crunch and flavor. You can also serve it with pasta for a hearty meal. These sides complement the rich flavors of the dish. Presentation Ideas For a beautiful presentation, layer your Eggplant Parmesan in a clear dish. This way, people can see the colorful layers. Garnish with fresh basil leaves on top for a pop of color. You can also drizzle some extra marinara sauce around the plate. This makes it look elegant and inviting. Over-salting the Eggplant Be careful with salt when preparing eggplant. While salting helps draw out moisture, too much salt can ruin the dish. Always taste the eggplant after rinsing. Adjust the salt in your marinara sauce to balance flavors. This way, you avoid a salty dish. Incorrect Layering Order When assembling the layers, follow the right order. Start with marinara sauce, then eggplant, and then cheese. Repeat this pattern. If you mix up the layers, the dish may not cook evenly. Following the proper layering keeps everything in place and ensures a tasty meal. {{image_2}} Substitutes for Cheese You can use plant-based cheese. Look for nut-based or soy-based options. They melt well and add flavor. Nutritional yeast is a great choice too. It adds a cheesy taste without dairy. Egg Replacement Options If you want to skip eggs, try using flaxseed meal. Mix one tablespoon of flaxseed with three tablespoons of water. Let it sit for five minutes. This mix works well as a binder. Gluten-Free Breadcrumbs You can find gluten-free breadcrumbs at stores. They are made from rice or corn. They work just like regular breadcrumbs, giving you that nice crunch. Flour Options Instead of all-purpose flour, use almond flour or chickpea flour. Both options give a nutty flavor and work well in the recipe. Adding Vegetables Add layers of zucchini or spinach for more taste. They boost nutrition and add color to the dish. You can also mix in roasted red peppers for a sweet twist. Using Different Sauces Besides marinara, try pesto or a white sauce. Each sauce brings a new flavor. This keeps the dish fresh and exciting. You can even mix sauces for a unique taste. How do you store leftovers? After enjoying your Eggplant Parmesan, let it cool to room temperature. Place any leftovers in an airtight container. Store it in the fridge for up to three days. What are the best practices for reheating? To reheat, preheat your oven to 350°F (175°C). Place the Eggplant Parmesan in an oven-safe dish. Cover it with foil to keep it moist. Heat for about 20 minutes. Check if it’s warm all the way through before serving. How do you freeze Eggplant Parmesan? If you want to store it longer, freezing is a great option. First, let the dish cool completely. Cut it into portions if you prefer smaller servings. Wrap each piece tightly in plastic wrap. Then, place them in a freezer-safe container. It can last for up to three months in the freezer. What are the thawing and reheating instructions? When you’re ready to eat, move the Eggplant Parmesan to the fridge. Let it thaw overnight. Reheat it in the oven at 350°F (175°C) for about 25-30 minutes. Remove the foil halfway through to help the top crisp up. Enjoy your delicious dish again! For the complete recipe, check out the Full Recipe. How do you prevent eggplants from turning brown? To stop eggplants from browning, sprinkle salt on the slices. This draws out moisture. After 30 minutes, rinse and pat them dry. This method keeps them fresh and tasty. Can eggplant parmesan be made ahead of time? Yes, you can make eggplant parmesan ahead of time. Prepare it, then cover and chill it in the fridge. When ready to bake, just heat it in the oven. This saves time on busy days. What’s the best cheese to use for eggplant parmesan? The best cheese for eggplant parmesan is mozzarella. It melts well and adds creaminess. Parmesan adds a nice salty flavor. Using both gives a rich taste. Calories and serving size One serving of eggplant parmesan has about 300-400 calories. This depends on how much cheese and sauce you use. A serving size is usually one slice. Health benefits of eggplant Eggplant is low in calories and high in fiber. It helps with digestion and keeps you full. It also has antioxidants that may protect your heart. Eating eggplant adds nutrients to your meals. For more recipes, check out the Full Recipe for Layered Delight Eggplant Parmesan. In this post, we explored making eggplant Parmesan from start to finish. We covered ingredients, step-by-step instructions, and tips for success. You learned about variations for vegan and gluten-free options. I hope you feel confident to try this dish. Remember to avoid common mistakes and pair it well with sides. Enjoy your cooking and savor each bite of this tasty meal!](https://dailydishlab.com/wp-content/uploads/2025/06/de34a9c5-902e-4f12-9462-c26c35663e43-768x768.webp)
![For this BBQ ranch chicken salad, you will need: - 2 boneless, skinless chicken breasts - 1 cup BBQ sauce (divided) - 6 cups mixed greens (spinach, arugula, and romaine) - 1 cup cherry tomatoes, halved - 1 cucumber, sliced - 1 cup corn (fresh or canned) - 1/2 red onion, thinly sliced - 1 cup shredded cheddar cheese - 1/2 cup ranch dressing - 1/4 cup fresh cilantro, chopped (optional) - Salt and pepper to taste - Olive oil for grilling To make your BBQ ranch chicken salad stand out, use high-quality ingredients. Choose organic chicken for a juicier bite. Fresh, local greens add a crisp taste. Opt for ripe cherry tomatoes for sweetness. Sweet corn complements the BBQ sauce well. Aged cheddar cheese enhances the flavor depth. If you can, use homemade ranch dressing. This adds a personal touch and fresh flavor. You can easily adjust this recipe for different diets. If you're vegan, swap chicken for grilled tofu or chickpeas. Use a vegan BBQ sauce and ranch dressing to keep it plant-based. For gluten-free options, ensure your BBQ sauce and ranch are gluten-free. If you're dairy-free, use a dairy-free cheese or skip it entirely. Enjoying this salad can fit your needs while still being delicious! Start by preheating your grill to medium-high heat. This gives you a nice, hot grill for cooking. While the grill heats up, brush your chicken breasts with olive oil. This helps keep the chicken juicy. Season the chicken with salt and pepper for flavor. Grill the chicken for about 6 to 7 minutes on each side. You want the chicken to reach an internal temperature of 165°F (75°C). Near the end, brush one side with BBQ sauce. This adds a great smoky flavor. Once done, take the chicken off the grill. Let it rest for about 5 minutes before slicing it into thin strips. Grab a large salad bowl for this part. In the bowl, mix together the greens, cherry tomatoes, cucumber, corn, red onion, and shredded cheddar cheese. This mix adds color and texture to your salad. It’s a great way to sneak in some veggies. Next, place the sliced grilled chicken on top of the salad mixture. This creates a beautiful layered look. Now, it’s time for the dressings! Drizzle the remaining BBQ sauce and ranch dressing over the salad. Use enough to coat the salad well, but not too much that it gets soggy. Toss the salad gently to combine all the ingredients. Make sure everything gets a bit of dressing. If you like, you can garnish with chopped cilantro for a fresh touch. This adds a nice pop of color and flavor. For the full recipe, check out the complete instructions above. Enjoy your BBQ Ranch Chicken Salad! To grill chicken just right, start with good quality meat. Use boneless, skinless chicken breasts for even cooking. Brush them lightly with olive oil to help them stay moist. Season with salt and pepper for extra flavor. Preheat your grill to medium-high heat. Place the chicken on the grill and cook for 6-7 minutes on each side. This ensures they cook through. Brush BBQ sauce on the chicken in the last few minutes. This adds a nice glaze to the chicken. Always check that the internal temperature reaches 165°F (75°C). Let the chicken rest for five minutes before slicing. This helps keep the juices in. Making ranch dressing from scratch is simple and fun. You need just a few ingredients. Mix together 1/2 cup of sour cream, 1/4 cup of mayonnaise, and 1/4 cup of buttermilk. Add 1 teaspoon of garlic powder and 1 teaspoon of onion powder. Stir in a pinch of salt and pepper. For extra flavor, add fresh herbs like dill or parsley. Whisk everything until it's smooth and creamy. Adjust thickness by adding more buttermilk if needed. This dressing pairs perfectly with the BBQ Ranch Chicken Salad. When serving the salad, make it look appealing. Use a large bowl to let guests help themselves. Layer the salad ingredients for a colorful display. Start with mixed greens as the base. Next, add the cherry tomatoes and cucumbers. Sprinkle corn and red onion on top. Place the grilled chicken strips attractively on the salad. Drizzle BBQ sauce and ranch dressing over the top. Garnish with chopped cilantro for a fresh touch. This not only adds flavor but also makes the dish pop visually. If you want to dive deeper into the full recipe, check out the [Full Recipe]. {{image_2}} You can easily swap chicken for tofu. Use firm or extra-firm tofu. First, press the tofu to remove excess water. Then, slice it into thick strips. Marinate the tofu in BBQ sauce for 30 minutes. Grill it for about 5-7 minutes on each side. This gives you a smoky flavor without meat. Serve it on your salad just like you would with chicken. For a keto-friendly version, keep the BBQ sauce low in sugar. Use fresh veggies like spinach and cucumbers. Skip the corn and reduce the amount of cheese. You can add avocado for healthy fats. This keeps the salad tasty while staying low in carbs. Want to boost flavor? Try adding crispy bacon bits or sliced jalapeños. You can also toss in some black beans or avocado. These will add texture and richness. For a crunch, consider adding nuts or seeds. Each addition enhances the taste and visual appeal. Check out the Full Recipe for all the details! To keep your BBQ Ranch Chicken Salad fresh, store it in an airtight container. Make sure the salad is cool before sealing it. If you have extra dressing, keep it separate for the best taste. This way, the greens stay crisp, and you avoid sogginess. When stored correctly, your salad can last up to three days in the fridge. After that, the quality may drop. Always check for any signs of spoilage before eating. If it looks or smells funny, it's best to toss it. I prefer this salad cold, straight from the fridge. The flavors blend well when chilled. If you want to warm it up, heat the chicken separately. Adding hot chicken to the salad can make the greens wilt. Enjoy it how you like, but cold is my top choice! Don't forget to check the full recipe for more details. You can serve BBQ Ranch Chicken Salad with warm bread or crispy tortilla chips. Grilled corn on the cob makes a great side too. If you want a drink, try iced tea or lemonade. They balance the flavors of the salad well. A light fruit salad also pairs nicely for a fresh touch. Yes, you can use store-bought BBQ sauce. Many brands offer tasty options that save time. Look for sauces with natural ingredients for the best flavor. If you want a kick, try spicy BBQ sauce. Just remember to adjust the amount to fit your taste. Homemade BBQ sauce gives a fresh touch, but store-bought is fine. You can make parts of this salad in advance. Grill the chicken and cool it, then slice it. Store it in the fridge until you need it. Chop veggies like cucumbers and onions ahead of time too. Keep them in an airtight container. Mix the greens just before serving to keep them fresh. Dress the salad right before serving to avoid sogginess. For the full recipe, check the section above. You now know how to make a tasty BBQ Ranch Chicken Salad. We covered the key ingredients, steps for grilling chicken, and assembling the salad. I shared tips for grilling perfectly and making the dressing from scratch. Plus, you learned fun variations for different diets. Enjoy this salad fresh or store it for later. You can adapt it easily for your taste. This meal is great for everyone, so get creative and have fun!](https://dailydishlab.com/wp-content/uploads/2025/06/37ba7e2e-ec61-4304-bb56-f70e4f5b40d8-768x768.webp)

![- Sweet Potatoes and Chickpeas - 2 medium sweet potatoes, diced - 1 can (15 oz) chickpeas, drained and rinsed - Aromatics and Spices - 1 onion, finely chopped - 3 cloves garlic, minced - 1 inch ginger, grated - 2 tablespoons curry powder - 1 teaspoon turmeric powder - 1 teaspoon cumin - 1 teaspoon red chili flakes (adjust for spice level) - Liquid Ingredients - 1 can (14 oz) coconut milk - 2 cups vegetable broth - 2 tablespoons olive oil - Salt and pepper to taste - Fresh cilantro, for garnish This mix of ingredients gives the dish its bold and flavorful taste. Sweet potatoes bring a natural sweetness and creaminess. Chickpeas add protein and texture. The onion, garlic, and ginger create a strong base. Spices like curry powder and turmeric give warmth and depth. Coconut milk adds richness, while vegetable broth brings it all together. Don't forget to adjust the red chili flakes to suit your taste. For the full recipe, check out the Sweet Potato & Chickpea Delight 🥔. Sautéing the Aromatics First, grab a large pot and heat olive oil on medium heat. Add finely chopped onion. Sauté for about five minutes. You want the onion to turn translucent. Next, stir in minced garlic and grated ginger. Cook this for two minutes. The aroma will fill your kitchen. Toasting the Spices Now, add curry powder, turmeric, cumin, and red chili flakes. Stir the mix for about one minute. This toasting brings out the spices' flavors. You will notice a warm, fragrant scent. Cooking the Sweet Potatoes Next, incorporate diced sweet potatoes into the pot. Mix them well with the spices. Ensure they are fully coated. This step adds depth to the curry's taste. Adding Coconut Milk and Vegetable Broth Pour in the coconut milk and vegetable broth. Stir the mixture gently. Bring it to a gentle simmer. The sweet potatoes will soften as it cooks. Incorporating Chickpeas and Seasoning Now, add drained and rinsed chickpeas. Stir everything to combine. Season with salt and pepper to your liking. This is where the dish gets its hearty texture. Simmering the Curry Cover the pot and let it simmer for about 20 to 25 minutes. This allows the sweet potatoes to become tender. You want them to be easy to pierce with a fork. Adjusting Seasoning and Serving Once cooked, taste the curry. Adjust the seasoning if needed. You can add more chili for heat or cumin for depth. Serve the curry hot. Garnish with fresh cilantro for a pop of color. For the complete recipe, check the [Full Recipe]. - Perfecting the Texture of Sweet Potatoes To get the best texture, cut sweet potatoes into even pieces. This helps them cook uniformly. If you want them soft and creamy, cook them until tender. You can check by piercing them with a fork. If they break apart easily, they are done. - Balancing Flavor with Seasoning Start with the spices. Toast them to release their oils and enhance their taste. Taste the curry as it cooks. You can always add more salt or spices. If you want more heat, add red chili flakes. For a deeper flavor, add extra cumin. - Ideas for Accompaniments Serve the curry with rice or quinoa. They soak up the sauce well. You can also pair it with naan or pita bread for a fun twist. Add a side salad for some crunch and freshness. - Garnishing Tips Fresh cilantro adds a nice touch. Chop it finely and sprinkle on top just before serving. You can also drizzle a little coconut milk for creaminess and visual flair. For a pop of color, add lime wedges on the side. These tips will help you make the Sweet Potato Chickpea Curry truly special. Be sure to check the Full Recipe for all the details! {{image_2}} You can change up the protein in this dish. Tofu or tempeh works well. Both add great texture and soak up the flavors. For a heartier option, consider lentils. They cook quickly and mix nicely with the sweet potatoes. You can also swap in different veggies. Spinach adds color and nutrition. Kale offers a chewy texture that holds up well in the curry. Carrots or green beans bring crunch. Feel free to get creative with what you have on hand! If you like it hot, increase the red chili flakes. Start with a pinch, then taste as you go. You can also add fresh chili peppers for more heat. Just slice them and toss them in during cooking. For unique flavors, add a dash of cinnamon or nutmeg. These spices add warmth without overpowering the dish. You could also try curry pastes or blends. They can add a different twist to the classic taste. For the full recipe of this tasty dish, check the [Full Recipe]. To keep your sweet potato chickpea curry fresh, follow these tips: - Refrigerating Leftovers: Place leftover curry in an airtight container. It lasts about 3 to 5 days in the fridge. Make sure it cools down before sealing. This helps lock in flavor and freshness. - Freezing for Long-Term Storage: If you want to save some for later, freezing is a great option. Use a freezer-safe container or a heavy-duty freezer bag. Your curry can stay good for up to 3 months. Just remember to leave some space for expansion as it freezes. For the best taste when reheating, consider these methods: - Best Methods for Reheating: The stove is ideal for reheating. Pour the curry into a pot and warm it over low heat. Stir it often to heat evenly. You can also use the microwave. Place it in a microwave-safe bowl and cover it. Heat in short bursts, stirring in between, until hot. These simple storage and reheating tips ensure that your sweet potato chickpea curry remains delicious and satisfying every time you enjoy it. How long does the curry last in the fridge? Sweet Potato Chickpea Curry stays fresh for about 4 to 5 days in the fridge. Store it in an airtight container. The flavors deepen as it sits. Can I make Sweet Potato Chickpea Curry ahead of time? Yes, you can make this curry a day early. This dish tastes even better after resting. Just reheat it gently on the stove or in the microwave. Is this recipe gluten-free or vegan? Absolutely! This recipe is both gluten-free and vegan. It uses wholesome ingredients like sweet potatoes and chickpeas. You can enjoy it without worry. Health Benefits of Sweet Potatoes and Chickpeas Sweet potatoes are rich in vitamins and fiber. They support your immune system and digestion. Chickpeas provide protein and keep you full. They also have good fats and help with heart health. Nutritional Information for the Recipe Each serving of Sweet Potato Chickpea Curry offers: - Calories: 320 - Protein: 10g - Carbohydrates: 50g - Fiber: 12g - Fat: 10g This dish is a great choice for a healthy meal. You get nourishment and flavor in every bite. For the complete recipe, check the [Full Recipe]. This blog post covered the key steps to make a delicious sweet potato chickpea curry. We explored the ingredients, from sweet potatoes to spices. I shared tips on perfecting texture and flavor. You learned how to store and reheat leftovers effectively. In the end, this curry is simple, tasty, and full of nutrition. Feel free to modify it as you like. Enjoy making it your own!](https://dailydishlab.com/wp-content/uploads/2025/06/3a6395ce-0a8b-49f3-888b-6de387966cb9-768x768.webp)
![- 1 pound boneless, skinless chicken breasts - 1/4 cup olive oil - Juice and zest of 2 large lemons - 3 cloves garlic, minced - Fresh rosemary and thyme - Salt, black pepper, and paprika - Wooden or metal skewers - Soaking tips for wooden skewers When making Lemon Herb Chicken Skewers, start with fresh chicken. I prefer using boneless, skinless chicken breasts. They are easy to work with and cook evenly. Cut the chicken into 1-inch cubes. This size is perfect for skewering and grilling. Next, you need a flavorful marinade. Mix olive oil, lemon juice, and lemon zest in a bowl. The lemon adds a bright taste that makes the chicken pop. Then, add minced garlic, fresh rosemary, fresh thyme, salt, black pepper, and paprika. Each herb adds its unique flavor. Rosemary gives a woodsy note, while thyme adds earthiness. This blend makes each bite delicious. Now, let's talk about skewers. You can use either wooden or metal skewers. If you choose wooden skewers, soak them in water for about 30 minutes. This step helps prevent burning on the grill. Metal skewers do not need soaking. These ingredients come together to create a tasty dish. The lemon and herbs work well with the chicken, making it a hit at any gathering. For the full recipe, check out the [Full Recipe]. To start, marinate the chicken. First, mix the olive oil, lemon juice, lemon zest, minced garlic, rosemary, thyme, salt, pepper, and paprika in a large bowl. Whisk it together well. Add the chicken cubes and coat them fully. Cover the bowl with plastic wrap. I suggest refrigerating it for at least 30 minutes. For a bolder taste, marinate for up to 2 hours. Next, let's get grilling! Preheat your grill to medium heat. If you use wooden skewers, soak them in water for 30 minutes. This step prevents burning. Once the grill is hot, carefully thread the marinated chicken onto the skewers. Make sure to leave small gaps between each piece. This helps them cook evenly. Cook the skewers for about 6-8 minutes on each side. Look for nice grill marks. Use a meat thermometer to check doneness. The chicken should reach an internal temperature of 165°F (75°C). Once cooked, remove the skewers from the grill. Let them rest for a few minutes before serving. This resting time helps the juices settle back in. Enjoy your Lemon Herb Chicken Skewers! For the full recipe, check the details above. To enhance the marinade flavor, start with fresh herbs. Fresh rosemary and thyme bring bright tastes that mix well with lemon. Also, always use quality olive oil. It adds richness and depth. Marination time is key. For good flavor, marinate the chicken for at least 30 minutes. You can go up to 2 hours for an even better taste. This allows the chicken to soak up all the good flavors. For perfect grill marks, preheat your grill well. A hot grill sears the chicken quickly. This creates those beautiful lines. When placing skewers on the grill, do not move them too much. Let them cook before flipping. Avoiding overcooking is vital. Always check the chicken's internal temperature. It should reach 165°F (75°C). Use a meat thermometer to get accurate readings. This way, your chicken stays juicy and tender. Pair Lemon Herb Chicken Skewers with refreshing sides. A fresh garden salad or tzatziki works great. Both add coolness to the warm skewers. For plating, serve on a colorful platter. Garnish with lemon slices and fresh herbs. This makes your dish look inviting and tasty. Enjoy your meal! {{image_2}} You can change the herbs in these skewers for new tastes. Try using mint or cilantro instead of rosemary and thyme. These fresh herbs bring a bright flavor. If you want some heat, add chili flakes to the marinade. This small change can give your skewers a spicy kick. Chicken is great, but you can switch it up. Shrimp works well and cooks fast. It only takes about 2-3 minutes per side on the grill. Tofu is another good choice for a plant-based meal. Cut firm tofu into cubes and marinate just like the chicken. Cook it for about 4-5 minutes per side for a tasty option. If you need gluten-free meals, this recipe fits the bill. All the ingredients are gluten-free. You can also make it low-carb. Just serve the skewers with a salad instead of bread or rice. This keeps your meal light and full of flavor. For the full recipe, check above. To store leftovers safely, let the skewers cool down first. Place them in an airtight container. This keeps the chicken moist and fresh. For best results, eat the leftovers within three days. Use glass or plastic containers that seal tightly. If you want to enjoy the skewers later, freezing is a great option. Wrap each skewer tightly in plastic wrap. Then, place them in a freezer bag or container. This helps prevent freezer burn. You can freeze them for up to three months. When ready to eat, thaw in the fridge overnight. To reheat without drying out, use an oven or grill. Set the oven to 350°F (175°C) and warm the skewers for about 10-15 minutes. If using a grill, heat it to medium and grill the skewers for a few minutes. This keeps the flavor and texture just right. Avoid microwaving, as it can make the chicken tough. Marinate the chicken for at least 30 minutes. For best taste, 2 hours works great. The longer you let it sit, the more the flavors soak in. Use a bowl and cover it with plastic wrap. Refrigerate during this time. Yes, you can! Preheat your oven to 400°F (200°C). Place the skewers on a baking sheet lined with foil. Bake for about 15-20 minutes, turning halfway. Ensure you check that the chicken is fully cooked. These skewers pair well with many sides. Try fresh salad, rice, or roasted veggies. You can also serve them with tzatziki for a cool dip. Add some lemon wedges for extra zest. Check the internal temperature. It should reach 165°F (75°C). Look for juices that run clear, not pink. The chicken should feel firm to the touch, with grill marks on the outside. Absolutely! You can use thighs, wings, or breasts. Thighs add more flavor and stay juicy. Wings are great for a fun appetizer. Adjust cooking times based on the cut you choose. This article covered how to make delicious lemon herb chicken skewers. We discussed key ingredients like chicken, olive oil, and herbs. You'll find tips for marinating, grilling, and serving these skewers perfectly. I also shared fun variations, storage info, and answers to common questions. Whether cooking for family or friends, these skewers will impress everyone. Enjoy the flavors and simplicity of this dish. Now get grilling!](https://dailydishlab.com/wp-content/uploads/2025/06/c24fc282-7a70-46a3-baaa-73a8f74c38d8-768x768.webp)