
If you’re looking for a simple yet delicious dish, try this Maple Dijon Glazed Salmon. In just a few steps, I’ll show you how to blend sweet maple syrup with zesty Dijon mustard for a glaze that takes salmon to the next level. Perfect for weeknight dinners or special occasions, this recipe is sure to impress. Let’s dive in and make dinner time more exciting!
Why I Love This Recipe
- Delicious Flavor Combination: The sweet maple syrup paired with the tangy Dijon mustard creates a delightful blend that enhances the natural flavors of the salmon.
- Quick and Easy: This recipe requires minimal prep time and cooks in just 12-15 minutes, making it perfect for a busy weeknight dinner.
- Healthy and Nutritious: Salmon is packed with omega-3 fatty acids, and this recipe makes it easy to incorporate this healthy fish into your diet.
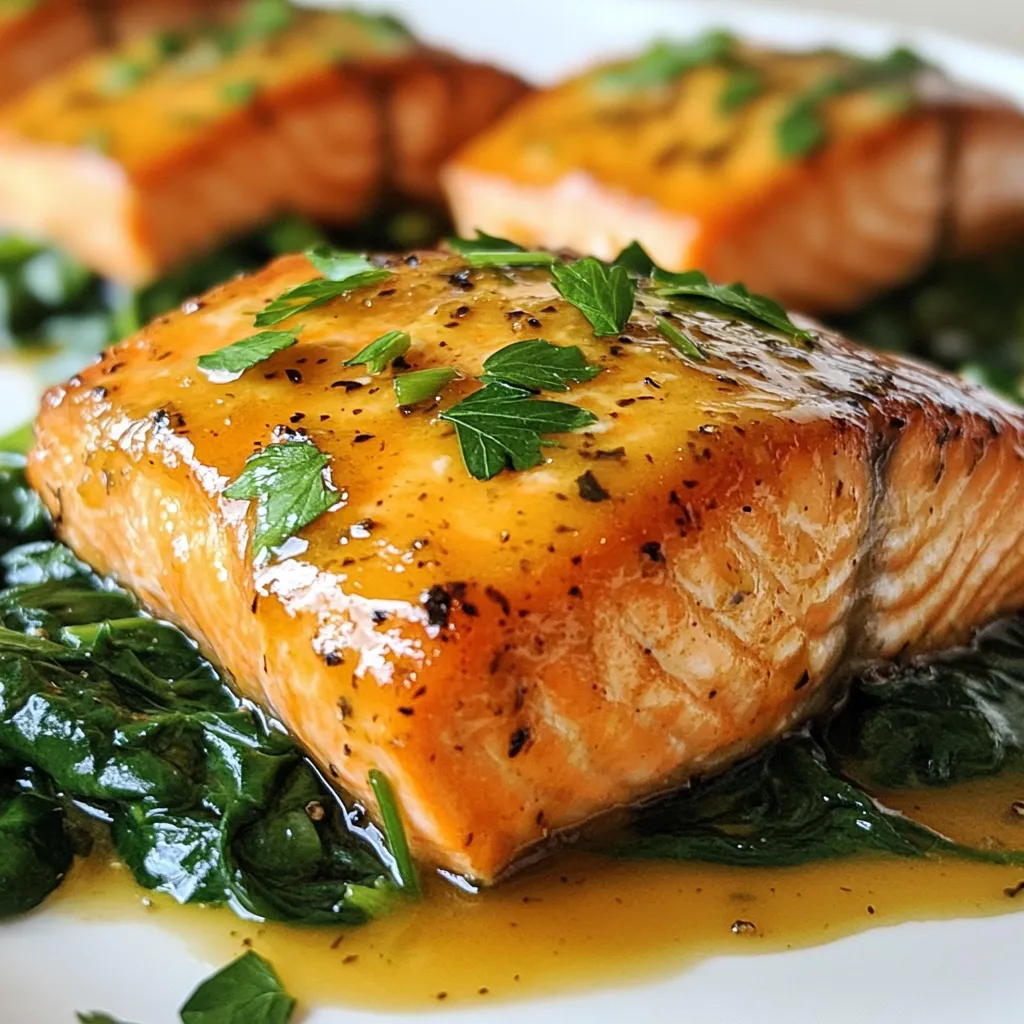
- Impressive Presentation: With vibrant colors and a glossy glaze, this dish looks as good as it tastes, making it great for entertaining guests.
Ingredients
To make Maple Dijon Glazed Salmon, gather these simple ingredients:
– 4 salmon fillets (6 ounces each)
– 1/4 cup pure maple syrup
– 2 tablespoons Dijon mustard
– 1 tablespoon soy sauce (low sodium)
– 1 tablespoon lemon juice
– 2 cloves garlic, minced
– Salt and pepper, to taste
– Fresh parsley, chopped (for garnish)
These ingredients come together to create a sweet and tangy glaze. The salmon is rich and flaky, perfectly balanced by the maple syrup and Dijon mustard. You get a hint of brightness from the lemon juice and garlic. I love how easy it is to prepare. With just a few ingredients, you can impress anyone at the dinner table.
Make sure to use pure maple syrup for the best flavor. The Dijon mustard adds a nice kick, while the soy sauce gives depth. Fresh parsley brings a pop of color and freshness to the dish. Trust me, this ingredient list is all you need for a delicious meal.

Step-by-Step Instructions
Preparing the Glaze
To start, get a small bowl. In that bowl, add the maple syrup, Dijon mustard, soy sauce, lemon juice, and minced garlic. Use a whisk to mix them well. You want to blend these until you have a smooth glaze. This glaze adds flavor and makes the salmon shine.
Prepping the Oven
Next, let’s get the oven ready. Preheat it to 400°F (200°C). This is the perfect heat for cooking salmon. While the oven warms up, take a baking dish. You can lightly grease it or line it with parchment paper. This will help with easy cleanup later.
Cooking the Salmon
Now, it’s time to cook the salmon. Take your salmon fillets and place them in the baking dish. Make sure the skin side is down. Now, season them with salt and pepper. It adds a nice touch to the flavor. Pour the maple Dijon glaze over each fillet. Make sure every piece is well coated; this is key for great taste.
Bake the salmon in your preheated oven for 12 to 15 minutes. You know it’s done when it flakes easily with a fork. If you want a crispy top, you can broil the salmon for an extra 2 to 3 minutes. This caramelizes the glaze and makes it even tastier. Once it’s ready, take it out and let it rest for a minute. Don’t forget to garnish with fresh parsley before serving.
Tips & Tricks
Cooking Tips
To get the perfect salmon texture, aim for a medium doneness. Cook the salmon until it’s just opaque and flakes easily. This usually takes about 12-15 minutes at 400°F. To avoid overcooking, check the salmon a few minutes early. If your fork easily flakes the fish, it’s done. Remember, it will continue to cook a bit after you take it out of the oven.
Serving Suggestions
For great accompaniments, serve your glazed salmon on a bed of sautéed spinach or next to roasted veggies. These sides add color and nutrients to your plate. For a stunning look, drizzle any leftover glaze over the salmon after plating. Garnish with fresh parsley for a bright touch.
Flavor Enhancements
Feel free to experiment with spices. A dash of cayenne or paprika can add a nice kick. You can also try other glazes. Honey works well instead of maple syrup. Or mix in some orange juice for a citrus twist. Each variation can give your meal a new taste sensation!
Pro Tips
- Use Fresh Ingredients: Always opt for fresh salmon and high-quality maple syrup to enhance the flavor of your dish.
- Marinate for Extra Flavor: For a deeper flavor, let the salmon marinate in the glaze for 30 minutes before baking.
- Experiment with Flavors: Feel free to add herbs like thyme or dill to the glaze for an extra layer of flavor.
- Check for Doneness: Use a fork to gently flake the salmon to check for doneness; it should be opaque and flake easily.
Variations
Alternative Proteins
You can use other fish with this recipe. Cod, trout, or tilapia work well. Choose a fish that you enjoy. Each will soak up the glaze nicely. If you want to adapt this for chicken, go for it! Chicken breast or thighs will taste great with the maple Dijon glaze. Just adjust the cooking time. Chicken usually takes a bit longer to cook than salmon.
Dietary Adjustments
Need this dish to be gluten-free? Swap out the soy sauce for coconut aminos. This will keep the flavor while making it safe for gluten-free diets. If you want a low-sugar version, try using sugar-free maple syrup. The taste may change slightly but will still be delicious.
Seasonal Ingredients
Adding seasonal vegetables can enhance your meal. Try asparagus, zucchini, or bell peppers. They add color and flavor to your plate. You can roast them alongside the salmon for a complete dish. Fresh herbs also boost flavor. Use parsley, dill, or chives for a bright touch. Just sprinkle them on before serving for a fresh taste.
Storage Info
Storing Leftovers
To keep your Maple Dijon Glazed Salmon fresh, follow these steps. First, let the salmon cool to room temperature. Then, place it in an airtight container. This helps prevent moisture loss. You can store it in the fridge for up to three days. If you want to keep it longer, consider freezing it.
Reheating Tips
When it’s time to enjoy your leftovers, reheating properly is key. The best method is to use the oven. Preheat it to 350°F (175°C). Place the salmon on a baking sheet and cover it with foil. Heat it for about 10 minutes. This keeps the fish moist and tasty. You can also use the microwave but be careful. Heat it in short bursts to avoid drying it out.
Freezing Recommendations
If you want to freeze cooked salmon, wrap it tightly in plastic wrap. Then place it in a freezer bag. This helps protect it from freezer burn. You can freeze it for up to three months. When you are ready to eat it, thaw it in the fridge overnight. You can then reheat it as described above. Enjoy your delicious salmon any time!
FAQs
How long to bake salmon at 400°F?
Bake salmon for 12 to 15 minutes at 400°F. The salmon should flake easily when done. For best results, check it at 12 minutes. Thicker fillets may need a bit more time. Always avoid overcooking to keep it moist and tender.
Can I use honey instead of maple syrup?
Yes, you can swap honey for maple syrup. Honey adds a unique sweetness and flavor. The dish will taste different, but still delicious. Maple syrup has a richer flavor. If you use honey, keep the other ingredients the same to maintain balance.
What sides pair well with Maple Dijon Glazed Salmon?
Many sides go well with this dish. Here are some great options:
– Sautéed spinach
– Roasted vegetables
– Quinoa or rice
– Garlic mashed potatoes
– A fresh green salad
These sides enhance the flavors of the salmon and create a balanced meal.
You learned how to make a delicious Maple Dijon Glazed Salmon. We discussed the key ingredients, step-by-step cooking methods, and helpful tips to get it just right. You now know how to adapt the recipe to fit your needs and store any leftovers. Enjoying this dish can elevate your dining experience. With these skills, you can impress your friends and family at any meal. Remember, cooking should be fun and creative, so make it your ow


