Mediterranean Quinoa Stuffed Peppers Flavorful Delight

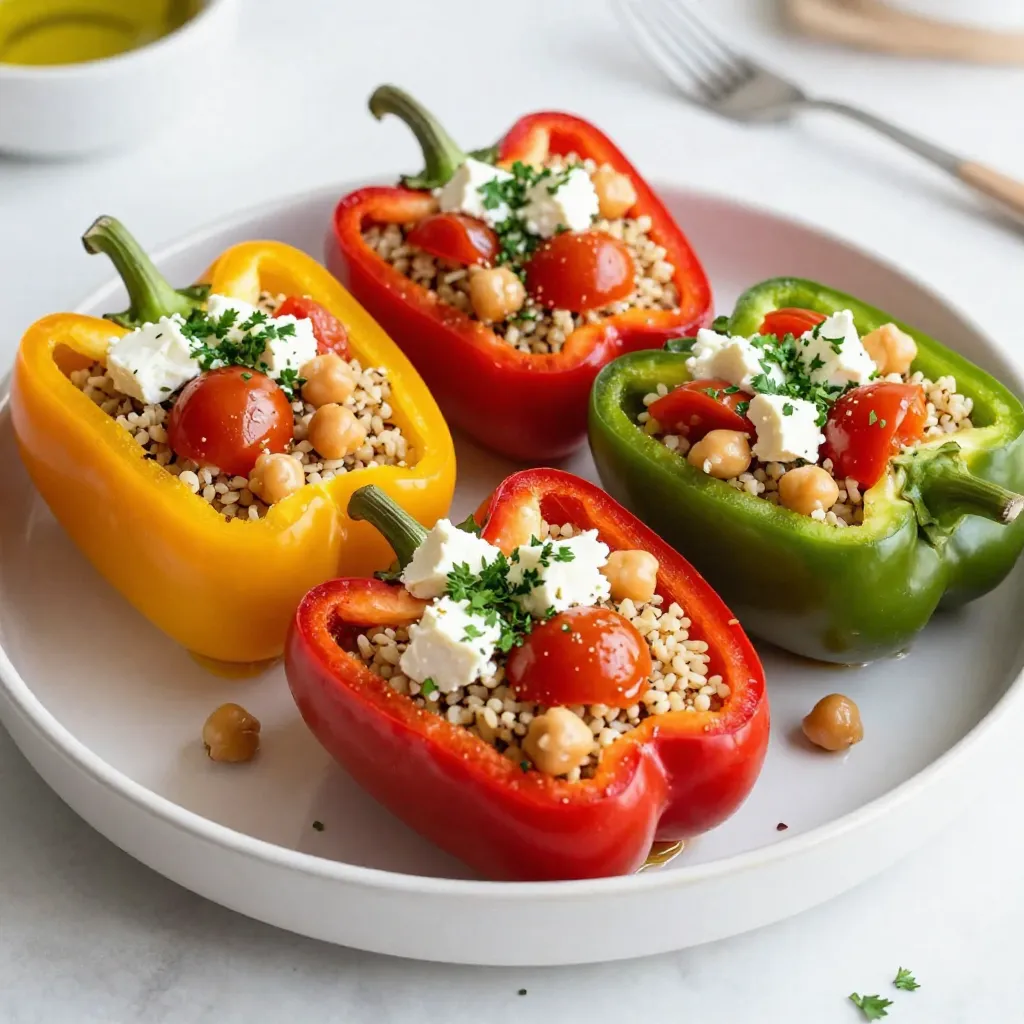
Are you ready to dive into a dish that’s colorful, healthy, and bursting with flavor? My Mediterranean Quinoa Stuffed Peppers are a perfect combination of taste and nutrition. Packed with protein, veggies, and vibrant spices, these stuffed peppers make for a delightful meal or a standout side. Join me as I guide you through simple steps to create this tasty treat that’s sure to impress your family and friends!
Why I Love This Recipe
- Healthy and Nutritious: This recipe is packed with protein-rich quinoa and chickpeas, along with fresh vegetables, making it a wholesome meal option.
- Vibrant Colors: The mix of colorful bell peppers and bright cherry tomatoes creates a visually appealing dish that’s sure to impress.
- Customizable: You can easily swap ingredients based on your preferences or what you have on hand, making it a versatile recipe.
- Easy to Prepare: With simple steps and minimal prep time, this dish is perfect for a quick weeknight dinner or meal prep.
Ingredients
List of Ingredients
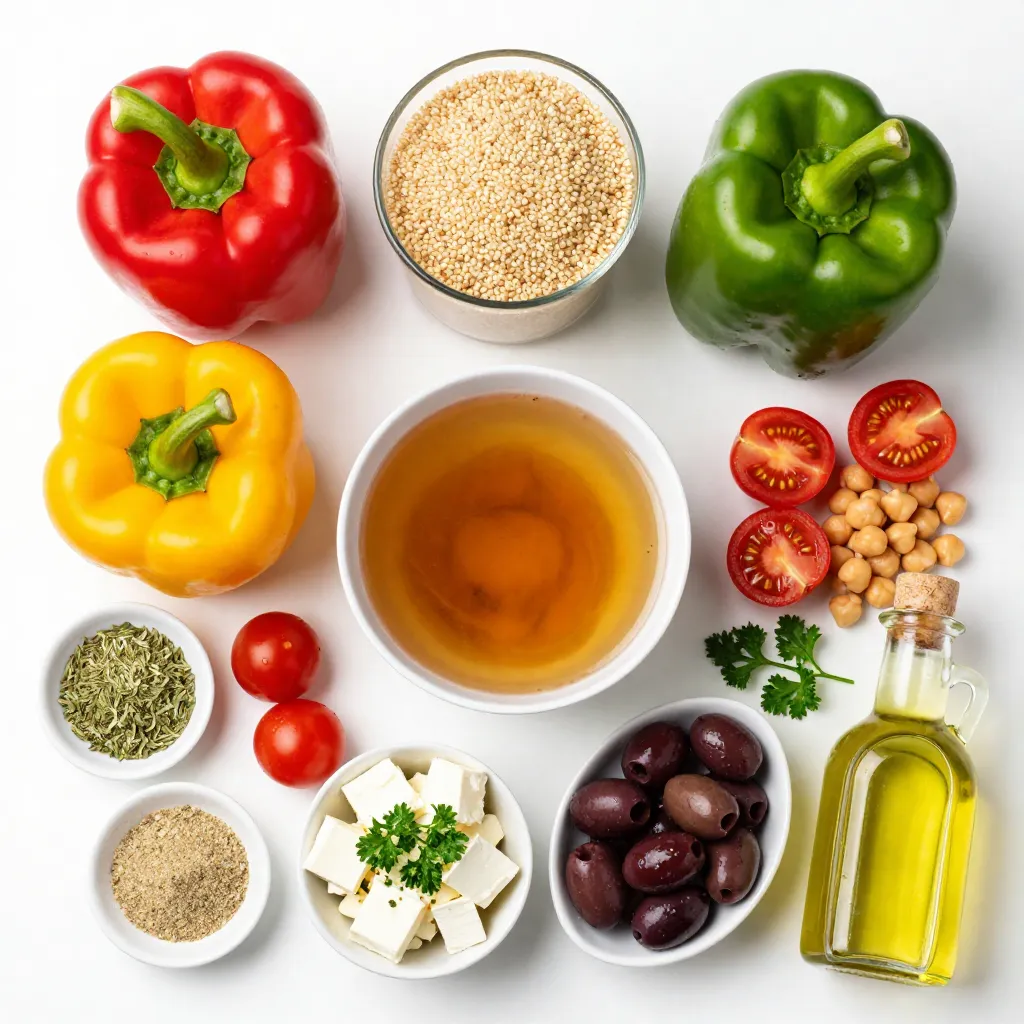
To make Mediterranean quinoa stuffed peppers, gather these ingredients:
- 4 large bell peppers (red, yellow, or green)
- 1 cup quinoa, rinsed
- 2 cups vegetable broth
- 1 cup cherry tomatoes, halved
- 1 cup cooked chickpeas (canned or freshly cooked)
- 1/2 cup Kalamata olives, pitted and chopped
- 1/2 cup feta cheese, crumbled
- 1/4 cup fresh parsley, chopped
- 1 teaspoon dried oregano
- 1 teaspoon garlic powder
- Salt and pepper to taste
- 2 tablespoons olive oil
- Optional: 1/4 teaspoon red pepper flakes for heat
Optional Ingredients for Customization
You can easily adjust this recipe to fit your taste. Here are some options:
- Add more veggies like zucchini or spinach for extra color and nutrition.
- Use different kinds of cheese, such as goat cheese or mozzarella.
- Swap in quinoa for rice or couscous if preferred.
- Spice it up with jalapeños or chili powder for a kick.
Substitutions and Alternatives
If you need to make substitutions, here are some ideas:
- Use vegetable stock instead of broth for flavor.
- Chickpeas can be replaced with black beans or lentils.
- For a dairy-free option, use nutritional yeast instead of feta.
- If you don’t have olives, try capers for a similar briny taste.
These ingredients make your dish vibrant and packed with flavor. Enjoy crafting this delicious meal!

Step-by-Step Instructions
Preparing the Bell Peppers
Start by preheating your oven to 375°F (190°C). This step is key for even cooking. Next, take your large bell peppers. Cut off the tops and scoop out the seeds and membranes. You want them hollow. Lightly drizzle olive oil on the outside of each pepper. This helps them cook nicely. Place the peppers upright in a baking dish. They need a cozy spot to bake!
Cooking the Quinoa
In a medium saucepan, combine 1 cup of rinsed quinoa with 2 cups of vegetable broth. This broth adds great flavor. Bring the mixture to a boil, then reduce the heat. Cover the pot and let it simmer for about 15 minutes. Check that the quinoa is fluffy and the liquid is all absorbed. If it’s not cooked, let it simmer a few more minutes.
Combining the Filling Ingredients
In a large mixing bowl, add the cooked quinoa. Toss in 1 cup of halved cherry tomatoes, 1 cup of cooked chickpeas, and 1/2 cup of chopped Kalamata olives. Then, add 1/2 cup of crumbled feta cheese and 1/4 cup of chopped fresh parsley. Don’t forget to sprinkle in 1 teaspoon of dried oregano and 1 teaspoon of garlic powder. If you want some heat, add 1/4 teaspoon of red pepper flakes. Mix everything well and season with salt and pepper to taste.
Stuffing and Baking the Peppers
Spoon the delicious quinoa mixture into each bell pepper. Fill them generously, letting all those flavors come together. Drizzle a little olive oil on top of the stuffed peppers for extra crispiness. Cover the baking dish with aluminum foil to keep the moisture in. Bake in your preheated oven for 25 minutes. After that, remove the foil and bake for another 10-15 minutes. You want the peppers to be tender and the tops slightly golden. Let them cool for a moment before serving. Enjoy your flavorful delight!
Tips & Tricks
How to Achieve Perfectly Cooked Quinoa
To achieve perfectly cooked quinoa, rinse it first. This removes bitterness. Use a 1:2 ratio of quinoa to vegetable broth. Bring the broth to a boil, then lower the heat. Cover the pot and simmer for about 15 minutes. When the liquid is gone, fluff it with a fork. This makes the quinoa light and airy.
Best Practices for Stuffing Peppers
When stuffing peppers, choose large, firm ones. Red, yellow, or green peppers work well. Cut off the tops and remove the seeds. Drizzle a bit of olive oil on the outside for flavor. Fill each pepper generously with the quinoa mixture. Press down lightly to pack it in. This helps the flavors meld well.
Cooking Time Adjustments for Different Peppers
Cooking times vary based on pepper size. For large peppers, bake for 25 minutes covered. Then, remove the foil and add another 10-15 minutes. For smaller peppers, reduce the time by about 5-10 minutes. Check for tenderness by piercing with a fork. The goal is a soft pepper with a golden top.
Pro Tips
- Choose Colorful Peppers: Using a mix of red, yellow, and green bell peppers not only enhances the dish’s visual appeal but also adds a variety of flavors.
- Rinse Quinoa Thoroughly: Rinsing quinoa before cooking removes its natural coating, called saponin, which can give a bitter taste. This step ensures a pleasant flavor in your stuffed peppers.
- Customize Fillings: Feel free to add or substitute ingredients in the filling. Spinach, zucchini, or different cheeses can provide unique flavors and textures to the dish.
- Let Them Rest: Allowing the stuffed peppers to rest for a few minutes after baking helps the flavors meld together and makes them easier to serve.
Variations
Adding Protein Options (Chicken, Tofu, etc.)
You can easily boost the protein in your stuffed peppers. Adding cooked chicken or tofu gives a nice touch. Simply shred cooked chicken or cube tofu and mix it into the quinoa filling. This makes the dish heartier and more filling. You can also try ground turkey or beef for a meatier flavor.
Vegetarian and Vegan Variations
This recipe is already vegetarian, but you can easily make it vegan. Just skip the feta cheese or use a plant-based alternative. You can also use nut cheese for a creamy texture. The chickpeas add protein, so you still get a great meal. Feel free to add more veggies like spinach or zucchini for extra nutrients.
Different Flavor Profiles (Spicy, Mediterranean Twist)
You can change the flavor of your stuffed peppers based on your mood. To make them spicy, add jalapeños or red pepper flakes into the mix. For a Mediterranean twist, try using sun-dried tomatoes, capers, or a splash of lemon juice. These options can brighten the dish and give it a fresh taste.
Storage Info
How to Store Leftovers
To store your leftover Mediterranean quinoa stuffed peppers, let them cool first. Place them in an airtight container. You can keep them in the fridge for up to four days. Always label your container with the date. This helps you know when to eat them again.
Freezing Stuffed Peppers
If you want to freeze the stuffed peppers, it’s simple. Wrap each pepper in plastic wrap. Then, place them in a freezer-safe bag or container. They will stay good for up to three months. Remember to label the bags with the date. This way, you won’t forget their yummy contents!
Reheating Suggestions
When you’re ready to enjoy your stuffed peppers, reheat them easily. For the oven, preheat it to 350°F (175°C). Place the peppers in a baking dish and cover them with foil. Bake for about 20 minutes or until warm. You can also use the microwave. Just place a pepper on a plate, cover it, and heat for 2-3 minutes. Check that it’s hot inside before diving in!
FAQs
Can I make Mediterranean Quinoa Stuffed Peppers ahead of time?
Yes, you can prepare Mediterranean quinoa stuffed peppers ahead of time. You can stuff the peppers with the quinoa mix, and then cover them and store them in the fridge. This keeps them fresh for up to a day. When you are ready to eat, bake them right from the fridge. You might need to add a few extra minutes to the baking time.
What can I serve with stuffed peppers?
Stuffed peppers are great on their own but pair well with other dishes. Here are some ideas:
- A simple green salad with lemon dressing
- Garlic bread for a crunchy side
- A bowl of creamy yogurt or tzatziki for dipping
- Couscous or rice to complete the meal
These sides add flavor and balance to the meal.
How do I know when the peppers are done baking?
You will know the peppers are done when they are soft and tender. After baking for 25 minutes covered, remove the foil. Bake for an extra 10-15 minutes. The tops should be slightly golden. You can poke the peppers gently with a fork. If they give a little and feel soft, they are ready to serve!
You now have all you need to make tasty quinoa stuffed peppers. We covered key ingredients, step-by-step instructions, and tips for success. You can customize with protein or different flavors. Don’t worry about leftovers; I’ll show you how to store and reheat them right.
With these techniques, you can create a meal everyone will love. Enjoy your cooking, and let your creativity shin

Mediterranean Quinoa Stuffed Peppers
Ingredients
- 4 large bell peppers (red, yellow, or green)
- 1 cup quinoa, rinsed
- 2 cups vegetable broth
- 1 cup cherry tomatoes, halved
- 1 cup cooked chickpeas (canned or freshly cooked)
- 0.5 cup Kalamata olives, pitted and chopped
- 0.5 cup feta cheese, crumbled
- 0.25 cup fresh parsley, chopped
- 1 teaspoon dried oregano
- 1 teaspoon garlic powder
- to taste salt and pepper
- 2 tablespoons olive oil
- 0.25 teaspoon red pepper flakes (optional)
Instructions
- Preheat the oven to 375°F (190°C).
- Cut the tops off the bell peppers and remove the seeds and membranes. Lightly drizzle the outside with olive oil and place them upright in a baking dish.
- In a medium saucepan, combine the rinsed quinoa and vegetable broth. Bring to a boil, then reduce the heat to low, cover, and simmer for about 15 minutes, or until the quinoa is fluffy and the liquid is absorbed.
- In a large mixing bowl, combine the cooked quinoa, cherry tomatoes, chickpeas, olives, feta cheese, parsley, dried oregano, garlic powder, and red pepper flakes (if using). Mix well, and season with salt and pepper to taste.
- Spoon the quinoa mixture into each bell pepper until filled generously.
- Drizzle the tops of the stuffed peppers with a little olive oil.
- Cover the baking dish with aluminum foil and bake in the preheated oven for 25 minutes.
- Remove the foil and bake for an additional 10-15 minutes, or until the peppers are tender and the tops are slightly golden.
- Allow to cool slightly before serving.


![- 2 cans (15 oz each) of white beans (cannellini or great northern), drained and rinsed - 1 medium onion, chopped - 4 cloves garlic, minced - 4 cups vegetable broth - 1 cup coconut milk (or heavy cream for a richer flavor) - 2 tablespoons olive oil - 1 teaspoon dried thyme - 1 teaspoon smoked paprika - Salt and pepper to taste - Fresh parsley, chopped (for garnish) When making creamy garlic white bean soup, you need simple and fresh ingredients. White beans serve as the base. They provide creaminess and protein. I prefer cannellini or great northern beans. Both are soft and smooth. A medium onion adds depth and sweetness to the soup. Garlic brings strong flavor. I use four cloves for a nice kick. Vegetable broth adds rich taste. You can use homemade or store-bought broth. Coconut milk gives the soup its creamy texture. For a richer taste, heavy cream works well too. Olive oil is essential for sautéing the onion and garlic. Dried thyme and smoked paprika add warmth and earthiness. Season with salt and pepper to make the flavors pop. Finally, fresh parsley brightens the dish when you serve it. This soup is easy to make and very satisfying. You can find the full recipe for this dish above. This soup is not only tasty but also healthy. It is high in fiber and protein due to the beans. The coconut milk adds healthy fats. Each serving provides a good balance of nutrients. You can change some ingredients to suit your taste. If you want a different bean, try chickpeas or navy beans. Red onion works well instead of yellow. For a spicy kick, add a pinch of red pepper flakes. If you need a dairy-free option, stick with coconut milk. This soup is flexible and can fit many diets. Start by gathering all your ingredients. You need two cans of white beans, an onion, garlic, vegetable broth, coconut milk, olive oil, dried thyme, smoked paprika, salt, and pepper. Chop the onion into small pieces. Mince the garlic cloves. Drain and rinse the beans well to remove excess sodium. This prep work makes cooking quick and easy. In a large pot, heat the olive oil over medium heat. Once hot, add the chopped onion. Sauté for about five minutes or until the onion turns clear. Next, add the minced garlic. Cook it for two more minutes. This helps to release the garlic’s flavor. Stir in the drained white beans, thyme, smoked paprika, salt, and pepper. Mix everything well to coat the beans in flavor. Now, pour in the vegetable broth. Bring the mixture to a boil. When it starts to boil, lower the heat and let it simmer for 15 to 20 minutes. This time allows the flavors to blend. After simmering, it’s time to blend the soup. I recommend using an immersion blender for this. Blend until the soup is smooth and creamy. If you want some texture, blend just half of the soup. This way, you still have chunks of beans to enjoy. Stir in the coconut milk and heat the soup for another five minutes. Taste it and adjust the seasoning if needed. Serve hot and garnish with fresh parsley. For the full recipe, check out the details above. Enjoy your creamy garlic white bean soup! To make your soup nice and creamy, blend well. I use an immersion blender. This tool lets you puree the soup right in the pot. If you want some texture, blend only half. For extra creaminess, add coconut milk or heavy cream. This makes the soup rich and smooth. Good seasonings can make a big difference. I love using dried thyme and smoked paprika. These give the soup depth and warmth. You can also add a pinch of cayenne for some heat. Don't forget to taste and adjust the salt and pepper. This will bring out all the flavors. Serve your soup hot, topped with fresh parsley. This adds color and a fresh taste. You can pair it with crusty bread or a light salad. For a complete meal, try adding grilled chicken or sautéed greens. Enjoy it with friends or family for a cozy meal. Check out the Full Recipe for more tips! {{image_2}} You can easily add protein to your creamy garlic white bean soup. For a heartier meal, try adding cooked chicken or turkey. Just shred the meat and stir it in during the last few minutes of cooking. If you want a plant-based option, add cooked quinoa or chickpeas. Both will blend well with the creamy texture of the soup without overpowering its flavor. This soup is naturally vegetarian. To make it vegan, simply use coconut milk instead of heavy cream. The coconut milk gives a rich taste and keeps it creamy. You can also add nutritional yeast for a cheesy flavor without dairy. This way, you can enjoy a warm, fulfilling dish that fits your dietary needs. To boost the flavor, try adding fresh herbs like rosemary or basil. They add a nice touch and aroma. You can also play with spices. A pinch of red pepper flakes gives a nice kick. If you love a smoky flavor, add more smoked paprika. For a fresh twist, squeeze a little lemon juice right before serving. These simple changes keep the soup exciting each time you make it. For the full recipe, check out the detailed cooking steps! Store any leftover creamy garlic white bean soup in an airtight container. Make sure it is cool before sealing the lid. You can keep it in the fridge for up to four days. If you want to enjoy it later, storing it properly will keep it fresh. You can freeze this soup for longer storage. Use freezer-safe containers or bags. Leave some space at the top, as the soup will expand when it freezes. The soup can last in the freezer for up to three months. When you're ready to eat it, thaw it in the fridge overnight. To reheat the soup, pour it into a pot over medium heat. Stir it gently as it warms. You can also microwave it in a safe bowl. Heat in short bursts, stirring in between. If the soup seems too thick, add a splash of vegetable broth or water to reach your desired consistency. Enjoy it warm for a cozy meal! For the full recipe, check out the link provided. Creamy garlic white bean soup lasts about 4 to 5 days in the fridge. Keep it in a sealed container. This way, it stays fresh and safe to eat. Always check for any off smells or changes in color before enjoying leftovers. Yes, you can use dried beans. Just soak them overnight before cooking. Use about 1 cup of dried beans for this soup recipe. After soaking, cook them until tender, then follow the recipe as usual. This adds a nice texture and flavor to your soup. You can serve white bean soup with crusty bread or a fresh salad. Grilled cheese sandwiches also pair nicely. For a heartier meal, try a side of roasted vegetables. These sides can bring out the yummy garlic flavor in the soup. Yes, you can make this soup ahead of time. It tastes even better the next day as the flavors blend. Just store it in the fridge after cooking. Reheat it on the stove when ready to serve. Absolutely! This soup is packed with fiber and plant-based protein. White beans are great for your heart. The garlic adds flavor and has health benefits too. It’s a wholesome choice for any meal. Yes, this soup freezes well. Let it cool completely before transferring it to freezer-safe containers. It can last for up to 3 months in the freezer. Just thaw in the fridge overnight and reheat when ready to eat. If you want a kick, add red pepper flakes or hot sauce. Stir in these spicy additions during cooking. This will give your creamy garlic white bean soup a warm, zesty flavor that wakes up your taste buds. For a richer flavor, you can use heavy cream instead of coconut milk. This will give the soup a creamier texture. You can also add more garlic for a stronger taste. Experiment with flavors to find your perfect mix. To make the soup more filling, add diced potatoes or carrots during cooking. You can also stir in cooked grains like quinoa or rice. These options will add bulk and nutrients to your meal. Yes! Fresh parsley adds a nice touch. You can also use croutons or a drizzle of olive oil for extra flavor. Garnishing makes the soup look appealing and adds a bit of crunch. For the full recipe, check out the [Full Recipe]. This blog post covered how to make creamy garlic white bean soup. We went through ingredients, nutritional info, and cooking steps. I shared tips for a creamy texture and flavor must-haves. You learned about serving options and variations too. In summary, this soup is easy and healthy. Feel free to customize it to fit your taste. Enjoy making it for friends, family, or yourself!](https://dailydishlab.com/wp-content/uploads/2025/07/b682e594-aaaa-4098-8015-8011c3b1faa4-768x768.webp)


![- Eggplants: You need 2 medium eggplants. Slice them into 1/4-inch rounds. This helps them cook evenly. - Marinara Sauce: Use 2 cups of marinara sauce. You can make it fresh or use store-bought. It adds rich flavor. - Cheese Types: You will need 2 cups of shredded mozzarella cheese and 1 cup of grated Parmesan cheese. These cheeses melt well and create a creamy texture. - Breading Components: Gather 1 cup of all-purpose flour, 3 large eggs (beaten), and 2 cups of breadcrumbs. Italian-style breadcrumbs add great taste. - Seasonings and Garnish: Use 1 teaspoon of dried oregano and 1 teaspoon of garlic powder. These spices boost the flavor. For garnish, fresh basil leaves add color and freshness. Don’t forget olive oil for frying and salt and pepper for taste. With these ingredients, you will create a layered delight that is both tasty and satisfying. For the complete recipe, check the Full Recipe section. Preparing the Eggplant First, slice your eggplants into 1/4-inch rounds. Lay them on a clean towel. Sprinkle salt over the slices and let them sit for 30 minutes. This helps draw out moisture and bitterness. After 30 minutes, rinse the eggplants and pat them dry with a paper towel. This step is key for tasty eggplant. Setting Up a Breading Station Now, gather three bowls for breading. In the first bowl, add all-purpose flour. In the second bowl, beat three large eggs. In the third bowl, mix breadcrumbs with one teaspoon of dried oregano, one teaspoon of garlic powder, salt, and pepper. This setup speeds up the process and keeps things neat. Frying the Eggplant Heat olive oil in a large skillet over medium heat. Take each eggplant slice and dip it into the flour, shaking off excess. Next, dip it into the beaten eggs, then coat it well with the breadcrumb mix. Fry the breaded slices in batches until they turn golden brown and crisp. This should take about 3-4 minutes on each side. Once done, drain them on paper towels to remove extra oil. Assembling the Layers Grab a greased baking dish to start layering. Spread a thin layer of marinara sauce on the bottom. Place a third of the fried eggplant slices over the sauce. Add half of the marinara sauce on top, followed by a third of the mozzarella cheese and half of the Parmesan cheese. Repeat these layers. Finish with a final layer of eggplant, then top it off with the remaining marinara sauce and cheeses. Baking Directions Preheat your oven to 375°F (190°C). Cover the baking dish with foil and bake it for 25 minutes. After that, remove the foil and bake it for another 15-20 minutes. You want the cheese to be bubbly and golden brown. Resting Time Once the baking is done, let the Eggplant Parmesan rest for about 10 minutes. This helps it set and makes it easier to serve. Enjoy the delicious layers of flavor and texture! If you want the full recipe, check the [Full Recipe]. Drawing Out Moisture To make your eggplant perfect, start by drawing out moisture. Slice the eggplants into 1/4-inch rounds. Lay them on a clean towel and sprinkle salt over them. Let them sit for about 30 minutes. This step helps to reduce bitterness and makes them less soggy. After 30 minutes, rinse and pat them dry with a paper towel. This process is key for a great texture. Achieving Optimal Crispiness For a crispy texture, make sure to coat the eggplant well. First, dip each slice in flour, then in beaten eggs, and finally in breadcrumbs. Use Italian-style breadcrumbs for extra flavor. Fry them in hot olive oil until they are golden brown. Frying in batches helps keep the oil hot. This step ensures every piece of eggplant turns out crispy and delicious. Pairing with Side Dishes Eggplant Parmesan pairs well with many sides. A fresh green salad with a lemon vinaigrette adds brightness. Garlic bread brings a nice crunch and flavor. You can also serve it with pasta for a hearty meal. These sides complement the rich flavors of the dish. Presentation Ideas For a beautiful presentation, layer your Eggplant Parmesan in a clear dish. This way, people can see the colorful layers. Garnish with fresh basil leaves on top for a pop of color. You can also drizzle some extra marinara sauce around the plate. This makes it look elegant and inviting. Over-salting the Eggplant Be careful with salt when preparing eggplant. While salting helps draw out moisture, too much salt can ruin the dish. Always taste the eggplant after rinsing. Adjust the salt in your marinara sauce to balance flavors. This way, you avoid a salty dish. Incorrect Layering Order When assembling the layers, follow the right order. Start with marinara sauce, then eggplant, and then cheese. Repeat this pattern. If you mix up the layers, the dish may not cook evenly. Following the proper layering keeps everything in place and ensures a tasty meal. {{image_2}} Substitutes for Cheese You can use plant-based cheese. Look for nut-based or soy-based options. They melt well and add flavor. Nutritional yeast is a great choice too. It adds a cheesy taste without dairy. Egg Replacement Options If you want to skip eggs, try using flaxseed meal. Mix one tablespoon of flaxseed with three tablespoons of water. Let it sit for five minutes. This mix works well as a binder. Gluten-Free Breadcrumbs You can find gluten-free breadcrumbs at stores. They are made from rice or corn. They work just like regular breadcrumbs, giving you that nice crunch. Flour Options Instead of all-purpose flour, use almond flour or chickpea flour. Both options give a nutty flavor and work well in the recipe. Adding Vegetables Add layers of zucchini or spinach for more taste. They boost nutrition and add color to the dish. You can also mix in roasted red peppers for a sweet twist. Using Different Sauces Besides marinara, try pesto or a white sauce. Each sauce brings a new flavor. This keeps the dish fresh and exciting. You can even mix sauces for a unique taste. How do you store leftovers? After enjoying your Eggplant Parmesan, let it cool to room temperature. Place any leftovers in an airtight container. Store it in the fridge for up to three days. What are the best practices for reheating? To reheat, preheat your oven to 350°F (175°C). Place the Eggplant Parmesan in an oven-safe dish. Cover it with foil to keep it moist. Heat for about 20 minutes. Check if it’s warm all the way through before serving. How do you freeze Eggplant Parmesan? If you want to store it longer, freezing is a great option. First, let the dish cool completely. Cut it into portions if you prefer smaller servings. Wrap each piece tightly in plastic wrap. Then, place them in a freezer-safe container. It can last for up to three months in the freezer. What are the thawing and reheating instructions? When you’re ready to eat, move the Eggplant Parmesan to the fridge. Let it thaw overnight. Reheat it in the oven at 350°F (175°C) for about 25-30 minutes. Remove the foil halfway through to help the top crisp up. Enjoy your delicious dish again! For the complete recipe, check out the Full Recipe. How do you prevent eggplants from turning brown? To stop eggplants from browning, sprinkle salt on the slices. This draws out moisture. After 30 minutes, rinse and pat them dry. This method keeps them fresh and tasty. Can eggplant parmesan be made ahead of time? Yes, you can make eggplant parmesan ahead of time. Prepare it, then cover and chill it in the fridge. When ready to bake, just heat it in the oven. This saves time on busy days. What’s the best cheese to use for eggplant parmesan? The best cheese for eggplant parmesan is mozzarella. It melts well and adds creaminess. Parmesan adds a nice salty flavor. Using both gives a rich taste. Calories and serving size One serving of eggplant parmesan has about 300-400 calories. This depends on how much cheese and sauce you use. A serving size is usually one slice. Health benefits of eggplant Eggplant is low in calories and high in fiber. It helps with digestion and keeps you full. It also has antioxidants that may protect your heart. Eating eggplant adds nutrients to your meals. For more recipes, check out the Full Recipe for Layered Delight Eggplant Parmesan. In this post, we explored making eggplant Parmesan from start to finish. We covered ingredients, step-by-step instructions, and tips for success. You learned about variations for vegan and gluten-free options. I hope you feel confident to try this dish. Remember to avoid common mistakes and pair it well with sides. Enjoy your cooking and savor each bite of this tasty meal!](https://dailydishlab.com/wp-content/uploads/2025/06/de34a9c5-902e-4f12-9462-c26c35663e43-768x768.webp)
