No-Bake Funfetti Cake Batter Bars Easy and Delicious
![- 1 cup all-purpose flour (heat-treated) - 1/4 cup granulated sugar - 1/4 cup brown sugar, packed - 1/2 cup unsalted butter, melted - 1/4 teaspoon salt - 1 teaspoon vanilla extract - 1/2 cup rainbow sprinkles - 1/2 cup mini chocolate chips (optional) - 1 cup vanilla frosting Heat-treating flour is key for safety. Raw flour can have germs. To heat-treat, spread the flour on a baking sheet. Bake it at 350°F (175°C) for five minutes. This step kills any harmful bacteria, making it safe to eat without baking. If you want a gluten-free option, you can use a gluten-free flour blend. Look for one that is designed for baking. This makes it easy for everyone to enjoy these tasty bars. Feel free to mix it up with different sprinkles. You can use chocolate sprinkles, or even themed sprinkles for events. For frosting, try chocolate or cream cheese frosting instead. Each will give a new twist to the bars. You can always experiment to find your favorite combination! 1. Mixing the dry ingredients Start with a large mixing bowl. Add 1 cup of heat-treated flour, 1/4 cup of granulated sugar, 1/4 cup of brown sugar, and 1/4 teaspoon of salt. Use a whisk to blend them well. This mix forms the base of your bars. 2. Combining wet ingredients Next, pour in 1/2 cup of melted unsalted butter and 1 teaspoon of vanilla extract. Stir until everything combines into a dough. This part brings the sweetness and rich flavor to the bars. 1. Pressing mixture into the pan Line an 8x8-inch square baking pan with parchment paper. Leave some paper hanging over the edges. This makes it easy to lift the bars later. Press the dough evenly into the pan. Use a spatula to smooth the top. 2. Spreading the frosting evenly Grab 1 cup of vanilla frosting. Spread it over the pressed mixture. Use your spatula to create a nice, even layer. For fun, sprinkle some extra rainbow sprinkles on top for color and crunch. 1. Refrigeration time and tips for proper setting Place the pan in the fridge for at least 30 minutes. This helps the bars firm up. If you want them extra solid, leave them in longer. Once set, lift the bars out using the parchment paper. Cut into squares and enjoy! For the complete recipe, check out the Full Recipe section. - Overmixing the batter: Mixing too much can make your bars dense. Just mix until combined. - Skipping refrigeration: If you don’t chill the bars, they will stay too soft. Chill for at least 30 minutes. - Reducing sugar for less sweetness: You can cut down the granulated sugar. This will make the bars less sweet without losing flavor. - Adding flavor extracts: Try different extracts like almond or coconut. Just a little can change the taste. - Best mixing bowls and tools: Use a large mixing bowl for easy stirring. A sturdy spatula helps combine the batter well. - Recommended baking pan types: A metal or glass 8x8-inch pan works best. Line it with parchment paper for easy removal. For the full recipe, check out the No-Bake Funfetti Cake Batter Bars. {{image_2}} You can change the flavor of your No-Bake Funfetti Cake Batter Bars easily. Try making chocolate cake batter bars by swapping in chocolate cake mix for the flour. Just mix it in as you would the flour. This gives a rich, chocolatey taste that many love. Another fun twist is using peanut butter. Replace the butter with creamy peanut butter. This adds a nutty flavor that pairs well with sprinkles. You can also mix in mini chocolate chips for extra indulgence. Make your bars pop with seasonal decorations. Use holiday-themed sprinkles for Christmas, Halloween, or birthdays. You can find sprinkles shaped like stars, hearts, or seasonal colors. This makes the bars festive and fun for any occasion. You can also change the color of your sprinkles based on the season. For spring, use pastel colors. For summer, bright colors shine. This small touch makes your bars look special and inviting. Want a vegan version? It’s easy! For dairy-free substitutions, use coconut oil in place of butter. It gives a nice flavor and texture. You can also use plant-based milk for the frosting. For frosting, try a vegan buttercream made with powdered sugar and plant-based butter. This way, you keep the creamy texture without using dairy. These options make your delicious bars suitable for everyone! For the full recipe, check out the [Full Recipe]. To keep your No-Bake Funfetti Cake Batter Bars fresh, store them in the refrigerator. Place the bars in an airtight container. This helps keep them moist and tasty. You can also cover them tightly with plastic wrap. If you want to save them for later, you can freeze them. Cut the bars into squares first. Wrap each piece in plastic wrap and then put them in a freezer bag. They will stay fresh this way! When stored correctly, these bars can last about a week in the fridge. If you freeze them, expect them to stay fresh for up to three months. Always check for any signs of spoilage before eating them. Look for changes in color or smell. You don’t need to reheat these bars, as they are best served cold. If you want a warm treat, you can microwave them for a few seconds. Just be careful not to overheat. A few seconds is all you need to enjoy a soft, tasty treat! No, you should not use regular flour. Raw flour can contain harmful bacteria. Heat-treated flour kills these germs and makes the flour safe for no-bake recipes. You can easily heat-treat flour at home by baking it on a baking sheet. Spread it out and bake at 350°F for about five minutes. Let it cool before using. These bars stay fresh for about five days at room temperature. To keep them longer, store them in the fridge. You know they are spoiled if they smell bad or look dry. Check for any mold as well. If you see any signs of spoilage, toss them out. Yes, you can make these bars ahead of time. They are great for parties and special events. Just prepare them a day or two before. Store them in the fridge until you are ready to serve. To save time, you can also press the mixture into the pan and chill it. Frost just before serving for the best taste. You can easily swap ingredients if needed. If you lack rainbow sprinkles, use chocolate or other types. For the frosting, any flavor works well. Don’t have mini chocolate chips? You can skip them or use nuts instead. Just be creative and adjust the recipe to fit what you have at home. For the full recipe, check the original instructions. This blog post covered the key ingredients, steps, and tips for making delicious dessert bars. We discussed crucial details like heat-treating flour and gluten-free options. I shared variations and ideas for seasonal fun, plus how to store and reheat leftovers. In summary, these bars are easy to make and fun to customize. With simple ingredients and clear steps, you're ready to bake. Enjoy creating your own tasty treats!](https://dailydishlab.com/wp-content/uploads/2025/07/c4f5a401-6c49-4de0-bdd4-db0dcac5f5d0.webp)
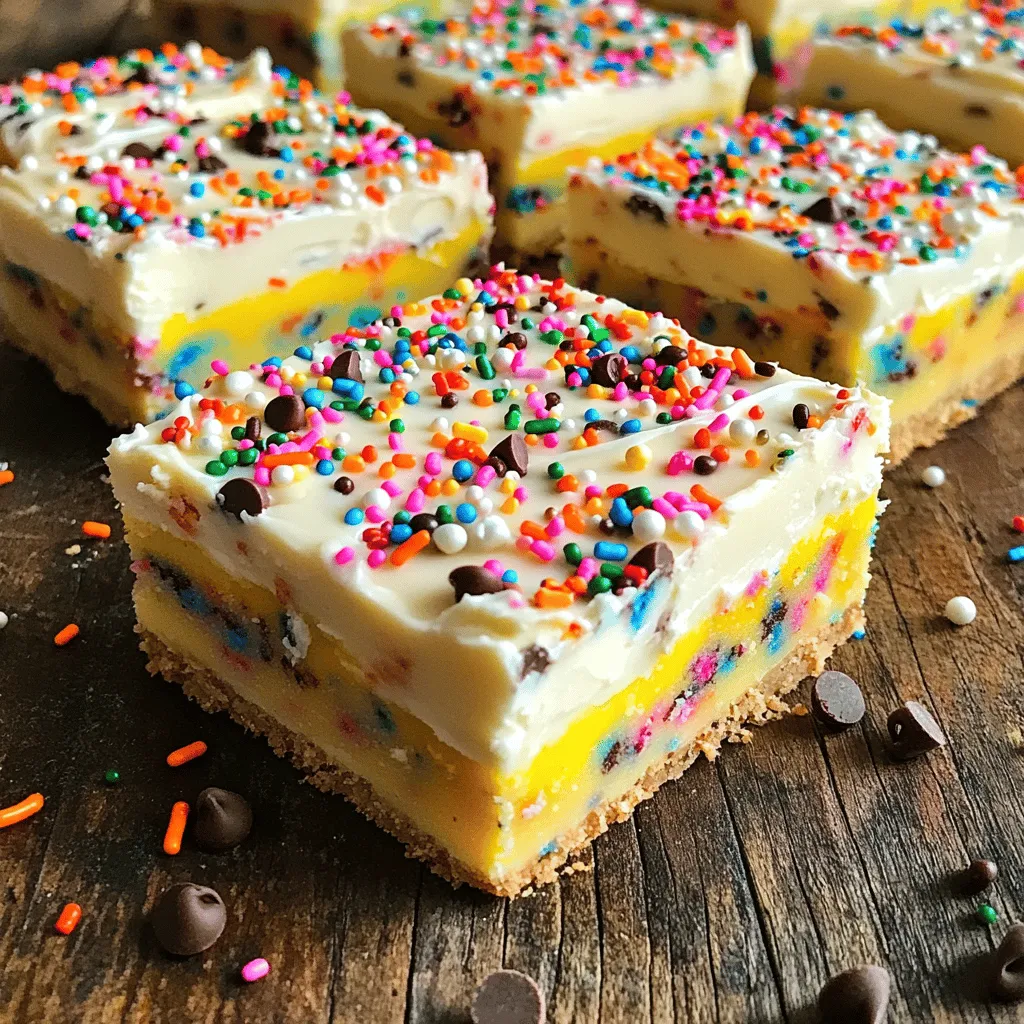
Are you craving a treat that’s easy to make and absolutely delicious? Look no further! These No-Bake Funfetti Cake Batter Bars are perfect for any occasion. Just a few simple ingredients come together to create a fun dessert that’s sure to impress. Whether you’re planning a party or just want a sweet surprise, these bars are quick to whip up. Let’s dive into the fun of making these tasty delights!
Why I Love This Recipe
- Easy Preparation: No baking required, making it a quick and simple dessert option.
- Great for Parties: The colorful sprinkles make these bars a hit for birthdays and celebrations.
- Customizable: Add your favorite mix-ins like nuts or different types of chocolate for variety.
- Deliciously Indulgent: The combination of cake batter and frosting gives a rich, sweet flavor that’s irresistible.
Ingredients
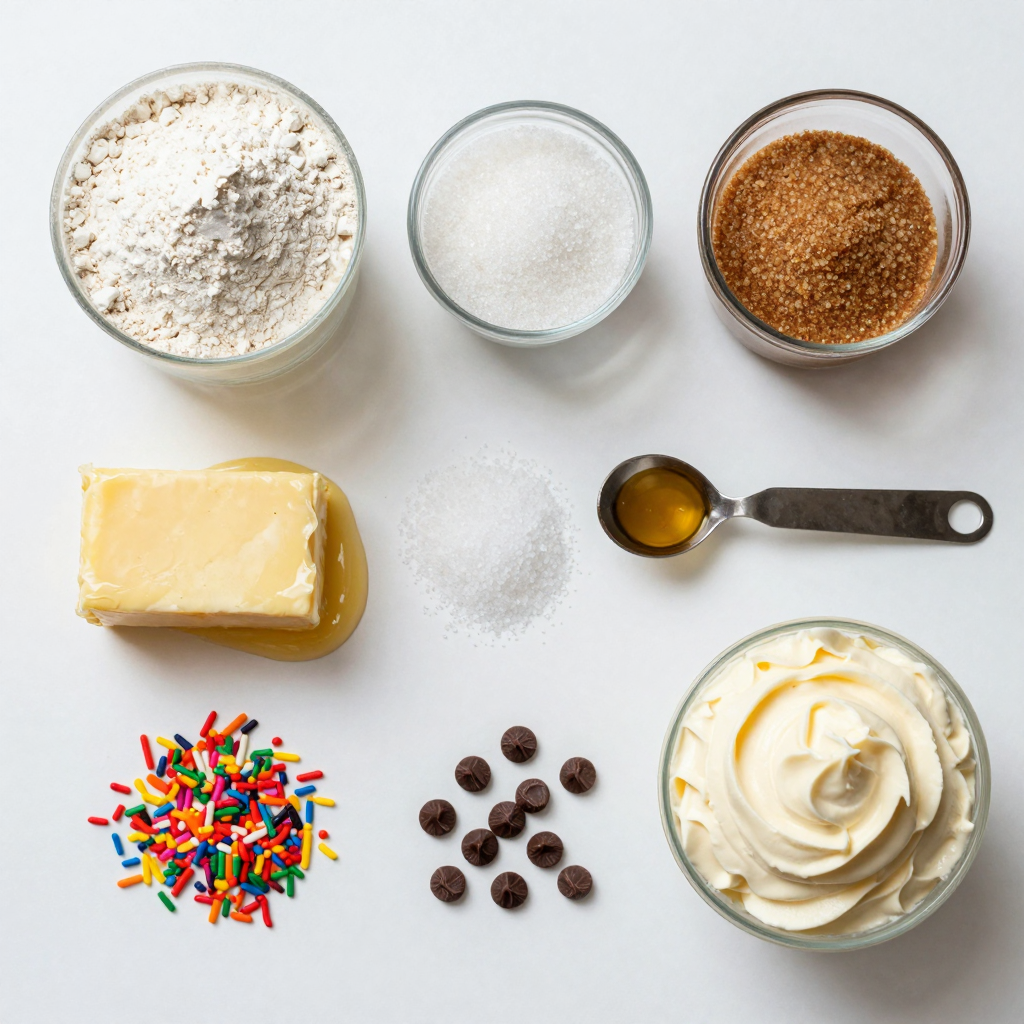
Main Ingredients Needed
- 1 cup all-purpose flour (heat-treated)
- 1/4 cup granulated sugar
- 1/4 cup brown sugar, packed
- 1/2 cup unsalted butter, melted
- 1/4 teaspoon salt
- 1 teaspoon vanilla extract
- 1/2 cup rainbow sprinkles
- 1/2 cup mini chocolate chips (optional)
- 1 cup vanilla frosting
Important Ingredient Notes
Heat-treating flour is key for safety. Raw flour can have germs. To heat-treat, spread the flour on a baking sheet. Bake it at 350°F (175°C) for five minutes. This step kills any harmful bacteria, making it safe to eat without baking.
If you want a gluten-free option, you can use a gluten-free flour blend. Look for one that is designed for baking. This makes it easy for everyone to enjoy these tasty bars.
Optional Add-ins and Substitutions
Feel free to mix it up with different sprinkles. You can use chocolate sprinkles, or even themed sprinkles for events. For frosting, try chocolate or cream cheese frosting instead. Each will give a new twist to the bars. You can always experiment to find your favorite combination!

Step-by-Step Instructions
Preparation Steps
1. Mixing the dry ingredients
Start with a large mixing bowl. Add 1 cup of heat-treated flour, 1/4 cup of granulated sugar, 1/4 cup of brown sugar, and 1/4 teaspoon of salt. Use a whisk to blend them well. This mix forms the base of your bars.
2. Combining wet ingredients
Next, pour in 1/2 cup of melted unsalted butter and 1 teaspoon of vanilla extract. Stir until everything combines into a dough. This part brings the sweetness and rich flavor to the bars.
Assembling the Bars
1. Pressing mixture into the pan
Line an 8×8-inch square baking pan with parchment paper. Leave some paper hanging over the edges. This makes it easy to lift the bars later. Press the dough evenly into the pan. Use a spatula to smooth the top.
2. Spreading the frosting evenly
Grab 1 cup of vanilla frosting. Spread it over the pressed mixture. Use your spatula to create a nice, even layer. For fun, sprinkle some extra rainbow sprinkles on top for color and crunch.
Setting the Bars
1. Refrigeration time and tips for proper setting
Place the pan in the fridge for at least 30 minutes. This helps the bars firm up. If you want them extra solid, leave them in longer. Once set, lift the bars out using the parchment paper. Cut into squares and enjoy!
Pro Tips
- Heat-Treat Your Flour: To ensure your flour is safe to eat raw, heat it in the oven at 350°F (175°C) for about 5-10 minutes before using it in the recipe.
- Customize Your Sprinkles: Feel free to mix different colors of sprinkles, or even use themed sprinkles to match a holiday or celebration!
- Chill Thoroughly: Make sure to refrigerate the bars for the full 30 minutes to achieve the perfect texture for cutting and serving.
- Use Parchment Paper: Lining the pan with parchment paper not only makes for easy removal but also helps prevent the bars from sticking to the bottom.
Tips & Tricks
Common Mistakes to Avoid
- Overmixing the batter: Mixing too much can make your bars dense. Just mix until combined.
- Skipping refrigeration: If you don’t chill the bars, they will stay too soft. Chill for at least 30 minutes.
Ingredient Adjustments for Taste
- Reducing sugar for less sweetness: You can cut down the granulated sugar. This will make the bars less sweet without losing flavor.
- Adding flavor extracts: Try different extracts like almond or coconut. Just a little can change the taste.
Equipment Suggestions
- Best mixing bowls and tools: Use a large mixing bowl for easy stirring. A sturdy spatula helps combine the batter well.
- Recommended baking pan types: A metal or glass 8×8-inch pan works best. Line it with parchment paper for easy removal.

Variations
Flavor Variations
You can change the flavor of your No-Bake Funfetti Cake Batter Bars easily. Try making chocolate cake batter bars by swapping in chocolate cake mix for the flour. Just mix it in as you would the flour. This gives a rich, chocolatey taste that many love.
Another fun twist is using peanut butter. Replace the butter with creamy peanut butter. This adds a nutty flavor that pairs well with sprinkles. You can also mix in mini chocolate chips for extra indulgence.
Seasonal Decorations
Make your bars pop with seasonal decorations. Use holiday-themed sprinkles for Christmas, Halloween, or birthdays. You can find sprinkles shaped like stars, hearts, or seasonal colors. This makes the bars festive and fun for any occasion.
You can also change the color of your sprinkles based on the season. For spring, use pastel colors. For summer, bright colors shine. This small touch makes your bars look special and inviting.
Vegan Options
Want a vegan version? It’s easy! For dairy-free substitutions, use coconut oil in place of butter. It gives a nice flavor and texture. You can also use plant-based milk for the frosting.
For frosting, try a vegan buttercream made with powdered sugar and plant-based butter. This way, you keep the creamy texture without using dairy. These options make your delicious bars suitable for everyone!
Storage Info
How to Store Leftovers
To keep your No-Bake Funfetti Cake Batter Bars fresh, store them in the refrigerator. Place the bars in an airtight container. This helps keep them moist and tasty. You can also cover them tightly with plastic wrap. If you want to save them for later, you can freeze them. Cut the bars into squares first. Wrap each piece in plastic wrap and then put them in a freezer bag. They will stay fresh this way!
Shelf Life
When stored correctly, these bars can last about a week in the fridge. If you freeze them, expect them to stay fresh for up to three months. Always check for any signs of spoilage before eating them. Look for changes in color or smell.
Reheating Recommendations
You don’t need to reheat these bars, as they are best served cold. If you want a warm treat, you can microwave them for a few seconds. Just be careful not to overheat. A few seconds is all you need to enjoy a soft, tasty treat!
FAQs
Can I use regular flour instead of heat-treated flour?
No, you should not use regular flour. Raw flour can contain harmful bacteria. Heat-treated flour kills these germs and makes the flour safe for no-bake recipes. You can easily heat-treat flour at home by baking it on a baking sheet. Spread it out and bake at 350°F for about five minutes. Let it cool before using.
How long do these bars stay fresh?
These bars stay fresh for about five days at room temperature. To keep them longer, store them in the fridge. You know they are spoiled if they smell bad or look dry. Check for any mold as well. If you see any signs of spoilage, toss them out.
Can I make these bars in advance?
Yes, you can make these bars ahead of time. They are great for parties and special events. Just prepare them a day or two before. Store them in the fridge until you are ready to serve. To save time, you can also press the mixture into the pan and chill it. Frost just before serving for the best taste.
What if I don’t have access to certain ingredients?
You can easily swap ingredients if needed. If you lack rainbow sprinkles, use chocolate or other types. For the frosting, any flavor works well. Don’t have mini chocolate chips? You can skip them or use nuts instead. Just be creative and adjust the recipe to fit what you have at home.
This blog post covered the key ingredients, steps, and tips for making delicious dessert bars. We discussed crucial details like heat-treating flour and gluten-free options. I shared variations and ideas for seasonal fun, plus how to store and reheat leftovers.
In summary, these bars are easy to make and fun to customize. With simple ingredients and clear steps, you’re ready to bake. Enjoy creating your own tasty treats!
![- 1 cup all-purpose flour (heat-treated) - 1/4 cup granulated sugar - 1/4 cup brown sugar, packed - 1/2 cup unsalted butter, melted - 1/4 teaspoon salt - 1 teaspoon vanilla extract - 1/2 cup rainbow sprinkles - 1/2 cup mini chocolate chips (optional) - 1 cup vanilla frosting Heat-treating flour is key for safety. Raw flour can have germs. To heat-treat, spread the flour on a baking sheet. Bake it at 350°F (175°C) for five minutes. This step kills any harmful bacteria, making it safe to eat without baking. If you want a gluten-free option, you can use a gluten-free flour blend. Look for one that is designed for baking. This makes it easy for everyone to enjoy these tasty bars. Feel free to mix it up with different sprinkles. You can use chocolate sprinkles, or even themed sprinkles for events. For frosting, try chocolate or cream cheese frosting instead. Each will give a new twist to the bars. You can always experiment to find your favorite combination! 1. Mixing the dry ingredients Start with a large mixing bowl. Add 1 cup of heat-treated flour, 1/4 cup of granulated sugar, 1/4 cup of brown sugar, and 1/4 teaspoon of salt. Use a whisk to blend them well. This mix forms the base of your bars. 2. Combining wet ingredients Next, pour in 1/2 cup of melted unsalted butter and 1 teaspoon of vanilla extract. Stir until everything combines into a dough. This part brings the sweetness and rich flavor to the bars. 1. Pressing mixture into the pan Line an 8x8-inch square baking pan with parchment paper. Leave some paper hanging over the edges. This makes it easy to lift the bars later. Press the dough evenly into the pan. Use a spatula to smooth the top. 2. Spreading the frosting evenly Grab 1 cup of vanilla frosting. Spread it over the pressed mixture. Use your spatula to create a nice, even layer. For fun, sprinkle some extra rainbow sprinkles on top for color and crunch. 1. Refrigeration time and tips for proper setting Place the pan in the fridge for at least 30 minutes. This helps the bars firm up. If you want them extra solid, leave them in longer. Once set, lift the bars out using the parchment paper. Cut into squares and enjoy! For the complete recipe, check out the Full Recipe section. - Overmixing the batter: Mixing too much can make your bars dense. Just mix until combined. - Skipping refrigeration: If you don’t chill the bars, they will stay too soft. Chill for at least 30 minutes. - Reducing sugar for less sweetness: You can cut down the granulated sugar. This will make the bars less sweet without losing flavor. - Adding flavor extracts: Try different extracts like almond or coconut. Just a little can change the taste. - Best mixing bowls and tools: Use a large mixing bowl for easy stirring. A sturdy spatula helps combine the batter well. - Recommended baking pan types: A metal or glass 8x8-inch pan works best. Line it with parchment paper for easy removal. For the full recipe, check out the No-Bake Funfetti Cake Batter Bars. {{image_2}} You can change the flavor of your No-Bake Funfetti Cake Batter Bars easily. Try making chocolate cake batter bars by swapping in chocolate cake mix for the flour. Just mix it in as you would the flour. This gives a rich, chocolatey taste that many love. Another fun twist is using peanut butter. Replace the butter with creamy peanut butter. This adds a nutty flavor that pairs well with sprinkles. You can also mix in mini chocolate chips for extra indulgence. Make your bars pop with seasonal decorations. Use holiday-themed sprinkles for Christmas, Halloween, or birthdays. You can find sprinkles shaped like stars, hearts, or seasonal colors. This makes the bars festive and fun for any occasion. You can also change the color of your sprinkles based on the season. For spring, use pastel colors. For summer, bright colors shine. This small touch makes your bars look special and inviting. Want a vegan version? It’s easy! For dairy-free substitutions, use coconut oil in place of butter. It gives a nice flavor and texture. You can also use plant-based milk for the frosting. For frosting, try a vegan buttercream made with powdered sugar and plant-based butter. This way, you keep the creamy texture without using dairy. These options make your delicious bars suitable for everyone! For the full recipe, check out the [Full Recipe]. To keep your No-Bake Funfetti Cake Batter Bars fresh, store them in the refrigerator. Place the bars in an airtight container. This helps keep them moist and tasty. You can also cover them tightly with plastic wrap. If you want to save them for later, you can freeze them. Cut the bars into squares first. Wrap each piece in plastic wrap and then put them in a freezer bag. They will stay fresh this way! When stored correctly, these bars can last about a week in the fridge. If you freeze them, expect them to stay fresh for up to three months. Always check for any signs of spoilage before eating them. Look for changes in color or smell. You don’t need to reheat these bars, as they are best served cold. If you want a warm treat, you can microwave them for a few seconds. Just be careful not to overheat. A few seconds is all you need to enjoy a soft, tasty treat! No, you should not use regular flour. Raw flour can contain harmful bacteria. Heat-treated flour kills these germs and makes the flour safe for no-bake recipes. You can easily heat-treat flour at home by baking it on a baking sheet. Spread it out and bake at 350°F for about five minutes. Let it cool before using. These bars stay fresh for about five days at room temperature. To keep them longer, store them in the fridge. You know they are spoiled if they smell bad or look dry. Check for any mold as well. If you see any signs of spoilage, toss them out. Yes, you can make these bars ahead of time. They are great for parties and special events. Just prepare them a day or two before. Store them in the fridge until you are ready to serve. To save time, you can also press the mixture into the pan and chill it. Frost just before serving for the best taste. You can easily swap ingredients if needed. If you lack rainbow sprinkles, use chocolate or other types. For the frosting, any flavor works well. Don’t have mini chocolate chips? You can skip them or use nuts instead. Just be creative and adjust the recipe to fit what you have at home. For the full recipe, check the original instructions. This blog post covered the key ingredients, steps, and tips for making delicious dessert bars. We discussed crucial details like heat-treating flour and gluten-free options. I shared variations and ideas for seasonal fun, plus how to store and reheat leftovers. In summary, these bars are easy to make and fun to customize. With simple ingredients and clear steps, you're ready to bake. Enjoy creating your own tasty treats!](https://dailydishlab.com/wp-content/uploads/2025/07/c4f5a401-6c49-4de0-bdd4-db0dcac5f5d0-300x300.webp)
No-Bake Funfetti Cake Batter Bars
Ingredients
1 cup all-purpose flour (heat-treated)
1/4 cup granulated sugar
1/4 cup brown sugar, packed
1/2 cup unsalted butter, melted
1/4 teaspoon salt
1 teaspoon vanilla extract
1/2 cup rainbow sprinkles
1/2 cup mini chocolate chips (optional)
1 cup vanilla frosting
Instructions
In a large mixing bowl, combine the heat-treated flour, granulated sugar, brown sugar, and salt.
Pour in the melted butter and vanilla extract. Mix until well combined and a dough forms.
Fold in the rainbow sprinkles and mini chocolate chips if using.
Line an 8×8-inch square baking pan with parchment paper, leaving some overhang for easy removal later.
Press the cake batter mixture into the prepared pan evenly, smoothing the top with a spatula.
Spread the vanilla frosting over the pressed mixture, using a spatula to create an even layer.
Sprinkle additional rainbow sprinkles over the frosting for added decoration.
Refrigerate for at least 30 minutes to firm up the bars.
Once set, lift the bars from the pan using the parchment overhang and cut into squares.
Prep Time: 15 minutes | Total Time: 45 minutes | Servings: 16 squares
![- 1 cup all-purpose flour (heat-treated) - 1/4 cup granulated sugar - 1/4 cup brown sugar, packed - 1/2 cup unsalted butter, melted - 1/4 teaspoon salt - 1 teaspoon vanilla extract - 1/2 cup rainbow sprinkles - 1/2 cup mini chocolate chips (optional) - 1 cup vanilla frosting Heat-treating flour is key for safety. Raw flour can have germs. To heat-treat, spread the flour on a baking sheet. Bake it at 350°F (175°C) for five minutes. This step kills any harmful bacteria, making it safe to eat without baking. If you want a gluten-free option, you can use a gluten-free flour blend. Look for one that is designed for baking. This makes it easy for everyone to enjoy these tasty bars. Feel free to mix it up with different sprinkles. You can use chocolate sprinkles, or even themed sprinkles for events. For frosting, try chocolate or cream cheese frosting instead. Each will give a new twist to the bars. You can always experiment to find your favorite combination! 1. Mixing the dry ingredients Start with a large mixing bowl. Add 1 cup of heat-treated flour, 1/4 cup of granulated sugar, 1/4 cup of brown sugar, and 1/4 teaspoon of salt. Use a whisk to blend them well. This mix forms the base of your bars. 2. Combining wet ingredients Next, pour in 1/2 cup of melted unsalted butter and 1 teaspoon of vanilla extract. Stir until everything combines into a dough. This part brings the sweetness and rich flavor to the bars. 1. Pressing mixture into the pan Line an 8x8-inch square baking pan with parchment paper. Leave some paper hanging over the edges. This makes it easy to lift the bars later. Press the dough evenly into the pan. Use a spatula to smooth the top. 2. Spreading the frosting evenly Grab 1 cup of vanilla frosting. Spread it over the pressed mixture. Use your spatula to create a nice, even layer. For fun, sprinkle some extra rainbow sprinkles on top for color and crunch. 1. Refrigeration time and tips for proper setting Place the pan in the fridge for at least 30 minutes. This helps the bars firm up. If you want them extra solid, leave them in longer. Once set, lift the bars out using the parchment paper. Cut into squares and enjoy! For the complete recipe, check out the Full Recipe section. - Overmixing the batter: Mixing too much can make your bars dense. Just mix until combined. - Skipping refrigeration: If you don’t chill the bars, they will stay too soft. Chill for at least 30 minutes. - Reducing sugar for less sweetness: You can cut down the granulated sugar. This will make the bars less sweet without losing flavor. - Adding flavor extracts: Try different extracts like almond or coconut. Just a little can change the taste. - Best mixing bowls and tools: Use a large mixing bowl for easy stirring. A sturdy spatula helps combine the batter well. - Recommended baking pan types: A metal or glass 8x8-inch pan works best. Line it with parchment paper for easy removal. For the full recipe, check out the No-Bake Funfetti Cake Batter Bars. {{image_2}} You can change the flavor of your No-Bake Funfetti Cake Batter Bars easily. Try making chocolate cake batter bars by swapping in chocolate cake mix for the flour. Just mix it in as you would the flour. This gives a rich, chocolatey taste that many love. Another fun twist is using peanut butter. Replace the butter with creamy peanut butter. This adds a nutty flavor that pairs well with sprinkles. You can also mix in mini chocolate chips for extra indulgence. Make your bars pop with seasonal decorations. Use holiday-themed sprinkles for Christmas, Halloween, or birthdays. You can find sprinkles shaped like stars, hearts, or seasonal colors. This makes the bars festive and fun for any occasion. You can also change the color of your sprinkles based on the season. For spring, use pastel colors. For summer, bright colors shine. This small touch makes your bars look special and inviting. Want a vegan version? It’s easy! For dairy-free substitutions, use coconut oil in place of butter. It gives a nice flavor and texture. You can also use plant-based milk for the frosting. For frosting, try a vegan buttercream made with powdered sugar and plant-based butter. This way, you keep the creamy texture without using dairy. These options make your delicious bars suitable for everyone! For the full recipe, check out the [Full Recipe]. To keep your No-Bake Funfetti Cake Batter Bars fresh, store them in the refrigerator. Place the bars in an airtight container. This helps keep them moist and tasty. You can also cover them tightly with plastic wrap. If you want to save them for later, you can freeze them. Cut the bars into squares first. Wrap each piece in plastic wrap and then put them in a freezer bag. They will stay fresh this way! When stored correctly, these bars can last about a week in the fridge. If you freeze them, expect them to stay fresh for up to three months. Always check for any signs of spoilage before eating them. Look for changes in color or smell. You don’t need to reheat these bars, as they are best served cold. If you want a warm treat, you can microwave them for a few seconds. Just be careful not to overheat. A few seconds is all you need to enjoy a soft, tasty treat! No, you should not use regular flour. Raw flour can contain harmful bacteria. Heat-treated flour kills these germs and makes the flour safe for no-bake recipes. You can easily heat-treat flour at home by baking it on a baking sheet. Spread it out and bake at 350°F for about five minutes. Let it cool before using. These bars stay fresh for about five days at room temperature. To keep them longer, store them in the fridge. You know they are spoiled if they smell bad or look dry. Check for any mold as well. If you see any signs of spoilage, toss them out. Yes, you can make these bars ahead of time. They are great for parties and special events. Just prepare them a day or two before. Store them in the fridge until you are ready to serve. To save time, you can also press the mixture into the pan and chill it. Frost just before serving for the best taste. You can easily swap ingredients if needed. If you lack rainbow sprinkles, use chocolate or other types. For the frosting, any flavor works well. Don’t have mini chocolate chips? You can skip them or use nuts instead. Just be creative and adjust the recipe to fit what you have at home. For the full recipe, check the original instructions. This blog post covered the key ingredients, steps, and tips for making delicious dessert bars. We discussed crucial details like heat-treating flour and gluten-free options. I shared variations and ideas for seasonal fun, plus how to store and reheat leftovers. In summary, these bars are easy to make and fun to customize. With simple ingredients and clear steps, you're ready to bake. Enjoy creating your own tasty treats!](https://dailydishlab.com/wp-content/uploads/2025/07/c4f5a401-6c49-4de0-bdd4-db0dcac5f5d0-300x300.webp)
No-Bake Funfetti Cake Batter Bars
Ingredients
- 1 cup all-purpose flour (heat-treated)
- 1/4 cup granulated sugar
- 1/4 cup brown sugar, packed
- 1/2 cup unsalted butter, melted
- 1/4 teaspoon salt
- 1 teaspoon vanilla extract
- 1/2 cup rainbow sprinkles
- 1/2 cup mini chocolate chips (optional)
- 1 cup vanilla frosting
Instructions
- In a large mixing bowl, combine the heat-treated flour, granulated sugar, brown sugar, and salt.
- Pour in the melted butter and vanilla extract. Mix until well combined and a dough forms.
- Fold in the rainbow sprinkles and mini chocolate chips if using.
- Line an 8x8-inch square baking pan with parchment paper, leaving some overhang for easy removal later.
- Press the cake batter mixture into the prepared pan evenly, smoothing the top with a spatula.
- Spread the vanilla frosting over the pressed mixture, using a spatula to create an even layer.
- Sprinkle additional rainbow sprinkles over the frosting for added decoration.
- Refrigerate for at least 30 minutes to firm up the bars.
- Once set, lift the bars from the pan using the parchment overhang and cut into squares.


![- 1 cup rolled oats - 1 cup almond milk (or your preferred milk) - 1/2 cup plain Greek yogurt - 1/4 cup cream cheese, softened - 2 tablespoons maple syrup (or honey) - 1 teaspoon vanilla extract - 1/2 cup fresh blueberries - 1 tablespoon chia seeds (optional) - 1/4 teaspoon ground cinnamon - Fresh blueberries and graham cracker crumbs for topping - If you want dairy-free options, swap cream cheese and Greek yogurt for coconut yogurt. Almond milk works well, but you can also use oat or soy milk. - For gluten-free oats, use certified gluten-free rolled oats. They are easy to find in most stores. - If you prefer a different sweetener, try agave syrup or coconut sugar instead of maple syrup or honey. When I create this dish, I aim for the best taste and texture. These ingredients blend well, giving you that cheesecake flavor you crave. The oats soak up the almond milk and yogurt, creating a creamy base. The blueberries add a burst of natural sweetness and freshness. Plus, the graham cracker crumbs on top provide a nice crunch. You can find the full recipe here, which shows you how to mix everything perfectly. 1. In a medium bowl, combine the rolled oats, almond milk, Greek yogurt, and cream cheese. 2. Whisk these ingredients together until they form a creamy mixture. 3. Next, stir in the maple syrup, vanilla extract, chia seeds, and ground cinnamon. 4. Mix until all the flavors blend smoothly. 5. Now, gently fold in the fresh blueberries. 6. Be careful not to crush the blueberries while mixing. 1. Divide the mixture evenly into two mason jars or airtight containers. 2. Close the jars with their lids tightly. 3. Place the jars in the fridge overnight. 4. This helps the oats soak up the flavors and get soft. 1. When it's time to serve, remove the jars from the fridge. 2. Give each jar a good stir to mix everything up again. 3. For a cheesecake effect, top your oats with more fresh blueberries. 4. Sprinkle graham cracker crumbs on top to finish it off. For the full recipe, you can refer to the recipe section above. To get the best texture, use rolled oats. They soak up the liquid without getting mushy. You want your oats creamy but still holding their shape. Avoid quick oats; they can turn your dish into a mushy mess. For a thicker texture, add a bit more oats or reduce the milk slightly. Spices can take your oats to the next level. A pinch of nutmeg or a dash of vanilla can make a big difference. You can also add fresh lemon zest for a bright flavor. Don't forget about crunch! Toss in some chopped nuts or seeds. They add a nice texture and extra nutrition. Making a larger batch saves time. Double or triple the recipe and store in jars. This way, you can grab a jar for breakfast all week. These oats keep well in the fridge for up to five days. Use airtight containers to keep them fresh. Enjoy a quick and easy meal every morning! For the full recipe, check the earlier section. {{image_2}} You can swap blueberries for other fruits. Strawberries, raspberries, or blackberries work great, too. Each fruit brings its own sweet flavor. You can also use seasonal fruits. In summer, try peaches or cherries. In fall, apple slices or pumpkin puree can add a fun twist. Want to make your oats even better? You can add protein powders or nut butters. These add a great taste and extra protein. Almond butter or peanut butter mix well. Seeds like chia or flax can add crunch and fiber. They also help keep you full longer. Feeling fancy? You can create fun dessert flavors. Try adding cocoa powder for chocolate oats. You can also use caramel syrup for a sweet treat. Using flavored yogurt can make it even tastier. Vanilla or strawberry yogurt adds a nice twist. You can explore so many flavors with just a few tweaks! Check the [Full Recipe] for all the details you need. To keep your blueberry cheesecake overnight oats fresh, use glass jars or airtight containers. These options seal well and prevent odors from mixing in the fridge. Make sure to store them in the refrigerator. This keeps the oats cool and safe to eat. For the best taste and texture, eat your oats within three days. After this, the oats may lose their creamy texture. Signs of spoilage include a sour smell, watery separation, or mold. If you see any of these, throw them away. Yes, you can freeze overnight oats! This is great for meal prep. Just make sure to use freezer-safe containers. When you’re ready to eat, transfer the oats to the fridge to thaw overnight. Avoid heating them directly from the freezer. This can change the texture and flavor. Blueberry Cheesecake Overnight Oats stay fresh for about 3 to 5 days in the fridge. Store them in airtight containers. This keeps them moist and tasty. If you notice any strange smell or mold, it's best to toss them out. Yes, you can use frozen blueberries. However, they may change the texture a bit. Frozen berries can make the oats a little mushy. If you want to keep the fresh taste, add frozen blueberries just before serving. Almond milk is my go-to for these oats. It adds a nice flavor without extra calories. You can also use oat milk, soy milk, or regular cow's milk. Choose what you like best. Each type gives a different taste and creaminess. To make this recipe vegan, swap Greek yogurt for coconut yogurt. Use vegan cream cheese instead of regular cream cheese. For sweeteners, choose maple syrup or agave nectar. These simple swaps keep it dairy-free and delicious. Yes, you can meal prep these oats for the week. Just make sure to portion them in jars. They keep well in the fridge. This is a great way to have a quick and healthy breakfast ready. Just grab a jar each morning! For the full recipe, check out the provided link. This article covered how to make Blueberry Cheesecake Overnight Oats. We went over key ingredients, easy steps, and various storage tips. You learned how to customize your oats and enjoy delicious flavors. Whether you need a quick breakfast or snack, these oats fit the bill. Enjoy the creamy texture and fresh taste. Give this recipe a try and discover your favorite mix!](https://dailydishlab.com/wp-content/uploads/2025/07/6a6a2d5b-d90b-4d1a-93b4-34eef24f4ecd-768x768.webp)