No Bake Key Lime Energy Balls Refreshing Snack Option

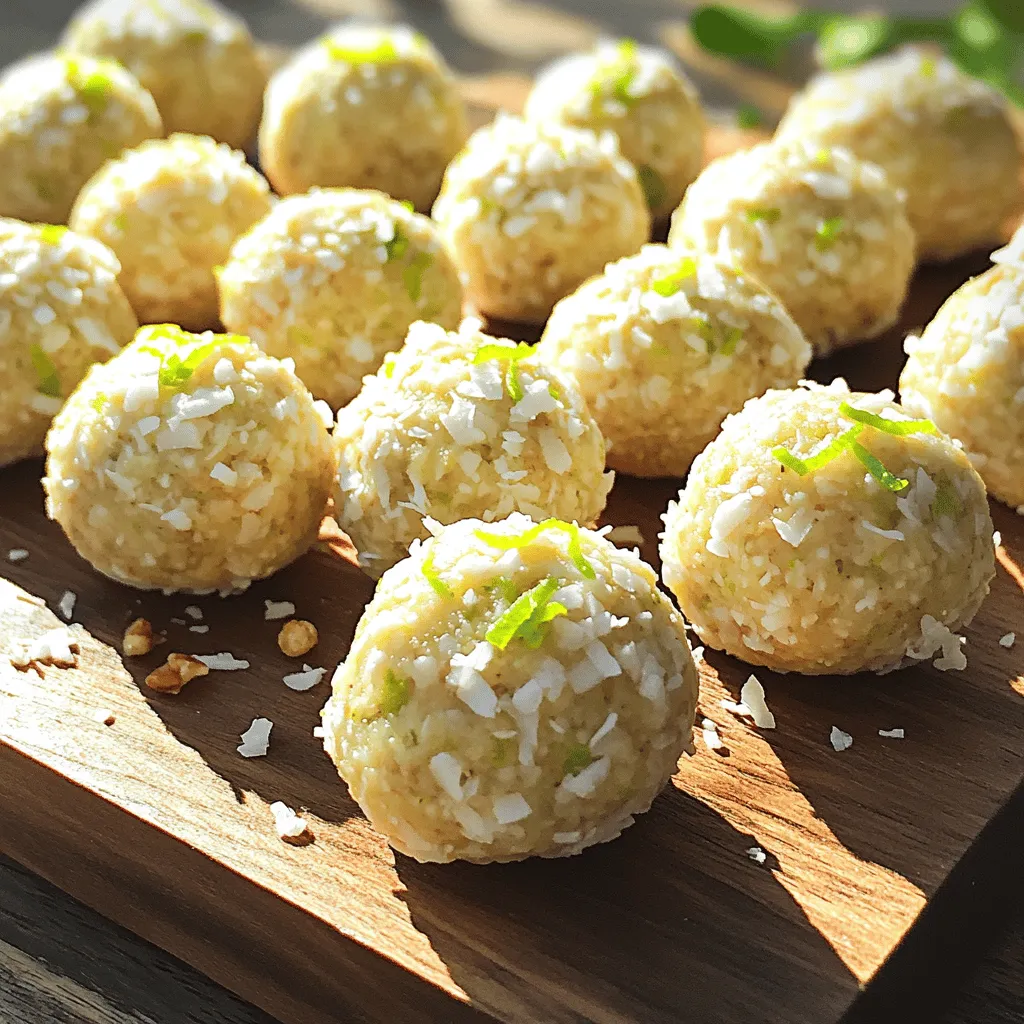
Looking for a delicious snack that gives you energy without baking? Allow me to introduce you to No Bake Key Lime Energy Balls! These bite-sized treats pack a zesty punch, are quick to make, and are loaded with wholesome ingredients. Whether you want a pick-me-up or a refreshing treat, these energy balls hit the spot. Ready to make your own? Let’s dive into this tasty recipe!
Why I Love This Recipe
- Quick and Easy: This recipe requires no baking, making it a convenient option for busy days.
- Healthy Ingredients: Packed with wholesome oats, coconut, and nut butter, these energy balls are a nutritious snack.
- Refreshing Flavor: The zesty key lime adds a bright and refreshing taste that’s perfect for any time of the year.
- Customizable: You can easily adapt the recipe by adding your favorite nuts or seeds for extra crunch.
Ingredients
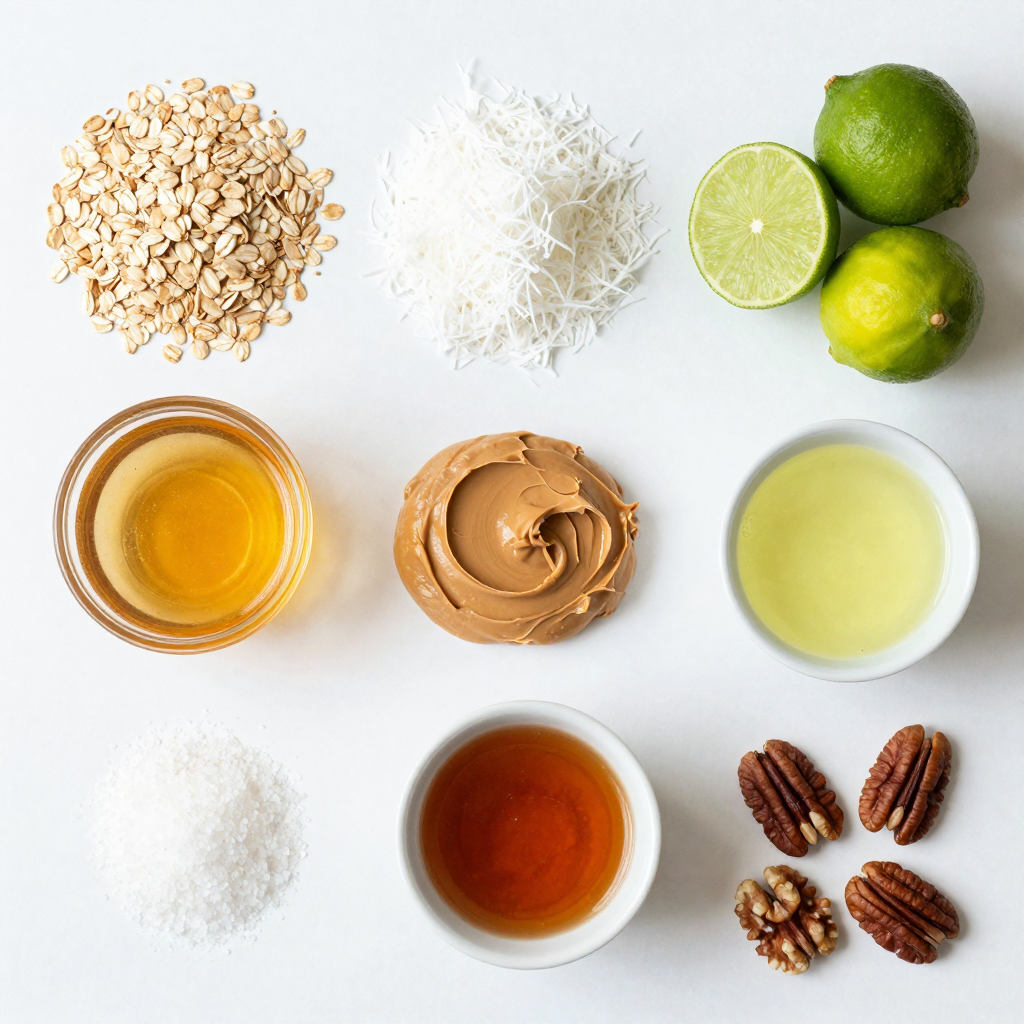
To make No Bake Key Lime Energy Balls, you need some simple and fresh ingredients. Here’s a list to get you started:
- 1 cup rolled oats
- 1/2 cup unsweetened shredded coconut
- 1/3 cup honey or maple syrup
- 1/4 cup almond butter or peanut butter
- Zest of 2 key limes
- 2 tablespoons lime juice
- 1 teaspoon vanilla extract
- A pinch of salt
- Optional: 1/4 cup chopped walnuts or pecans
Each ingredient plays a key role. Rolled oats give the balls a great base. They add fiber to keep you full. Shredded coconut brings a nice, chewy texture and a hint of tropical flavor.
Honey or maple syrup acts as a natural sweetener. It helps bind the mixture together. Almond or peanut butter adds creaminess and healthy fats. The key lime zest and juice provide that zesty punch that makes these energy balls pop.
Vanilla extract adds warmth and depth, while salt enhances the overall flavor. If you want a nutty crunch, you can add chopped walnuts or pecans. They add extra texture and taste.
This mix of flavors and textures makes these energy balls a refreshing snack. They are perfect for a boost of energy anytime!

Step-by-Step Instructions
Preparation of Dry Ingredients
Start by mixing the rolled oats and shredded coconut in a large bowl. Use your hands or a spoon to combine them well. This step sets the base for your energy balls. The oats add fiber, while the coconut gives a nice texture.
Mixing Wet Ingredients
In another bowl, whisk together the honey or maple syrup, almond or peanut butter, lime zest, lime juice, vanilla extract, and a pinch of salt. Make sure everything is smooth and mixed well. This mixture brings a sweet and tangy flavor that makes these energy balls special.
Combining Mixtures
Now, pour the wet ingredients into the dry ingredients. Stir them together until everything is fully combined. If you want a crunch, add in the chopped walnuts or pecans. Once mixed, use your hands to form small balls, about 1 inch in size. You should get around 12 to 15 energy balls.
Chilling and Serving
Place the formed balls on a parchment-lined tray. Refrigerate them for at least 30 minutes. This step helps them firm up. Once chilled, they are ready to enjoy. You can store any leftovers in an airtight container in the fridge for up to one week. Enjoy these tasty bites as a quick snack or a healthy treat!
Pro Tips
- Use Fresh Key Limes: For the best flavor, use fresh key limes instead of bottled lime juice. The zest and juice from fresh limes will give your energy balls a bright and zesty taste.
- Chill for Better Texture: Allowing the energy balls to chill in the refrigerator for at least 30 minutes helps them firm up, making them easier to handle and enhancing their texture.
- Experiment with Mix-Ins: Feel free to customize your energy balls by adding other mix-ins like chocolate chips, dried fruit, or seeds for added flavor and nutrition.
- Store Properly: Keep any leftover energy balls in an airtight container in the refrigerator to maintain their freshness for up to one week.
Tips & Tricks
Perfecting the Texture
You may want to adjust the texture of your energy balls. If they feel too dry, add a bit more almond butter or honey. This will help bind the ingredients and make them soft. If they are too sticky, add more rolled oats. You can also mix in a bit of shredded coconut to balance things out.
Enhancing Flavor
To bring out more flavor, add extra key lime zest. This will give your energy balls a burst of zesty goodness. You could also use agave syrup instead of honey for a different sweetness. If you’re feeling adventurous, try adding a few drops of coconut extract for a new twist.
Health Benefits
These energy balls pack a punch of nutrition. Rolled oats are great for energy and fiber. They help keep you full longer. Almond butter adds healthy fats and protein. Key limes are high in vitamin C and antioxidants, boosting your immune system. Shredded coconut offers healthy fats too, making these snacks both tasty and good for you.

Variations
Customizing Ingredients
You can easily make these energy balls fit your needs. For a dairy-free option, simply use maple syrup instead of honey. To make them nut-free, swap almond butter for sun butter or a seed-based spread. If you want a gluten-free snack, choose oats labeled as gluten-free. These simple swaps help everyone enjoy this tasty treat.
Flavor Mix-Ins
Want to make your energy balls even better? Add some fun mix-ins! Chocolate chips add sweetness and richness. Dried fruits like cranberries or apricots bring a chewy texture. A few drops of coconut extract can boost the coconut flavor. Try different combinations to find your favorite mix!
Seasonal Twists
You can change the flavors with the seasons. In spring, use fresh strawberries or blueberries for a fruity kick. In fall, add pumpkin spice and pureed pumpkin for a cozy vibe. During winter, try adding peppermint extract for a refreshing twist. The options are endless, so let your creativity shine!
Storage Info
Storing Leftovers
To keep your energy balls fresh, place them in an airtight container. This helps lock in moisture and flavor. Store them in the fridge for easy access. I find they stay best when kept cold. If you use a glass container, it’s a great choice. Glass keeps the taste intact and is eco-friendly.
Freezing Options
You can freeze these energy balls for later use. First, lay them on a tray and freeze for about an hour. Once frozen, transfer them to a freezer bag. This prevents them from sticking together. To thaw, leave them in the fridge overnight. You can also let them sit at room temp for 15 to 30 minutes.
Shelf Life
These energy balls last about one week in the fridge. Check for signs of spoilage. If they smell sour or look dry, it’s best to toss them. Fresh energy balls should feel firm but not hard. If they change texture, that’s a sign they are past their prime. Enjoy them while they are still tasty!
FAQs
Can I substitute honey with another sweetener?
Yes, you can use maple syrup instead of honey. Both sweeteners work well. If you want to try something else, agave nectar can be a good option too. Just keep in mind that different sweeteners may change the taste slightly.
How long can I store No Bake Key Lime Energy Balls?
You can store these energy balls for up to one week in the fridge. Keep them in an airtight container. This helps them stay fresh and tasty. If you want to keep them longer, you can freeze them. They will last about three months in the freezer.
Can I add protein powder to the recipe?
Yes, you can add protein powder! It’s a great way to boost nutrition. Start with one to two tablespoons. Mix it in with the dry ingredients. This addition may change the texture a bit, so adjust the wet ingredients if needed.
You can make tasty No Bake Key Lime Energy Balls with simple ingredients. We discussed the steps to mix and chill them perfectly. Remember to customize flavors for a fun twist. These energy balls are nutritious and easy to store. With the right tips, you can enjoy them fresh or frozen. I hope you feel inspired to try this recipe and make it your own! Your kitchen will be filled with a refreshing key lime flavor that everyone will love.

No Bake Key Lime Energy Balls
Ingredients
1 cup rolled oats
1/2 cup unsweetened shredded coconut
1/3 cup honey or maple syrup
1/4 cup almond butter or peanut butter
Zest of 2 key limes
2 tablespoons lime juice
1 teaspoon vanilla extract
A pinch of salt
1/4 cup chopped walnuts or pecans (optional)
Instructions
In a large mixing bowl, combine the rolled oats and shredded coconut.
In a separate bowl, whisk together the honey (or maple syrup), almond butter (or peanut butter), key lime zest, lime juice, vanilla extract, and salt until smooth and well combined.
Pour the wet ingredients into the dry ingredients and mix until fully incorporated. If you’re using chopped nuts, fold them into the mixture.
Use your hands to form small balls, about 1 inch in diameter, from the mixture. You should get about 12 to 15 energy balls.
Place the formed energy balls on a parchment-lined tray and refrigerate for at least 30 minutes to firm up.
Once chilled, they’re ready to be enjoyed! Store any leftovers in an airtight container in the refrigerator for up to one week.
Prep Time: 10 min | Total Time: 40 min | Servings: 12-15

No Bake Key Lime Energy Balls
Ingredients
- 1 cup rolled oats
- 1/2 cup unsweetened shredded coconut
- 1/3 cup honey or maple syrup
- 1/4 cup almond butter or peanut butter
- Zest of 2 key limes
- 2 tablespoons lime juice
- 1 teaspoon vanilla extract
- A pinch of salt
- 1/4 cup chopped walnuts or pecans (optional)
Instructions
- In a large mixing bowl, combine the rolled oats and shredded coconut.
- In a separate bowl, whisk together the honey (or maple syrup), almond butter (or peanut butter), key lime zest, lime juice, vanilla extract, and salt until smooth and well combined.
- Pour the wet ingredients into the dry ingredients and mix until fully incorporated. If you’re using chopped nuts, fold them into the mixture.
- Use your hands to form small balls, about 1 inch in diameter, from the mixture. You should get about 12 to 15 energy balls.
- Place the formed energy balls on a parchment-lined tray and refrigerate for at least 30 minutes to firm up.
- Once chilled, they're ready to be enjoyed!


![For these muffins, you need simple, wholesome ingredients. Here’s what you will use: - 1 cup rolled oats - 1 cup canned pumpkin puree - 1/4 cup honey or maple syrup - 1/4 cup Greek yogurt - 2 large eggs - 1 teaspoon vanilla extract - 1 teaspoon baking powder - 1/2 teaspoon baking soda - 1 teaspoon ground cinnamon - 1/2 teaspoon ground nutmeg - 1/4 teaspoon salt These ingredients blend to create a moist and tasty treat. The oats add fiber, while pumpkin gives a rich flavor and nutrition. You can enhance your muffins with optional items. Try adding: - 1/2 cup chopped nuts (like walnuts or pecans) - 1/2 cup chocolate chips These extras add crunch and sweetness. You can mix and match based on your taste. If you need to swap ingredients, here are some ideas: - For honey or maple syrup, use agave syrup or coconut sugar. - Replace Greek yogurt with applesauce for a dairy-free option. - If you want a nut-free version, skip the nuts or use seeds instead. These swaps keep the muffins healthy while catering to your needs. You can find the full recipe above for step-by-step guidance. First, gather all your ingredients. You will need rolled oats, pumpkin puree, honey, Greek yogurt, eggs, and spices. Preheat your oven to 350°F (175°C). Line a muffin tin with paper liners or grease it lightly with oil. This step helps to prevent the muffins from sticking. In a large bowl, combine the rolled oats, baking powder, baking soda, salt, and spices. This includes ground cinnamon and nutmeg. Mix these ingredients well. An even mix ensures that each muffin gets the same flavor and rise. In a separate bowl, whisk together the pumpkin puree, honey or maple syrup, Greek yogurt, eggs, and vanilla. Make sure this mixture is smooth and creamy. Once combined, pour this wet mixture into the dry ingredients. Stir gently until just combined. If you want to add nuts or chocolate chips, fold them in now. Now you have a delicious batter ready for baking. Follow the [Full Recipe] to continue. Baking muffins can be fun and easy. To get the best results, start with fresh ingredients. Check the expiration dates on your baking powder and baking soda. Use room temperature eggs and yogurt for a better mix. Always preheat your oven. This helps muffins rise nicely. To get a soft, fluffy muffin, do not overmix your batter. Stir until the dry and wet ingredients just come together. Small lumps are okay! Overmixing makes muffins dense. Bake them until a toothpick comes out clean. This ensures they are cooked but not dry. You can boost flavor by adding spices like ginger or cloves. Try adding nuts or seeds for crunch and taste. For more nutrients, swap out some oats for ground flaxseed or chia seeds. This adds fiber and omega-3s. You can also use unsweetened applesauce instead of some sweetener for a healthier twist. For the complete recipe, check out the Full Recipe. {{image_2}} You can make these muffins gluten-free. Use gluten-free oats instead of regular rolled oats. Make sure to check the label to ensure they are certified gluten-free. For the flour, try almond flour or coconut flour. These flours add a nice texture and flavor. Adjust the amount of liquid in your recipe, as these flours absorb moisture differently. To make these muffins vegan, swap the eggs for flax eggs. Mix one tablespoon of ground flaxseed with three tablespoons of water for each egg. Let it sit for a few minutes until it thickens. Replace Greek yogurt with unsweetened applesauce or a dairy-free yogurt. Use maple syrup instead of honey for sweetness. This keeps the muffins moist while staying plant-based. Feel free to get creative with your muffins. Add-ins can change the flavor and texture. Some great options include: - 1/2 cup chopped nuts (walnuts or pecans) - 1/2 cup chocolate chips - 1/2 cup dried cranberries or raisins - 1/2 teaspoon of ginger or cloves for warmth - 1/4 cup of apple sauce for extra moisture For seasonal twists, try stirring in a bit of orange zest or a splash of maple extract. These small changes can elevate your muffins. You can also top them with pumpkin seeds or a sprinkle of cinnamon for extra flair. Enjoy experimenting with these variations from the Full Recipe! To keep your muffins fresh, store them in an airtight container. This helps avoid drying out. You can place a paper towel in the container. The towel absorbs excess moisture, keeping muffins soft. If you live in a humid area, store them in the fridge to prevent mold. You can freeze muffins for later use. First, let them cool completely. Wrap each muffin in plastic wrap. Then place them in a freezer-safe bag. This keeps them fresh for up to three months. When you're ready to eat, remove a muffin and thaw it overnight in the fridge. You can also warm it in the microwave for 15-20 seconds. Healthy Pumpkin Oat Muffins last for about five days at room temperature. If stored in the fridge, they can last up to a week. For the best taste, eat them within three days. You can find the full recipe above for detailed instructions. Enjoy these tasty treats while they are fresh! You can replace eggs with applesauce or mashed banana. Use 1/4 cup of either for each egg. This keeps the muffins moist and adds natural sweetness. You can also use flaxseed meal. Mix 1 tablespoon of flaxseed with 2.5 tablespoons of water. Let it sit for five minutes until it gels. Both options work well in this recipe. Rolled oats are best for these muffins. They give a nice texture and hold their shape. You can also use quick oats, but they will make the muffins softer. Avoid steel-cut oats, as they need more cooking time. Using rolled oats ensures a good balance of flavor and texture in every bite. Yes, you can use fresh pumpkin. Just cook it until soft, then blend until smooth. This adds a fresh flavor to your muffins. Make sure to measure the same amount as the canned pumpkin. Fresh pumpkin can be more watery, so drain any excess moisture if needed. Pumpkin is rich in vitamins A and C, which support your immune system. It also has fiber that helps digestion. Oats are a great source of whole grains. They lower cholesterol and keep you full longer. Together, they make a nutritious snack. Enjoy these muffins guilt-free! You can find the Full Recipe above for a tasty way to enjoy these benefits. Healthy pumpkin oat muffins are simple and tasty. We covered key ingredients and how to make them. You learned tips for perfect texture and added flavors. Variations cater to gluten-free and vegan diets. I also shared storage tips for freshness and longevity. In the end, these muffins offer a healthy option for any meal. Enjoy making them your own with different ingredients and flavors. Your baking journey can be both fun and healthy!](https://dailydishlab.com/wp-content/uploads/2025/07/c0729778-358d-4726-8681-cbd04cabebc9-768x768.webp)

![- 1 cup ricotta cheese - 2 large eggs - 1/4 cup granulated sugar - Zest of 1 lemon - 1/4 cup fresh lemon juice I love using ricotta cheese in these pancakes. It makes them soft and creamy. The eggs add richness and help the pancakes rise. Granulated sugar gives just the right hint of sweetness. Zest and juice from the lemon bring a bright, fresh flavor. - 1 cup all-purpose flour - 2 teaspoons baking powder - 1/4 teaspoon salt All-purpose flour gives the pancakes structure. Baking powder lifts the batter and keeps it light. A pinch of salt balances the sweetness and enhances the lemon's flavor. - 1/4 cup milk (or a dairy-free alternative) - Butter or oil for cooking Milk helps adjust the batter's consistency. You can use dairy-free milk if you prefer. Butter or oil is essential for cooking the pancakes. It prevents sticking and adds a nice golden color. For the full recipe, check out the details above. To start, grab a large mixing bowl. Add 1 cup of ricotta cheese, 2 large eggs, and 1/4 cup of granulated sugar. Use a whisk to mix these until smooth. It's important to blend well so your pancakes turn out fluffy. Next, add the zest of 1 lemon and 1/4 cup of fresh lemon juice. The zest gives a bright flavor, while the juice adds a nice tang. Mix again until everything is well combined. Now, take another bowl for the dry mix. Combine 1 cup of all-purpose flour, 2 teaspoons of baking powder, and 1/4 teaspoon of salt. Stir until it looks even. This blend helps the pancakes rise and stay light. Gradually add the dry mix to the wet mix. Use a spatula to fold the ingredients together. Be careful not to over-mix; some lumps are okay. If the batter seems too thick, pour in 1/4 cup of milk. This will help reach the right consistency for pouring. It's time to cook! Preheat a non-stick skillet over medium heat. Lightly grease it with butter or oil. Pour about 1/4 cup of batter for each pancake onto the skillet. Cook for 2-3 minutes. You'll see small bubbles form on the surface when they're ready to flip. Carefully turn the pancakes and cook for another 2-3 minutes until golden brown and fluffy. Repeat this with the remaining batter. Enjoy your Lemon Ricotta Pancakes warm! For the full recipe, check the section above. To make the best Lemon Ricotta Pancakes, start with the right skillet temperature. Preheat your non-stick skillet over medium heat. This helps the pancakes cook evenly and become fluffy. If the skillet is too hot, the pancakes can burn on the outside while staying raw inside. Next, avoid over-mixing your batter. Gently fold the wet and dry ingredients together until just combined. A few lumps are okay. Over-mixing can make the pancakes tough instead of light and airy. When it comes to toppings, get creative! Fresh fruit like berries or sliced bananas pairs well with the zesty lemon flavor. You can also drizzle maple syrup or honey on top for added sweetness. For an appealing look, stack the pancakes high on a plate. Add a dollop of whipped cream and sprinkle powdered sugar on top. This adds a nice touch and makes them even more tempting. If you need a gluten-free option, swap out the all-purpose flour for a gluten-free blend. Many brands offer good alternatives that work just as well. For a dairy-free version, use a plant-based ricotta and a non-dairy milk. Almond or oat milk works great here. These changes still keep the pancakes tasty and fluffy. For the full recipe, check the previous section. {{image_2}} You can make these pancakes even better with some fun additions. Try adding blueberries or chocolate chips to the batter before cooking. This small change adds bursts of flavor and sweetness to each bite. Another option is to switch up the citrus flavor. Instead of lemon, you can use orange zest. This will give your pancakes a bright and fresh taste, perfect for a sunny breakfast. Garnishing your pancakes can take them to the next level. Fresh fruits like strawberries, bananas, or raspberries pair nicely. Just slice them up and place them on top for a colorful look. Drizzling maple syrup or honey adds a nice touch of sweetness. You can also add a dollop of whipped cream for some extra creaminess. It makes your pancakes look fancy and taste even better. You can serve these pancakes in different ways. Stacking them high on a plate looks impressive and makes for a fun meal. Don’t forget to add your favorite toppings! If you want to try something new, consider a pancake waffle hybrid. Use the batter in a waffle maker instead. This gives you a crispy outside and fluffy inside, making for a great breakfast treat. For the full recipe, check out the detailed steps above. Enjoy these tasty lemon ricotta pancakes! To keep your pancakes fresh, follow these steps: - Refrigeration: Place leftover pancakes in an airtight container. They stay good for 3-4 days in the fridge. You can also stack them with parchment paper between layers to prevent sticking. - Freezer Tips: For long-term storage, freeze pancakes in a single layer first. Then, transfer them to a freezer bag or container. They can last up to 2 months. Label the bag with the date for easy tracking. You have a couple of options for reheating: - Microwave: This method is quick. Just place a pancake on a microwave-safe plate. Heat for 20-30 seconds. Add a damp paper towel on top to keep them moist. - Stovetop Reheating: This keeps the texture better. Heat a skillet over low heat. Add a small amount of butter or oil, then place the pancake in the skillet. Heat for about 1-2 minutes on each side until warm. To maintain the fluffy texture, avoid overheating. Check often to prevent drying out. Enjoy your pancakes warm! To make Lemon Ricotta Pancakes from scratch, you need simple ingredients. Here’s what you need: - 1 cup ricotta cheese - 2 large eggs - 1/4 cup granulated sugar - 1 teaspoon vanilla extract - Zest of 1 lemon - 1/4 cup fresh lemon juice - 1 cup all-purpose flour - 2 teaspoons baking powder - 1/4 teaspoon salt - 1/4 cup milk (or a dairy-free alternative) - Butter or oil for the skillet Start by whisking the ricotta, eggs, sugar, vanilla, lemon zest, and juice until smooth. In another bowl, mix the flour, baking powder, and salt. Combine the wet and dry ingredients gently to keep the batter light. If the batter is thick, add milk until it feels right. For the cooking, heat a skillet, pour the batter, and cook until fluffy. Check the [Full Recipe] for exact steps! Yes, you can substitute ricotta cheese. Some good options include: - Cottage cheese (blend for a smoother texture) - Cream cheese (soften it first) - Greek yogurt (adds protein and tang) These alternatives will change the flavor slightly but can still taste great. You can make Lemon Ricotta Pancakes even better with fun mix-ins and toppings. Consider these ideas: - Fresh blueberries or raspberries - Chocolate chips for sweetness - Chopped nuts for crunch - Honey or maple syrup for drizzling You can also top them with whipped cream, fresh fruit, or a sprinkle of powdered sugar. To keep your pancakes fluffy, follow these tips: - Avoid over-mixing the batter; lumps are okay. - Use a light hand when folding in the dry ingredients. - Ensure your skillet is at the right temperature; too hot can burn them. - Let the batter rest for a few minutes before cooking. These steps will help you achieve fluffy and light pancakes every time. In this post, we covered how to make delicious Lemon Ricotta Pancakes. You learned about the key ingredients, like ricotta, eggs, and sugar, and how to prepare them. I shared tips on cooking, serving, and even storing leftover pancakes. You can mix in fruits or switch up flavors to make them your own. Remember, with the right cooking methods, you can create light and fluffy pancakes every time. Enjoy your cooking adventure; these pancakes are sure to impress!](https://dailydishlab.com/wp-content/uploads/2025/06/08a6d73f-3236-4643-afc4-ab19070334e6-768x768.webp)
![- Fresh strawberries - Semi-sweet chocolate chips - Coconut oil for smooth melting - Crushed nuts (almonds or hazelnuts) - Colorful sprinkles - Lollipop sticks - Microwave-safe bowl - Parchment paper To make delicious chocolate-covered strawberry pops, you need a few key items. Start with fresh strawberries. Choose ripe, firm ones for the best taste. Next, grab semi-sweet chocolate chips. They melt well and add a rich flavor. Also, use coconut oil. This helps the chocolate melt smoothly and stick to the strawberries. You can add fun toppings to make your pops even better. Try crushed nuts, like almonds or hazelnuts, for a crunchy bite. Colorful sprinkles also add a nice touch. They make the pops look festive and fun. For the tools, have lollipop sticks ready. They help you hold the strawberries while dipping. Use a microwave-safe bowl for melting the chocolate. Finally, get parchment paper. It keeps your pops from sticking as they cool. With these ingredients and tools, you're all set to create a tasty delight. For the full recipe, check the details above. First, wash the strawberries gently. Make sure they are dry. Any water will stop the chocolate from sticking. You can use a paper towel to help. Next, take the lollipop sticks. Push one stick into the stem end of each strawberry. Aim to push it about halfway in. This gives you a nice handle for dipping. Now, let’s melt the chocolate. In a microwave-safe bowl, mix the chocolate chips with coconut oil. The coconut oil helps the chocolate melt smoothly. Microwave this mix in 30-second bursts. Stir after each burst until it is fully melted. Be careful not to overheat it, or the chocolate can burn. Hold the strawberry by the stick. Dip it into the melted chocolate. Make sure to cover it fully. Let any extra chocolate drip off. After dipping, it’s time to add toppings. While the chocolate is still wet, sprinkle on crushed nuts or colorful sprinkles. This helps them stick well. Finally, place the dipped strawberries upright in a container or on parchment paper. Let them sit until the chocolate hardens. This usually takes about 15-20 minutes at room temperature. If you’re in a hurry, the fridge works too; just chill them for 10 minutes. To get a smooth coat on your pops, always add coconut oil. Coconut oil helps the chocolate melt evenly. This helps create a shiny finish that looks great. If you don't have coconut oil, you can use vegetable oil. Just keep in mind that it may not shine as much. When you melt the chocolate, do it slowly. Use short bursts in the microwave. Stir well after each burst to keep the texture just right. Making your chocolate-covered strawberry pops look fun is easy. Use colorful lollipop holders to make them pop at parties. Consider sticking them in a piece of foam or a pretty container. You can also arrange them in a fun shape, like a heart. Another idea is to drizzle white chocolate on top for a more stylish look. These small touches make your dessert stand out. Watch out for moisture! If your strawberries are wet, the chocolate will not stick. Always dry them well before dipping. Another mistake is overheating the chocolate. If it gets too hot, it can clump. This ruins the smooth finish you want. Always use a low heat and stir often to prevent this. {{image_2}} You can switch up the chocolate for your pops. Dark chocolate gives a rich taste. Milk chocolate is sweet and creamy. White chocolate adds a fun twist with its sweet flavor. You can also add flavor. Try a drop of peppermint extract for a cool touch. Vanilla extract brings a warm, sweet note to the mix. Get creative with toppings! Coconut flakes add a tropical flair. Mini chocolate chips bring extra sweetness and crunch. You can also use crushed nuts for a nutty bite. Rainbow sprinkles make the pops fun and colorful. Just make sure to add them right after dipping the strawberry. Make your pops party-ready! For holidays, decorate with colors that match the theme. Use red and green for Christmas or pastel colors for Easter. You can even customize them for birthdays. Just add sprinkles or edible glitter to match the party theme. These small touches make your pops stand out! For the complete recipe, check out the [Full Recipe]. Store chocolate-covered strawberry pops in a cool, dry place. The ideal temperature is between 60°F and 70°F. Keep them away from direct sunlight. This helps keep the chocolate smooth and shiny. To stack the pops, use a container with dividers. Place parchment paper between layers. This prevents them from sticking to each other. If you don't have dividers, lay them flat on a tray lined with parchment paper. For the best taste, eat the pops within two days. After that, the strawberries may lose their freshness. You can freeze chocolate-covered strawberry pops. Wrap them well in plastic wrap, then place them in a freezer bag. They can last up to a month in the freezer. To enjoy, thaw them in the fridge. Avoid thawing at room temperature. This keeps the chocolate from getting too soft. If you have leftover chocolate, pour it into molds. You can make chocolate bites or bars. This is a fun way to enjoy extra chocolate. For leftover strawberries, try making a smoothie. Blend them with yogurt or milk. You can also slice them for topping on pancakes or oatmeal. This way, nothing goes to waste, and you enjoy more treats. You can use frozen strawberries, but they change the texture. They may become mushy when thawed. This can affect how well the chocolate sticks to them. Fresh strawberries hold up better, ensuring a firm bite. If you choose frozen, let them thaw completely and dry them well before dipping. To make the chocolate smoother, you can add coconut oil during melting. This helps create a nice, glossy finish. Melt the chocolate in short bursts in the microwave, stirring well in between. Avoid overheating, as this can make the chocolate clumpy. Stirring helps keep the heat even, giving you a smooth result. Yes, there are vegan options! You can use dairy-free chocolate chips for a vegan treat. Look for brands that use plant-based ingredients. For toppings, consider nuts, seeds, or dairy-free sprinkles. This way, you can enjoy chocolate-covered strawberry pops while sticking to a vegan diet. We explored how to create delicious chocolate-covered strawberry pops, from essential ingredients to creative variations. Remember, fresh strawberries, coconut oil, and careful melting are key. Avoid common mistakes like moisture and overheating for the best results. With these tips, you can impress at any event. Enjoy experimenting with toppings and flavors, and get creative in your presentations. These treats are not just tasty; they can also be fun to make and share. Happy dipping!](https://dailydishlab.com/wp-content/uploads/2025/07/28782691-e2ef-4ba1-b328-d9019563a0b5-768x768.webp)