Craving a sweet treat that’s easy to make and irresistibly delicious? Look no further! These No-Bake Peanut Butter Jelly Cheesecake Bars combine creamy peanut butter and fruity jam, offering a tasty twist on a classic favorite. With just a few simple ingredients and no oven required, you’ll have a dessert that’s perfect for any occasion. Let’s dive into this fun recipe, so you can impress your friends and family!
Why I Love This Recipe
- Delicious Flavor Combination: The perfect mix of creamy peanut butter and sweet berry jam creates a delightful balance that everyone will love.
- No-Bake Convenience: This recipe is incredibly easy to make without the need for baking, making it a great choice for quick desserts.
- Customizable Toppings: Feel free to switch up the jam or add your favorite nuts for a personalized touch to each batch.
- Perfect Make-Ahead Dessert: These cheesecake bars can be prepared in advance and stored in the fridge, making them ideal for gatherings.
Ingredients
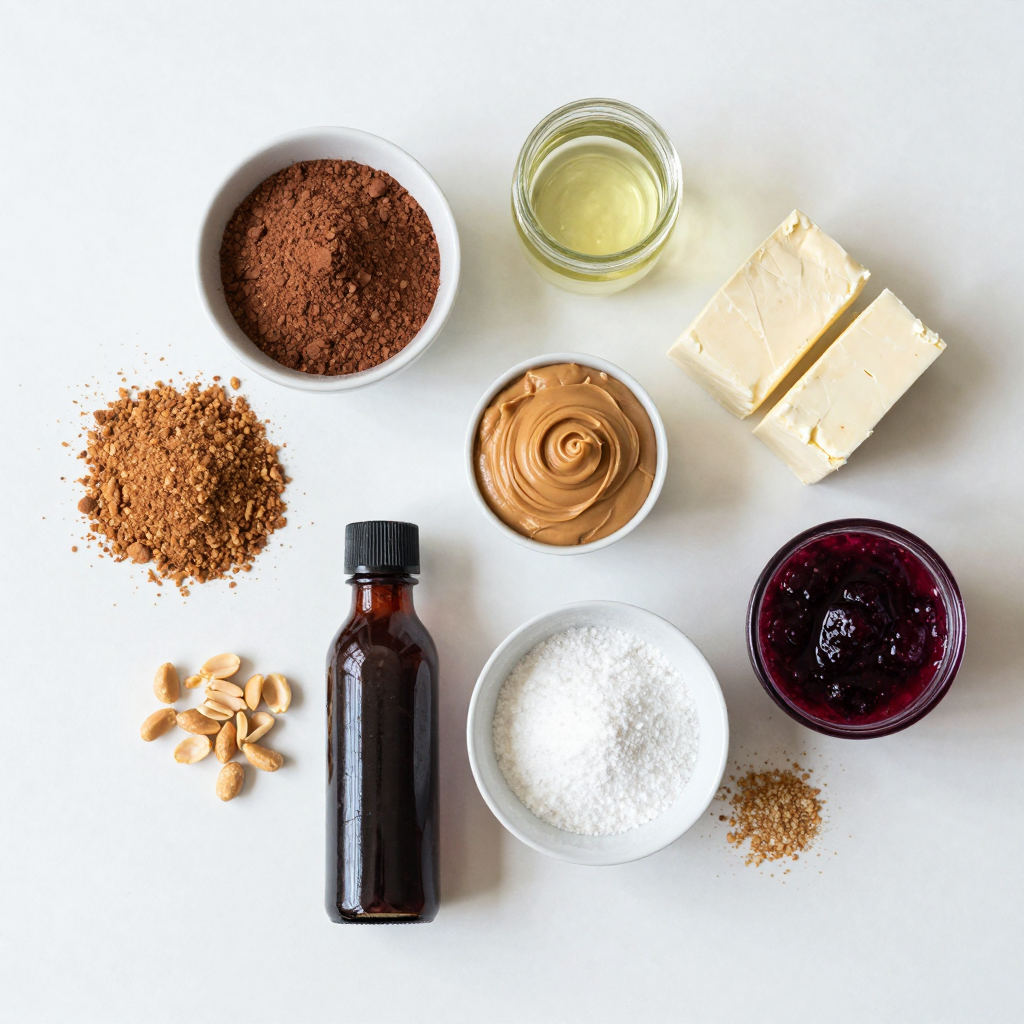
To make these no-bake peanut butter jelly cheesecake bars, you need some simple ingredients. Each one brings a special taste that makes this dessert a hit. Here’s what you will need:
– 1 cup graham cracker crumbs
– 1/2 cup unsweetened cocoa powder
– 1/3 cup melted coconut oil
– 2 cups cream cheese, softened
– 1 cup creamy peanut butter
– 1/2 cup powdered sugar
– 1 teaspoon vanilla extract
– 1 cup mixed berry jam (raspberry or strawberry works great)
– 1/4 cup crushed peanuts (for garnish)
These ingredients work together to create a rich, creamy, and flavorful dessert. The graham cracker crumbs and cocoa powder form a tasty crust. The cream cheese and peanut butter make the filling smooth and indulgent. Finally, the mixed berry jam adds a fruity twist. It’s a perfect balance of flavors, making every bite delightful!

Step-by-Step Instructions
Preparing the Crust
1. In a bowl, combine 1 cup graham cracker crumbs and 1/2 cup unsweetened cocoa powder.
2. Add 1/3 cup melted coconut oil.
3. Mix until it looks like wet sand.
4. Press this mix into the bottom of a greased 8×8 inch pan.
5. Use the back of a measuring cup to smooth it out.
Making the Cheesecake Layer
1. In a mixing bowl, beat together 2 cups softened cream cheese and 1 cup creamy peanut butter.
2. Add 1/2 cup powdered sugar and 1 teaspoon vanilla extract.
3. Mix until the filling is smooth and creamy.
Assembling the Bars
1. Spread the cheesecake mix evenly over the crust.
2. Dollop 1 cup mixed berry jam on top.
3. Use a knife or toothpick to swirl the jam into the cheesecake.
4. Refrigerate the bars for at least 4 hours to set.
5. Cut them into squares or rectangles when firm.
6. For a nice touch, sprinkle 1/4 cup crushed peanuts on top.
Pro Tips
- Chill the Ingredients: Make sure your cream cheese is at room temperature to mix easily, but chill the bars well before serving for a firmer texture.
- Swirl with Care: When swirling the jam, be gentle to maintain the distinct layers; a light hand ensures a beautiful marbled effect.
- Flavor Variations: Experiment with different types of jam or fruit preserves to create unique flavor combinations for your cheesecake bars.
- Storage Tips: Keep the bars covered in the refrigerator for up to a week, and they can also be frozen for longer storage, just thaw before serving.
Tips & Tricks
Achieving the Perfect Crust
To make a great crust, you can adjust the graham cracker crumbs and cocoa ratio. If you want a stronger chocolate flavor, add more cocoa powder. For a sweeter crust, increase the sugar slightly.
Use a flat-bottomed measuring cup to press the crust. This tool helps create a firm base. You want to press it down evenly for the best texture.
Getting the Right Texture
For a creamy filling, use softened cream cheese. It blends easier and gives a smooth texture. Let it sit at room temperature for about 30 minutes before mixing.
When mixing, beat the cream cheese and peanut butter together slowly. Gradually increase the speed for a fluffy filling. This method helps avoid lumps and ensures a perfect blend.
Serving Suggestions
Garnish your cheesecake bars with crushed peanuts. They add a nice crunch and look great too. You can also drizzle extra jam on top for color.
Pair these bars with a glass of milk or coffee. The creamy filling and sweet jam balance well with these drinks. Feel free to experiment with your favorite beverages!
Variations
Flavor Swaps
You can switch up the nut butter in this recipe. Almond butter or cashew butter works great too. Each nut butter gives a unique taste. You can also try sunflower seed butter for a nut-free option. For jam, mixed berry is amazing, but strawberry or grape jam also works well. You can even use homemade jam for a personal touch.
Dietary Adjustments
If you want gluten-free bars, use gluten-free graham cracker crumbs. They taste just as good and keep the texture nice. For a vegan version, swap the cream cheese for a dairy-free cream cheese. Use maple syrup instead of powdered sugar for sweetness. These swaps keep the bars tasty and friendly for everyone.
Presentation Ideas
Serving these bars in individual squares looks nice and is easy to serve. You can use cupcake liners for a fun touch. For a creative plate, drizzle extra jam on the plate before adding a bar. Top each piece with crushed peanuts to make it pop. These simple ideas make your dessert stand out.
Storage Info
How to Store
Keep these bars in the fridge. Use an airtight container to seal them well. This helps keep them fresh. If you want to save them longer, freeze them. Wrap each bar in plastic wrap and place them in a freezer bag.
Shelf Life
In the fridge, these cheesecake bars last about a week. Look for signs of spoilage. If they smell off or have a strange texture, it’s best to toss them. The bars might also become dry or lose flavor over time.
Reheating Tips
You don’t need to thaw these before serving. They taste great cold! If you want them soft, let them sit at room temperature for a few minutes. Avoid using the microwave, as it can change the texture. Enjoy your delicious no-bake bars!
FAQs
Can I use crunchy peanut butter instead of creamy?
Yes, you can use crunchy peanut butter. It will add a nice texture. The bars will still taste great. Just remember, the crunch may change the smoothness of the cheesecake layer. If you love the extra bite, go for it!
How long do these cheesecake bars last in the fridge?
These cheesecake bars can last about 5 days in the fridge. Store them in an airtight container. This will help keep them fresh and tasty. After a few days, the texture may change slightly, but they will still be delicious!
Can I make this recipe ahead of time?
Absolutely! You can make these bars a day or two ahead. This gives the flavors time to meld and the bars to set nicely. Just be sure to cover them well before refrigerating. It makes for a perfect make-ahead dessert!
These cheesecake bars combine tasty ingredients like graham crackers and creamy peanut butter. The steps are simple: prepare the crust, make the filling, and chill to set. I shared tips for the perfect texture and different ways to customize your bars. Remember, you can adjust ingredients for special diets or to suit your taste. Enjoy your delicious creation and feel free to share it. Make it your own with fun flavors and garnishes. Happy baking!


