No-Bake Pumpkin Spice Oreo Truffles Easy Treat Recipe

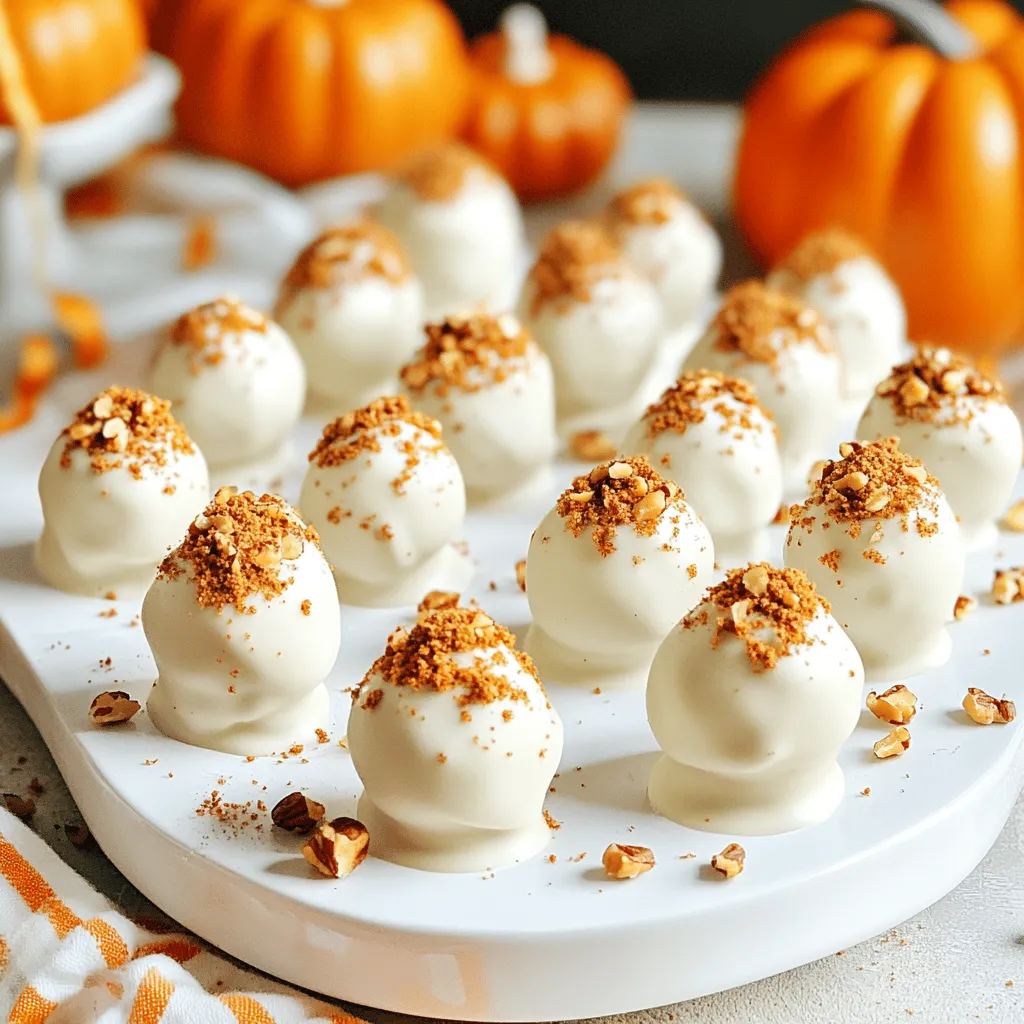
Get ready for a delightful treat that screams fall! My No-Bake Pumpkin Spice Oreo Truffles are simple, tasty, and perfect for any gathering. With just a few easy steps, you can create these creamy bites of joy that blend the flavors of pumpkin spice and Oreo. Whether you’re an experienced chef or a kitchen newbie, this recipe will make you a star. Let’s dive into the sweet details!
Why I Love This Recipe
- Easy to Make: This recipe requires no baking, making it a quick and simple dessert that anyone can whip up.
- Deliciously Festive: The combination of Pumpkin Spice Oreos and pumpkin pie spice captures the essence of fall in every bite.
- Customizable: Add your favorite toppings like crushed nuts or extra pumpkin spice to personalize these truffles to your taste.
- Perfect for Sharing: These truffles make great gifts or party treats, allowing you to spread the joy of pumpkin spice!
Ingredients
Complete List of Ingredients
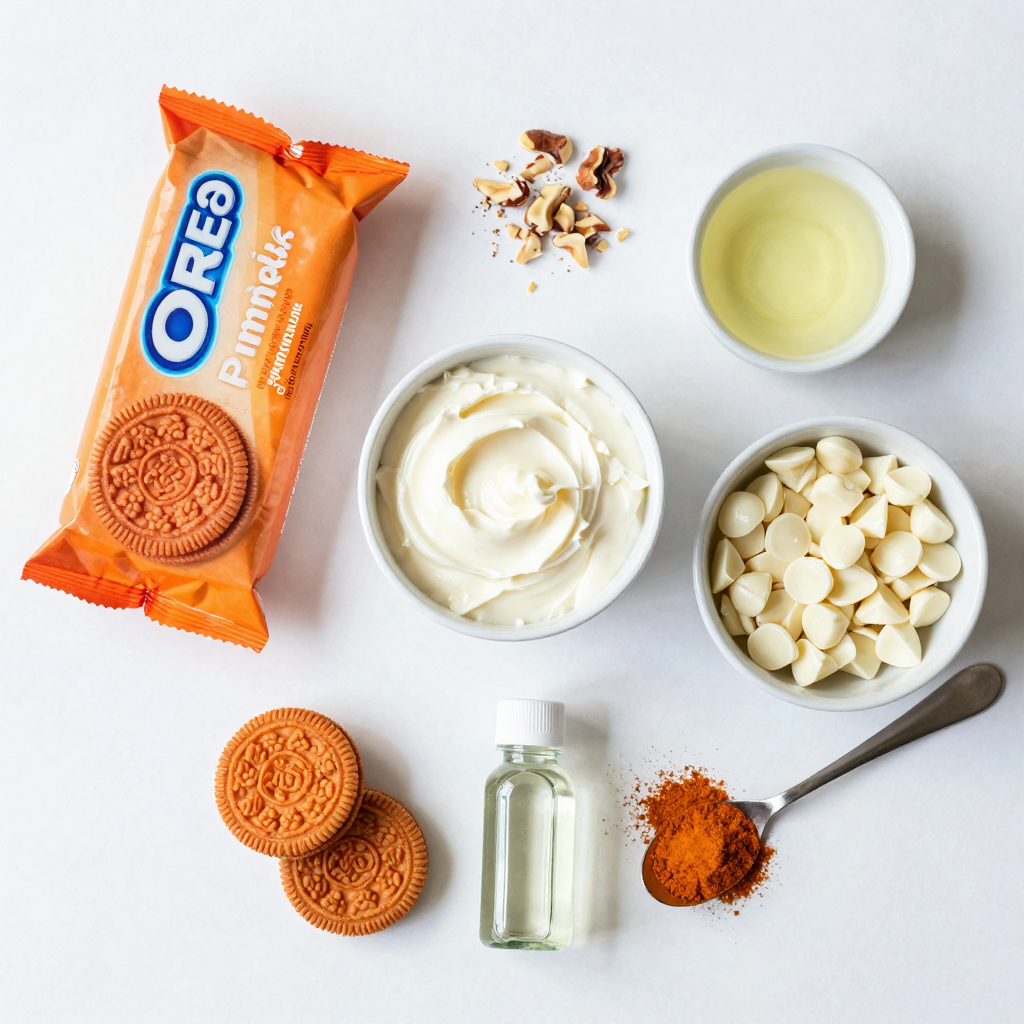
- 1 package (15.25 oz) Pumpkin Spice Oreos
- 1 cup cream cheese, softened
- 1 teaspoon vanilla extract
- 1 cup white chocolate chips
- 1 teaspoon pumpkin pie spice
- 1 tablespoon coconut oil
- Optional: crushed nuts or extra pumpkin spice for garnish
Gathering the right ingredients is key to making great No-Bake Pumpkin Spice Oreo Truffles. Start with a package of Pumpkin Spice Oreos. These cookies add a rich, spiced flavor. Next, use 1 cup of softened cream cheese. This gives the truffles a creamy texture.
Don’t forget 1 teaspoon of vanilla extract for sweetness. You will also need 1 cup of white chocolate chips. They coat the truffles and add a lovely sweetness. A teaspoon of pumpkin pie spice enhances the fall flavors.
Add 1 tablespoon of coconut oil to help melt the chocolate smoothly. Finally, consider optional garnishes like crushed nuts or extra pumpkin spice. They add texture and visual appeal to your truffles.
Now you have all the ingredients ready for this fun treat!

Step-by-Step Instructions
Preparing the Oreo Mixture
1. Crushing the Oreos: First, take the Pumpkin Spice Oreos and crush them into fine crumbs. You can use a food processor for this. If you don’t have one, place the Oreos in a zip-top bag. Use a rolling pin to crush the cookies into small bits. Aim for a fine texture, like sand.
2. Mixing with Cream Cheese and Vanilla: Next, put the Oreo crumbs in a large mixing bowl. Add 1 cup of softened cream cheese and 1 teaspoon of vanilla extract. Use a spatula or your hands to mix until it looks like dough. Make sure everything is fully blended.
Forming the Truffles
1. Rolling the Mixture into Balls: Now, take a scoop of the mixture, about 1 tablespoon, and roll it into a ball. Place each ball on a baking sheet lined with parchment paper. This helps keep them from sticking.
2. Freezing for Firmness: Once you have rolled all the balls, place the baking sheet in the freezer. Let them chill for about 30 minutes. This step helps the truffles hold their shape when you dip them.
Melting and Dipping
1. Melting White Chocolate and Coconut Oil: While the truffles chill, melt 1 cup of white chocolate chips with 1 tablespoon of coconut oil. Use a microwave-safe bowl. Heat in 30-second bursts, stirring between each. Continue until the mixture is smooth.
2. Adding Pumpkin Pie Spice: After melting, stir in 1 teaspoon of pumpkin pie spice. This adds a warm, fall flavor to the chocolate coating.
3. Dipping and Garnishing: Remove the truffles from the freezer. Dip each one into the melted chocolate mixture. Use a fork to lift them out, letting excess chocolate drip off. Place them back on the parchment paper. If you want, sprinkle some crushed nuts or extra pumpkin spice on top while the chocolate is still wet.
Now, let the truffles set in the fridge for about 15 to 20 minutes. Enjoy your No-Bake Pumpkin Spice Oreo Truffles!
Pro Tips
- Chill the Dough: Refrigerate the Oreo mixture for about 10 minutes before rolling into balls to make it easier to handle.
- Use a Toothpick: For easier dipping, use a toothpick to dip the truffles into the chocolate, then gently remove it to minimize mess.
- Experiment with Toppings: Try adding different toppings like crushed pretzels or chocolate sprinkles for a fun twist on the traditional flavor.
- Store Correctly: Keep the truffles in an airtight container in the refrigerator to maintain freshness and texture for up to a week.
Tips & Tricks
Achieving the Perfect Consistency
To mix evenly, start with crushed Oreos. Use a food processor or a rolling pin. Crush them until they are fine crumbs. This helps the ingredients blend well.
Next, add softened cream cheese and vanilla extract. Mix them in a large bowl. Use a sturdy spatula or your hands. You want a dough-like texture. If the mix is too dry, add a tiny bit of cream cheese. If it’s too wet, add more Oreo crumbs.
When rolling the truffles, scoop out tablespoon-sized portions. Roll them into smooth balls. If you find them sticky, wet your hands slightly. This helps to keep the mixture from sticking.
Best Practices for Dipping Truffles
For dipping, melt white chocolate chips with coconut oil. Use a microwave-safe bowl and heat it in short bursts. Stir often until smooth. Adding coconut oil helps the chocolate stay glossy.
When dipping, hold a truffle with a fork. Dip the truffle into the chocolate. Let the excess chocolate drip off. Place it back on the parchment paper. If you want, sprinkle crushed nuts or pumpkin spice while the chocolate is still wet. This adds a nice touch.
Decorating Ideas
Get creative with garnishes. Use crushed nuts, sprinkles, or a drizzle of chocolate. You can even add a pinch of cinnamon or nutmeg. It gives a nice look and flavor boost.
For serving, arrange the truffles on a nice platter. Dust the platter with cocoa powder for an elegant touch. You can also use a decorative box for gifts.
These simple tips will help you make your No-Bake Pumpkin Spice Oreo Truffles stand out. Enjoy making and sharing them!

Variations
Ingredient Substitutions
Using Different Oreo Flavors
You can switch up the flavor of your truffles by using other Oreo types. For example, use regular chocolate Oreos for a rich twist. You might also try golden Oreos for a lighter taste. Each type will add a unique flavor to your truffles. Experiment with your favorite Oreo flavors to find your best match.
Alternatives for Cream Cheese
If you want a dairy-free option, try using vegan cream cheese. It works well and keeps the texture similar. You can also use mascarpone cheese for a richer taste. Greek yogurt is another option, giving a tangy flavor while keeping it creamy. These substitutions can change the taste and texture, so choose what you like best.
Flavor Enhancements
Adding More Spices
To make your truffles even more flavorful, add extra spices. A pinch of cinnamon or nutmeg can enhance the pumpkin flavor. You can also mix in a bit of allspice for a warm kick. Taste as you go to find the right spice blend for your preference.
Exploring Different Coatings
While white chocolate is a classic, you can try other coatings as well. Dark chocolate adds a rich contrast to the sweetness. You might also consider coating the truffles in crushed nuts for a crunchy texture. For a fun twist, roll them in cocoa powder or sprinkles. Each coating offers a new way to enjoy these treats.
Storage Info
How to Store Your Truffles
Storing in the Refrigerator
Once your truffles are set, place them in an airtight container. Keep them in the fridge. This helps them stay fresh. They taste best when cold. Enjoy them within a week for the best flavor.
Freezing Truffles for Later
If you want to save some truffles, freezing works great. Place them in a single layer on a baking sheet. Freeze them until firm, then transfer to a freezer-safe bag. They can last up to three months in the freezer. Just thaw them in the fridge before eating.
Shelf Life
How Long Do They Last?
When stored properly, your No-Bake Pumpkin Spice Oreo Truffles last about a week in the fridge. In the freezer, they can last up to three months. Always check for freshness before enjoying.
Signs of Spoilage
Look for any changes in color or texture. If your truffles smell off or feel sticky, it’s best to toss them out. Always trust your senses when it comes to food safety.
FAQs
Can I make these truffles ahead of time?
Yes, you can make these truffles ahead of time. They store well in the fridge. To prepare, follow these steps:
- Make the truffles as directed.
- After dipping them in chocolate, place them in an airtight container.
- Layer parchment paper between truffles to prevent sticking.
- Store them in the fridge for up to a week.
This way, you can enjoy them whenever you want!
Can I use regular Oreos instead of Pumpkin Spice?
You can use regular Oreos, but the flavor will change. Pumpkin Spice Oreos add a nice, warm taste. Using regular Oreos will make the truffles less seasonal. The texture will remain similar, but the truffles will taste less festive. If you want a twist, consider adding a bit of pumpkin pie spice to the mix.
How do I make the truffles dairy-free?
To make these truffles dairy-free, swap out the cream cheese and white chocolate. Here are some ideas:
- Use dairy-free cream cheese or cashew cream for cream cheese.
- Choose dairy-free white chocolate chips or melt dairy-free chocolate.
- Ensure the coconut oil is pure and dairy-free.
These swaps keep the truffles creamy and delicious!
These Pumpkin Spice Truffles are fun and easy to make. We covered all the steps: from mixing Pumpkin Spice Oreos with cream cheese to dipping them in white chocolate. You can customize them with different flavors and toppings. Remember to store truffles right for the best taste. Creating these treats can bring joy to any gathering. Enjoy making and sharing your truffles with friends and family. They’ll love the taste of fall in each bite!

No-Bake Pumpkin Spice Oreo Truffles
Ingredients
1 package (15.25 oz) Pumpkin Spice Oreos
1 cup cream cheese, softened
1 teaspoon vanilla extract
1 cup white chocolate chips
1 teaspoon pumpkin pie spice
1 tablespoon coconut oil
Optional: crushed nuts or extra pumpkin spice for garnish
Instructions
In a large mixing bowl, crush the Pumpkin Spice Oreos into fine crumbs using a food processor or by placing them in a zip-top bag and using a rolling pin.
Add the softened cream cheese and vanilla extract to the Oreo crumbs. Mix well until the mixture is fully combined and resembles a dough.
Scoop out tablespoon-sized portions of the mixture and roll them into balls. Place the truffles on a baking sheet lined with parchment paper.
Freeze the truffles for about 30 minutes to firm them up.
While the truffles are chilling, melt the white chocolate chips with the coconut oil in a microwave-safe bowl, heating in 30-second intervals and stirring in between until smooth.
Stir in the pumpkin pie spice into the melted chocolate for added flavor.
Remove the truffles from the freezer, and dip each one into the white chocolate mixture. Use a fork to gently lift each truffle out and allow the excess chocolate to drip off.
Place the dipped truffles back onto the parchment-lined baking sheet. If desired, sprinkle crushed nuts or a pinch of pumpkin spice on top while the chocolate is still wet.
Refrigerate the truffles until the chocolate is set (about 15-20 minutes).
Enjoy your delightful No-Bake Pumpkin Spice Oreo Truffles!
Prep Time: 15 min | Total Time: 1 hr | Servings: 20 truffles
– Presentation Tips: Arrange the truffles in a decorative box or on a platter dusted with cocoa powder for an elegant touch.

No-Bake Pumpkin Spice Oreo Truffles
Ingredients
- 1 package Pumpkin Spice Oreos (15.25 oz)
- 1 cup cream cheese, softened
- 1 teaspoon vanilla extract
- 1 cup white chocolate chips
- 1 teaspoon pumpkin pie spice
- 1 tablespoon coconut oil
- to taste crushed nuts or extra pumpkin spice for garnish
Instructions
- In a large mixing bowl, crush the Pumpkin Spice Oreos into fine crumbs using a food processor or by placing them in a zip-top bag and using a rolling pin.
- Add the softened cream cheese and vanilla extract to the Oreo crumbs. Mix well until the mixture is fully combined and resembles a dough.
- Scoop out tablespoon-sized portions of the mixture and roll them into balls. Place the truffles on a baking sheet lined with parchment paper.
- Freeze the truffles for about 30 minutes to firm them up.
- While the truffles are chilling, melt the white chocolate chips with the coconut oil in a microwave-safe bowl, heating in 30-second intervals and stirring in between until smooth.
- Stir in the pumpkin pie spice into the melted chocolate for added flavor.
- Remove the truffles from the freezer, and dip each one into the white chocolate mixture. Use a fork to gently lift each truffle out and allow the excess chocolate to drip off.
- Place the dipped truffles back onto the parchment-lined baking sheet. If desired, sprinkle crushed nuts or a pinch of pumpkin spice on top while the chocolate is still wet.
- Refrigerate the truffles until the chocolate is set (about 15-20 minutes).
- Enjoy your delightful No-Bake Pumpkin Spice Oreo Truffles!


![- 1 cup rolled oats - 1/2 cup almond butter (or any nut butter of choice) - 1/4 cup honey or maple syrup These key ingredients form the base of your energy bites. Rolled oats provide fiber and texture. Almond butter gives healthy fats and protein. Honey or maple syrup adds natural sweetness. - 1/4 cup mini chocolate chips - 1/4 cup ground flaxseed - 1/4 cup shredded coconut (unsweetened) Mini chocolate chips add a delightful burst of flavor. Ground flaxseed boosts nutrition with omega-3s. Shredded coconut gives a chewy texture and tropical taste. - 1 tsp vanilla extract - 1/2 tsp cinnamon - A pinch of salt Vanilla extract enhances the overall flavor. Cinnamon adds warmth and depth. A pinch of salt balances the sweetness and brings all the flavors together. For the complete guide on making these bites, check out the [Full Recipe]. To start, gather your ingredients. For the dry mix, you need rolled oats, ground flaxseed, shredded coconut, and cinnamon. In a medium bowl, combine these dry ingredients. Mix them well so they blend nicely. Next, let's make the wet mix. In a separate bowl, add almond butter, honey (or maple syrup), vanilla extract, and a pinch of salt. Stir until it becomes smooth and creamy. This step is key for a good flavor. Now, pour the wet mix into the dry mix. Stir until you combine everything. You want all the dry ingredients to be coated with the wet mix. Finally, gently fold in mini chocolate chips. This adds a sweet delight to every bite. Now it’s time to shape your energy bites. Take about one tablespoon of the mixture. Roll it between your hands to form a ball. Make sure they are about the same size for even bites. Repeat this process until you use all the mixture. Place each ball on a parchment-lined baking sheet. This helps them not stick and makes clean-up easy. Keep them spaced out a bit to avoid sticking together. After shaping, place the baking sheet in the fridge. Let the energy bites chill for at least 30 minutes. This helps them firm up and hold their shape. Once chilled, store the bites in an airtight container. Keep them in the fridge for up to one week. Enjoy these tasty snacks whenever you need a quick energy boost, and don’t forget to check out the Full Recipe for more details! To boost the flavor of your energy bites, add spices like nutmeg or ginger. They give a warm kick. You can also try different extracts, like almond or coconut, for a unique taste. If you like it sweeter, adjust the honey or maple syrup. Just add a little at a time to find your perfect sweetness. For a better texture, focus on the consistency of your mixture. If it's too dry, add a touch more nut butter or honey. For crunchier bites, mix in chopped nuts or seeds. If you prefer them chewier, reduce the baking time slightly. This makes them softer and more enjoyable. Use a medium bowl for mixing your ingredients. A spatula works well for combining everything. To store your energy bites, an airtight container is best. It keeps them fresh longer. You can also use parchment paper to prevent sticking when chilling them in the fridge. For the full recipe, check out the [Full Recipe]. {{image_2}} You can easily make these energy bites fit your diet. For gluten-free options, use certified gluten-free oats. This way, you avoid any gluten while still enjoying a tasty snack. If you want vegan alternatives, swap honey for maple syrup. Both options keep the bites sweet and delicious. You can add fun flavors to your energy bites. Try mixing in dried fruits like raisins or cranberries. These add chewiness and natural sweetness. Nuts such as almonds or walnuts also work well. They add crunch and healthy fats. You can also experiment with different types of chocolate. Use dark, milk, or even white chocolate chips. Each type brings its own unique taste. Get creative with nut butters! While almond butter is great, you can try peanut butter or cashew butter. Each brings a different flavor and texture. You can also incorporate protein powder for a boost. This makes the bites even more filling and nutritious. Adjust the wet ingredients slightly if you add protein powder to keep the right texture. Feel free to explore these variations. They can help you make the perfect chocolate chip energy bites just for you. Check out the Full Recipe for the basic mix, then let your imagination lead the way! To keep your chocolate chip energy bites fresh, store them in an airtight container. Glass or plastic containers work well. Place them in the fridge to maintain their texture and taste. They can last up to one week when stored properly. You can freeze energy bites for longer storage. To freeze, place them in a single layer on a baking sheet. Once frozen, transfer them to a freezer-safe bag. This method prevents them from sticking together. When you want to eat them, take out a few bites and let them thaw in the fridge. This process takes about an hour. In the fridge, these bites last about one week. After that, they may lose flavor and texture. Watch for signs of spoilage, like an off smell or changes in color. If you see or smell anything unusual, it's best to toss them. Enjoy your homemade snacks while they’re fresh! Chocolate chip energy bites can last up to one week in the fridge. Store them in an airtight container for the best freshness. If you freeze them, they can last for about three months. Just thaw them in the fridge when you're ready to enjoy. Yes, you can easily substitute ingredients in this recipe. If you don't like almond butter, feel free to use peanut butter or sunflower seed butter. You can swap honey for maple syrup if you prefer a vegan option. The mini chocolate chips can also be replaced with dried fruits or nuts. Absolutely! These energy bites are a great snack for kids. They are tasty, healthy, and easy to make. You can even involve your kids in the preparation. They will love rolling the bites into balls. Just ensure there are no allergies to the ingredients used. Yes, making these energy bites in advance is a smart idea. You can prepare a batch at the start of the week. This way, you have quick snacks ready for busy days. Just store them in the fridge or freeze some for later use. Chocolate chip energy bites offer many nutritional benefits. They contain rolled oats, which provide fiber for digestion. Almond butter adds healthy fats and protein. Flaxseed is rich in omega-3 fatty acids, promoting heart health. Plus, the little bit of chocolate makes them a treat! These chocolate chip energy bites are simple to make and full of good stuff. You can enjoy them as snacks or quick breakfast bites. Let’s dive into what makes these little treats so special. - Rolled oats: They give a hearty base and provide fiber. - Almond butter (or nut butter alternatives): This adds creaminess and healthy fats. - Honey or maple syrup: Sweeteners that bring flavor and stickiness. - Mini chocolate chips: They add sweetness and a fun texture. - Ground flaxseed: This boosts nutrition and adds omega-3s. - Unsweetened shredded coconut: It gives a nice chewiness. - Vanilla extract: This enhances the flavor and warms the bites. - Cinnamon: It adds spice and depth. - Salt: Just a pinch balances all the flavors. In this recipe, we blend all these ingredients to create something delicious. You can find the [Full Recipe] at the start of this article. It only takes about 10 minutes to mix, and then just chill for 30 minutes. You’ll have about 12 bites ready to enjoy! Feel free to switch it up with your favorite nut butter or add different mix-ins. The options are endless! These chocolate chip energy bites are simple to make and full of flavor. We covered key ingredients like oats and nut butter. I shared tips on making them crunchier or chewier, and variations for different diets. Remember to store them in an airtight container for the best taste. You can enjoy these bites anytime you need a quick snack. Making them yourself lets you control the ingredients and flavors. Healthy snacks can be easy and delicious, so try these energy bites today!](https://dailydishlab.com/wp-content/uploads/2025/07/ee6487bc-f560-4f96-a21c-d76d52703957-768x768.webp)

