No Bake Salted Caramel Apple Pie Cheesecake Delight

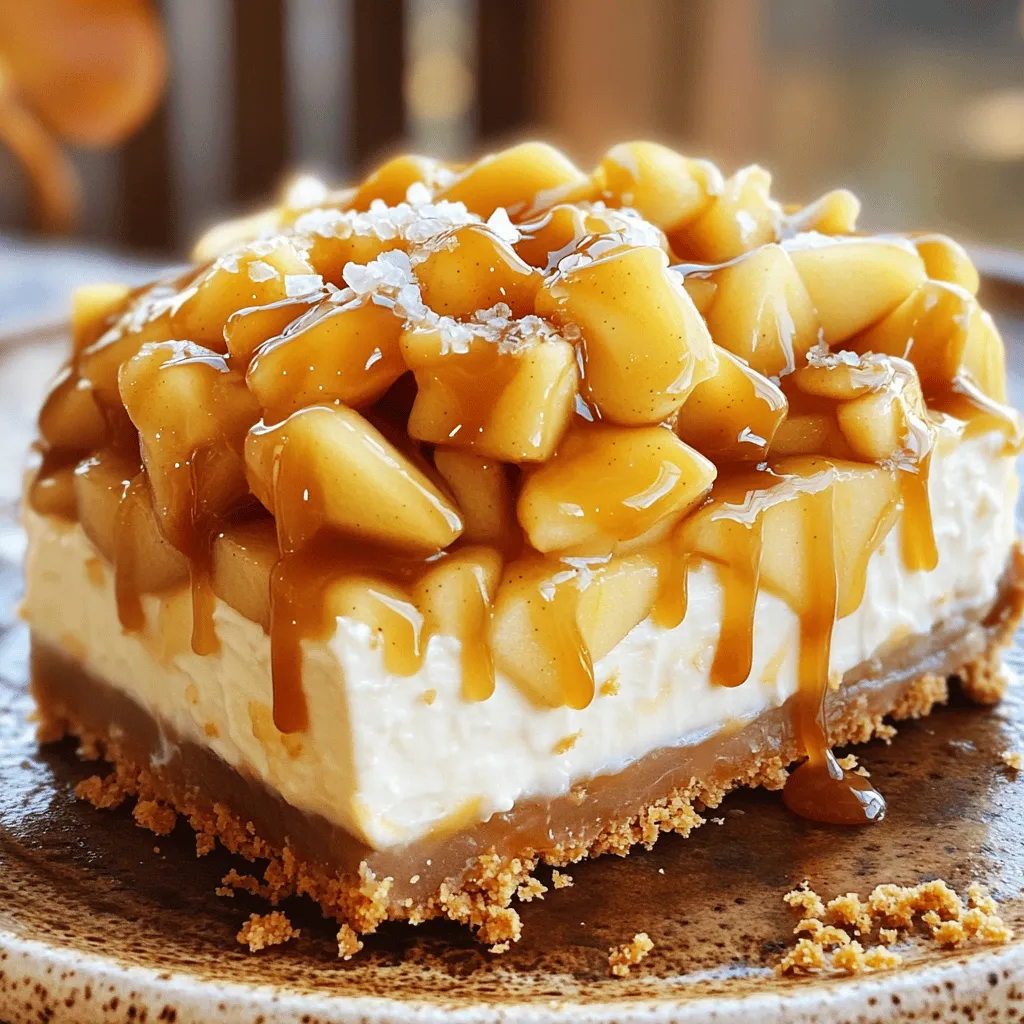
Get ready to indulge in a dessert that’s all about sweet, creamy goodness! My No Bake Salted Caramel Apple Pie Cheesecake Delight combines rich cream cheese, tart apples, and delicious salted caramel, all without turning on the oven. It’s an easy-to-make treat perfect for any occasion. Dive in with me as I guide you through simple steps to create this crowd-pleaser that will leave everyone asking for seconds!
Why I Love This Recipe
- Delicious Flavor Combination: The blend of creamy cheesecake with tart apples and rich caramel creates an irresistible flavor profile that’s perfect for any occasion.
- No-Bake Convenience: This cheesecake requires no baking, making it a hassle-free dessert option that’s perfect for warm days or when you’re short on time.
- Impressive Presentation: The layers of cream cheese filling and apple topping make for a stunning dessert that’s sure to impress your guests.
- Customizable Toppings: Add your favorite toppings like extra caramel, nuts, or even whipped cream to make it your own!
Ingredients
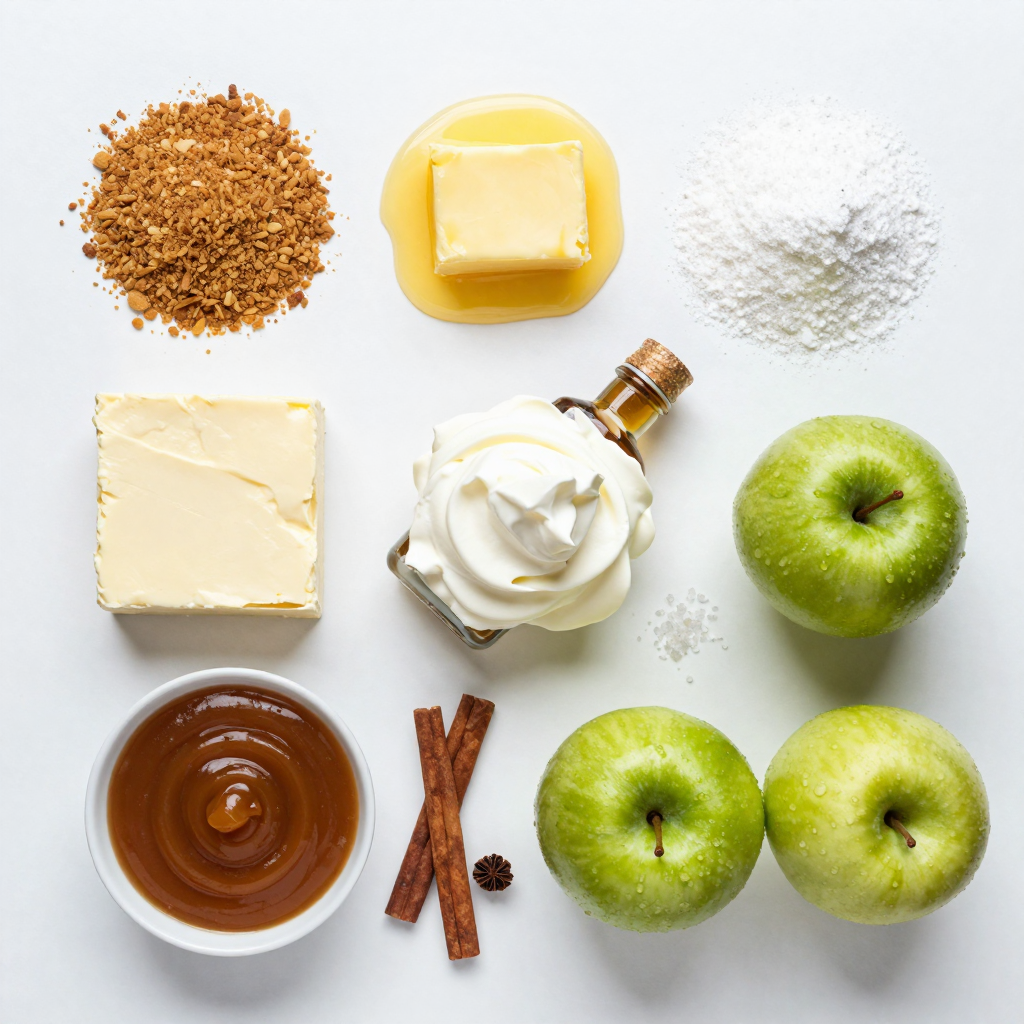
Here is the list of ingredients you need for the No Bake Salted Caramel Apple Pie Cheesecake:
- 2 cups graham cracker crumbs
- ½ cup unsalted butter, melted
- 2 cups cream cheese, softened
- 1 cup powdered sugar
- 1 teaspoon vanilla extract
- 1 cup heavy whipping cream
- 2 large apples (preferably Granny Smith), peeled, cored, and diced
- ½ cup salted caramel sauce
- 1 teaspoon cinnamon
- ½ teaspoon nutmeg
- Sea salt for sprinkling
Each ingredient plays a key role. The graham cracker crumbs form the base. Butter helps hold the crust together. Cream cheese gives it a rich flavor. Powdered sugar sweetens the filling. Vanilla adds warmth. Heavy cream makes the texture light and fluffy. Apples bring freshness. Salted caramel adds sweetness and a touch of salt. Cinnamon and nutmeg provide warmth and spice. Finally, a sprinkle of sea salt enhances all flavors.
By using fresh, quality ingredients, you ensure a tasty cheesecake. Feel free to experiment with apples or caramel sauce brands. You can even make your own salted caramel for a special touch.

Step-by-Step Instructions
Preparing the Crust
- Combine 2 cups of graham cracker crumbs and ½ cup of melted butter in a bowl.
- Press the mixture firmly into the bottom of a 9-inch springform pan.
Making the Filling
- Beat 2 cups of softened cream cheese in a large bowl until smooth.
- Mix in 1 cup of powdered sugar and 1 teaspoon of vanilla extract.
Whipping the Cream
- In another bowl, whip 1 cup of heavy cream until stiff peaks form.
- Carefully fold the whipped cream into the cream cheese mixture.
Preparing the Apple Topping
- Mix 2 diced apples with ½ cup of salted caramel sauce, 1 teaspoon of cinnamon, and ½ teaspoon of nutmeg.
- Toss until the apples are fully coated with the mixture.
Assembling the Cheesecake
- Spread half of the cream cheese filling on the crust.
- Layer the apple mixture on top, then add the remaining cream cheese filling.
- Finally, top with the rest of the apple mixture.
Chilling the Cheesecake
- Drizzle the remaining salted caramel sauce over the top.
- Sprinkle a little sea salt for extra flavor.
- Cover the cheesecake with plastic wrap and refrigerate for at least 4 hours.
Pro Tips
- Chill the Ingredients: For a creamier filling, make sure your cream cheese is at room temperature and your heavy cream is well chilled before whipping.
- Layering the Toppings: To prevent the apples from sinking, layer them gently on top of the cream cheese filling, ensuring an even distribution for a beautiful presentation.
- Salted Caramel Variations: Experiment with different types of salted caramel, such as bourbon or espresso-infused, to add a unique twist to your cheesecake.
- Serving Suggestions: Serve with a dollop of whipped cream and a sprinkle of chopped nuts for added texture and flavor.
Tips & Tricks
Perfecting the Crust
To ensure your crust holds together, press the graham cracker mixture firmly. Use the back of a measuring cup to pack it tightly into the pan. If you want more flavor, try adding a pinch of sea salt or a dash of cinnamon to the crust. You can also swap half of the graham crackers for crushed nuts for a unique twist.
Achieving the Perfect Filling
To avoid lumps in the cream cheese, make sure it’s really soft. Leave it out at room temperature for about 30 minutes. When mixing, beat it well before adding sugar and vanilla. For folding whipped cream, use a large spatula. Gently lift and fold to keep the mixture light and airy. This step is key for a creamy texture.
Flavor Enhancements
To elevate the taste, consider adding spices like ginger or allspice. These can bring warmth and depth. When it comes to caramel, homemade is best for flavor. However, store-bought can save you time. If you use store-bought, look for high-quality brands that offer a rich taste.

Variations
Different Fruit Toppings
You can swap apples for pears or berries. Pears add a soft, sweet touch. Berries give a bright, tart flavor. In fall, use pumpkin or cranberries for a seasonal twist. In summer, try fresh strawberries or blueberries. You can mix fruits for extra flavor!
Gluten-Free Options
To make this cheesecake gluten-free, use gluten-free graham crackers. Many brands offer great choices. You can also try almond flour or coconut flour for the crust. For the filling, ensure your cream cheese is gluten-free. This way, everyone can enjoy this dessert.
Dairy-Free Adaptations
If you want a dairy-free cheesecake, use cashew cream or coconut cream instead of cream cheese. These options are creamy and rich. For whipped cream, try coconut whipped cream. It adds a nice touch and keeps it dairy-free. Enjoying a cheesecake has never been so easy!
Storage Info
Proper Storage Techniques
To keep your no bake salted caramel apple pie cheesecake fresh, cover it well. Use plastic wrap or aluminum foil to cover the cheesecake tightly. This keeps air out and stops it from drying. You can also place it in an airtight container. Make sure to refrigerate the cheesecake right after you prepare it. This keeps it cool and safe to eat.
Freezing the Cheesecake
If you want to freeze the cheesecake, wrap it well. Use plastic wrap and then foil for extra protection. This helps avoid freezer burn. To thaw, take it out and place it in the fridge overnight. Avoid thawing it at room temperature. This keeps the texture nice and creamy.
Shelf Life
In the fridge, the cheesecake lasts about 5 days. Make sure to check it before eating. If it smells off or has a strange texture, it’s best to throw it away. Look for any mold or discoloration too. These signs mean it’s time to say goodbye to your cheesecake.
FAQs
Can I make this cheesecake ahead of time?
Yes, you can make this cheesecake a day in advance. This helps the flavors blend well. Just follow these tips:
- Prepare the crust and filling as directed.
- After assembling, cover it tightly with plastic wrap.
- Chill it in the fridge overnight.
- This gives the cheesecake time to set properly.
Can I use different types of apples?
Absolutely! You can use a variety of apples. Here are some great choices:
- Granny Smith: Tart and crisp, they add a nice bite.
- Honeycrisp: Sweet and juicy, perfect for a sweeter flavor.
- Fuji: Very sweet and crunchy, adds great texture.
Each apple type gives a unique taste to your cheesecake.
How do I cut the cheesecake cleanly?
To slice your no-bake cheesecake neatly, follow these steps:
- Use a sharp knife dipped in warm water.
- Wipe the knife clean between cuts.
- This keeps your slices looking nice.
- For a cleaner finish, chill the cheesecake longer.
What can I serve with this cheesecake?
Pair your cheesecake with delicious sides! Here are some ideas:
- Serve with extra salted caramel sauce.
- A dollop of whipped cream adds richness.
- Fresh fruit like berries brightens the plate.
These additions enhance the dessert experience and impress your guests.
You now have the tools to make a delicious no-bake cheesecake with apples. We covered all the needed ingredients, step-by-step instructions, and tips for variations. You’ll impress your friends and family with this treat. Remember, you can customize it to suit your taste. Store it well, and it will last. Enjoy making and sharing this simple yet tasty dessert. Happy baking!

No Bake Salted Caramel Apple Pie Cheesecake
Ingredients
2 cups graham cracker crumbs
½ cup unsalted butter, melted
2 cups cream cheese, softened
1 cup powdered sugar
1 teaspoon vanilla extract
1 cup heavy whipping cream
2 large apples, peeled, cored, and diced (preferably Granny Smith)
½ cup salted caramel sauce (store-bought or homemade)
1 teaspoon cinnamon
½ teaspoon nutmeg
Sea salt for sprinkling
Instructions
Prepare the Crust: In a mixing bowl, combine the graham cracker crumbs and melted butter until fully mixed. Press the mixture firmly into the bottom of a 9-inch springform pan to form an even crust. Set aside in the refrigerator to chill.
Make the Filling: In a large mixing bowl, beat the softened cream cheese using an electric mixer until smooth. Gradually add the powdered sugar and vanilla extract, mixing until well blended.
Whip the Cream: In a separate bowl, whip the heavy cream until stiff peaks form. Gently fold the whipped cream into the cream cheese mixture until fully combined, being careful not to deflate the whipped cream.
Prepare the Apple Topping: In a medium bowl, mix the diced apples, ¼ cup of the salted caramel sauce, cinnamon, and nutmeg. Toss until the apples are well coated.
Assemble the Cheesecake: Spread half of the cream cheese filling on top of the chilled graham cracker crust, ensuring it’s even. Add a layer of the apple mixture on top, then spread the remaining cream cheese filling over the apples. Top with the rest of the apple mixture.
Chill: Drizzle the remaining salted caramel sauce over the top of the cheesecake and sprinkle a little sea salt for a sweet-salty crunch. Cover the cheesecake with plastic wrap and refrigerate for at least 4 hours, or overnight for best results.
Serve: When ready to serve, carefully remove the sides of the springform pan. Slice into wedges and drizzle with additional caramel sauce and sprinkle with more sea salt if desired.
Prep Time: 30 minutes | Total Time: 4 hours 30 minutes, including chilling | Servings: 10-12 slices

No Bake Salted Caramel Apple Pie Cheesecake
Ingredients
- 2 cups graham cracker crumbs
- ½ cup unsalted butter, melted
- 2 cups cream cheese, softened
- 1 cup powdered sugar
- 1 teaspoon vanilla extract
- 1 cup heavy whipping cream
- 2 large apples, peeled, cored, and diced (preferably Granny Smith)
- ½ cup salted caramel sauce (store-bought or homemade)
- 1 teaspoon cinnamon
- ½ teaspoon nutmeg
- to taste sea salt for sprinkling
Instructions
- Prepare the Crust: In a mixing bowl, combine the graham cracker crumbs and melted butter until fully mixed. Press the mixture firmly into the bottom of a 9-inch springform pan to form an even crust. Set aside in the refrigerator to chill.
- Make the Filling: In a large mixing bowl, beat the softened cream cheese using an electric mixer until smooth. Gradually add the powdered sugar and vanilla extract, mixing until well blended.
- Whip the Cream: In a separate bowl, whip the heavy cream until stiff peaks form. Gently fold the whipped cream into the cream cheese mixture until fully combined, being careful not to deflate the whipped cream.
- Prepare the Apple Topping: In a medium bowl, mix the diced apples, ¼ cup of the salted caramel sauce, cinnamon, and nutmeg. Toss until the apples are well coated.
- Assemble the Cheesecake: Spread half of the cream cheese filling on top of the chilled graham cracker crust, ensuring it's even. Add a layer of the apple mixture on top, then spread the remaining cream cheese filling over the apples. Top with the rest of the apple mixture.
- Chill: Drizzle the remaining salted caramel sauce over the top of the cheesecake and sprinkle a little sea salt for a sweet-salty crunch. Cover the cheesecake with plastic wrap and refrigerate for at least 4 hours, or overnight for best results.
- Serve: When ready to serve, carefully remove the sides of the springform pan. Slice into wedges and drizzle with additional caramel sauce and sprinkle with more sea salt if desired.


![To make these delicious pancakes, gather the following ingredients: - 1 cup all-purpose flour - 1 tablespoon baking powder - 1 teaspoon ground cinnamon - 1/2 teaspoon ground nutmeg - 1/4 teaspoon salt - 1 cup pumpkin puree (canned or fresh) - 1 cup milk (or non-dairy alternative) - 1 large egg - 2 tablespoons brown sugar - 1 teaspoon vanilla extract - 2 tablespoons melted butter (or coconut oil) - For the cinnamon swirl: - 2 tablespoons brown sugar - 1 teaspoon ground cinnamon - 1 tablespoon melted butter You can swap some ingredients for different options. Here are a few ideas: - For all-purpose flour, try whole wheat flour for a heartier pancake. - If you want a dairy-free option, use almond milk or oat milk instead of regular milk. - Replace the large egg with a flax egg (1 tablespoon ground flaxseed mixed with 2.5 tablespoons water). - Coconut oil can replace butter for a dairy-free pancake. Using fresh pumpkin can give your pancakes a vibrant taste. Fresh pumpkin has a rich texture and a sweet flavor. However, canned pumpkin works well too. It is convenient and saves time. Canned pumpkin is often cooked and pureed, making it ready to use. Both options can provide the delicious taste you want. So, choose based on your time and preference. To make Cinnamon Swirl Pumpkin Pancakes, start by gathering your ingredients. In a large bowl, whisk together the flour, baking powder, ground cinnamon, nutmeg, and salt. This helps the dry ingredients mix well. In another bowl, blend the pumpkin puree, milk, egg, brown sugar, vanilla extract, and melted butter until smooth. Pour this mixture into the dry ingredients and stir gently. Remember, a few lumps are okay; overmixing can make pancakes tough. Next, prepare the cinnamon swirl. In a small bowl, mix brown sugar, ground cinnamon, and melted butter until it forms a paste. Preheat your skillet over medium heat. Lightly grease it with cooking spray or butter. For each pancake, pour about 1/4 cup of batter onto the skillet. Use the back of a spoon to create a swirl with the cinnamon mix on top of the batter. Cook the pancakes until bubbles form on the surface, about 2-3 minutes. Then, carefully flip them and cook for another 1-2 minutes until golden brown. Repeat this process until you finish all the batter and swirl. These steps will give you fluffy and flavorful pancakes. To achieve the right pancake texture, keep these tips in mind: - Use fresh ingredients. Fresh baking powder gives better rise. - Avoid overmixing the batter. This keeps pancakes light and fluffy. - Let the batter rest for a few minutes. This helps the gluten relax. - Adjust your heat. If pancakes brown too quickly, reduce the heat. These small adjustments can make a big difference in your pancake outcome. The cinnamon swirl is what makes these pancakes special. Here’s how to incorporate it perfectly: - When you pour the batter, do it in a circular motion. This helps the swirl blend nicely. - Use a spoon to create a gentle spiral. Don’t press too hard; you want a light touch. - If you have leftover swirl, drizzle it on top when serving. This will enhance the flavor and visual appeal of your pancakes. If you want more tips or the full recipe, check out the details I provided earlier. Enjoy your cooking! To make your pancakes fluffy, use a light hand when mixing. Overmixing can lead to tough pancakes. Mix until just combined, leaving some lumps in the batter. Also, let the batter rest for a few minutes before cooking. This helps the baking powder to activate and creates a lighter texture. Use a non-stick skillet or griddle for even cooking, and keep the heat at medium. This way, you avoid burning the outside while the inside remains raw. If you want thicker pancakes, add a bit more flour. For thinner pancakes, add a little milk. You can also change the spices to match your taste. Love nutmeg? Add a bit more! Prefer a sweeter pancake? Increase the brown sugar slightly. Always taste your batter before cooking to get it just right. You can even mix in chocolate chips or nuts for extra flavor. Serve your pancakes warm with maple syrup or honey. A dollop of whipped cream adds a nice touch, too. For a fun twist, sprinkle some chopped pecans or walnuts on top. You can also add a sprinkle of cinnamon for added warmth. If you want to make it a full breakfast, serve alongside crispy bacon or fresh fruit. These pancakes also pair well with a cup of hot coffee or chai tea. For the full recipe, check out the complete instructions above. {{image_2}} You can make these pancakes gluten-free. Swap the all-purpose flour for a gluten-free blend. Look for one that works well in baking. You can also use almond flour or oat flour. Just keep in mind that the texture may change slightly. Adding a little xanthan gum helps to bind the batter. This keeps your pancakes light and fluffy. To make this recipe vegan, use a non-dairy milk like almond or oat milk. Replace the egg with a flax egg. Just mix one tablespoon of ground flaxseed with three tablespoons of water. Let it sit for five minutes to thicken. You can also use vegan butter or coconut oil in place of regular butter. These swaps keep the pancakes rich and tasty without any dairy or eggs. Spice it up! You can add different flavors to your pancakes. Try adding a dash of ginger or allspice for a warm kick. Chopped nuts, like walnuts or pecans, add a nice crunch. You can also fold in chocolate chips for a sweet treat. For a fruity twist, add blueberries or cranberries. Each variation gives a new taste to your pancakes. These ideas let you customize your breakfast to fit your mood. For the full recipe, check out the *Full Recipe* section. After you enjoy your cinnamon swirl pumpkin pancakes, store leftovers properly. Let the pancakes cool to room temperature. Then, stack them with parchment paper in between each. This helps prevent them from sticking. Place the stack in an airtight container or wrap them tightly in plastic wrap. Keep them in the fridge for up to three days. If you want to save pancakes for later, freezing is a great option. Place cooled pancakes in a single layer on a baking sheet. Freeze them for about an hour. Once frozen, transfer them to a freezer-safe bag. This prevents them from sticking together. They can last up to two months in the freezer. To reheat, you can use a microwave or a toaster oven. For the microwave, heat them for about 30 seconds. Check if they are warm enough. For the toaster oven, set it to a low temperature and heat until warmed through. Pancakes in the fridge should be eaten within three days. If they start to smell sour or look dry, it’s time to toss them. Frozen pancakes can last up to two months. Be sure to check for freezer burn or ice crystals before eating. If they seem off, it’s best to err on the side of caution. Enjoy your delicious cinnamon swirl pumpkin pancakes at their best! For the full recipe, check out the [Full Recipe]. Yes, you can make the batter ahead of time. Mix your dry and wet ingredients separately, then store them in the fridge. Just remember to combine them when you're ready to cook. This makes your mornings easier and faster! You can use several alternatives to milk. Almond milk, soy milk, or oat milk work well. If you want a creamier taste, try coconut milk. Each option adds a unique flavor to your pancakes. Look for bubbles on the surface of the pancakes. When bubbles form, it’s time to flip them. Cook until they turn golden brown on both sides. A good pancake should feel firm but springy to the touch. Enjoy your cooking! For the full recipe, check out the details above. In this blog post, we explored how to make delicious cinnamon swirl pumpkin pancakes. We covered the essential ingredients and suggested alternatives, like fresh versus canned pumpkin. You learned step-by-step instructions for perfect pancakes and tips for cooking and serving. We also shared variations, including gluten-free and vegan options. Finally, we went over storage tips to keep leftovers fresh. Enjoy making these pancakes! They’re easy, tasty, and perfect for any meal.](https://dailydishlab.com/wp-content/uploads/2025/07/40c25aa9-222c-4f53-9c69-0bb881f505c1-768x768.webp)
