Nutella Stuffed French Toast Deliciously Indulgent Treat

Are you ready to indulge in a blissful breakfast treat? Nutella Stuffed French Toast combines rich Nutella and fluffy bread for a delightful start to your day. I’ll share easy steps to create this delicious dish, plus tips to avoid common mistakes. Whether you’re serving a crowd or just treating yourself, this recipe is sure to impress. Let’s dive into making this mouthwatering treat!
Why I Love This Recipe
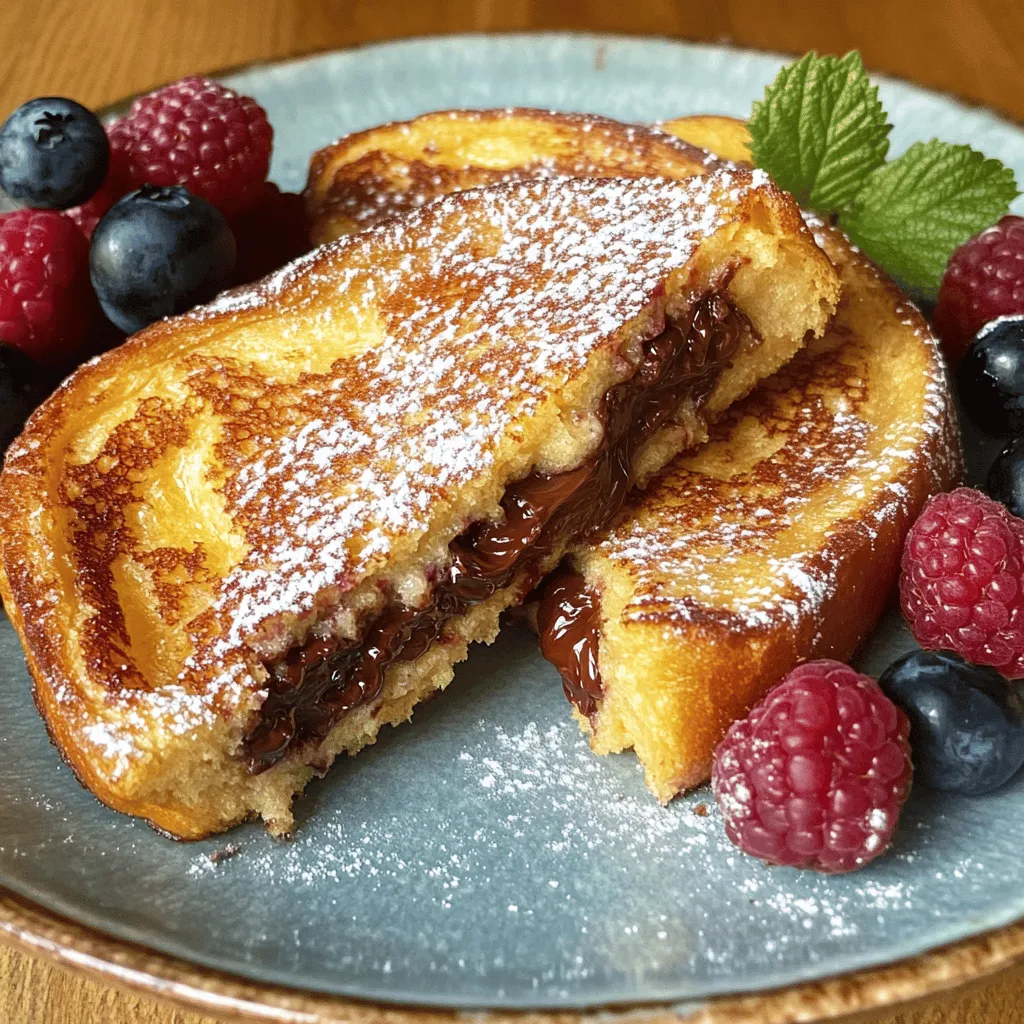
- Decadent Filling: The combination of creamy Nutella and warm, fluffy bread creates an irresistible treat that satisfies any sweet tooth.
- Quick and Easy: This recipe can be whipped up in just 20 minutes, making it perfect for busy mornings or a last-minute brunch.
- Customizable: Feel free to add your favorite toppings, such as fresh berries or sliced bananas, to personalize your French toast experience.
- Impressive Presentation: Dusting with powdered sugar and serving with berries makes this dish look as good as it tastes, perfect for impressing guests.
Ingredients
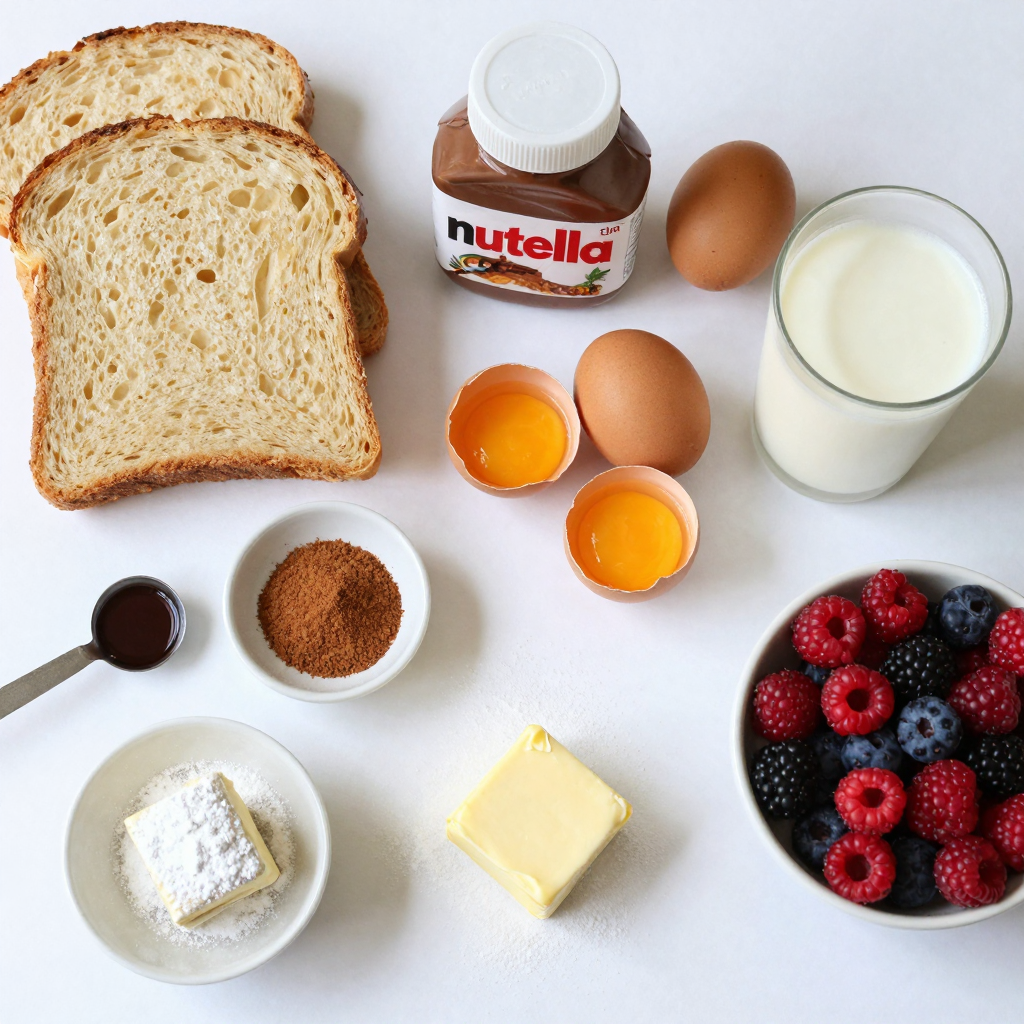
To make Nutella stuffed French toast, you need a few key ingredients that come together for a delightful treat. Here’s the list:
- 4 slices of thick bread (like brioche or challah)
- 1/2 cup Nutella
- 2 large eggs
- 1/4 cup milk (or non-dairy alternative)
- 1 teaspoon vanilla extract
- 1 teaspoon ground cinnamon
- Butter or oil for cooking
- Powdered sugar for dusting
- Fresh berries (optional, for garnish)
Each ingredient plays a role in creating the perfect balance of flavors and textures. The thick bread adds structure and can hold the creamy Nutella. The eggs and milk create a rich batter that coats the sandwiches. Vanilla and cinnamon add warmth and depth, making each bite special.
Choosing the right bread is key. Brioche or challah brings a soft and fluffy texture. Nutella provides that irresistible chocolate-hazelnut flavor. You can also use non-dairy milk if you want a vegan option.
I often dust the French toast with powdered sugar. It adds a sweet touch without overpowering the dish. Fresh berries, while optional, bring a burst of freshness that complements the rich Nutella. Enjoy gathering these ingredients; they promise a truly indulgent breakfast!

Step-by-Step Instructions
Preparing the Sandwiches
- First, take two slices of thick bread.
- Spread a generous layer of Nutella on each slice.
- Now, place the other two slices on top to make sandwiches.
Making the Batter
- In a medium bowl, crack two large eggs.
- Add 1/4 cup of milk and mix well.
- Stir in one teaspoon of vanilla and one teaspoon of cinnamon.
- Whisk until the mixture is smooth and creamy.
Cooking the French Toast
- Heat a skillet over medium heat.
- Add a little butter or oil to coat the pan.
- Dip each sandwich into the egg mixture, covering both sides.
- Let any extra batter drip off before cooking.
- Place the sandwiches on the skillet and cook for 3 to 4 minutes.
- Flip them to cook the other side until golden brown.
- Adjust the heat if needed to avoid burning the toast.
Pro Tips
- Use Stale Bread: Stale bread absorbs the egg mixture better, creating a custardy texture. If your bread is fresh, leave it out for a few hours or lightly toast it before using.
- Customize the Filling: Feel free to mix in other ingredients with the Nutella, such as sliced bananas or strawberries, for added flavor and texture.
- Keep it Warm: If making multiple sandwiches, keep cooked French toast warm in a low oven (around 200°F) until serving to ensure they stay crispy.
- Experiment with Toppings: Beyond powdered sugar, try drizzling maple syrup, honey, or a dollop of whipped cream for an extra indulgent treat.
Tips & Tricks
Achieving Perfect Texture
To get crispy outsides and gooey insides, use thick bread like brioche or challah. They hold up well and add flavor. When you dip the sandwiches in the egg mix, do it quickly. You want them coated but not soaked. Let any extra batter drip off before cooking. This keeps them from getting too soggy.
Avoiding Common Mistakes
To prevent soggy bread, don’t let the sandwiches sit in the egg mix for long. Cook them right away after dipping. If your French toast burns, lower the heat. Cooking too fast can lead to burnt edges. Keep an eye on them, turning when golden brown.
Serving Suggestions
Garnish your Nutella stuffed French toast with a sprinkle of powdered sugar. Fresh berries add color and flavor, making the dish pop. You can serve it with whipped cream or maple syrup too. Pair it with a hot cup of coffee or a cold glass of milk for a delightful meal.

Variations
Flavor Twists
You can change up the Nutella stuffed French toast to fit your taste. Adding fruit or nuts can give a fresh twist. Try slices of banana or strawberries inside the toast. You can also sprinkle some chopped almonds or walnuts for crunch.
You can use other spreads or flavor mixes too. Instead of Nutella, try peanut butter or almond butter. For a fun twist, mix Nutella with a bit of orange zest for a citrus kick. You can even go savory by using cream cheese or mascarpone instead.
Dietary Adjustments
If you need gluten-free options, use gluten-free bread. Many stores carry tasty gluten-free loaves that work well. Check the labels to find one you like.
For a vegan version, swap the eggs and milk. Use mashed bananas or a flaxseed mixture instead of eggs. For milk, try almond milk or oat milk. These changes keep the dish delicious and suitable for everyone.
Storage Info
Refrigeration
To store leftovers, let your Nutella stuffed French toast cool down first. Wrap each piece tightly in plastic wrap or place them in an airtight container. This helps keep them fresh and prevents them from drying out. You can store them in the fridge for up to three days. If you want to keep them longer, consider freezing them.
Reheating Instructions
To reheat, I recommend using a skillet. Heat it over medium heat. Add a little butter or oil to the pan. Place the French toast in the skillet and cook for about 2-3 minutes on each side. This method keeps the outside crispy and the inside warm. You can also use a toaster oven for quick reheating. Just place them on the tray and heat until warm. Enjoy your tasty treat!
FAQs
How long does Nutella Stuffed French Toast last?
Nutella Stuffed French Toast lasts about 2-3 days in the fridge. Store it in an airtight container. The bread might get a bit soft, but the flavor stays good. You can always reheat it in a pan or microwave to enjoy.
Can I use other types of bread?
Yes, you can use many kinds of bread. Brioche and challah work best, but any thick bread will do. Try sourdough or even bagels for a fun twist. Just make sure it doesn’t fall apart when you dip it in the egg mix.
What can I substitute for eggs or milk?
For eggs, you can use flaxseed meal mixed with water. Mix 1 tablespoon of flaxseed with 2.5 tablespoons of water. For milk, almond or oat milk are great choices. These swaps keep the taste yummy and work well in the recipe.
Is Nutella Stuffed French Toast a good make-ahead recipe?
Yes, you can make it ahead! Prepare the sandwiches and store them in the fridge. When ready to cook, just dip them in the egg mix and fry. This saves time on busy mornings and still tastes fresh.
How do I know when it’s done cooking?
The French toast is ready when it turns golden brown. Cook each side for about 3 to 4 minutes. You can check by lifting a corner with a spatula. If it looks crispy and golden, it’s done!
This article covered how to make Nutella Stuffed French Toast. You learned the right ingredients, step-by-step instructions, and tips for success. We discussed flavor variations and how to store leftovers.
Remember, cooking is fun and creative. Enjoy experimenting with different flavors and techniques. Serve this dish to impress guests or treat yourself. Happy cooking!

Nutella Stuffed French Toast
Ingredients
4 slices of thick bread (like brioche or challah)
1/2 cup Nutella
2 large eggs
1/4 cup milk (or non-dairy alternative)
1 teaspoon vanilla extract
1 teaspoon ground cinnamon
Butter or oil for cooking
Powdered sugar for dusting
Fresh berries (optional, for garnish)
Instructions
Prepare the Bread: Spread a generous layer of Nutella on two slices of thick bread. Top with the other two slices to form two sandwiches.
Make the Batter: In a medium mixing bowl, whisk together the eggs, milk, vanilla extract, and ground cinnamon until well combined.
Heat the Pan: Heat a skillet or griddle over medium heat and add a little butter or oil to coat the surface.
Dunk the Sandwiches: Carefully dip each sandwich into the egg mixture, ensuring both sides are well coated but not overly saturated. Let any excess batter drip off.
Cook the French Toast: Place the sandwiches on the skillet and cook for 3 to 4 minutes on each side, or until golden brown and crispy. Adjust the heat if necessary to prevent burning.
Serve: Once cooked, remove from the pan and let them cool slightly before slicing in half. Dust with powdered sugar and serve with fresh berries on the side if desired.
Prep Time: 10 mins | Total Time: 20 mins | Servings: 2

Nutella Stuffed French Toast
Ingredients
- 4 slices thick bread (like brioche or challah)
- 0.5 cup Nutella
- 2 large eggs
- 0.25 cup milk (or non-dairy alternative)
- 1 teaspoon vanilla extract
- 1 teaspoon ground cinnamon
- as needed Butter or oil for cooking
- as needed Powdered sugar for dusting
- optional Fresh berries (for garnish)
Instructions
- Spread a generous layer of Nutella on two slices of thick bread. Top with the other two slices to form two sandwiches.
- In a medium mixing bowl, whisk together the eggs, milk, vanilla extract, and ground cinnamon until well combined.
- Heat a skillet or griddle over medium heat and add a little butter or oil to coat the surface.
- Carefully dip each sandwich into the egg mixture, ensuring both sides are well coated but not overly saturated. Let any excess batter drip off.
- Place the sandwiches on the skillet and cook for 3 to 4 minutes on each side, or until golden brown and crispy. Adjust the heat if necessary to prevent burning.
- Once cooked, remove from the pan and let them cool slightly before slicing in half. Dust with powdered sugar and serve with fresh berries on the side if desired.


![- Fresh strawberries - Semi-sweet chocolate chips - Coconut oil for smooth melting - Crushed nuts (almonds or hazelnuts) - Colorful sprinkles - Lollipop sticks - Microwave-safe bowl - Parchment paper To make delicious chocolate-covered strawberry pops, you need a few key items. Start with fresh strawberries. Choose ripe, firm ones for the best taste. Next, grab semi-sweet chocolate chips. They melt well and add a rich flavor. Also, use coconut oil. This helps the chocolate melt smoothly and stick to the strawberries. You can add fun toppings to make your pops even better. Try crushed nuts, like almonds or hazelnuts, for a crunchy bite. Colorful sprinkles also add a nice touch. They make the pops look festive and fun. For the tools, have lollipop sticks ready. They help you hold the strawberries while dipping. Use a microwave-safe bowl for melting the chocolate. Finally, get parchment paper. It keeps your pops from sticking as they cool. With these ingredients and tools, you're all set to create a tasty delight. For the full recipe, check the details above. First, wash the strawberries gently. Make sure they are dry. Any water will stop the chocolate from sticking. You can use a paper towel to help. Next, take the lollipop sticks. Push one stick into the stem end of each strawberry. Aim to push it about halfway in. This gives you a nice handle for dipping. Now, let’s melt the chocolate. In a microwave-safe bowl, mix the chocolate chips with coconut oil. The coconut oil helps the chocolate melt smoothly. Microwave this mix in 30-second bursts. Stir after each burst until it is fully melted. Be careful not to overheat it, or the chocolate can burn. Hold the strawberry by the stick. Dip it into the melted chocolate. Make sure to cover it fully. Let any extra chocolate drip off. After dipping, it’s time to add toppings. While the chocolate is still wet, sprinkle on crushed nuts or colorful sprinkles. This helps them stick well. Finally, place the dipped strawberries upright in a container or on parchment paper. Let them sit until the chocolate hardens. This usually takes about 15-20 minutes at room temperature. If you’re in a hurry, the fridge works too; just chill them for 10 minutes. To get a smooth coat on your pops, always add coconut oil. Coconut oil helps the chocolate melt evenly. This helps create a shiny finish that looks great. If you don't have coconut oil, you can use vegetable oil. Just keep in mind that it may not shine as much. When you melt the chocolate, do it slowly. Use short bursts in the microwave. Stir well after each burst to keep the texture just right. Making your chocolate-covered strawberry pops look fun is easy. Use colorful lollipop holders to make them pop at parties. Consider sticking them in a piece of foam or a pretty container. You can also arrange them in a fun shape, like a heart. Another idea is to drizzle white chocolate on top for a more stylish look. These small touches make your dessert stand out. Watch out for moisture! If your strawberries are wet, the chocolate will not stick. Always dry them well before dipping. Another mistake is overheating the chocolate. If it gets too hot, it can clump. This ruins the smooth finish you want. Always use a low heat and stir often to prevent this. {{image_2}} You can switch up the chocolate for your pops. Dark chocolate gives a rich taste. Milk chocolate is sweet and creamy. White chocolate adds a fun twist with its sweet flavor. You can also add flavor. Try a drop of peppermint extract for a cool touch. Vanilla extract brings a warm, sweet note to the mix. Get creative with toppings! Coconut flakes add a tropical flair. Mini chocolate chips bring extra sweetness and crunch. You can also use crushed nuts for a nutty bite. Rainbow sprinkles make the pops fun and colorful. Just make sure to add them right after dipping the strawberry. Make your pops party-ready! For holidays, decorate with colors that match the theme. Use red and green for Christmas or pastel colors for Easter. You can even customize them for birthdays. Just add sprinkles or edible glitter to match the party theme. These small touches make your pops stand out! For the complete recipe, check out the [Full Recipe]. Store chocolate-covered strawberry pops in a cool, dry place. The ideal temperature is between 60°F and 70°F. Keep them away from direct sunlight. This helps keep the chocolate smooth and shiny. To stack the pops, use a container with dividers. Place parchment paper between layers. This prevents them from sticking to each other. If you don't have dividers, lay them flat on a tray lined with parchment paper. For the best taste, eat the pops within two days. After that, the strawberries may lose their freshness. You can freeze chocolate-covered strawberry pops. Wrap them well in plastic wrap, then place them in a freezer bag. They can last up to a month in the freezer. To enjoy, thaw them in the fridge. Avoid thawing at room temperature. This keeps the chocolate from getting too soft. If you have leftover chocolate, pour it into molds. You can make chocolate bites or bars. This is a fun way to enjoy extra chocolate. For leftover strawberries, try making a smoothie. Blend them with yogurt or milk. You can also slice them for topping on pancakes or oatmeal. This way, nothing goes to waste, and you enjoy more treats. You can use frozen strawberries, but they change the texture. They may become mushy when thawed. This can affect how well the chocolate sticks to them. Fresh strawberries hold up better, ensuring a firm bite. If you choose frozen, let them thaw completely and dry them well before dipping. To make the chocolate smoother, you can add coconut oil during melting. This helps create a nice, glossy finish. Melt the chocolate in short bursts in the microwave, stirring well in between. Avoid overheating, as this can make the chocolate clumpy. Stirring helps keep the heat even, giving you a smooth result. Yes, there are vegan options! You can use dairy-free chocolate chips for a vegan treat. Look for brands that use plant-based ingredients. For toppings, consider nuts, seeds, or dairy-free sprinkles. This way, you can enjoy chocolate-covered strawberry pops while sticking to a vegan diet. We explored how to create delicious chocolate-covered strawberry pops, from essential ingredients to creative variations. Remember, fresh strawberries, coconut oil, and careful melting are key. Avoid common mistakes like moisture and overheating for the best results. With these tips, you can impress at any event. Enjoy experimenting with toppings and flavors, and get creative in your presentations. These treats are not just tasty; they can also be fun to make and share. Happy dipping!](https://dailydishlab.com/wp-content/uploads/2025/07/28782691-e2ef-4ba1-b328-d9019563a0b5-768x768.webp)
![To make these brownies, you need specific ingredients. Here’s what you’ll gather: - 1 cup unsalted butter (2 sticks) - 2 cups granulated sugar - 4 large eggs - 1 teaspoon vanilla extract - 1 cup all-purpose flour - 1 cup unsweetened cocoa powder - 1/2 teaspoon salt - 1 cup chopped pecans - 1 cup caramel sauce (store-bought or homemade) - 1/2 cup chocolate chips (semi-sweet or dark) - 1/4 teaspoon sea salt (for topping) Each ingredient plays a key role in creating the rich, fudgy texture and flavor you will love. While the essential ingredients are perfect, you can add more for extra flavor. Consider these options: - A dash of espresso powder can deepen the chocolate taste. - A splash of bourbon or rum brings warmth and complexity. - Use dark chocolate chips for a richer finish. - Add sea salt flakes on top for a contrast in taste. These optional ingredients can take your brownies to the next level. To make the process smooth, you'll need some tools. Here’s what I recommend: - A medium saucepan for melting butter. - A mixing bowl for combining wet ingredients. - A separate bowl for dry ingredients. - A whisk for mixing eggs and vanilla. - A spatula to fold in the nuts and chips. - A 9x13 inch baking pan lined with parchment paper. These tools help you create the perfect caramel pecan turtle brownies. For the full recipe, you can check the complete steps and tips. Enjoy your baking! To create your brownie batter, start with the basics. First, preheat your oven to 350°F (175°C). Next, grease a 9x13 inch baking pan and line the bottom with parchment paper. This step helps with easy removal later. In a medium saucepan, melt 1 cup of unsalted butter over low heat. Once it melts, add 2 cups of granulated sugar and stir until mixed well. Remove the saucepan from heat and let it cool for a few minutes. This cooling step is important to avoid cooking the eggs. Now, whisk in 4 large eggs, one at a time. Add 1 teaspoon of vanilla extract and mix until smooth. In another bowl, sift together 1 cup of all-purpose flour, 1 cup of unsweetened cocoa powder, and 1/2 teaspoon of salt. Gradually add the dry mix to the wet mix. Stir gently until just combined. Overmixing can lead to tough brownies. Fold in 1 cup of chopped pecans and 1/2 cup of chocolate chips, saving a few pecans for the topping. Now it’s time to layer your brownies. Pour half of the brownie batter into the prepared pan and spread it evenly. Drizzle half of the caramel sauce over this layer. Then spoon the rest of the batter on top and spread it gently. Drizzle the remaining caramel sauce over this layer. Sprinkle the reserved pecans on top and add a pinch of sea salt to enhance the flavor. Bake in your preheated oven for 30 to 35 minutes. To check for doneness, insert a toothpick in the center. It should come out with a few moist crumbs, not wet batter. After baking, remove the pan from the oven. Let the brownies cool in the pan for at least 30 minutes. Use the parchment paper to lift them out. Slice them into squares for serving. For a special touch, serve the brownies warm. Drizzle with extra caramel sauce and sprinkle with sea salt. This adds a lovely finishing touch that enhances the flavor. Enjoy your delicious creation! For the complete recipe, check out the [Full Recipe]. One big mistake is overmixing the batter. When you mix too much, it makes brownies tough. Mix until just combined for a softer bite. Another common error is not measuring ingredients well. Use dry measuring cups for flour and cocoa powder. Level the tops with a knife for accuracy. For that perfect chewy texture, use melted butter. This gives your brownies a rich flavor. Don't forget to let the batter rest for a few minutes before baking. It helps the ingredients meld together. Also, bake just until a toothpick shows a few moist crumbs. Too long makes them dry. Serve brownies warm to enjoy their gooey center. Drizzle extra caramel sauce on top for added sweetness. A sprinkle of sea salt can enhance the flavors. Pair with a scoop of vanilla ice cream for a delightful treat. Enjoy your Caramel Pecan Turtle Brownies with friends and family for a memorable dessert. Check out the Full Recipe for more tips! {{image_2}} If you want to change the taste, try other nuts. Almonds, walnuts, or hazelnuts can work well. Each nut gives a unique flavor. Almonds add a sweet crunch. Walnuts bring a rich, earthy taste. Hazelnuts give a hint of chocolate flavor. Just chop them as you would with pecans and mix them in. You can even toast the nuts lightly for extra flavor! Making your own caramel sauce is easy and fun. You need just sugar, butter, and cream. Start by melting sugar in a pan. Watch it closely so it doesn’t burn. Once it melts and turns golden, add butter and let it melt. Then, pour in heavy cream slowly and stir. Let it cool before using it in your brownies. This sauce adds a fresh taste that store-bought cannot match. Want to make these brownies gluten-free? Use gluten-free all-purpose flour instead of regular flour. Check that your caramel sauce is also gluten-free. Many brands are safe, but always read the label. This way, you can enjoy rich, gooey brownies without worry. The taste remains just as delightful, and your friends will never know the difference! Don't forget to check out the Full Recipe for all the details on making these sweet treats! To keep your caramel pecan turtle brownies fresh, store them in an airtight container. Place parchment paper between layers to avoid sticking. They can last up to a week at room temperature. For longer storage, put them in the fridge. This helps maintain their chewy texture and flavor. Freezing brownies is a great way to save some for later. First, allow them to cool completely. Then, cut them into squares. Wrap each piece tightly in plastic wrap. Put them in a freezer-safe bag or container. They can stay frozen for up to three months. When you’re ready to enjoy, just thaw them in the fridge overnight. To enjoy your brownies warm, reheat them in the microwave. Use a low power setting to avoid drying them out. Heat for about 10-15 seconds. You can also warm them in the oven. Set the oven to 350°F (175°C) and place the brownies in for about 5-10 minutes. This brings back that fresh-baked taste. For extra delight, drizzle some caramel sauce on top before serving. Turtle brownies get their name from the classic turtle candy. This candy has caramel, pecans, and chocolate. In our brownies, I mix these same flavors. The caramel adds sweetness, the pecans give a nice crunch, and the chocolate ties it all together. When you bite into these brownies, you taste the rich chocolate and gooey caramel. It's like a treat you can hold in your hand! Yes, you can. If you want to skip the eggs, you can use a few substitutes. Applesauce is a great choice. Use 1/4 cup of unsweetened applesauce for each egg. You can also use a flaxseed meal. Mix one tablespoon of flaxseed meal with three tablespoons of water. Let it sit for a few minutes until it gets thick. Both options work well and keep the brownies moist. These brownies stay fresh for about four to five days when stored properly. Keep them in an airtight container at room temperature. If you want them to last longer, you can freeze them. Just wrap them well in plastic wrap and place them in a freezer bag. They can last up to three months in the freezer. When you're ready to enjoy, just thaw them at room temperature or warm them in the microwave for a few seconds. Remember, for the full recipe, check our earlier section! In this post, we explored how to make delicious caramel pecan turtle brownies. We discussed essential and optional ingredients, the tools you need, and easy step-by-step instructions. I also shared useful tips to avoid common mistakes and achieve the perfect texture. Plus, we looked at variations, storage info, and common questions. Enjoying these brownies can be a fun baking adventure. I hope you try these tips and enjoy every bite!](https://dailydishlab.com/wp-content/uploads/2025/07/cd6252c4-9eb9-4ecc-b5d9-7ffc816e6e24-768x768.webp)