One-Pot Creamy Red Lentil Curry Easy and Flavorful Dish

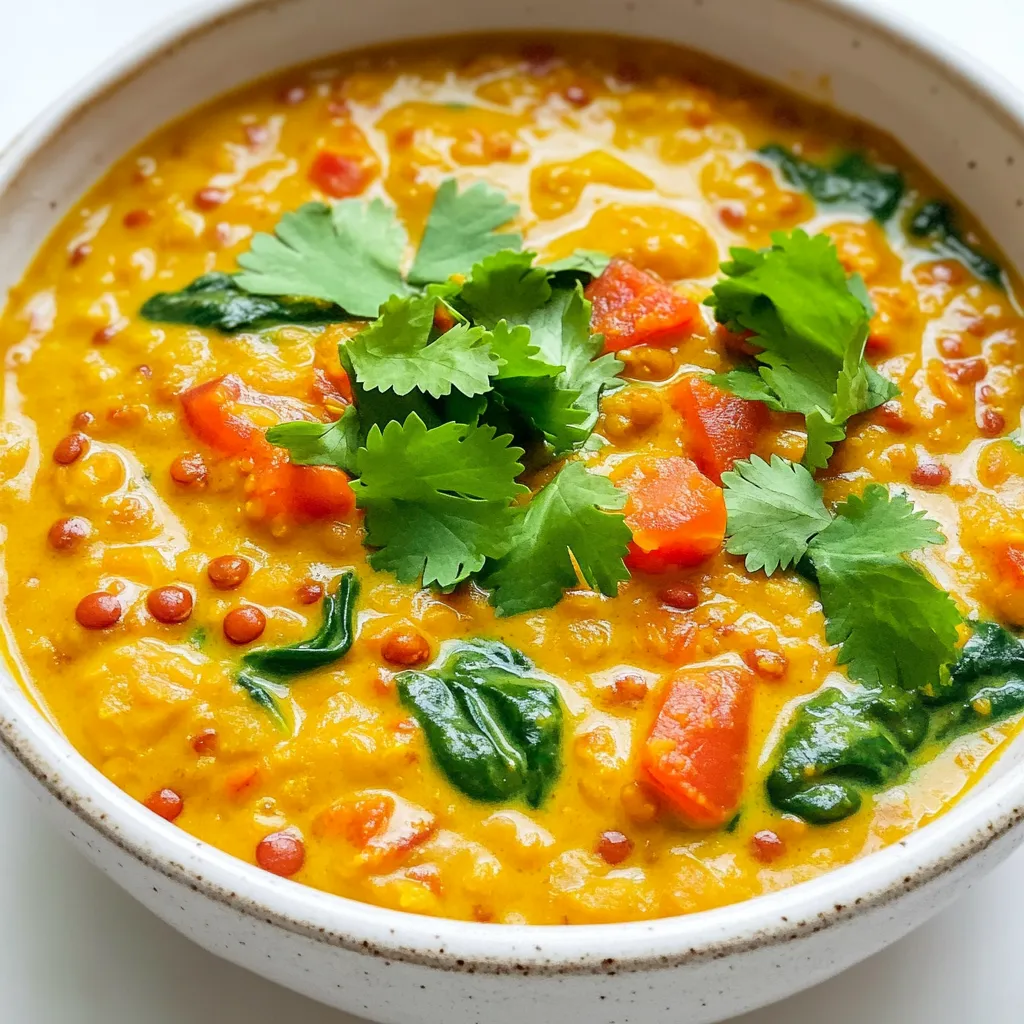
Are you ready to whip up a dish that’s easy and packed with flavor? This One-Pot Creamy Red Lentil Curry combines simple ingredients and bold spices to create a meal everyone will love. You’ll learn step-by-step how to cook lentils to perfection, boost flavors, and explore tasty variations. Whether you’re a busy parent or a cooking novice, this recipe is perfect for a quick weeknight dinner. Let’s dive in!
Why I Love This Recipe
- Quick and Easy: This one-pot meal is ready in just 35 minutes, making it perfect for busy weeknights.
- Nutritious and Filling: Packed with protein-rich red lentils and vibrant spinach, this curry is both healthy and satisfying.
- Flavorful and Creamy: The combination of coconut milk and spices creates a rich, creamy texture that elevates the dish.
- Versatile Ingredients: You can easily customize this recipe by adding your favorite vegetables or adjusting the spice level.
Ingredients
List of Essential Ingredients
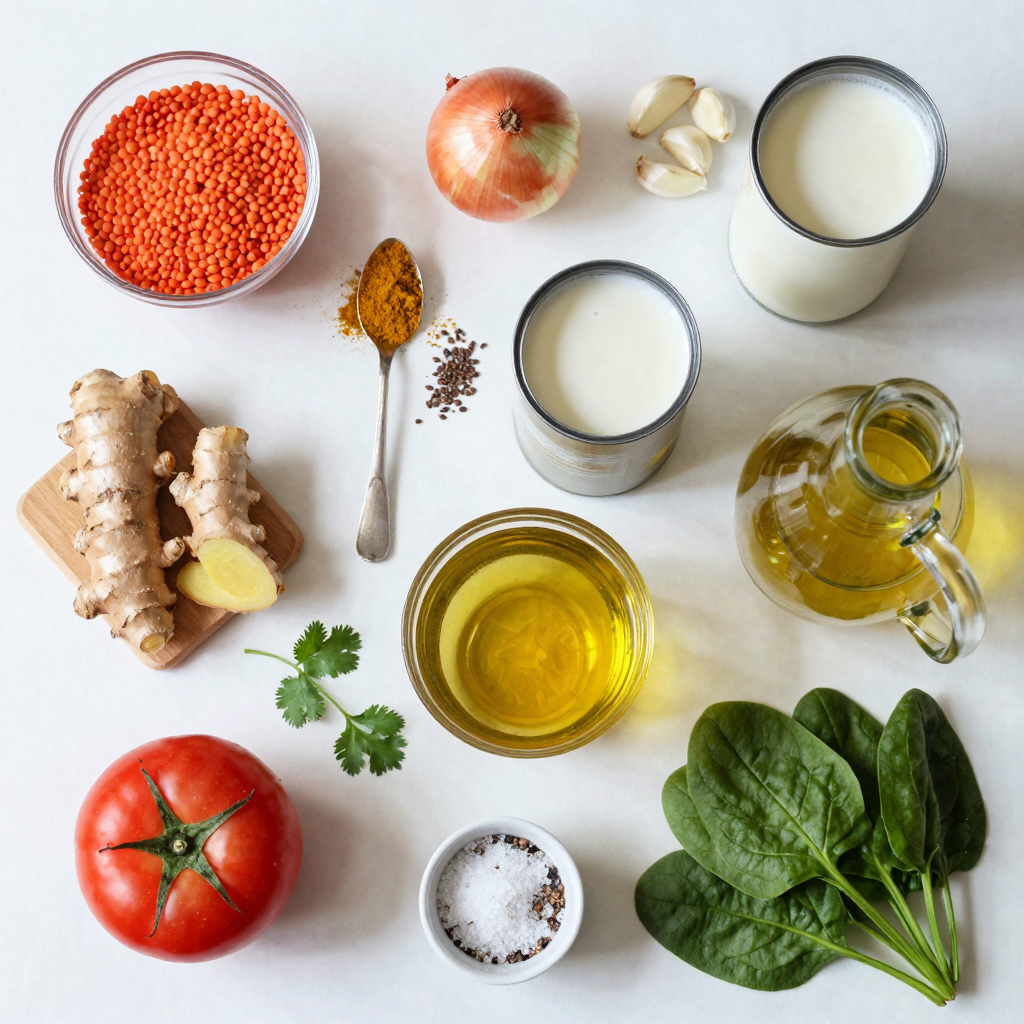
To make a great one-pot creamy red lentil curry, you need the following:
- 1 cup red lentils, rinsed
- 1 medium onion, diced
- 2 garlic cloves, minced
- 1-inch piece of ginger, grated
- 1 tablespoon curry powder
- 1 teaspoon cumin seeds
- 1 can (400ml) coconut milk
- 2 cups vegetable broth
- 1 large tomato, diced
- 1 cup spinach, fresh or frozen
- 1 tablespoon olive oil
- Salt and pepper to taste
- Fresh cilantro for garnish
These ingredients create a flavorful and creamy dish. The red lentils cook quickly and add protein. Coconut milk gives a rich texture. The spices make it warm and inviting.
Optional Ingredients for Extra Flavor
You can enhance your curry with these optional ingredients:
- 1 cup chopped carrots or bell peppers
- 1 tablespoon lemon juice
- 1 teaspoon turmeric
- A pinch of red chili flakes for heat
Adding these can change the taste in fun ways. Carrots or peppers add crunch. Lemon juice brightens the flavor. Turmeric adds color and health benefits.
Tips on Choosing Quality Ingredients
When shopping for ingredients, focus on freshness and quality:
- Choose lentils that are bright in color, not dull.
- Pick firm tomatoes that feel heavy for their size.
- Fresh herbs should look vibrant, with no browning.
- Opt for full-fat coconut milk for the best creaminess.
Quality ingredients make a big difference in taste. Always check for the best options. This small effort pays off in the final dish.

Step-by-Step Instructions
Preparation Steps Overview
To make this dish, you need to gather your ingredients. Start by rinsing 1 cup of red lentils. Dice 1 medium onion and 1 large tomato. Mince 2 garlic cloves and grate a 1-inch piece of ginger. Measure out 1 tablespoon of curry powder and 1 teaspoon of cumin seeds. Lastly, have 1 can of coconut milk and 2 cups of vegetable broth ready.
Cooking Process with Detailed Timeline
1. Heat the Oil: In a large pot, add 1 tablespoon of olive oil. Turn the heat to medium.
2. Sauté the Spices: Once the oil is hot, add the cumin seeds. Sauté them for 1 minute until they smell good.
3. Add Aromatics: Next, add the diced onion, minced garlic, and grated ginger. Sauté this mix for 3-4 minutes until the onion turns clear.
4. Bloom the Spices: Stir in the curry powder now. Cook for another minute so the spices can release their flavors.
5. Combine Ingredients: Add the rinsed red lentils, diced tomato, coconut milk, and vegetable broth to the pot. Give everything a good stir.
6. Simmer the Mixture: Bring the pot to a boil. Then, reduce the heat to low. Cover the pot and let it simmer for 20-25 minutes. Stir occasionally until the lentils become soft.
7. Add Spinach: When the lentils are cooked, toss in 1 cup of spinach. Stir until it wilts. Add salt and pepper to taste.
Final Steps for Serving the Dish
Once ready, ladle the curry into bowls. Garnish with fresh cilantro on top. Serve warm and enjoy!
Pro Tips
- Rinse Lentils Thoroughly: Always rinse your red lentils before cooking to remove any dust or impurities, ensuring a cleaner taste and texture.
- Customize Spice Levels: Adjust the amount of curry powder and cumin seeds according to your preference for spice. Start with less and add more gradually for a balanced flavor.
- Use Fresh Ingredients: Whenever possible, use fresh garlic, ginger, and spinach to enhance the flavor and nutritional value of your curry.
- Rest Before Serving: Let the curry sit for a few minutes after cooking; this allows the flavors to meld together for a richer taste.
Tips & Tricks
How to Achieve Perfectly Cooked Lentils
To get perfectly cooked lentils, always rinse them well before cooking. This removes excess starch. Use a pot with enough space for lentils to expand. Cooking them in vegetable broth adds rich flavor. Keep an eye on the time; about 20-25 minutes should do. Stir occasionally to prevent sticking. If they get too thick, add a little more broth or water.
Common Mistakes to Avoid
One common mistake is not rinsing the lentils. This can lead to a gummy texture. Another mistake is cooking them too long. They can turn mushy if overcooked. Don’t skip the spices, either! They are crucial for flavor. Lastly, avoid using too much heat. Cooking on low helps blend all the flavors well.
Suggestions for Enhancing Flavor
To boost flavor, try adding a squeeze of lime juice before serving. Fresh herbs like cilantro elevate the dish, too. You could also add a dash of chili powder for some heat. If you love garlic, toss in an extra clove or two. For a richer taste, consider adding a dollop of yogurt on top. These simple tweaks can make your curry shine!

Variations
Adding Protein: Suggestions and Alternatives
You can add protein to your curry easily. Try adding cooked chicken, shrimp, or tofu. Each option brings its own taste. For chicken, use shredded or diced pieces. For shrimp, add them in the last few minutes of cooking. Tofu should be cubed and can be added early on to soak in flavor.
Vegan or Vegetarian Variations
This curry is already vegan with red lentils and coconut milk. To keep it vegetarian, add yogurt or cheese for creaminess. You can also use vegetable broth for a richer taste. Mix in veggies like bell peppers or peas to boost nutrition. Each choice adds color and flavor to your dish.
Spice Level Adjustments for Different Tastes
You can adjust the spice level easily. For a mild curry, skip the cumin seeds and use less curry powder. If you like heat, add chopped chili peppers or cayenne pepper. You can also add fresh ginger for a spicy kick. Taste as you go to find your perfect heat level.
Storage Info
Best Practices for Storing Leftovers
To store your One-Pot Creamy Red Lentil Curry, let it cool first. You can keep it in an airtight container. Place it in the fridge for up to four days. If you want to enjoy it later, this curry freezes well too. Just make sure it cools completely before freezing it.
How to Reheat the Curry Effectively
When you’re ready to eat your leftovers, reheat them gently. Pour the curry into a pot over medium heat. Stir often to prevent sticking. You can also add a splash of water or coconut milk to keep it creamy. Heat until warm, and enjoy!
Freezing Guidelines and Tips
If you decide to freeze your curry, use freezer-safe containers. Leave some space at the top for expansion. It’s best to eat frozen curry within three months for the best taste. When you’re ready to use it, thaw it in the fridge overnight. Then, reheat as mentioned above for a quick meal.
FAQs
Can I use other types of lentils?
Yes, you can use other lentils, but red lentils work best. They cook fast and break down, giving the curry a creamy texture. If you use green or brown lentils, they will take longer to cook. Adjust the cooking time to ensure they are tender.
How do I make the curry creamier?
To make the curry creamier, add more coconut milk. You can also stir in some yogurt or cashew cream for extra richness. If you blend a portion of the lentils, it will create a smooth, creamy base. Just remember to mix it well.
What can I serve with One-Pot Creamy Red Lentil Curry?
This curry pairs well with rice or naan bread. You can also serve it with a fresh salad for a nice crunch. If you want more protein, add grilled chicken or chickpeas on the side. Feel free to mix and match!
How long does it take to cook lentils?
Cooking lentils usually takes 20 to 25 minutes. Red lentils cook faster than other types. Make sure to rinse them before cooking. This helps remove any dust and improves the flavor. Always check for tenderness as they cook.
In this blog post, we covered how to make a delicious One-Pot Creamy Red Lentil Curry. We explored essential and optional ingredients, focusing on quality choices. I provided step-by-step cooking instructions and tips for perfectly cooked lentils. We also looked at tasty variations and safe storage methods.
Always remember, cooking is about joy and creativity. Experiment with flavors and enjoy every bite of your dish!

One-Pot Creamy Red Lentil Curry
Ingredients
1 cup red lentils, rinsed
1 medium onion, diced
2 garlic cloves, minced
1-inch piece of ginger, grated
1 tablespoon curry powder
1 teaspoon cumin seeds
1 can (400ml) coconut milk
2 cups vegetable broth
1 large tomato, diced
1 cup spinach, fresh or frozen
1 tablespoon olive oil
Salt and pepper to taste
Fresh cilantro for garnish
Instructions
In a large pot, heat the olive oil over medium heat. Add the cumin seeds and sauté for a minute until fragrant.
Add the diced onion, garlic, and ginger to the pot. Sauté for 3-4 minutes or until the onion becomes translucent.
Stir in the curry powder and cook for another minute, allowing the spices to bloom.
Add the rinsed red lentils, diced tomato, coconut milk, and vegetable broth to the pot. Stir everything together.
Bring the mixture to a boil, then reduce the heat to low. Cover and let it simmer for about 20-25 minutes, stirring occasionally until the lentils are tender.
Once the lentils are cooked, add the spinach and stir until wilted. Season with salt and pepper to taste.
Serve warm, garnished with fresh cilantro.
Prep Time, Total Time, Servings: 10 minutes | 35 minutes | Serves 4

One-Pot Creamy Red Lentil Curry
Ingredients
- 1 cup red lentils, rinsed
- 1 medium onion, diced
- 2 cloves garlic, minced
- 1 inch piece of ginger, grated
- 1 tablespoon curry powder
- 1 teaspoon cumin seeds
- 1 can (400ml) coconut milk
- 2 cups vegetable broth
- 1 large tomato, diced
- 1 cup spinach, fresh or frozen
- 1 tablespoon olive oil
- to taste salt and pepper
- for garnish fresh cilantro
Instructions
- In a large pot, heat the olive oil over medium heat. Add the cumin seeds and sauté for a minute until fragrant.
- Add the diced onion, garlic, and ginger to the pot. Sauté for 3-4 minutes or until the onion becomes translucent.
- Stir in the curry powder and cook for another minute, allowing the spices to bloom.
- Add the rinsed red lentils, diced tomato, coconut milk, and vegetable broth to the pot. Stir everything together.
- Bring the mixture to a boil, then reduce the heat to low. Cover and let it simmer for about 20-25 minutes, stirring occasionally until the lentils are tender.
- Once the lentils are cooked, add the spinach and stir until wilted. Season with salt and pepper to taste.
- Serve warm, garnished with fresh cilantro.


![Here’s what you need for Easy Sheet Pan Salmon Fajitas. Gather these ingredients for a fun and tasty meal: - 1 lb salmon fillet, cut into bite-sized pieces - 2 bell peppers (any color), sliced - 1 medium onion, sliced - 3 tablespoons olive oil - 2 teaspoons chili powder - 1 teaspoon ground cumin - 1 teaspoon garlic powder - 1/2 teaspoon smoked paprika - Salt and pepper to taste - 8 small flour or corn tortillas - Fresh cilantro, for garnish - Lime wedges, for serving These ingredients work together to create a dish that is both simple and full of flavor. The salmon brings a rich taste, while the vegetables add crunch and color. Each spice adds a unique depth, making every bite exciting. You can find the full recipe to guide you through the cooking process. Enjoy crafting this delightful meal! - Preheat your oven to 400°F (200°C). - Line a baking sheet with parchment paper. - In a large bowl, combine sliced bell peppers and onion with 3 tablespoons of olive oil, chili powder, ground cumin, garlic powder, smoked paprika, salt, and pepper. - Toss well to coat the veggies evenly. - Spread the seasoned vegetables on one side of the sheet pan. - Coat salmon pieces with olive oil and place them on the other side of the pan. - Bake everything for 15-20 minutes. Check for doneness to ensure the salmon is cooked through. - Warm the tortillas in a dry skillet or microwave until soft. - Once done, assemble salmon and veggies in the warm tortillas. - Add fresh cilantro and a squeeze of lime juice for extra flavor. You can find the complete instructions in the Full Recipe. Enjoy your cooking! I love to play with flavors. For a zestier kick, add more chili powder. If you prefer a milder taste, reduce it. You can also mix in some lime zest for a fresh twist. For a smoky flavor, increase the smoked paprika. Experiment with spices to find what you love. Cooking time depends on the salmon's thickness. Thicker pieces need a bit more time, while thinner ones cook faster. Check your salmon at 15 minutes. If it flakes easily with a fork, it's done! Different ovens heat unevenly, so keep an eye on your dish. If your oven runs hot, reduce the time slightly. These salmon fajitas shine with simple sides. A fresh avocado salad pairs well. You can also serve with black beans or corn on the side. For dips, try a creamy avocado sauce or salsa. A cold drink, like lemonade or iced tea, complements the meal perfectly. Enjoy your colorful, tasty dish! {{image_2}} You can switch salmon for chicken or tofu. Chicken works well because it absorbs flavors nicely. Cut chicken into small pieces like the salmon. Cook it for about 20-25 minutes. Tofu is a great choice for a plant-based option. Press it to remove extra water, then cut it into cubes. Bake it for 15-20 minutes too. Both options are tasty and keep the dish simple. Feel free to add more veggies for fun and flavor. Zucchini, corn, or mushrooms are great choices. Slice zucchini into thin rounds and add it to the mix. Corn can bring a sweet crunch. You can chop mushrooms and toss them in for extra depth. Mixing different vegetables keeps every bite exciting. Don’t be shy to use what you like! Want it spicier? Add more chili powder or fresh jalapeños. You can sprinkle red pepper flakes for an extra kick. If you prefer it milder, use less chili powder. You can also add more lime juice to balance the heat. Adjusting spice levels makes this dish fun for everyone. Your taste buds will thank you! For the complete recipe, check out the [Full Recipe]. To store your leftover salmon fajitas, first let them cool. This step helps keep the food fresh. Use an airtight container for best results. You can separate the salmon, veggies, and tortillas or store them together. If you store them together, the tortillas may get soggy. I recommend using glass containers or heavy-duty plastic bags. When you reheat salmon fajitas, you want to keep them moist. The best method is to use the oven. Preheat your oven to 350°F (175°C). Place the salmon and veggies on a baking sheet. Cover them with foil to trap moisture. Heat for about 10-15 minutes. You can also use a skillet over medium heat. Just add a splash of water to help steam them. If you prefer the microwave, use a microwave-safe dish. Cover it with a damp paper towel. Heat in short bursts, checking often. Freezing salmon fajitas is simple. Pack the leftovers in airtight containers or freezer bags. Remove as much air as possible. They can last up to three months in the freezer. When ready to eat, thaw them in the fridge overnight. Reheat them as mentioned above. This keeps the flavor and texture nice. You’ll have a quick meal ready to go! For the full recipe, visit the section above. Yes, you can prep ahead. Chop the veggies and salmon in advance. Store them in the fridge. You can mix the spices and keep them in a small jar. This way, you save time when cooking. Just remember to bake everything fresh for the best taste. Salmon fajitas pair well with many sides. Here are some tasty options: - Rice or quinoa for a filling base - Black beans for extra protein - A fresh salad with lime dressing - Guacamole for a creamy touch - Chips for a crunchy contrast You can easily lighten up this dish. Try these tips: - Use less oil when roasting the veggies - Add more vegetables like zucchini or corn - Choose whole wheat tortillas for more fiber - Skip the cheese or use a low-fat option - Serve with a side of steamed veggies To reheat salmon fajitas, use a skillet. Warm it over medium heat. Add the salmon and veggies, and cover with a lid. This keeps them moist. You can also use the microwave. Heat in short bursts to avoid drying them out. Just remember, fresh is always best! This recipe highlights the joy of making salmon fajitas. You learned about the key ingredients, step-by-step instructions, and helpful tips. I shared ideas for variations and storage. Remember, you can customize flavors and spices to suit your taste. Whether you enjoy it with chicken, tofu, or extra veggies, it’s all about creating a meal you love. Use these pointers to enjoy cooking and eating. Your salmon fajitas can be a hit at every meal. Cooking should be fun and tasty!](https://dailydishlab.com/wp-content/uploads/2025/07/cbf1539a-7436-4928-932a-7fda2b4117aa-768x768.webp)
![Loaded Baked Potato Soup is all about comfort and flavor. To make this hearty dish, you will need the following ingredients: - 4 large russet potatoes, peeled and diced - 1 cup sharp cheddar cheese, shredded - 1 cup sour cream - 4 cups chicken or vegetable broth - 1/2 cup green onions, sliced (plus extra for garnish) - 1/2 cup cooked bacon bits (or vegetarian bacon for a meat-free option) - 1/4 cup unsalted butter - 1/4 cup all-purpose flour - 1 teaspoon garlic powder - 1 teaspoon onion powder - Salt and pepper to taste These ingredients come together to create a creamy and rich soup that warms the soul. The russet potatoes provide a great base, while the cheddar cheese and sour cream add the perfect tang. You can easily switch out the bacon for a vegetarian option if you prefer. Each bite is full of flavor, making this soup a true delight. For the full recipe, check out the details above. Start by melting the butter in a large pot over medium heat. Once the butter is melted, add the flour to create a roux. Stir it constantly for about two minutes. This step helps to thicken your soup later. Gradually whisk in the chicken or vegetable broth. Keep whisking until the mixture is smooth and thickened. Cook this for another five minutes. This base gives your soup a rich flavor. Now, it’s time to add the star of the show: the potatoes! Add the diced potatoes along with garlic powder, onion powder, salt, and pepper to the pot. Stir everything well. Bring the mixture to a boil, then reduce the heat to low. Cover the pot and let it simmer for 15 to 20 minutes, or until the potatoes are soft. This step allows the flavors to blend nicely. Once the potatoes are tender, grab an immersion blender. Blend the soup to your desired consistency. You can make it completely smooth or leave some chunks for texture. After blending, stir in the sour cream and half of the cheddar cheese. Mix until everything is well combined and heated through. Taste your soup, and adjust the seasoning if needed. For the final touch, serve your soup hot. Top it with the remaining cheese, crispy bacon bits, and sliced green onions. This adds flavor and a nice crunch. For the full recipe, be sure to check the detailed instructions above. - Cut your potatoes into even pieces. This helps them cook at the same time. - Use an immersion blender for easy blending. It makes the soup smooth and creamy. - Serve your soup in rustic bread bowls. This adds a cozy touch. - Top your soup with extra cheese, crispy bacon, and sliced green onions. These toppings add flavor and fun. - If your soup is too thin, thicken it with more flour. Just a little will do. - If your soup is too thick, add more broth. This will help reach your perfect texture. For the full recipe, check the details above! {{image_2}} To make a vegetarian version of loaded baked potato soup, swap out the bacon for sautéed mushrooms. Mushrooms add a rich, umami flavor that enhances the soup. You can use any kind of mushrooms you like, such as cremini or shiitake. Next, instead of chicken broth, use vegetable broth. This keeps the soup hearty while ensuring it’s meat-free. With these changes, you keep the soup delicious and satisfying. If you want to kick up the flavor, add some spices. Smoked paprika gives a nice depth, while chili powder adds warmth. Both spices can transform the soup into something special. For those who like heat, a splash of hot sauce can work wonders. Just a few drops can make your taste buds dance! For a richer, creamier soup, use heavy cream instead of sour cream. This will give the soup a velvety texture. If you prefer a tangy taste, swap sour cream with Greek yogurt. This option still keeps the soup creamy but adds a nice zing. Each choice leads to a different experience in every bowl. For the complete recipe, check out the [Full Recipe]. Store your Loaded Baked Potato Soup in an airtight container. It stays fresh for up to 4 days. I find it best to let it cool first before sealing. This helps keep the flavors intact. If you plan to enjoy it later, proper storage is key. This soup freezes well for up to 3 months. When you freeze it, use a freezer-safe container. Make sure to leave some space at the top for expansion. When you want to eat it, just reheat gently. This keeps the creamy texture smooth and inviting. To reheat, warm it on the stove over low heat. Stir often to avoid sticking. If the soup seems thick, add a splash of broth. This brings back its creamy goodness. I recommend avoiding the microwave if you want to keep it creamy. The stovetop method is much better for flavor. Yes, prepare the soup and store in the fridge overnight. This makes meal prep easy. When you’re ready, just reheat it for a warm, tasty meal. Add more flour or use a cornstarch slurry for thickening. Start with a little and stir well. Keep adding until you reach your desired thickness. Pair with crusty bread, salad, or a sandwich for a complete meal. These sides add balance and texture to your soup experience. Gently reheat on the stovetop, adding broth if necessary to maintain consistency. Stir often to avoid hot spots and ensure even heating. Use gluten-free flour for a gluten-free option (check all other ingredients). This way, everyone can enjoy this delicious soup without worry. This blog post covered how to make delicious Loaded Baked Potato Soup. We discussed the key ingredients, step-by-step instructions, and useful tips. You can choose variations to suit your taste. Storage tips ensure your soup stays fresh, whether in the fridge or freezer. Now, you can enjoy this classic dish at home. With simple ingredients and easy steps, it’s a fun recipe to try. Make it your own by adjusting flavors and toppings. Enjoy your cooking and the great taste of this soup!](https://dailydishlab.com/wp-content/uploads/2025/06/6da01e17-9fa2-4ad9-9d4f-ab98b2553b0b-768x768.webp)


