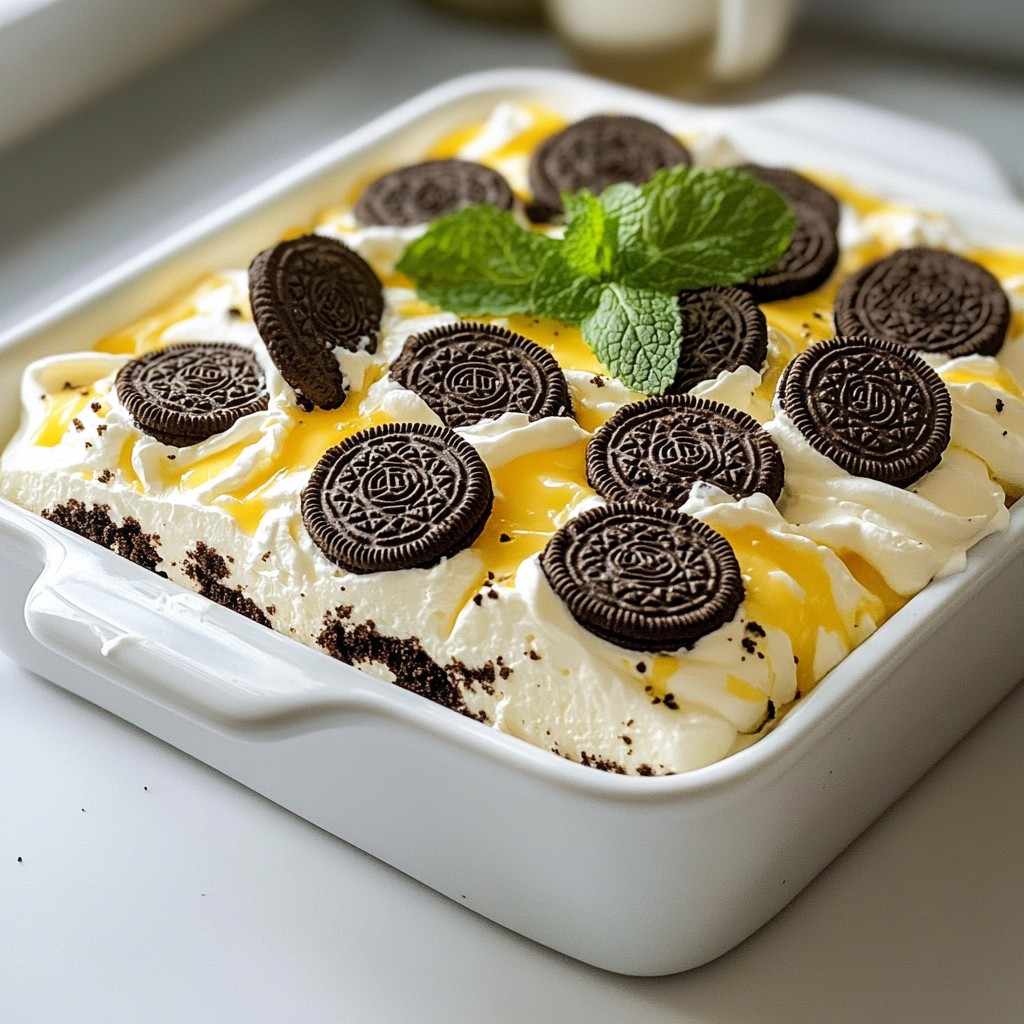
Craving a tasty dessert that’s easy and fun? You’ll love my Oreo Cookies and Cream Icebox Cake! This simple no-bake treat combines fluffy whipped cream and crunchy cookies for a delightful experience. With just a few easy steps, you can impress friends and family with this luscious dessert. Let’s dive into the ingredients and get started on your new favorite cake!
Why I Love This Recipe
- Deliciously Decadent: This icebox cake is a chocolate lover's dream, combining the rich flavor of Oreos with a creamy filling that melts in your mouth.
- No Baking Required: Perfect for warm days, this recipe requires no oven time, making it simple and mess-free to prepare.
- Layered Perfection: The alternating layers of cookies and cream create a visually stunning dessert that is sure to impress at any gathering.
- Make-Ahead Convenience: With a chilling time of just a few hours, this cake can be prepared in advance, freeing up your time for other party preparations.
Ingredients
Essential Ingredients for Oreo Cookies and Cream Icebox Cake
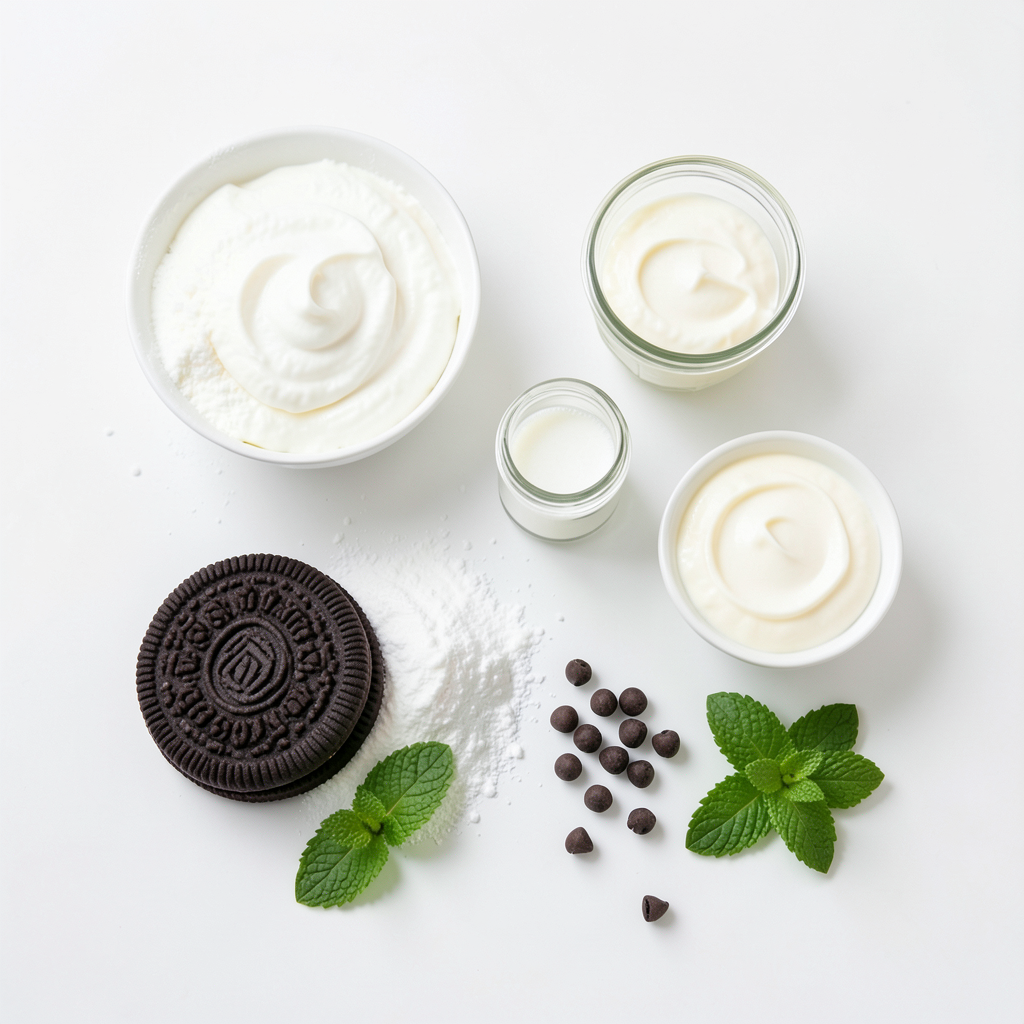
To make this tasty icebox cake, you need some key ingredients:
- 2 packs of Oreo cookies (about 36 cookies)
- 2 cups heavy cream
- 1 cup powdered sugar
- 1 teaspoon vanilla extract
- 8 oz cream cheese, softened
- 1 cup milk
These ingredients blend well to create a creamy, dreamy treat. The Oreos provide the classic flavor, while the whipped cream adds lightness.
Optional Ingredients for Variations
You can add some fun twists with these optional ingredients:
- 1 cup mini chocolate chips
- Fresh mint leaves for garnish
The chocolate chips give extra sweetness, and mint leaves add a fresh touch. Feel free to mix and match!
Tips for Selecting Quality Ingredients
Choosing the best ingredients is key. Here are some tips:
- Buy fresh heavy cream. It should be thick and smooth.
- Look for full-fat cream cheese. This gives a rich texture.
- Use real vanilla extract for the best flavor.
Quality makes a difference in taste and texture. So, pick wisely!
Step-by-Step Instructions
Preparation of Whipped Cream Mixture
First, grab a large bowl. Add 2 cups of heavy cream, 1 cup of powdered sugar, and 1 teaspoon of vanilla extract. Use a hand mixer to beat them on high speed. Stop when you see medium peaks form. Set this mixture aside for now. Next, take another bowl and add 8 oz of softened cream cheese. Beat it until it’s creamy and smooth. Now, gently fold in the whipped cream mixture. Mix until everything is combined well.
How to Handle Oreo Cookies
Next, take your 2 packs of Oreo cookies. Pour 1 cup of milk into a shallow dish. Dip each Oreo cookie into the milk for 2 to 3 seconds. Make sure they soak a bit but do not let them get too soft. You want them to hold their shape. This step adds flavor and helps the cookies soften later.
Layering the Cake
Now, it’s time to build your cake! Start with a 9x13 inch baking dish. Layer the dipped Oreos at the bottom. Cover the entire surface. Then, spread a layer of your cream cheese and whipped cream mixture over the Oreos. Smooth it out evenly. If you like, sprinkle some mini chocolate chips over this layer. Repeat the process. Alternate dipping more Oreos and spreading the cream mixture until you reach the top. Aim for 3 to 4 layers. For the top layer, use any leftover cream mixture. Decorate with crushed Oreos or whole cookies. Cover the dish with plastic wrap. Put it in the fridge for at least 4 to 6 hours, or overnight for the best taste. This waiting time lets the cookies soften and flavors meld together.
Tips & Tricks
Best Practices for Achieving Perfect Layers
To get the best layers in your Oreo Cookies and Cream Icebox Cake, follow these tips:
- Soak Cookies Briefly: Dip each Oreo in milk for just 2-3 seconds. This keeps them firm.
- Even Spreading: When you spread the cream mixture, use a spatula. It helps to create smooth layers.
- Layer Order: Start with dipped Oreos at the bottom. Alternate with the cream mixture for even flavor.
- Chill Time: Chill the cake overnight. This allows the cookies to soak and flavors to blend.
Common Mistakes to Avoid
Watch out for these common mistakes:
- Over-soaking Cookies: Don’t let the Oreos sit in milk too long. They can fall apart.
- Skipping Chill Time: If you don’t chill long enough, the cake may not hold its shape.
- Uneven Layers: Make sure to spread the cream evenly. This helps with taste and looks.
- Too Many Layers: Aim for 3-4 layers. Too many can make the cake hard to cut.
Enhancements for Added Flavor
Want to take your cake to the next level? Try these ideas:
- Add Mint Extract: Mix a few drops of mint extract into the cream. It adds a fresh taste.
- Use Flavored Cream Cheese: Try chocolate or strawberry cream cheese for extra flavor.
- Sprinkle Toppings: Top with mini chocolate chips, crushed Oreos, or fresh fruit. These add texture and taste.
- Garnish with Mint: Fresh mint leaves not only look nice but add a pop of flavor.
Pro Tips
- Soak Just Right: Make sure to dip the Oreos in milk for only 2-3 seconds to avoid them becoming too soggy. You want them to be soft but still holding their shape.
- Layering Technique: For a harmonious blend of flavors, ensure that your cream cheese mixture is spread evenly between the layers of Oreos. This helps every bite to be creamy and delicious.
- Chill Time Matters: While 4-6 hours is the minimum chill time, letting the cake sit overnight will enhance the flavors and improve the texture, making each layer perfectly melded together.
- Garnish for Appeal: For an extra touch of elegance, add fresh mint leaves or additional crushed Oreos on top before serving. It not only looks great but adds a refreshing flavor contrast.
Variations
Different Flavors to Try
You can switch up the flavors in your icebox cake. Try using chocolate cookies instead of Oreos. This gives a rich, deep taste. You can also use vanilla wafers for a lighter flavor. If you love mint, add mint Oreos for a fresh twist. For fruity fun, use strawberry or lemon-flavored cookies. These simple changes can make your cake unique and exciting.
Ingredient Swaps for Dietary Needs
Need to adapt your recipe? Use coconut cream instead of heavy cream for a dairy-free option. If you're avoiding sugar, try a sugar substitute in your whipped cream. You can also choose gluten-free cookies if you have a gluten allergy. Substitute vegan cream cheese for regular cream cheese to make it plant-based. These swaps help everyone enjoy this dessert.
Garnishes and Toppings Ideas
Garnishing adds flair to your cake. Sprinkle crushed Oreos on top for crunch. You can also add mini chocolate chips for extra sweetness. Fresh berries like strawberries or raspberries can add a colorful touch. For a classy look, place mint leaves on top. All these ideas make your cake not just tasty, but pretty too.
Storage Info
How to Properly Store Your Icebox Cake
To store your icebox cake, cover it tightly with plastic wrap. You want to keep moisture in and air out. This helps maintain the creamy texture. Place it in the fridge for best results. It stays fresh and tasty this way.
Freezing Instructions for Longer Preservation
You can freeze your icebox cake if you want to keep it longer. First, let it chill in the fridge for a few hours. Then, wrap it well in plastic wrap and foil. This keeps ice crystals away. When you’re ready to eat, thaw it in the fridge overnight.
Shelf Life and Best Time to Consume
Your icebox cake will last about 5 days in the fridge. For the best flavor, eat it within 3 days. After that, it may lose some taste. If you freeze it, it can last up to 2 months. But remember, it tastes best when fresh!
FAQs
What is an Icebox Cake?
An icebox cake is a layered dessert. It uses cookies and cream. The cookies soften as they chill. This makes a creamy, delicious cake. You can use many kinds of cookies. It is easy to make and perfect for warm days.
Can I Make This Dessert Ahead of Time?
Yes, you can make this dessert ahead of time. It tastes better when it sits. Chill it for at least 4-6 hours. For best results, chill it overnight. This gives flavors time to blend. It is a great make-ahead treat for parties.
How to Serve Oreo Cookies and Cream Icebox Cake?
To serve this cake, slice it into squares. Use a sharp knife for clean cuts. You can add fresh mint leaves on top. This adds color and a fresh taste. Serve it cold for the best flavor. It pairs well with a scoop of ice cream.
Is it Possible to Use Other Types of Cookies?
Yes, you can use other cookies. Try chocolate chip or graham crackers. Each cookie gives a unique taste. Just make sure they soak in milk. This keeps them soft. Feel free to mix and match your favorites!
You learned how to make a delicious Oreo Cookies and Cream Icebox Cake. We covered essential and optional ingredients, plus tips for choosing the best quality items. The step-by-step instructions make the process easy, from mixing the whipped cream to layering. I shared tips for perfect layers and common mistakes to avoid. You can also try tasty variations and learn proper storage practices. This dessert is simple to make ahead of time and fun to customize. Enjoy every bite of your sweet creation; it’s an easy treat you’ll love!