Peach Cream Cheese Bars Simple and Delightful Treat

Looking for a sweet treat that’s simple to make and tastes divine? These Peach Cream Cheese Bars are your answer! With fresh peaches and creamy filling, each bite feels like a warm hug. I’ll walk you through the easy steps to create this delightful dessert, using ingredients you likely have on hand. Get ready to impress family and friends with a dessert that’s as tasty as it is beautiful!
Why I Love This Recipe
- Fresh Flavor: The combination of juicy peaches and creamy cheese creates a delightful balance of flavors that’s perfect for summer.
- Easy to Make: This recipe comes together quickly, making it ideal for a last-minute dessert or a family gathering.
- Versatile Dessert: These bars can be served chilled or at room temperature, making them a great choice for any occasion.
- Nutty Crunch: The optional walnuts or pecans add a wonderful texture and flavor contrast to the creamy filling.
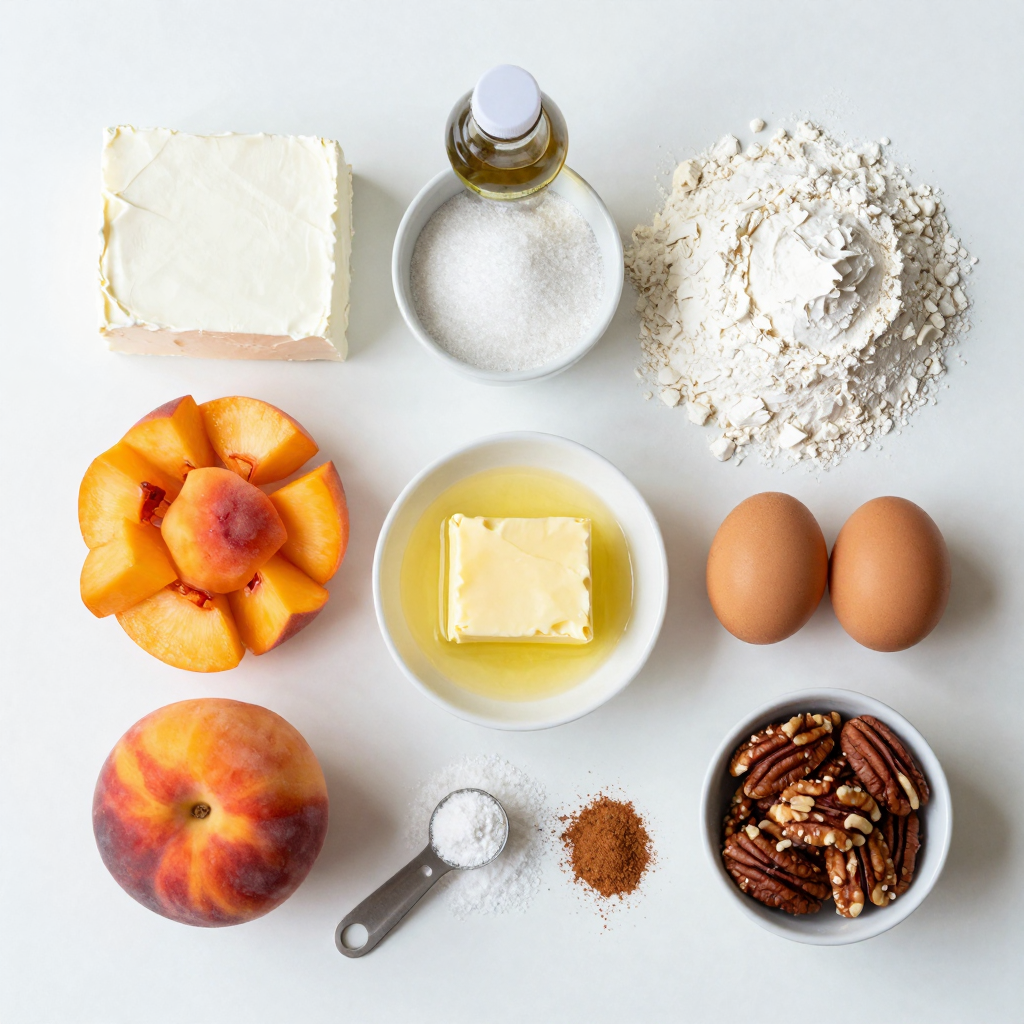
Ingredients
Fresh Ingredients
- 2 cups fresh peaches, peeled and diced
- 1 cup cream cheese, softened
Fresh ingredients bring the best flavor to Peach Cream Cheese Bars. I love using ripe peaches. They add sweetness and a lovely texture. You want them soft but not mushy. Cream cheese is also key. It adds a rich, creamy taste that makes these bars special.
Pantry Staples
- ½ cup granulated sugar
- 1 cup all-purpose flour
- ½ cup unsalted butter, melted
For the pantry staples, granulated sugar gives sweetness. It balances the tartness of the peaches. All-purpose flour holds everything together. It forms a nice base for the bars. Unsalted butter adds moisture and richness. I always use melted butter to blend easily.
Baking Essentials
- 1 egg
- ½ teaspoon baking powder
- ¼ teaspoon salt
- ½ teaspoon cinnamon
- ½ cup chopped walnuts or pecans (optional)
The egg helps bind the ingredients. Baking powder makes the bars rise and become fluffy. A pinch of salt brings out the flavors. Cinnamon adds warmth and depth. If you like nuts, chopped walnuts or pecans give a nice crunch. You can skip them if you prefer a smoother texture.

Step-by-Step Instructions
Preparation
First, you need to preheat your oven to 350°F (175°C). This step is key. While the oven heats, prepare your baking pan. You can grease a 9×9 inch pan or line it with parchment paper for easy removal later.
Next, mix your cream cheese, sugar, and vanilla extract in a bowl. Beat these ingredients until the mixture is smooth and creamy. Set this aside, as it will become a delightful layer in your bars.
Combine Dry Ingredients
Now, whisk together the dry ingredients in another bowl. Combine the flour, baking powder, salt, and cinnamon. Make sure everything is mixed well. This step ensures that the flavors blend nicely in your bars.
Create the Batter
In a separate bowl, mix the melted butter with the egg. Once combined, add this mixture to your dry ingredients. Stir gently until just combined. The batter will be thick, which is perfect for layering.
Spread half of this thick batter evenly in the bottom of your prepared baking pan.
Next, layer the diced peaches on top of the batter. Make sure the peaches are spread out evenly for the best flavor.
Now, spoon the cream cheese mixture over the peaches. It should cover them nicely.
Finally, drop spoonfuls of the remaining batter on top of the cream cheese layer. It doesn’t have to be perfect, as it will spread while baking.
Baking Process
Place your baking pan in the preheated oven. Bake for 30-35 minutes. Check for doneness by inserting a toothpick into the center. If it comes out clean, your bars are ready.
Once baked, let the bars cool completely in the pan. This cooling time helps them set. After cooling, cut them into bars.
You can serve these peach cream cheese bars chilled or at room temperature. Enjoy this simple and delightful treat!
Pro Tips
- Use Ripe Peaches: For the best flavor, make sure to use ripe, juicy peaches. They should yield slightly to pressure and have a sweet aroma.
- Chill the Cream Cheese: To make mixing easier, ensure your cream cheese is at room temperature. If it’s too cold, it can be lumpy and hard to blend.
- Don’t Overbake: Keep an eye on the bars as they bake. The edges should turn golden brown, but avoid overbaking to keep them moist and tender.
- Allow to Cool: Let the bars cool completely in the pan before cutting. This helps them set properly and makes it easier to slice cleanly.
Tips & Tricks
Ingredient Substitutions
You can swap cream cheese for Greek yogurt for a lighter option. It will give a nice tang and creaminess, too. If you want a dairy-free choice, try using cashew cream. Blend soaked cashews with a bit of lemon juice until smooth for a similar taste.
When it comes to fruit, frozen peaches work great if fresh ones are not available. Thaw them and drain any excess liquid. This keeps the bars from being too wet. You can also use other fruits like berries or apples for a twist.
Baking Tips
To ensure even baking, spread the batter in the pan carefully. Use an offset spatula to smooth it out. Check the bars halfway through baking. If they are browning too fast, cover them with foil to prevent burning.
For the best texture, allow the bars to cool completely before cutting. This helps them set up nicely. If you want a softer bite, try underbaking them slightly. They will firm up as they cool.
Presentation Ideas
For serving, cut the bars into squares or rectangles. Place them on a pretty platter for a nice touch. You can also serve them with a scoop of vanilla ice cream for added delight.
Garnish the bars with fresh peach slices or a sprinkle of cinnamon. A drizzle of honey or maple syrup can add sweetness. If you used nuts, sprinkle some on top for crunch. These simple ideas will make your Peach Cream Cheese Bars look and taste amazing.

Variations
Seasonal Variations
You can switch up the fruit in these bars. Try using blueberries or strawberries. Both fruits add a different taste and color. Blueberries give a burst of juiciness. Strawberries offer a sweet-tart flavor. You can mix these fruits with peaches or use them alone. You’ll create a fresh twist every season!
Healthy Alternatives
For a healthier version, consider low-sugar or gluten-free options. You can replace granulated sugar with a sweetener like stevia or monk fruit. Look for gluten-free flour blends to make the crust. These swaps keep the taste great while making the bars friendlier for your diet. Enjoy a treat without the guilt!
Flavor Additions
Enhance the flavor by adding spices or extracts. A dash of nutmeg or cardamom can spice things up. You can also add a splash of almond or lemon extract. These little changes make a big difference. They will make your bars stand out and surprise your taste buds.
Storage Info
Refrigeration Guidelines
To keep your Peach Cream Cheese Bars fresh, store them in the fridge. First, let the bars cool completely. Once cool, cut them into squares. Place the squares in an airtight container. Make sure to add parchment paper between layers to avoid sticking. This helps keep them fresh and tasty!
Freezing Instructions
You can also freeze Peach Cream Cheese Bars for later. Cut the bars into squares and wrap each piece in plastic wrap. Then, place them in a freezer-safe bag or container. This way, they stay fresh for months. When you want to eat them, thaw them in the fridge overnight. Enjoy them chilled or at room temperature!
Shelf Life
In the fridge, the bars last about five days. If frozen, they can last up to three months. Just remember, the sooner you eat them, the better they will taste! Always check for any changes in smell or texture before eating, to ensure they are still good.
FAQs
Can I use canned peaches instead of fresh?
Yes, you can use canned peaches. Choose peaches in light syrup or juice. Drain the peaches well. Pat them dry with a paper towel. This helps prevent too much moisture. Cut them into small pieces to match the fresh ones. Canned peaches can give a sweet flavor, but fresh peaches offer a brighter taste.
How do I know when the bars are done?
You can tell when the bars are done by checking the edges. They should be golden brown. Insert a toothpick into the center. If it comes out clean, the bars are ready. The top should look firm, not jiggly. Let them cool down. This helps them set properly.
Can I make these bars a day in advance?
Yes, you can make these bars a day ahead. Let them cool completely before storing. Wrap them tightly in plastic wrap or foil. This keeps them fresh. Store them in the fridge. The flavors will blend well overnight. Enjoy them chilled or at room temperature.
This blog post shared a simple recipe for Peach Cream Cheese Bars. We covered fresh ingredients, essential pantry staples, and the baking process. I also included tips for substitutions, variations, and storage.
Feel free to get creative with flavors and fruits. Remember, these bars are not only delicious but easy to make. Enjoy experimenting and sharing them with friends and family! They are sure to please all who taste them.

Peach Cream Cheese Bars
Ingredients
2 cups fresh peaches, peeled and diced
1 cup cream cheese, softened
½ cup granulated sugar
1 teaspoon vanilla extract
1 cup all-purpose flour
½ cup unsalted butter, melted
1 egg
½ teaspoon baking powder
¼ teaspoon salt
½ teaspoon cinnamon
½ cup chopped walnuts or pecans (optional)
Instructions
Preheat your oven to 350°F (175°C). Grease a 9×9 inch baking pan or line with parchment paper.
In a mixing bowl, combine the softened cream cheese, ½ cup granulated sugar, and vanilla extract. Beat until smooth and creamy. Set aside.
In another bowl, whisk together the flour, baking powder, salt, and cinnamon.
In a separate bowl, mix the melted butter with the egg, then add this mixture to the dry ingredients. Stir until just combined; the batter will be thick.
Spread half of the batter evenly in the bottom of the prepared baking pan.
Layer the diced peaches over the batter, spreading them evenly.
Spoon the cream cheese mixture over the peaches.
Drop spoonfuls of the remaining batter on top of the cream cheese layer. It doesn’t have to be perfectly even, as it will spread while baking.
If using, sprinkle the chopped nuts on top for added texture.
Bake in the preheated oven for 30-35 minutes, or until the edges are golden brown and a toothpick inserted in the center comes out clean.
Let cool completely in the pan before cutting into bars.
Serve chilled or at room temperature.
Prep Time: 15 min | Total Time: 50 min | Servings: 9 bars

Peach Cream Cheese Bars
Ingredients
- 2 cups fresh peaches, peeled and diced
- 1 cup cream cheese, softened
- 0.5 cup granulated sugar
- 1 teaspoon vanilla extract
- 1 cup all-purpose flour
- 0.5 cup unsalted butter, melted
- 1 large egg
- 0.5 teaspoon baking powder
- 0.25 teaspoon salt
- 0.5 teaspoon cinnamon
- 0.5 cup chopped walnuts or pecans (optional)
Instructions
- Preheat your oven to 350°F (175°C). Grease a 9x9 inch baking pan or line with parchment paper.
- In a mixing bowl, combine the softened cream cheese, ½ cup granulated sugar, and vanilla extract. Beat until smooth and creamy. Set aside.
- In another bowl, whisk together the flour, baking powder, salt, and cinnamon.
- In a separate bowl, mix the melted butter with the egg, then add this mixture to the dry ingredients. Stir until just combined; the batter will be thick.
- Spread half of the batter evenly in the bottom of the prepared baking pan.
- Layer the diced peaches over the batter, spreading them evenly.
- Spoon the cream cheese mixture over the peaches.
- Drop spoonfuls of the remaining batter on top of the cream cheese layer. It doesn’t have to be perfectly even, as it will spread while baking.
- If using, sprinkle the chopped nuts on top for added texture.
- Bake in the preheated oven for 30-35 minutes, or until the edges are golden brown and a toothpick inserted in the center comes out clean.
- Let cool completely in the pan before cutting into bars.
- Serve chilled or at room temperature.


![To make Chocolate Swirl Banana Ice Cream, you will need: - 4 ripe bananas, sliced and frozen - 1 cup coconut milk (or any milk of choice) - 2 tablespoons maple syrup (adjust for sweetness) - 1 teaspoon vanilla extract - 1/4 cup cacao powder (or unsweetened cocoa powder) - A pinch of sea salt These ingredients come together to create a creamy and rich treat. The ripe bananas give sweetness, while the cacao powder adds that lovely chocolate flavor. If you have dietary needs, there are easy swaps. For dairy-free options, use almond milk or oat milk instead of coconut milk. You can replace maple syrup with agave syrup or honey for sweetness. Those who avoid sugar may use a sugar substitute like stevia. For the cacao powder, you can use carob powder for a different taste. This ice cream is not only tasty but also has some health benefits. Each serving contains: - Calories: Around 150 - Protein: 2g - Carbohydrates: 30g - Sugar: 12g (natural sugars from bananas) - Fat: 4g This treat is a great way to enjoy dessert while getting some nutrients from the bananas. It’s a fun way to cool down and feel good about what you eat. For the complete recipe, check out the [Full Recipe]. Start by gathering all your ingredients. You will need: - 4 ripe bananas, sliced and frozen - 1 cup coconut milk (or any milk of choice) - 2 tablespoons maple syrup (adjust for sweetness) - 1 teaspoon vanilla extract - 1/4 cup cacao powder (or unsweetened cocoa powder) - A pinch of sea salt Make sure your bananas are ripe. This will make your ice cream sweet and tasty. Slice the bananas and freeze them for a few hours. Now, let's blend! Take the frozen bananas and put them in a blender. Add the coconut milk, maple syrup, vanilla extract, and sea salt. Blend until everything is smooth and creamy. You may need to stop and scrape down the sides of the blender. This helps everything mix well. Once you see a creamy texture, transfer the banana mix to a big bowl. In a different bowl, mix the cacao powder with a splash of coconut milk. Stir until you make a smooth chocolate sauce. If it is too thick, add a little more milk until it is pourable. Now, drizzle the chocolate sauce over the banana mix in the large bowl. Use a spatula to gently swirl the chocolate into the banana mixture. Create those pretty marbled patterns! Once you finish swirling, transfer the mix into an airtight container. Smooth the top with your spatula and cover it tightly. Freeze it for 2-4 hours until it is firm enough to scoop. For the best experience, let the ice cream sit out for about 5 minutes before serving. This makes it easier to scoop. Enjoy the delightful taste of your homemade Chocolate Swirl Banana Ice Cream! Check out the Full Recipe for more details. To get the right texture, freeze your bananas well. I slice them and freeze them overnight. This gives a creamy base. When blending, add coconut milk slowly. Start with a little, then add more if needed. Blend until smooth, but don’t overdo it. If it's too soft, freeze it longer. You can easily boost the flavor of your ice cream. Try adding a pinch of cinnamon. It adds warmth and depth. You can also swap maple syrup for honey or agave. Each sweetener gives a unique taste. For a nutty twist, mix in some almond extract. This brings a fun twist to the classic flavor. Serve your ice cream in chilled bowls. This keeps it cold longer. Scoop it out after letting it sit for five minutes. This makes scooping easier. Top with fresh banana slices and a drizzle of chocolate sauce. For extra crunch, sprinkle cacao nibs on top. This adds texture and looks pretty too. For the full recipe, check the main article. {{image_2}} If you want a dairy-free treat, use coconut milk. It adds creaminess and a light flavor. You can also try almond milk or oat milk. Both work well in this recipe. Just make sure to pick a milk that you enjoy. You can make your ice cream even better with mix-ins. Try adding chopped nuts or shredded coconut. Chocolate chips are also a fun choice. For toppings, fresh fruit, crushed cookies, or granola add texture and flavor. Drizzle extra chocolate sauce on top for a sweet touch. Feel free to get creative with flavors. Add peanut butter for a rich taste. You might also try adding berries like strawberries or raspberries for a fruity twist. A pinch of cinnamon gives a warm note. Each of these options makes your chocolate swirl banana ice cream unique! Remember, you can find the full recipe above. Enjoy making your ice cream! To keep your chocolate swirl banana ice cream fresh, you need to store it right. Here are some tips to help you. First, always let your ice cream cool to room temperature. This helps to avoid ice crystals. After mixing, transfer it to a container. Make sure it’s airtight. This keeps the air out and prevents freezer burn. If you want to enjoy it later, freeze it for up to a month. Use a sturdy container for your ice cream. Glass and plastic containers work well. Make sure the lid fits tightly. This keeps the ice cream safe from other smells in the freezer. If you want to scoop easily, choose a shallow container. It makes it simple to reach every part of the ice cream. Chocolate swirl banana ice cream stays fresh for about two weeks. After that, it can lose flavor and texture. It’s best to eat it within this time frame for the best taste. If it sits too long, it might become icy. Now, you can enjoy your delightful chocolate swirl banana ice cream, knowing how to store it right! For the full recipe, check out the earlier section. To make chocolate swirl banana ice cream, start by blending frozen bananas, coconut milk, maple syrup, vanilla extract, and sea salt. Blend until smooth. Next, mix cacao powder with some coconut milk to create a chocolate sauce. After blending, transfer the banana mix to a bowl. Drizzle the chocolate sauce over it and gently swirl it in. Finally, put the mixture in an airtight container and freeze it for 2-4 hours. For the full recipe, check out the details above. Yes, you can use any milk you like. Almond milk, soy milk, or oat milk work well too. Each type will give a slightly different taste and texture. Choose the milk that fits your diet or taste. Store homemade ice cream in an airtight container. This keeps it fresh and prevents ice crystals. Make sure to smooth the top before sealing to avoid air pockets. It stays fresh in the freezer for about 1-2 weeks. This blog post covered how to make chocolate swirl banana ice cream. We talked about the right ingredients, step-by-step instructions, and helpful tips. You learned how to customize the recipe with different flavors and toppings. I shared storage advice to keep your ice cream fresh. Now you can enjoy a tasty treat that fits your diet. Get ready to impress your friends and family with your new skills!](https://dailydishlab.com/wp-content/uploads/2025/07/482899ed-90ac-4dc0-8cba-52d6130bf4d8-768x768.webp)
![- 1 cup all-purpose flour (heat-treated) - 1/4 cup granulated sugar - 1/4 cup brown sugar, packed - 1/2 cup unsalted butter, melted - 1/4 teaspoon salt - 1 teaspoon vanilla extract - 1/2 cup rainbow sprinkles - 1/2 cup mini chocolate chips (optional) - 1 cup vanilla frosting Heat-treating flour is key for safety. Raw flour can have germs. To heat-treat, spread the flour on a baking sheet. Bake it at 350°F (175°C) for five minutes. This step kills any harmful bacteria, making it safe to eat without baking. If you want a gluten-free option, you can use a gluten-free flour blend. Look for one that is designed for baking. This makes it easy for everyone to enjoy these tasty bars. Feel free to mix it up with different sprinkles. You can use chocolate sprinkles, or even themed sprinkles for events. For frosting, try chocolate or cream cheese frosting instead. Each will give a new twist to the bars. You can always experiment to find your favorite combination! 1. Mixing the dry ingredients Start with a large mixing bowl. Add 1 cup of heat-treated flour, 1/4 cup of granulated sugar, 1/4 cup of brown sugar, and 1/4 teaspoon of salt. Use a whisk to blend them well. This mix forms the base of your bars. 2. Combining wet ingredients Next, pour in 1/2 cup of melted unsalted butter and 1 teaspoon of vanilla extract. Stir until everything combines into a dough. This part brings the sweetness and rich flavor to the bars. 1. Pressing mixture into the pan Line an 8x8-inch square baking pan with parchment paper. Leave some paper hanging over the edges. This makes it easy to lift the bars later. Press the dough evenly into the pan. Use a spatula to smooth the top. 2. Spreading the frosting evenly Grab 1 cup of vanilla frosting. Spread it over the pressed mixture. Use your spatula to create a nice, even layer. For fun, sprinkle some extra rainbow sprinkles on top for color and crunch. 1. Refrigeration time and tips for proper setting Place the pan in the fridge for at least 30 minutes. This helps the bars firm up. If you want them extra solid, leave them in longer. Once set, lift the bars out using the parchment paper. Cut into squares and enjoy! For the complete recipe, check out the Full Recipe section. - Overmixing the batter: Mixing too much can make your bars dense. Just mix until combined. - Skipping refrigeration: If you don’t chill the bars, they will stay too soft. Chill for at least 30 minutes. - Reducing sugar for less sweetness: You can cut down the granulated sugar. This will make the bars less sweet without losing flavor. - Adding flavor extracts: Try different extracts like almond or coconut. Just a little can change the taste. - Best mixing bowls and tools: Use a large mixing bowl for easy stirring. A sturdy spatula helps combine the batter well. - Recommended baking pan types: A metal or glass 8x8-inch pan works best. Line it with parchment paper for easy removal. For the full recipe, check out the No-Bake Funfetti Cake Batter Bars. {{image_2}} You can change the flavor of your No-Bake Funfetti Cake Batter Bars easily. Try making chocolate cake batter bars by swapping in chocolate cake mix for the flour. Just mix it in as you would the flour. This gives a rich, chocolatey taste that many love. Another fun twist is using peanut butter. Replace the butter with creamy peanut butter. This adds a nutty flavor that pairs well with sprinkles. You can also mix in mini chocolate chips for extra indulgence. Make your bars pop with seasonal decorations. Use holiday-themed sprinkles for Christmas, Halloween, or birthdays. You can find sprinkles shaped like stars, hearts, or seasonal colors. This makes the bars festive and fun for any occasion. You can also change the color of your sprinkles based on the season. For spring, use pastel colors. For summer, bright colors shine. This small touch makes your bars look special and inviting. Want a vegan version? It’s easy! For dairy-free substitutions, use coconut oil in place of butter. It gives a nice flavor and texture. You can also use plant-based milk for the frosting. For frosting, try a vegan buttercream made with powdered sugar and plant-based butter. This way, you keep the creamy texture without using dairy. These options make your delicious bars suitable for everyone! For the full recipe, check out the [Full Recipe]. To keep your No-Bake Funfetti Cake Batter Bars fresh, store them in the refrigerator. Place the bars in an airtight container. This helps keep them moist and tasty. You can also cover them tightly with plastic wrap. If you want to save them for later, you can freeze them. Cut the bars into squares first. Wrap each piece in plastic wrap and then put them in a freezer bag. They will stay fresh this way! When stored correctly, these bars can last about a week in the fridge. If you freeze them, expect them to stay fresh for up to three months. Always check for any signs of spoilage before eating them. Look for changes in color or smell. You don’t need to reheat these bars, as they are best served cold. If you want a warm treat, you can microwave them for a few seconds. Just be careful not to overheat. A few seconds is all you need to enjoy a soft, tasty treat! No, you should not use regular flour. Raw flour can contain harmful bacteria. Heat-treated flour kills these germs and makes the flour safe for no-bake recipes. You can easily heat-treat flour at home by baking it on a baking sheet. Spread it out and bake at 350°F for about five minutes. Let it cool before using. These bars stay fresh for about five days at room temperature. To keep them longer, store them in the fridge. You know they are spoiled if they smell bad or look dry. Check for any mold as well. If you see any signs of spoilage, toss them out. Yes, you can make these bars ahead of time. They are great for parties and special events. Just prepare them a day or two before. Store them in the fridge until you are ready to serve. To save time, you can also press the mixture into the pan and chill it. Frost just before serving for the best taste. You can easily swap ingredients if needed. If you lack rainbow sprinkles, use chocolate or other types. For the frosting, any flavor works well. Don’t have mini chocolate chips? You can skip them or use nuts instead. Just be creative and adjust the recipe to fit what you have at home. For the full recipe, check the original instructions. This blog post covered the key ingredients, steps, and tips for making delicious dessert bars. We discussed crucial details like heat-treating flour and gluten-free options. I shared variations and ideas for seasonal fun, plus how to store and reheat leftovers. In summary, these bars are easy to make and fun to customize. With simple ingredients and clear steps, you're ready to bake. Enjoy creating your own tasty treats!](https://dailydishlab.com/wp-content/uploads/2025/07/c4f5a401-6c49-4de0-bdd4-db0dcac5f5d0-768x768.webp)

