Peanut Butter Banana Smoothie Quick and Creamy Blend

Are you ready to enjoy a delicious and healthy treat? The Peanut Butter Banana Smoothie is a quick and creamy delight that you can whip up in minutes. Packed with flavor and nutrients, this smoothie is perfect for breakfast or a snack. In this post, I’ll guide you through every step, from ingredients to tips for a perfect blend. Let’s dive into the world of this tasty smoothie; you won’t want to miss it!
Why I Love This Recipe
- Delicious Flavor: This smoothie combines the natural sweetness of bananas with the rich, nutty taste of peanut butter, creating a delicious and satisfying drink.
- Nutritious Ingredients: With frozen bananas and almond milk, this smoothie is packed with vitamins, minerals, and healthy fats, making it a great choice for a nourishing snack.
- Quick and Easy: Ready in just 5 minutes, this recipe is perfect for busy mornings or a quick post-workout refuel.
- Customizable: You can easily adjust the sweetness and thickness to your liking, plus add extras like protein powder or spinach for an added boost.
Ingredients
List of Ingredients
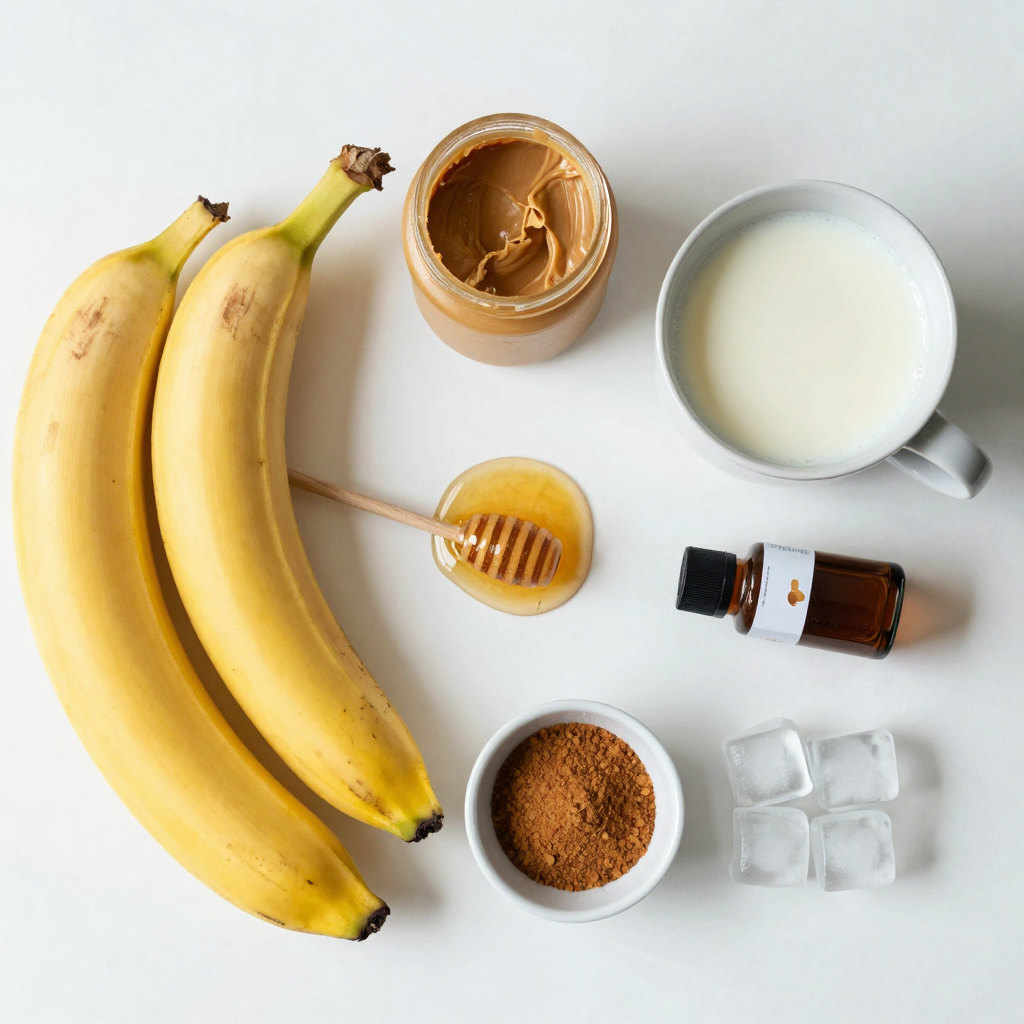
To make your Peanut Butter Banana Smoothie, gather these simple ingredients:
- 2 ripe bananas, frozen
- 2 tablespoons natural peanut butter
- 1 cup unsweetened almond milk (or milk of choice)
- 1 tablespoon honey or maple syrup (optional for sweetness)
- ½ teaspoon vanilla extract
- A pinch of cinnamon
- Ice cubes (optional, for thickness)
These ingredients blend together to create a creamy and rich smoothie that is full of flavor.
Optional Ingredients for Customization
You can tweak this recipe to suit your taste. Here are some fun options:
- Add a scoop of protein powder for a boost.
- Toss in a handful of spinach for extra nutrients.
- Use different nut butters like almond or cashew.
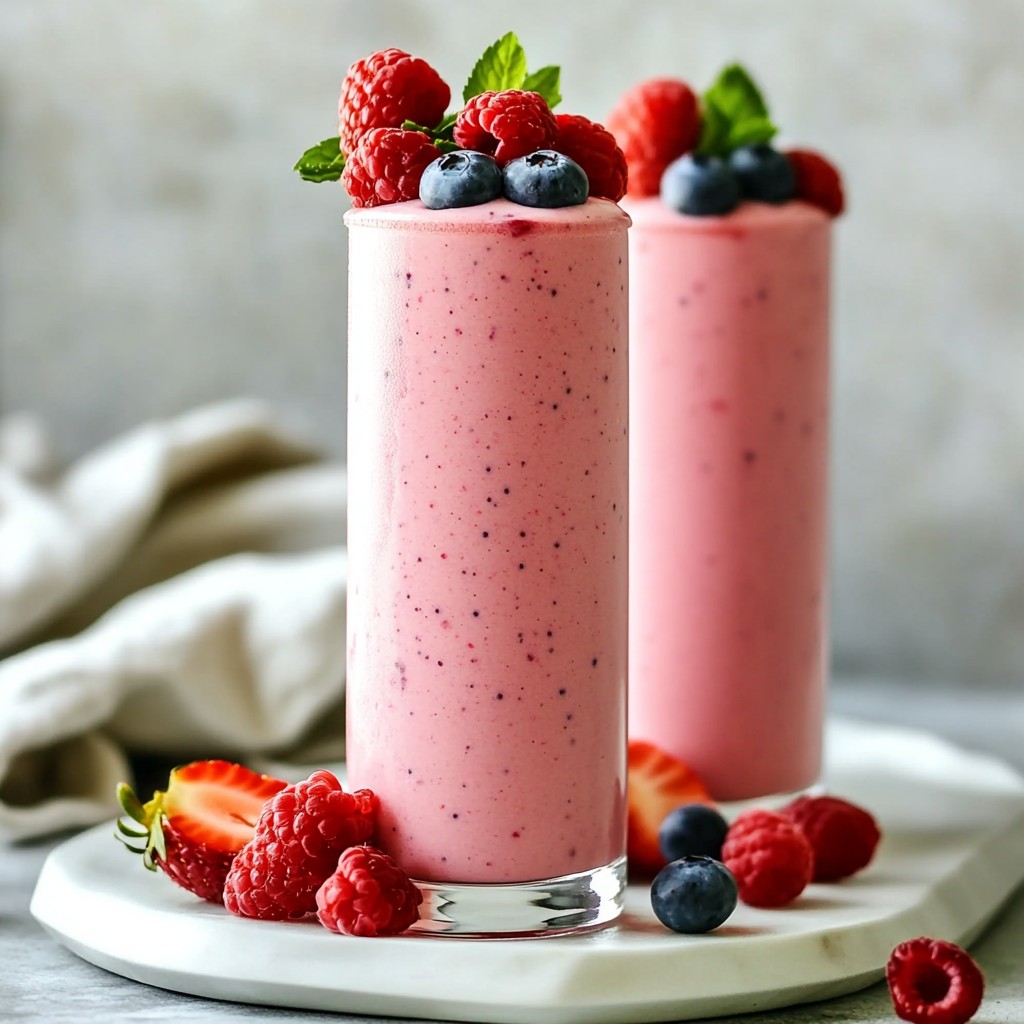
- Mix in berries for a fruity twist.
These options let you put your spin on the classic recipe.
Nutritional Information per Serving
Each serving of this smoothie is not only tasty but also healthy. Here’s a rough breakdown:
- Calories: 300
- Protein: 8g
- Carbohydrates: 45g
- Fat: 10g
- Fiber: 5g
This smoothie packs a nutritious punch, making it a great snack or meal replacement. It’s filling and gives you energy for your day.

Step-by-Step Instructions
Preparation Steps
To make this peanut butter banana smoothie, start by gathering your ingredients. You will need:
- 2 ripe bananas, frozen
- 2 tablespoons natural peanut butter
- 1 cup unsweetened almond milk (or milk of choice)
- 1 tablespoon honey or maple syrup (optional for sweetness)
- ½ teaspoon vanilla extract
- A pinch of cinnamon
- Ice cubes (optional, for thickness)
First, place the frozen bananas and peanut butter in a blender. Next, pour in the almond milk. If you like it sweeter, add honey or maple syrup. Then, include the vanilla extract and a pinch of cinnamon. If you want a thicker smoothie, toss in some ice cubes.
Blending Tips for Creaminess
Blend on high until the mixture is smooth and creamy. If needed, stop and scrape down the sides of the blender to mix everything well. This helps ensure all the ingredients blend evenly. Taste the smoothie. If you want it sweeter, add more honey or syrup. Blend again for a few seconds.
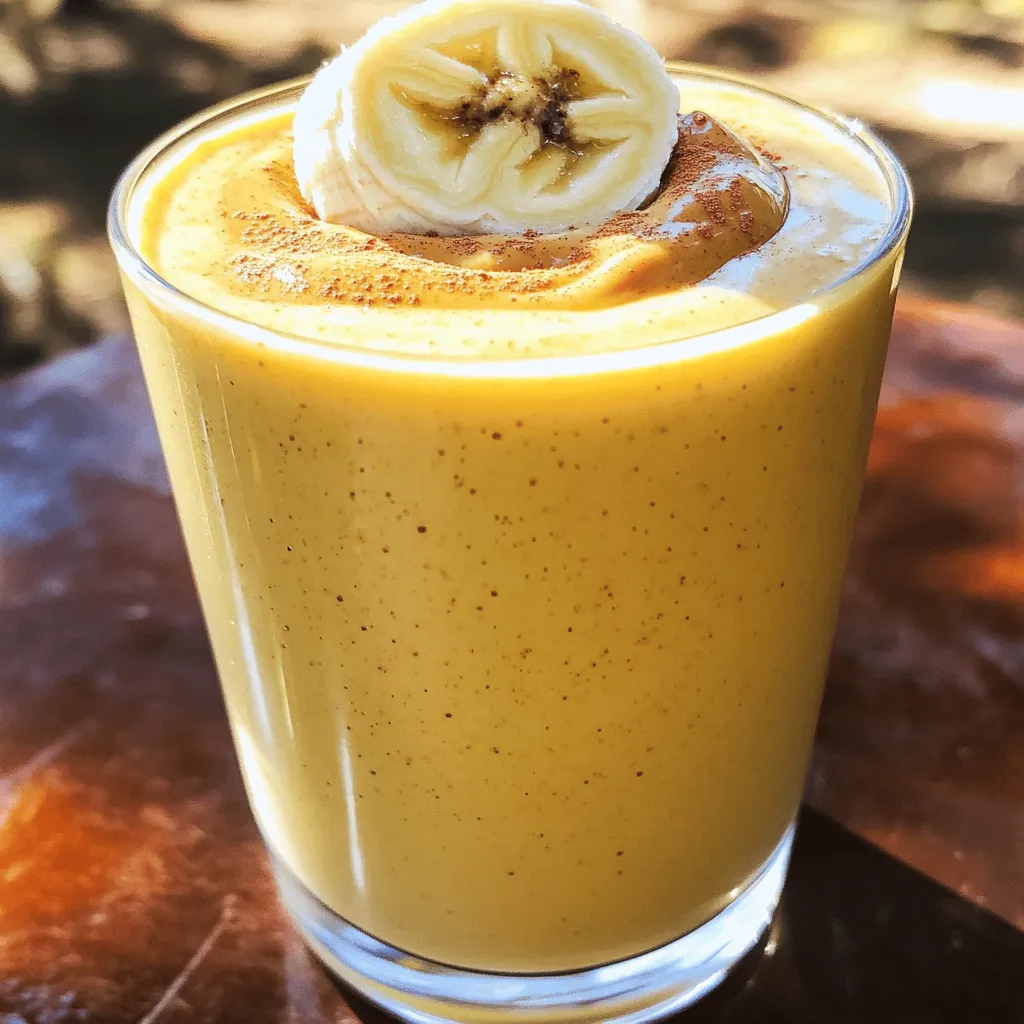
Serving Suggestions
Once your smoothie is fully blended, pour it into clear glasses. This shows off the rich, creamy texture. For a fun touch, drizzle a bit of peanut butter on top. You can also add a slice of banana or a sprinkle of cinnamon as a garnish. Enjoy this nutty banana bliss smoothie right after making it for the best flavor!
Pro Tips
- Use Overripe Bananas: The riper the bananas, the sweeter and creamier your smoothie will be. Look for bananas with brown spots for optimal flavor.
- Blend in Nut Varieties: Experiment with different nut butters like almond or cashew for a unique twist on flavor while keeping the smoothie creamy.
- Add Protein: For an extra protein boost, consider adding a scoop of protein powder or Greek yogurt to make the smoothie more filling.
- Chill Your Ingredients: If you prefer a colder smoothie but don’t have frozen bananas, chill your almond milk or other ingredients in advance to maintain a refreshing temperature.
Tips & Tricks
Achieving the Perfect Consistency
To get a smooth and creamy blend, use frozen bananas. They add coldness and thickness. Start with ripe bananas and freeze them overnight. If your smoothie is too thick, add more almond milk. Blend again until it reaches your desired texture.
Best Practices for Using Frozen Bananas
When using frozen bananas, peel them first. Cut them into small pieces for easier blending. Store the frozen bananas in a zip-top bag. This keeps them fresh and prevents freezer burn. Use them within a month for the best taste.
Enhancing Flavor with Additional Ingredients
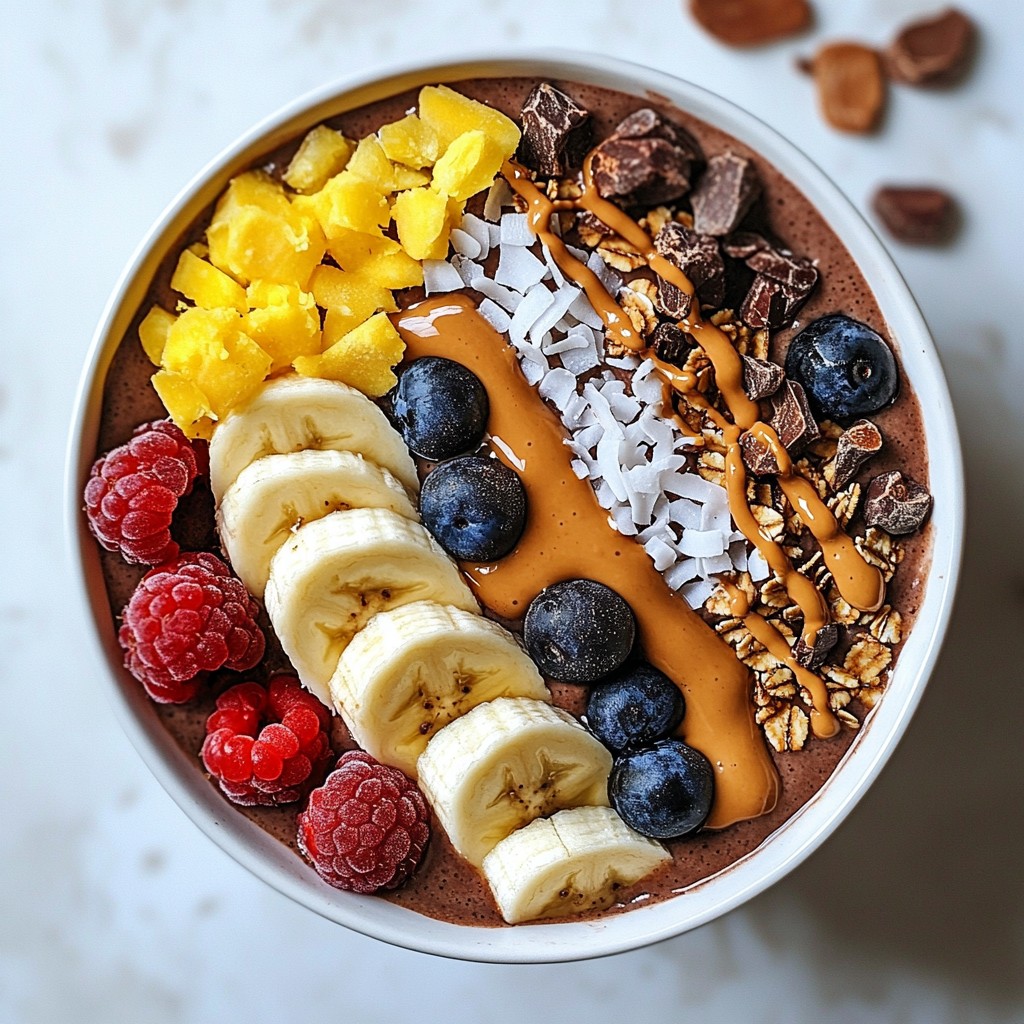
You can add fun flavors to your smoothie. A scoop of cocoa powder gives a chocolate twist. Try adding spinach for extra nutrients without changing the taste. You can also mix in chia seeds for added fiber. A dash of nutmeg can also spice things up!

Variations
Vegan Option
To make this smoothie vegan, you only need to swap out the milk. Instead of regular milk or yogurt, use plant-based milk like almond or oat. You can also choose a vegan sweetener, such as agave syrup, instead of honey. This way, you keep the creamy texture and rich flavor without animal products.
Protein-Packed Additions
Want to boost the protein? Add a scoop of your favorite protein powder. You can also mix in Greek yogurt for more creaminess and protein. For a nutty twist, consider adding seeds like chia or hemp. These options enhance the smoothie and keep you full longer.
Fruit Combinations for New Flavors
While banana and peanut butter shine together, feel free to mix in other fruits. Berries like strawberries or blueberries add a nice tartness. You might try mango or spinach for a different twist. Each fruit brings a unique flavor and makes your smoothie fun and fresh.
Storage Info
How to Store Leftover Smoothie
If you have leftover smoothie, pour it into a glass or a jar. Seal it tightly with a lid. Store it in the fridge for up to 24 hours. When you are ready to drink it, give it a good shake. This will mix the ingredients well again. The smoothie might separate after sitting, but that’s normal.
Freezing Smoothie for Future Use
You can also freeze your smoothie for later. Pour it into an ice cube tray or silicone molds. This makes it easy to use later. Once frozen, pop the cubes into a freezer bag. You can keep them for up to three months. When you want a quick snack, blend the cubes with a little milk or water.
Best Containers for Storing Smoothies
Glass jars work well for storing smoothies. They are easy to clean and do not hold odors. BPA-free plastic containers are a good choice too. Make sure they have a tight seal. This keeps your smoothie fresh and tasty. Avoid using metal containers, as they can affect the flavor. For freezing, use freezer-safe bags or silicone molds. They help save space and are easy to store.
Try these storage tips to enjoy your peanut butter banana smoothie later!
FAQs
Can I use regular milk instead of almond milk?
Yes, you can use regular milk. Whole milk or skim milk works well. Each type gives a different taste and creaminess. If you want a nutty flavor, almond milk is great. You can also try oat milk or soy milk for a dairy-free option.
How can I make this smoothie sweeter?
To make your smoothie sweeter, add honey or maple syrup. Start with one tablespoon. You can add more if you like it sweeter. You can also use ripe bananas for natural sweetness. Lastly, try adding a few dates for a richer flavor.
Is it healthy to have a peanut butter banana smoothie daily?
Yes, it can be healthy! This smoothie has good fats, protein, and fiber. Bananas give you potassium and vitamins too. Just watch the portion sizes. If you add too much sweetener, it can have extra sugar. Enjoying this smoothie daily can be part of a balanced diet.
This blog post covered the key elements of making a great smoothie. We explored ingredients, preparation steps, and ways to customize your drink. You learned tips for the perfect texture and flavorful options. We discussed storage methods to keep your smoothie fresh and answered common questions.
With this knowledge, you can create your own delicious and healthy smoothies. Experiment with flavors and enjoy every sip. Smoothies can be fun, tasty, and good for you! Now it’s time to blend your way to a better snack.

Peanut Butter Banana Smoothie
Ingredients
2 ripe bananas, frozen
2 tablespoons natural peanut butter
1 cup unsweetened almond milk (or milk of choice)
1 tablespoon honey or maple syrup (optional for sweetness)
½ teaspoon vanilla extract
A pinch of cinnamon
Ice cubes (optional, for thickness)
Instructions
In a blender, add the frozen bananas and peanut butter.
Pour in the almond milk and add the honey or maple syrup, if using.
Add the vanilla extract and cinnamon for extra flavor.
If you prefer a thicker smoothie, add a handful of ice cubes.
Blend on high until smooth and creamy, scraping down the sides as needed.
Taste the smoothie and adjust sweetness if desired by adding more honey or maple syrup.
Once fully blended, pour the smoothie into glasses.
Prep Time: 5 minutes | Total Time: 5 minutes | Servings: 2
– Presentation Tips: Serve in clear glasses to showcase the creamy texture and drizzle a bit of peanut butter on top for visual appeal. Garnish with a slice of banana or a sprinkle of cinnamon for an extra touch.

Peanut Butter Banana Smoothie
Ingredients
- 2 whole ripe bananas, frozen
- 2 tablespoons natural peanut butter
- 1 cup unsweetened almond milk (or milk of choice)
- 1 tablespoon honey or maple syrup (optional for sweetness)
- 0.5 teaspoon vanilla extract
- a pinch cinnamon
- as needed ice cubes (optional, for thickness)
Instructions
- In a blender, add the frozen bananas and peanut butter.
- Pour in the almond milk and add the honey or maple syrup, if using.
- Add the vanilla extract and cinnamon for extra flavor.
- If you prefer a thicker smoothie, add a handful of ice cubes.
- Blend on high until smooth and creamy, scraping down the sides as needed.
- Taste the smoothie and adjust sweetness if desired by adding more honey or maple syrup.
- Once fully blended, pour the smoothie into glasses.


![To make this tasty drink, you need: - 1 cup fresh blackberries - 1 cup water (for blackberry syrup) - 1 cup granulated sugar - 1 tablespoon dried lavender flowers - 1 cup fresh lemon juice (about 4-6 lemons) - 3-4 cups cold water (for dilution) - Ice cubes for serving The fresh blackberries bring a sweet burst of flavor. Their deep color makes the drink pretty too. The sugar helps balance the tartness of the lemons. Dried lavender flowers add a lovely floral note, making this drink feel special. You can make your drink even prettier with these garnishes: - Fresh blackberries - Lemon slices - Lavender sprigs Adding fresh blackberries and lemon slices on top makes the drink pop. Lavender sprigs can add a nice touch of elegance. You can mix and match these options to fit your style. If you want to learn how to make this refreshing drink, check out the Full Recipe. To start, you will need to make the blackberry syrup. Take a saucepan and combine 1 cup of fresh blackberries, 1 cup of water, and 1 cup of granulated sugar. This mixture is the heart of your drink. Bring it to a gentle simmer over medium heat. Stir it now and then. This helps the blackberries break down and release their juices. This should take about 5 to 7 minutes. Next, it’s time to add the lavender flavor. Stir in 1 tablespoon of dried lavender flowers into your syrup mixture. Reduce the heat and let it simmer for another 2 to 3 minutes. Then, remove the saucepan from the heat. Let the mixture steep for about 10 minutes. This step allows the lavender to infuse its wonderful aroma and taste into the syrup. Now, you are ready to mix your lemonade. In a large pitcher, combine the blackberry syrup with 1 cup of fresh lemon juice. You can use about 4 to 6 lemons to get this much juice. Then, add 3 to 4 cups of cold water to the pitcher. Stir well and taste your mixture. Adjust the sweetness or tartness to your liking. You can add more sugar if it’s too tart or more lemon juice if it’s too sweet. This process lets you create a refreshing drink that highlights the best of summer. For the full recipe, you can refer to the earlier section. Enjoy your cooling drink on a hot day! To make your blackberry lavender lemonade shine, focus on the right balance. Use equal parts sugar and lemon juice for a perfect blend. For example, if you use one cup of lemon juice, add one cup of sugar. This gives a nice sweet-tart flavor. You can adjust the sugar based on your taste, but this ratio works well for most. When straining the syrup, use a fine mesh strainer. This step is key to a smooth drink. Press down gently on the solids. This helps you get every drop of flavor. Discard the leftover solids, and you’ll have a beautiful syrup. Finding fresh blackberries and lavender is easy if you know where to look. Visit your local farmers market for the best options. Farmers often sell ripe blackberries in season. You can also check grocery stores. Look for berries that are firm and dark. For lavender, specialty shops or online stores often carry it. Make sure to choose culinary-grade lavender for the best flavor. You can also grow it yourself if you like gardening! When it comes to organic versus non-organic options, organic is often better. Organic berries have less pesticide. They taste fresher, too. However, if you can’t find organic, non-organic is still a good option and will work well in your drink. If you want to whip up this delightful drink, refer to the Full Recipe for all the details. {{image_2}} You can switch up the berries in this drink. Raspberries or blueberries work great. They each give a unique taste and color. You might even mix different berries for more fun! Try using honey or agave syrup instead of sugar. These natural sweeteners add depth to the flavor. They also make the drink a bit healthier. Adding herbs can give your drink a fresh twist. Mint adds a cool taste, while basil gives a warm flavor. Just a few leaves can change everything. If you want a stronger lavender taste, use more dried flowers. For a milder taste, reduce the amount. This lets you control the flavor profile to suit your mood or crowd. For the Full Recipe, check out the details above. To keep your blackberry lavender lemonade fresh, store it in the fridge. Use a large glass or plastic pitcher. Make sure the lid is on tight to avoid spills and keep out other smells. If you don’t have a pitcher, you can use a clean jar with a lid. Just remember to keep it covered. Your lemonade will stay fresh for about three to five days in the fridge. After that, it may lose its taste and color. If you have leftover lemonade, get creative! You can blend it into smoothies, use it to make popsicles, or even splash it into sparkling water for a tasty twist. Enjoy the refreshing flavor in many ways! To change the sweetness, you can add more or less sugar. If it’s too sweet, add more lemon juice. If it’s not sweet enough, mix in more sugar. Start with a small amount and taste it. This way, you can find the perfect balance for your drink. You can also try using honey or agave syrup as alternatives. Yes, you can use frozen blackberries. They are easy to find and often cheaper. They also save time since you don’t need to wash or pick them. However, frozen blackberries might be less firm and a bit mushy once thawed. If you choose frozen, use them straight from the freezer to make blackberry syrup. This will help keep the flavors fresh. Lavender offers calming effects and can help with sleep. It also has antioxidants that protect your cells. Blackberries are full of vitamins C and K. They are low in calories and high in fiber. This helps with digestion and supports a healthy heart. Drinking Blackberry Lavender Lemonade can refresh you while providing these health benefits. Enjoying this drink not only tastes good but also supports your wellness. For the full recipe, check out the [Full Recipe]. Blackberry lavender lemonade combines fresh berries, sweet sugar, and bright lemon juice. We learned how to make blackberry syrup, infuse lavender, and assemble the drink. I shared tips on ingredient sourcing, sweetening, and storing. You can even play with variations! This refreshing drink is fun to make and enjoy. Try your own twists and share this delightful recipe with friends. Happy sipping!](https://dailydishlab.com/wp-content/uploads/2025/07/3ca7755b-589d-4967-9590-f9a8bff39cf7-768x768.webp)
![To craft the perfect Pumpkin Maple Spice Latte, gather these key items: - 1 cup milk (dairy or non-dairy) - 1/2 cup strong brewed coffee or espresso - 1/4 cup pumpkin puree - 2 tablespoons pure maple syrup - 1/2 teaspoon pumpkin pie spice - 1/4 teaspoon vanilla extract - Pinch of salt These ingredients come together to create a rich and creamy drink. The pumpkin puree gives a smooth texture and deep flavor. Maple syrup adds sweetness while the pumpkin pie spice brings warmth and depth. You can enhance your latte in many ways. Here are some fun options: - Whipped cream (for topping) - Ground cinnamon (for garnish) - A sprinkle of nutmeg or ginger for extra spice - A drizzle of caramel for added sweetness Adding these elements can make your drink special. Feel free to experiment based on your taste! Using the right tools can make your latte-making experience easier. Here’s what I recommend: - Small saucepan for heating the milk - Whisk for mixing the ingredients - Immersion blender for frothing (or a regular blender) - Large mug to serve your drink These tools will help you create a delicious Pumpkin Maple Spice Latte at home. For the complete recipe, check out the [Full Recipe]. Making a Pumpkin Maple Spice Latte is easy and fun. You will heat milk, mix in pumpkin, and brew coffee. This drink combines sweet and warm flavors. Follow these steps for a cozy fall treat. 1. Heat the Milk: Pour 1 cup of milk into a small saucepan. Use medium heat until it gets hot, but don’t let it boil. 2. Mix the Pumpkin and Spices: Add 1/4 cup of pumpkin puree, 2 tablespoons of maple syrup, 1/2 teaspoon of pumpkin pie spice, 1/4 teaspoon of vanilla, and a pinch of salt. Whisk until smooth and warm. 3. Froth the Mixture: Take the saucepan off the heat. Use an immersion blender to froth the mix until it is creamy. If you don't have one, blend it in a regular blender. Then pour it back into the saucepan. 4. Brew the Coffee: While the milk is heating, brew 1/2 cup of strong coffee or espresso. 5. Combine the Two: In a large mug, pour the brewed coffee. Then, gently add the pumpkin-spice milk on top. 6. Add Toppings: If you like, add whipped cream on top. Sprinkle ground cinnamon for extra flavor. - Use Fresh Milk: Fresh milk froths better than older milk. - Heat Carefully: Heat milk slowly to avoid burning. - Whisk Vigorously: If using a whisk, whisk fast and hard for good froth. - Try a Blender: If you don’t have an immersion blender, a regular blender works well too. Just be careful when blending hot liquids. Enjoy your delicious Pumpkin Maple Spice Latte! For the full recipe, check the earlier section. To boost the taste of your Pumpkin Maple Spice Latte, use fresh spices. Fresh pumpkin pie spice will give a better flavor than old spice. Always choose pure maple syrup. This syrup has deep, rich notes that enhance the drink. You can also add a pinch of nutmeg or ginger for extra warmth. These spices can elevate the fall flavors. For a creamier texture, use whole milk or oat milk. Both options create a rich, smooth drink. One mistake is using canned pumpkin pie filling. It has added sugars and spices. Stick with plain pumpkin puree for the best taste. Another mistake is boiling the milk. Heat the milk until steaming, but not boiling. Boiling can ruin the texture and taste. Don't forget to whisk the mixture well. This helps blend the flavors. If you skip this step, your latte may taste uneven. Lastly, avoid over-sweetening. You can always add more syrup later. To adjust sweetness, add more maple syrup slowly. Start with a teaspoon and taste as you go. If it’s too sweet, add a pinch of salt. This can balance the flavors. For spice, you can increase the pumpkin pie spice. Add an extra 1/4 teaspoon to kick up the flavor. If you want a milder taste, reduce the spice a little. Personalize it to your liking! For a full guide on how to make this drink, check out the Full Recipe. {{image_2}} You can tweak the basic recipe to match the season. Adding apple cider can bring a fruity twist. A touch of nutmeg can deepen the fall flavor. You might also try using chai spice instead of pumpkin pie spice. This gives a warm, cozy vibe. Mixing in caramel sauce can add sweetness and a rich flavor. Each variation brings something new to your cup. If you prefer non-dairy options, you have choices. Almond milk or oat milk works great in this recipe. They both foam well and add flavor. For a richer taste, try coconut milk. It pairs nicely with pumpkin and maple. Maple syrup is already vegan, so you can enjoy this drink guilt-free. Make sure your whipped cream is vegan if you choose to add it. Want to enjoy this drink cold? You can easily make an iced version. Start by brewing your coffee and let it cool. Mix the pumpkin puree and spices with cold milk instead of heating it. Pour the cold coffee into a glass filled with ice. Add the pumpkin-spice milk mixture and stir. Top it with whipped cream and a sprinkle of cinnamon for a refreshing treat. For the complete recipe, refer to the Full Recipe section. If you have leftover Pumpkin Maple Spice Latte, store it in a sealed container. You can keep it in the fridge for up to three days. Make sure it cools first before sealing it. This helps keep the flavors fresh and tasty. When you are ready to enjoy your leftover latte, reheat it gently. Use a microwave or a small pot on the stove. Heat it slowly over low heat. Stir often to prevent burning. If you want to froth it again, use a frother or whisk after heating. Most of the ingredients last a while. Pumpkin puree can last in the pantry for a year. Once opened, keep it in the fridge for about a week. Maple syrup can last for years if stored correctly. Milk should be used within a week after the sell-by date. Always check for freshness before using any ingredient in your latte. For the full recipe, refer to the section above. Enjoy your cozy fall drink! The Pumpkin Maple Spice Latte blends fall flavors with coffee. This drink comes from the popular pumpkin spice trend. It started in the late 1990s with the rise of flavored coffee. The mix of pumpkin, maple, and spices makes it a favorite for autumn. Over the years, it has grown into a seasonal staple. Many coffee shops now serve it, adding their own twist. Yes, you can make the Pumpkin Maple Spice Latte ahead of time. Prepare the pumpkin-spice milk mixture in advance. Store it in the fridge for up to two days. When ready to serve, reheat it gently on the stove. Brew fresh coffee or espresso for the best taste. This latte stands out among seasonal drinks for its rich flavors. Unlike peppermint or eggnog, it offers a unique blend of pumpkin and maple. Many people love it for its warm, cozy vibe. It often feels more comforting than other drinks. Plus, it has a creamy texture that enhances the experience. Toppings can add extra flavor and fun to your latte. Here are some popular choices: - Whipped cream - Ground cinnamon - Nutmeg - Crushed graham crackers - Caramel drizzle Feel free to mix and match toppings for your perfect Pumpkin Maple Spice Latte! For the full recipe, check out the details above. You now have everything needed to make a great Pumpkin Maple Spice Latte. We covered key ingredients, tools, and step-by-step instructions for a smooth drink. Remember to check your sweetness and spice levels to suit your taste. You learned some common mistakes to avoid and cool variations to try. With proper storage, your latte can last longer and taste just as good. Enjoy your homemade treat!](https://dailydishlab.com/wp-content/uploads/2025/06/c2ae4cd5-2684-4eac-bee7-ccd7f81308fc-768x768.webp)

![For the Lemon Ginger Turmeric Smoothie, gather these simple ingredients: - 1 banana, frozen - 1 cup almond milk (or any milk of choice) - 1 tablespoon fresh ginger, grated - 1 teaspoon ground turmeric - 1 tablespoon honey (or maple syrup for a vegan option) - Juice of 1 lemon - 1/2 teaspoon cinnamon - A pinch of black pepper (to enhance turmeric absorption) - Ice cubes (optional, for a colder smoothie) - Banana adds creaminess and provides potassium. This helps with muscle function and heart health. - Almond milk is low in calories and dairy-free. It offers a nutty flavor and healthy fats. - Fresh ginger boosts digestion and fights inflammation. It also adds a zesty kick. - Ground turmeric contains curcumin, which has anti-inflammatory effects. This spice may help improve brain health. - Honey gives natural sweetness and has antioxidants. It can soothe sore throats and boost energy. - Lemon juice is high in vitamin C. It supports your immune system and adds a refreshing taste. - Cinnamon can regulate blood sugar and may help lower cholesterol levels. It adds warmth to the flavor. - Black pepper enhances the absorption of turmeric. It also adds a little heat to the mix. - Ice cubes make the smoothie cold and refreshing, especially in warm weather. You can swap ingredients to fit your needs: - Use any frozen fruit in place of banana for different flavors. - Substitute coconut milk or soy milk for almond milk if you prefer. - Replace fresh ginger with ground ginger in a pinch, but use less. - Use agave syrup instead of honey for a vegan sweetener. - If you don’t have ground turmeric, fresh turmeric can work as well. - For a spice boost, consider adding nutmeg instead of cinnamon. Feel free to mix and match to create your perfect smoothie! You can find the Full Recipe for detailed steps and tips. Start by gathering your ingredients. You will need: - 1 banana, frozen - 1 cup almond milk (or any milk of choice) - 1 tablespoon fresh ginger, grated - 1 teaspoon ground turmeric - 1 tablespoon honey (or maple syrup for a vegan option) - Juice of 1 lemon - 1/2 teaspoon cinnamon - A pinch of black pepper - Ice cubes (optional) Peel and grate the fresh ginger. This step makes the ginger easier to blend. Next, freeze your banana overnight. This will give your smoothie a creamy texture. Now it’s time to blend. In a blender, add: - The frozen banana - Almond milk - Grated ginger - Ground turmeric - Honey - Lemon juice - Cinnamon - Black pepper Blend on high speed for about 1-2 minutes. You want the mixture to be smooth and creamy. If you like it colder, add some ice cubes. Blend again until well mixed. Taste your smoothie. If you want it sweeter, add more honey or maple syrup. Blend briefly again if you do. Pour your smoothie into a tall glass. For a nice touch, garnish with a slice of lemon on the rim. You can also sprinkle a bit of turmeric on top. This makes the drink look great and adds a little extra flavor. Enjoy your Lemon Ginger Turmeric Smoothie right away for the best taste. For the full recipe, check the previous section. To get the smoothest texture, always use a frozen banana. This gives the smoothie a creamy base. Make sure to blend on high speed for about one to two minutes. If you find the texture too thick, add more almond milk. This helps to create a silky consistency. Taste your smoothie before serving. If you want more sweetness, add a bit of honey or maple syrup. Start with a small amount, like a half tablespoon. Blend again to mix well. You can always add more, but you can’t take it out! A high-speed blender works best for this smoothie. It makes sure all the ingredients blend evenly. If you don’t have one, a regular blender will work, but you may need to blend longer. Use a measuring cup for accurate ingredient amounts. A good knife makes peeling and grating ginger easier. For the full recipe, check out the section above. {{image_2}} You can make this smoothie even better by adding seasonal fruits. Fresh fruits can change the flavor and add more nutrition. In spring, try fresh strawberries or peaches. In summer, add ripe mango or watermelon. Autumn brings apples and pears, while winter is perfect for oranges or pomegranates. Each fruit offers unique vitamins that boost your health. This smoothie is easy to make dairy-free and vegan. Use almond milk or coconut milk instead of regular milk. For sweetness, use maple syrup instead of honey. This keeps the drink plant-based and still delicious. You can also add a scoop of your favorite plant-based protein powder for extra fuel. Want to make your smoothie even healthier? Consider adding a handful of spinach or kale. This gives you more fiber and vitamins without changing the taste much. You can also throw in some chia seeds or flaxseeds for healthy fats and omega-3s. These small changes can pack a big punch in nutrition. For the full recipe, check out the section above. If you have leftover smoothie, store it in an airtight container. Place it in the fridge. It can last for up to two days. When you want to enjoy it again, give it a good shake or stir. This will help mix it back up. The smoothie may separate a bit, but that’s normal. You can freeze parts of the smoothie for later use. Freeze the banana and ginger separately. This way, you can blend them fresh when you want a smoothie. To freeze, slice the banana and place it in a bag. Grate the ginger and store it in a small container. You can use these frozen pieces anytime for a quick, healthy drink. Smoothies are best enjoyed cold, but if you need to reheat, do so gently. Pour it into a pot and warm it on low heat. Stir often to keep the texture smooth. You can also add a little almond milk to refresh it if it thickens. For a quick pick-me-up, blend in some ice cubes to chill it right before serving. For the full recipe and more tips, check out the [Full Recipe]. Yes, you can use frozen ginger. It still has great flavor. However, fresh ginger adds a brighter taste. If you use frozen, just grate it first. This will help it blend better. Turmeric is known for its many health benefits. It may help reduce inflammation in the body. This spice also supports brain health and boosts immunity. Turmeric contains curcumin, which is a powerful antioxidant. Adding black pepper helps your body absorb turmeric better. If your smoothie is too thick, add more liquid. You can use almond milk or water. Blend it again until you reach your desired thickness. Another option is to use less frozen banana. Adjust it to fit your taste! Check out the Full Recipe for more tips. This blog post covered key smoothie ingredients and their health benefits. We explored how to prepare, blend, and serve your smoothies for the best taste. Tips helped you achieve great texture and adjust sweetness perfectly. You learned about delicious variations and smart storage methods. In summary, making smoothies can be fun and healthy. Experiment with flavors and find what you love. Enjoy your smoothie journey and boost your health!](https://dailydishlab.com/wp-content/uploads/2025/06/39b90a8c-8945-4064-ab1e-a02d16f24ba0-768x768.webp)