Pesto Roasted Potato Wedges Crispy and Flavorful Treat

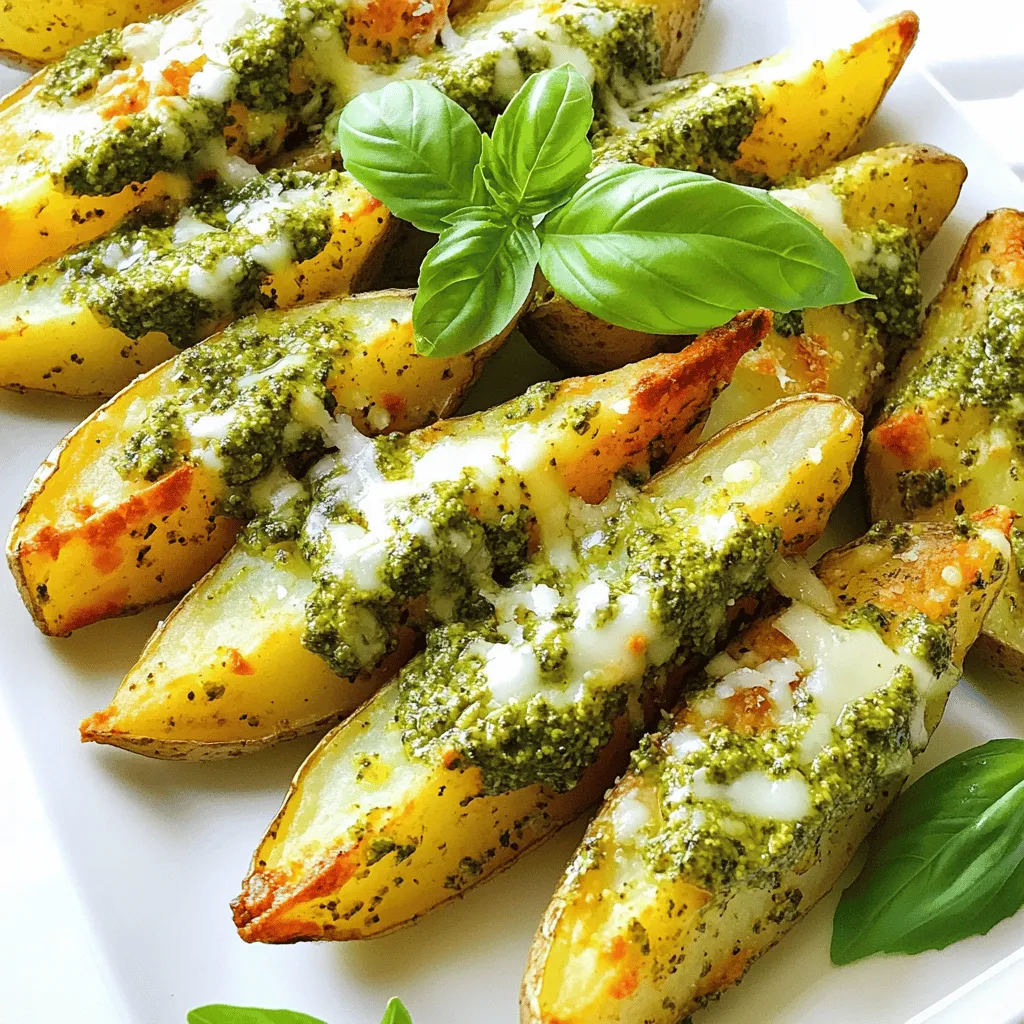
Craving a crispy, flavorful snack? Dive into my guide for Pesto Roasted Potato Wedges! These wedges transform simple potatoes into a vibrant treat, bursting with herb-filled deliciousness. With just a handful of ingredients and easy steps, you can impress your family or guests. Ready to make your taste buds dance? Let’s get started on crafting these irresistible bites!
Why I Love This Recipe
- Easy Preparation: This recipe requires minimal effort, making it perfect for any weeknight dinner.
- Flavorful Twist: The addition of pesto elevates classic potato wedges to a whole new level of deliciousness.
- Crispy Perfection: Roasting the wedges ensures they are crispy on the outside and fluffy on the inside.
- Customizable: You can easily adjust the spices and toppings to suit your taste preferences.
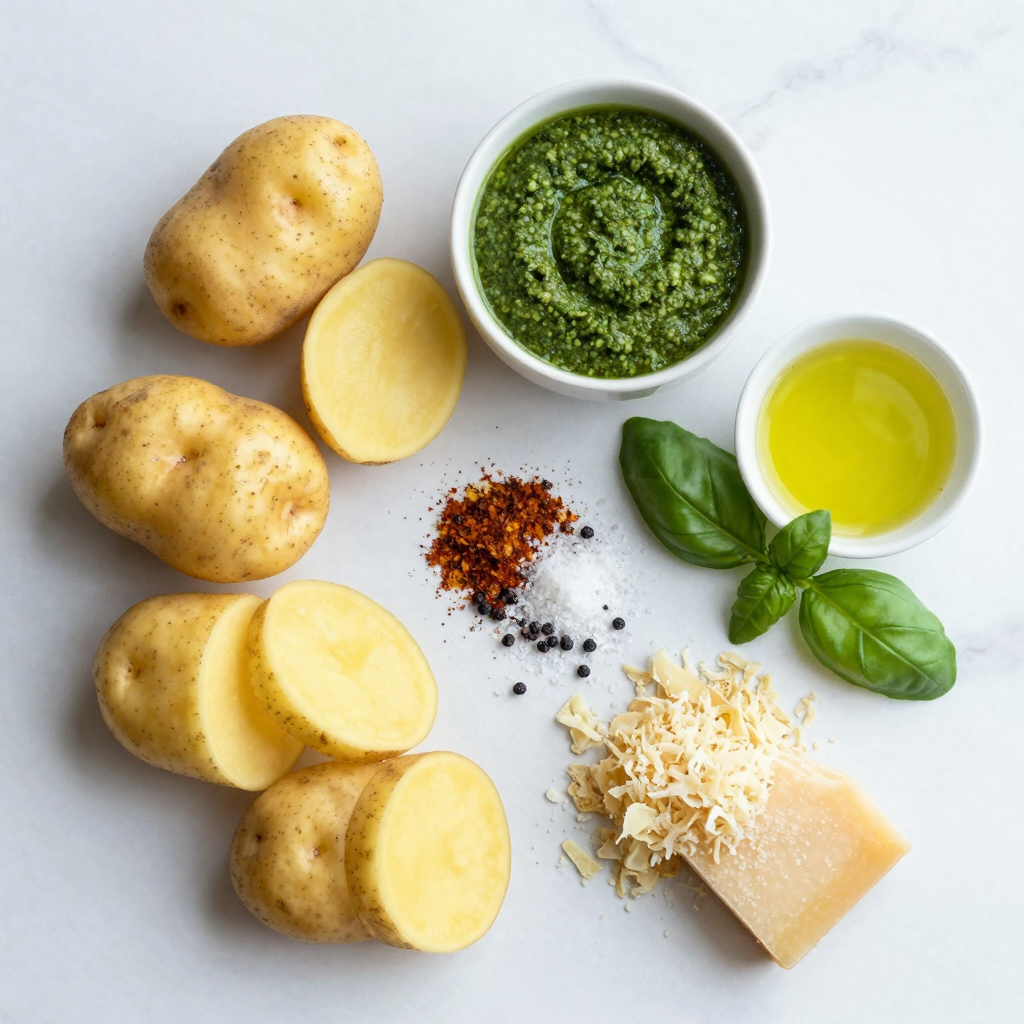
Ingredients
List of Ingredients
- 4 medium-sized Russet potatoes
- 1/3 cup pesto sauce
- 3 tablespoons olive oil
- 1 teaspoon garlic powder
- 1 teaspoon smoked paprika
- Salt and pepper to taste
- 1/4 cup Parmesan cheese (optional)
- Fresh basil leaves (for garnish)
Gather these items before you start cooking. The Russet potatoes give nice texture and flavor. Pesto sauce adds a rich taste. Olive oil helps the wedges crisp up. Garlic powder and smoked paprika bring extra flavor. You can add Parmesan cheese for a salty touch. Fresh basil will make your dish look pretty. Each ingredient plays a role in making these potato wedges a crispy and flavorful treat.

Step-by-Step Instructions
Prepping the Potatoes
Start by washing the four medium-sized Russet potatoes. Rinse them well under cold water. Cut the washed potatoes into wedges. Aim for even sizes to help them cook evenly. Next, preheat your oven to 425°F (220°C). This high heat helps make the wedges crispy.
Mixing Ingredients
In a large bowl, add the potato wedges. Pour in 3 tablespoons of olive oil and 1/3 cup of pesto sauce. Sprinkle in 1 teaspoon of garlic powder and 1 teaspoon of smoked paprika. Add salt and pepper to taste. Toss the mix until all the wedges get a good coating. This step is key for flavor.
Baking the Wedges
Spread the coated potato wedges in a single layer on a lined baking sheet. Make sure they are not crowded. This helps them crisp up nicely. Roast in the preheated oven for about 25 to 30 minutes. Flip the wedges halfway through cooking. This ensures they brown evenly. If you like, sprinkle grated Parmesan cheese over the wedges in the last five minutes of roasting.
Pro Tips
- Choose the Right Potatoes: For the best texture, opt for Russet potatoes as they become fluffy inside while crisping up on the outside.
- Customize Your Pesto: Feel free to experiment with different types of pesto, such as sun-dried tomato or arugula, to give the wedges a unique flavor twist.
- Don’t Overcrowd the Pan: Make sure the potato wedges are in a single layer with space between them to ensure they roast evenly and get crispy.
- Check for Doneness: Keep an eye on the wedges during the last few minutes of roasting; they should be golden brown and crispy, but not burnt.
Tips & Tricks
Achieving Crispy Wedges
To get those crispy potato wedges, start with a good coating. Make sure to mix the potatoes well with olive oil and pesto. This helps the seasoning stick. When you spread them on the baking sheet, keep space between each piece. This allows hot air to circulate, making them crispy on all sides.
Flavor Enhancements
Want to take your flavor up a notch? Try adding extra spices! A dash of cayenne pepper can bring some heat. You could also add onion powder for a savory touch. If the pesto flavor is too strong, mix in a bit more olive oil. This will soften the taste and balance the dish.
Perfecting the Parmesan Topping
Timing is key for the cheese. Add the Parmesan during the last five minutes of roasting. This way, it melts just right without burning. If you want a twist, try using feta or goat cheese instead. Both will add unique flavors that pair well with the pesto.

Variations
Gluten-Free Options
If you’re looking for gluten-free options, this recipe works well. Pesto sauce is often gluten-free. Just check the label to make sure. You can also make your own pesto at home. Use nuts, olive oil, and fresh herbs. This way, you control all the ingredients.
Vegan Adjustments
To make this dish vegan, skip the Parmesan cheese. Instead, use nutritional yeast for a cheesy flavor. It adds a nice twist and keeps the dish dairy-free. You can also make your own vegan pesto. Use nuts, garlic, olive oil, and basil without cheese.
Flavor Variations
Explore different pesto flavors to elevate your wedges. Try sun-dried tomato pesto or arugula pesto for a new taste. You can also add other veggies to the mix. Bell peppers, zucchini, or carrots roast well alongside the potatoes. They add color and nutrition to your dish.
Storage Info
Storing Leftovers
To keep your Pesto Roasted Potato Wedges fresh, place them in an airtight container. Make sure they cool down before sealing. Store them in the fridge for up to three days. This helps maintain their flavor and texture. If you notice any moisture, use a paper towel to absorb it. This simple step keeps them from getting soggy.
Reheating Tips
When reheating, aim to keep your wedges crispy. Preheat your oven to 400°F (200°C). Spread the wedges on a baking sheet in a single layer. Heat them for about 10-15 minutes. This method revives their crunch. Avoid using the microwave, as it makes them soft.
Freezing Instructions
Yes, you can freeze Pesto Roasted Potato Wedges! Cool them completely, then spread them on a baking sheet. Freeze them for a few hours until firm. Once frozen, transfer them to a freezer bag. They will last for up to three months. To reheat, bake directly from frozen. This keeps them crispy and tasty!
FAQs
How long do Pesto Roasted Potato Wedges take to cook?
Pesto roasted potato wedges take about 25-30 minutes to cook. First, preheat your oven to 425°F (220°C). Once you place the wedges in, flip them halfway through. This helps them get crispy on all sides.
Can I use a different type of potato?
Yes, you can use other types of potatoes. Yukon Gold or red potatoes work well too. Each type has its own taste and texture. Experiment to find your favorite!
What can I serve with Pesto Roasted Potato Wedges?
These wedges pair nicely with grilled chicken or fish. You can also serve them with a fresh salad or as a side for burgers. They add a nice crunch to any meal.
Is it necessary to peel the potatoes?
No, peeling is not necessary. The skin adds extra texture and nutrients. Just wash them well before cutting into wedges. This keeps the dish simple and tasty.
Can I make homemade pesto for this recipe?
Absolutely! Homemade pesto is a great choice. Blend fresh basil, garlic, pine nuts, Parmesan cheese, and olive oil. This allows you to control the flavor and freshness. Plus, it’s fun to make!
These Pesto Roasted Potato Wedges are simple yet packed with flavor. We explored the ingredients, mixing steps, and tips for crispy results. You can easily adjust the recipe for gluten-free or vegan needs. Remember to store leftovers properly and follow reheating tips to enjoy them again. With these steps and ideas, I hope you feel ready to make a delicious, easy side dish. Happy cooking!

Pesto Roasted Potato Wedges
Ingredients
4 medium-sized Russet potatoes, washed and cut into wedges
1/3 cup pesto sauce (store-bought or homemade)
3 tablespoons olive oil
1 teaspoon garlic powder
1 teaspoon smoked paprika
Salt and pepper to taste
1/4 cup Parmesan cheese, grated (optional for topping)
Fresh basil leaves for garnish
Instructions
Preheat your oven to 425°F (220°C) and line a baking sheet with parchment paper.
In a large bowl, combine the potato wedges, olive oil, pesto sauce, garlic powder, smoked paprika, salt, and pepper. Toss until the wedges are well-coated with the mixture.
Spread the potato wedges in a single layer on the prepared baking sheet, ensuring they are not crowded.
Roast in the preheated oven for 25-30 minutes, flipping halfway through, until they are golden brown and crispy on the edges.
If using, sprinkle the grated Parmesan cheese over the wedges during the last 5 minutes of roasting to let it melt slightly.
Once cooked, remove from the oven and let them cool for a couple of minutes.
Garnish with fresh basil leaves before serving.
Prep Time: 10 minutes | Total Time: 40 minutes | Servings: 4

Pesto Roasted Potato Wedges
Ingredients
- 4 medium-sized Russet potatoes, washed and cut into wedges
- 1 third cup pesto sauce (store-bought or homemade)
- 3 tablespoons olive oil
- 1 teaspoon garlic powder
- 1 teaspoon smoked paprika
- to taste Salt and pepper
- 1 fourth cup Parmesan cheese, grated (optional for topping)
- as needed Fresh basil leaves for garnish
Instructions
- Preheat your oven to 425°F (220°C) and line a baking sheet with parchment paper.
- In a large bowl, combine the potato wedges, olive oil, pesto sauce, garlic powder, smoked paprika, salt, and pepper. Toss until the wedges are well-coated with the mixture.
- Spread the potato wedges in a single layer on the prepared baking sheet, ensuring they are not crowded.
- Roast in the preheated oven for 25-30 minutes, flipping halfway through, until they are golden brown and crispy on the edges.
- If using, sprinkle the grated Parmesan cheese over the wedges during the last 5 minutes of roasting to let it melt slightly.
- Once cooked, remove from the oven and let them cool for a couple of minutes.
- Garnish with fresh basil leaves before serving.


![- 1 can (15 oz) chickpeas, drained and rinsed - 1/4 cup fresh parsley, chopped - 1/4 cup fresh cilantro, chopped - 1/2 small onion, roughly chopped - 2 cloves garlic, minced - 1 tsp ground cumin - 1 tsp ground coriander - 1/2 tsp baking powder - 1/4 cup all-purpose flour (or chickpea flour for gluten-free) - Salt and pepper to taste - 3 tablespoons olive oil - Optional: tahini sauce for serving Gathering your ingredients is the first step to making easy baked falafel. Chickpeas are the base of this dish. They provide protein and fiber. Fresh parsley and cilantro add bright flavor. The onion and garlic bring warmth and depth. Ground cumin and coriander give that classic falafel taste. Baking powder helps the falafel puff up a bit. Flour binds everything together. You can use all-purpose flour or chickpea flour if you want a gluten-free option. Don't forget to season with salt and pepper. This is key to enhancing the flavors. Finally, olive oil gives that crispy texture when baking. If you like, serve your falafel with tahini sauce for a creamy dip. Follow this full recipe to make sure you get it just right. - Preheat your oven to 375°F (190°C). Line a baking sheet with parchment paper. - In a food processor, combine the chickpeas, parsley, cilantro, onion, and garlic. Pulse it a few times until mixed, but keep some texture. - Add the cumin, coriander, baking powder, flour, salt, and pepper to the food processor. Pulse until just mixed. Scrape the sides as needed. The mix should hold but feel slightly crumbly. - Shape the mixture into small balls, about the size of a golf ball. Place them on the baking sheet. Gently flatten them with your hand. - Drizzle the falafel with olive oil. This helps them crisp up while baking. - Bake for 25-30 minutes, flipping halfway through. They should turn golden brown and feel crispy. - Let them cool slightly before serving. Enjoy your crunchy and flavorful baked falafel! For the complete details, check the Full Recipe. To get the best texture for your falafel, avoid overprocessing the mixture. When you blend the chickpeas and herbs, pulse it gently. You want a coarse blend, not a smooth paste. This keeps it light and fluffy. Also, determine the perfect falafel size. Aim for small balls about the size of a golf ball. This size helps them cook evenly and stay crispy. When you shape them, ensure they are not too compact. They need some air to become crunchy. You can enhance the flavor by experimenting with spices. In addition to cumin and coriander, try adding smoked paprika or cayenne pepper. These spices can kick up the taste and make your falafel stand out. Incorporate additional herbs for more depth. Fresh dill or mint adds a nice twist. Just chop them fine and mix them in. This will brighten the flavor and make your dish even more delightful. For the full recipe, check out the complete guide to making crispy baked falafel. {{image_2}} You can easily adapt baked falafel to fit different diets. For a gluten-free option, swap out the all-purpose flour for chickpea flour. This change keeps the falafel tasty and safe for those with gluten sensitivities. Just use the same amount of chickpea flour as the recipe calls for. If you're looking for vegan variations, you're in luck! The base of this recipe is already vegan. Just ensure you serve it with plant-based sauces like tahini. You can also add extra veggies to your falafel mix for added nutrients. Want to give your falafel a kick? Try making spicy baked falafel. Add a chopped jalapeño or a pinch of cayenne pepper to the mix. This addition gives the falafel a nice heat that pairs well with cooling sauces. For a Mediterranean-style twist, consider adding sun-dried tomatoes to your falafel mixture. This will give your falafel a tangy flavor that is delightful. You can chop them up and mix them in with the other ingredients. These variations help you explore different tastes while keeping the recipe simple. Try them out and see which ones you like best! For the full recipe, refer to the earlier sections. To keep your baked falafel fresh, store them in the fridge. Place them in an airtight container. They last up to four days this way. Make sure they cool completely before sealing. This prevents moisture buildup. For longer storage, you can freeze them. Wrap each falafel in plastic wrap. Then, place them in a freezer bag. They can stay in the freezer for up to three months. When it’s time to enjoy your falafel again, you have two good options: the oven or the microwave. The oven keeps them crispy. Preheat the oven to 350°F (175°C). Place the falafel on a baking sheet and heat for about 10-15 minutes. For a quick meal, use the microwave. Just remember, this method can make them softer. To keep them crispy, try reheating in a skillet. This adds a nice crunch back to the outside. Enjoy your crunchy falafel again! For the full recipe, check out the [Full Recipe]. How to make falafel from scratch? To make falafel from scratch, you need key ingredients. Start with a can of chickpeas. Rinse and drain them well. Then, blend the chickpeas with herbs like parsley and cilantro. Add onion, garlic, and spices for flavor. Mix in some flour and baking powder to help the falafel hold together. Shape the mixture into balls or patties, and bake them until crispy. Can I bake falafel without oil? You can bake falafel without oil, but it may not be as crispy. Oil helps create that crunchy texture. If you want to skip oil, form the falafel and bake them as is. Keep an eye on them, as they may need a little longer to brown. What to serve with baked falafel? Baked falafel pairs well with many things. You can serve them in warm pita bread. Add fresh veggies like lettuce, tomatoes, and cucumber. Drizzle tahini sauce or yogurt on top for added flavor. You can also enjoy them on a salad or with a side of hummus. Why are my falafel falling apart? Falafel may fall apart for a few reasons. If the mixture is too wet, they won’t hold shape. Be sure to drain the chickpeas well. Using enough flour helps bind the mixture. Also, do not overprocess it in the food processor. Keep some texture for better structure. How do I know when falafel is done baking? You can tell if falafel is done by its color and texture. They should be golden brown and crispy on the outside. If they feel firm to the touch, they are likely done. Bake for 25-30 minutes, flipping halfway through for even cooking. You now have a clear guide to making delicious falafel. We covered ingredients, step-by-step instructions, and helpful tips. Whether you prefer gluten-free or spicy versions, there’s an option for you. Store your falafel safely and reheat it right to keep it crisp. Enjoy your homemade falafel as a tasty snack or meal. With these tips, you can make perfect falafel every time. Now, it's time to get cooking and share your creations!](https://dailydishlab.com/wp-content/uploads/2025/07/105e670d-6b88-46d5-acd9-26b7b59cff64-768x768.webp)
![To make a delicious classic macaroni salad, you need simple, fresh ingredients. Here’s what you will need: - 2 cups elbow macaroni - 1 cup creamy mayonnaise - 2 tablespoons apple cider vinegar - 1 tablespoon Dijon mustard - 1 teaspoon granulated sugar - 1 cup celery, finely diced - 1 cup red bell pepper, diced - 1/2 cup red onion, finely chopped - 1 cup frozen peas, thawed - Salt and freshly cracked black pepper, to taste - Fresh parsley or chives, chopped, for garnish These ingredients create a salad that is both creamy and crunchy. The elbow macaroni serves as the base, while the veggies add color and texture. The dressing blends everything together, making each bite flavorful. When preparing the salad, always use fresh ingredients for the best taste. You can find the full recipe in the article. To cook the elbow macaroni, start with a large pot. Fill it with enough water to cover the pasta. Add a big pinch of salt to the water. Bring it to a rolling boil. Once boiling, pour in the macaroni. Cook it for about 8 to 10 minutes. You want it to be al dente, which means it should still have a little bite. When it's ready, drain it in a colander. Rinse it under cold water to stop the cooking. Let it cool completely. For the dressing, you need a few simple ingredients. Gather 1 cup of creamy mayonnaise, 2 tablespoons of apple cider vinegar, 1 tablespoon of Dijon mustard, and 1 teaspoon of granulated sugar. In a large bowl, whisk these together. Mix until it is smooth and creamy. Make sure there are no lumps left. This dressing adds the perfect flavor to your salad. Now it's time to combine everything. First, add the cooled macaroni to the bowl with the dressing. Then, fold in the veggies gently. Use 1 cup of finely diced celery, 1 cup of diced red bell pepper, ½ cup of finely chopped red onion, and 1 cup of thawed peas. Be careful not to mash the pasta. You want all the ingredients to be evenly coated with the dressing. Taste the salad to check the seasoning. Add salt and freshly cracked black pepper as needed. Mix it again to make sure every bite is tasty. Next, cover the bowl with plastic wrap or a lid. Put it in the refrigerator for at least 1 hour. This chilling time helps the flavors blend together. When it's ready, give it a gentle stir and adjust any seasoning if needed. Serve it in a big bowl or in individual portions. A sprinkle of fresh parsley or chives on top makes it look great. For the full recipe, check out the details above! Overcooking the macaroni is a mistake many people make. It turns mushy and loses its bite. Aim for al dente, which means firm but cooked. Follow the package time closely, usually about 8-10 minutes. Rinse it under cold water right after cooking to stop the heat. Not seasoning enough is another common error. A dash of salt makes a big difference. Taste your salad while mixing. Add salt and pepper slowly until you find the right level. To boost flavor, consider adding fresh herbs. Chopped dill, parsley, or chives add a nice touch. You could also try a sprinkle of paprika or garlic powder for extra zest. Chilling your salad is key. It allows the flavors to blend together. Let it sit in the fridge for at least one hour. The longer you chill, the better it tastes. Macaroni salad pairs well with grilled meats. It complements burgers, hot dogs, or barbecued chicken perfectly. You can also serve it with fresh veggies, chips, or fruit. For presentation, use a large, colorful bowl. You can garnish with extra herbs or slices of bell pepper on top. This makes the salad look as good as it tastes. Enjoy your beautiful dish! {{image_4}} You can easily change the classic macaroni salad by using different ingredients. One great swap is to replace mayonnaise with Greek yogurt. This makes the salad lighter and adds a nice tang. Greek yogurt also packs in protein, making your salad more filling. You can also add protein like chicken or tuna. This simple change makes it a full meal. Just shred cooked chicken or mix in canned tuna. You’ll have a hearty dish that everyone will love. To give your salad a new twist, try different flavors. For a Mediterranean twist, add olives and feta cheese. This adds a briny flavor that pairs well with the creamy dressing. The feta also gives a nice texture contrast. If you like spice, try adding jalapeños. This will give your salad a kick that may surprise your guests. You can adjust the amount based on how spicy you want it. If you need gluten-free options, use gluten-free macaroni. Many brands offer pasta made from rice or quinoa. These work great and taste delicious in the salad. For a vegan option, replace the mayo with a vegan dressing. You can find many great recipes online or in stores. This way, everyone can enjoy your macaroni salad without worry. For the full recipe, check out the [Full Recipe]. To keep your macaroni salad fresh, use an airtight container. Glass or plastic containers with tight lids work best. Avoid leaving it uncovered in the fridge. Covering it keeps out odors and maintains flavor. Store the salad in the fridge right after serving. The cool temperature slows spoilage. It's best to eat it within a few days for optimal taste. Classic macaroni salad usually lasts for about 3 to 5 days in the fridge. Make sure to check for signs of spoilage. If you see mold or an off smell, it’s best to discard it. Also, if the salad looks dry or the texture changes, it may not be safe to eat. Always trust your senses when assessing food safety. Reheating macaroni salad is usually not necessary. This dish is best served cold. If you have leftovers, you can enjoy them straight from the fridge. If you want to refresh the salad, add a bit more dressing. Stir it well to mix in the new dressing. This will help bring back some of the creaminess. Enjoy your classic macaroni salad with a burst of flavor! Yes, you can make macaroni salad ahead of time. It tastes better when chilled. I recommend chilling it for at least one hour. If you have more time, chilling overnight will enhance the flavors even more. If you want a creamy texture without mayonnaise, try Greek yogurt. It adds creaminess and a bit of tang. You can also use avocado or a mix of sour cream and mustard. These options are tasty and healthy. To make your macaroni salad creamier, add more mayonnaise or yogurt. Mixing in a little pasta water can also help. If you prefer a richer taste, consider adding a splash of heavy cream. Each of these tips can really boost the creaminess. Yes, it is safe to eat leftover macaroni salad if stored properly. Keep it in an airtight container in the fridge. It should be eaten within three to five days. Always check for any signs of spoilage before eating. This article explored making a classic macaroni salad, from ingredients to storage. Remember, cooking the macaroni al dente and chilling the salad enhance flavors. Avoid common mistakes like overcooking and under-seasoning. Variations, like using yogurt or adding protein, can create new tastes. Proper storage ensures your salad stays fresh. With these tips, you can enjoy a delicious macaroni salad any time. Now, it’s your turn to make it and impress your friends and family!](https://dailydishlab.com/wp-content/uploads/2025/06/3a7d09ad-1a72-4428-9717-30c1895d693b-768x768.webp)

