Pumpkin Cheesecake Brownie Bars Perfect for Fall Treats

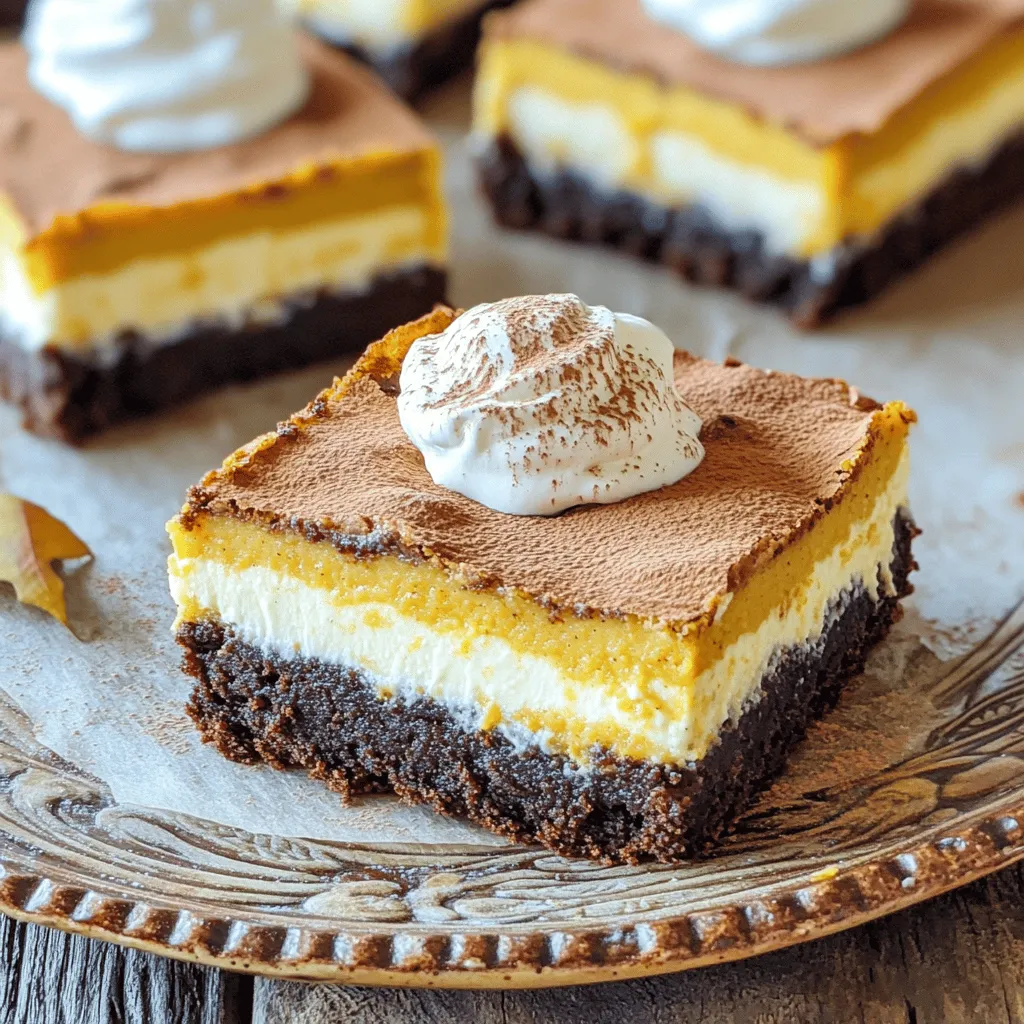
Fall is the perfect time to indulge in warm, cozy treats that bring joy to the table. In this article, I’ll share my favorite recipe for Pumpkin Cheesecake Brownie Bars. You’ll discover how to blend rich brownies with creamy pumpkin cheesecake for a delightful dessert that captures autumn flavors. Whether you’re hosting a gathering or enjoying a quiet evening at home, these bars are sure to impress. Let’s dive into the delicious details!
Why I Love This Recipe
- Decadent Flavor Fusion: The rich chocolate brownie layer perfectly complements the creamy pumpkin cheesecake, creating an irresistible combination of flavors.
- Seasonal Delight: This recipe captures the essence of fall with pumpkin and warm spices, making it a perfect treat for autumn gatherings.
- Easy Preparation: With simple ingredients and straightforward steps, these bars are easy to whip up, even for novice bakers.
- Beautiful Presentation: The two distinct layers create a visually stunning dessert that is sure to impress guests at any occasion.
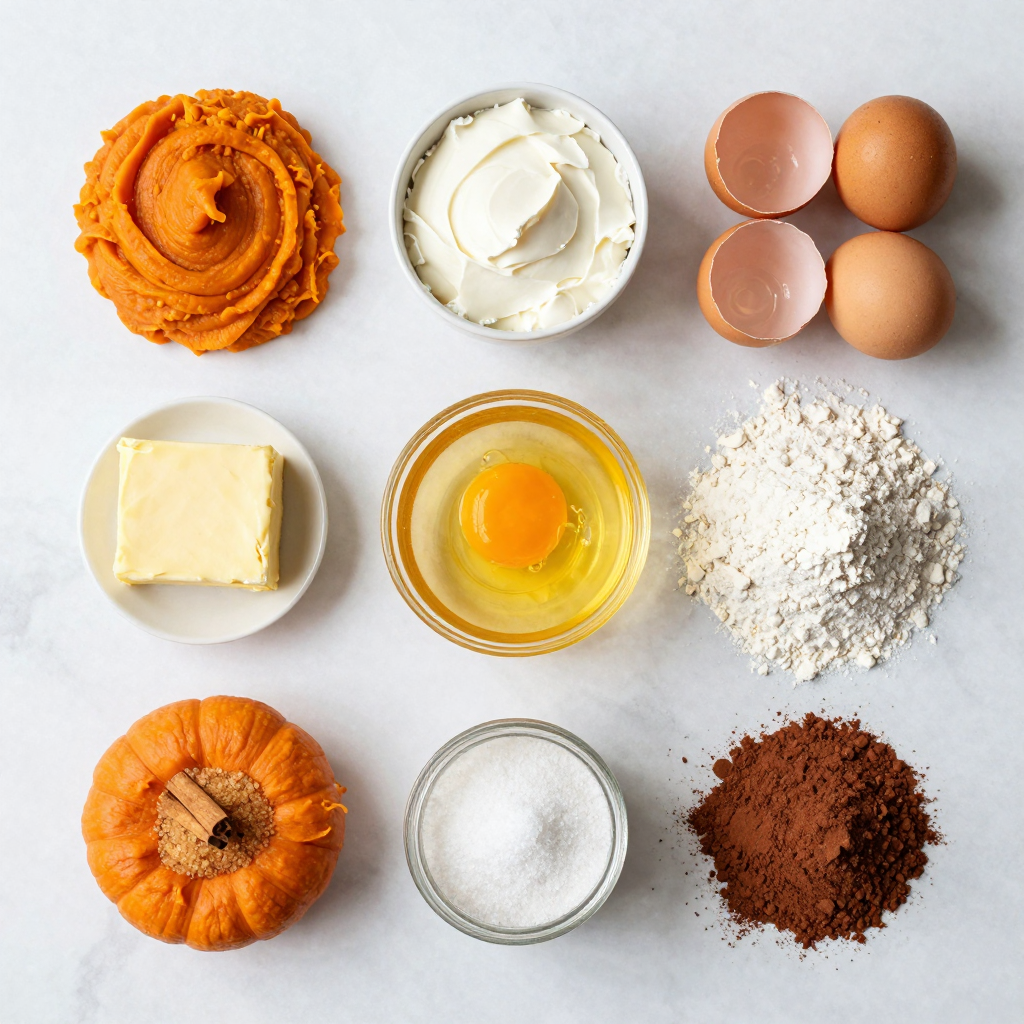
Ingredients
Ingredients for the Brownie Layer
- 1 cup unsalted butter
- 2 cups granulated sugar
- 1 cup brown sugar, packed
- 4 large eggs
- 1 teaspoon vanilla extract
- 1 cup all-purpose flour
- 1 cup unsweetened cocoa powder
- 1 teaspoon baking powder
- 1/2 teaspoon salt
Ingredients for the Pumpkin Cheesecake Layer
- 16 oz cream cheese, softened
- 1 cup pumpkin puree
- 3/4 cup granulated sugar
- 2 large eggs
- 1 teaspoon vanilla extract
- 1 teaspoon pumpkin pie spice
- 1/2 teaspoon cinnamon
The brownie layer starts with rich butter and two types of sugar. The butter gives the bars a smooth texture. Granulated sugar adds sweetness, while brown sugar brings depth. Four large eggs help bind the ingredients. Vanilla extract enhances the flavor.
We then mix in the dry ingredients. All-purpose flour adds structure. Unsweetened cocoa powder provides that deep, chocolatey taste. Baking powder helps the brownies rise, and salt balances the sweetness.
For the pumpkin cheesecake layer, we begin with softened cream cheese. It creates a smooth and creamy filling. Adding pumpkin puree gives it that fall flavor. Granulated sugar sweetens this layer, and eggs help it set.
Vanilla extract adds warmth, while pumpkin pie spice and cinnamon give it a cozy vibe. These ingredients make the cheesecake layer rich and flavorful. Together, they create a perfect blend of sweet and spiced flavors.

Step-by-Step Instructions
Preheating and Preparing the Pan
- Preheat the oven to 350°F (175°C).
- Grease or line a 9×13 inch baking pan with parchment paper.
Making the Brownie Layer
1. Melt 1 cup of unsalted butter in a bowl. You can use a microwave or stovetop.
2. Mix in 2 cups of granulated sugar and 1 cup of brown sugar. Stir until well combined.
3. Add 4 large eggs, one at a time. Mix well after each egg.
4. Pour in 1 teaspoon of vanilla extract and mix until smooth.
5. In another bowl, sift together 1 cup of all-purpose flour, 1 cup of unsweetened cocoa powder, 1 teaspoon of baking powder, and 1/2 teaspoon of salt.
6. Slowly fold the dry mix into the wet mix. Do not overmix.
7. Pour the brownie batter into the prepared pan and spread evenly.
Preparing the Pumpkin Cheesecake Layer
1. In a mixing bowl, beat 16 oz of softened cream cheese until smooth.
2. Add 1 cup of pumpkin puree, 3/4 cup of granulated sugar, 2 large eggs, 1 teaspoon of vanilla extract, 1 teaspoon of pumpkin pie spice, and 1/2 teaspoon of cinnamon.
3. Mix until everything is creamy and well blended.
4. Carefully layer the pumpkin cheesecake mixture over the brownie layer in the pan.
Baking and Cooling
1. Bake in the preheated oven for 30-35 minutes. The edges should set, and the center should not be liquid.
2. Check with a toothpick. It should come out mostly clean from the brownie part.
3. After baking, let it cool in the pan at room temperature.
4. Refrigerate for at least 2-3 hours before cutting into squares.
Pro Tips
- Use Room Temperature Ingredients: Ensure that your cream cheese and eggs are at room temperature for a smoother cheesecake layer, which helps achieve a creamy texture.
- Don’t Overmix: When combining the dry and wet ingredients for the brownie layer, mix just until combined to keep the brownies fudgy and avoid a cakey texture.
- Chill Before Serving: Allow the bars to chill in the refrigerator for at least 2-3 hours after baking to set properly, making them easier to slice and enhancing the flavors.
- Garnish Creatively: Consider adding a sprinkle of chopped pecans or a drizzle of caramel sauce on top before serving for an extra touch of flavor and presentation.
Tips & Tricks
Baking Tips
- Use room temperature ingredients for a smoother texture.
When all your ingredients are at room temperature, they mix better. This makes your brownie bars rich and creamy.
- Check for doneness with a toothpick.
Insert a toothpick into the center. If it comes out mostly clean, your bars are ready.
Presentation Suggestions
- Serve chilled with a dollop of whipped cream.
Whipped cream adds a nice touch. It makes the dessert feel special and festive.
- Dust with pumpkin pie spice for garnish.
A sprinkle of spice on top adds warmth and color to your bars.
Common Mistakes to Avoid
- Overmixing the batter.
Mix until just combined. Overmixing can lead to tough brownie bars.
- Skipping the refrigeration step.
Chilling helps the layers set. This makes them easier to cut and more delicious.

Variations
Flavor Variations
You can make these bars even tastier! Try adding chocolate chips to the brownie layer. This will give a rich, gooey bite. You can also use flavored cream cheese, like maple or vanilla, for the cheesecake layer. This adds a fun twist and makes each bite unique.
Dietary Substitutions
If you need a dairy-free treat, substitute dairy-free cream cheese for a vegan option. This keeps the taste while meeting dietary needs. You can also use gluten-free flour in the brownie layer. This makes the bars safe for those with gluten sensitivities.
Seasonal Twists
To add some crunch, incorporate nuts like walnuts or pecans. This gives a nice texture and flavor contrast. You might also swap pumpkin puree for sweet potato puree. This change offers a different taste while still being delicious.
Storage Info
Refrigeration
To keep your pumpkin cheesecake brownie bars fresh, store them in the fridge. First, let them cool completely after baking. Then, cut them into squares. Place them in an airtight container. This helps keep them moist.
You can also use a glass dish with a lid. If you want, cover them tightly with plastic wrap. Just make sure they are completely cooled first to avoid condensation.
Freezing
If you want to save some for later, freezing works great. First, wrap each square tightly in plastic wrap. This prevents freezer burn. Then, place the wrapped squares in a freezer-safe bag or container.
To thaw, take them out of the freezer a few hours before serving. Leave them in the fridge overnight for the best results. They will taste just as good as fresh!
Shelf Life
In the fridge, these bars can last up to a week. In the freezer, they can stay good for about three months.
Watch for signs of spoilage. If you see any mold or a strange smell, it’s time to throw them away. Always trust your senses when it comes to food safety!
FAQs
How do I know when the Pumpkin Cheesecake Brownie Bars are done baking?
The bars are done when the edges are set. The center should have a slight jiggle but not look liquid. A toothpick inserted into the brownie part should come out mostly clean. Check after 30 minutes to avoid overbaking.
Can I make these bars ahead of time?
Yes, you can make these bars a day or two ahead. Bake them and let them cool completely. Once cooled, wrap them tightly in plastic wrap, then refrigerate. This helps the flavors blend nicely.
What’s the best way to cut these brownie bars?
To cut these bars cleanly, use a sharp knife. Dip the knife in hot water, then wipe it dry before each cut. This helps prevent sticking and gives you neat squares.
Can I use a different type of pumpkin puree?
You can use canned or homemade pumpkin puree. Canned pumpkin is smooth and consistent. Homemade can have different textures and flavors, which may change the outcome slightly. Both work well in this recipe.
What can I serve with these bars?
These bars pair great with coffee or tea. A scoop of vanilla ice cream adds a nice touch too. You can also serve them with whipped cream or a sprinkle of pumpkin pie spice for extra flavor.
You can create a delicious dessert by layering brownie and pumpkin cheesecake. Start with fresh ingredients and follow the steps carefully. Remember to chill the bars before cutting to get perfect slices. You can also mix in flavors or make dietary swaps to suit your needs. Storing your bars correctly lets you enjoy them longer. I hope this guide helps you make tasty Pumpkin Cheesecake Brownie Bars that impress everyone. Enjoy your baking adventure and take pride in your creation!

Pumpkin Cheesecake Brownie Bars
Ingredients
For the Brownie Layer:
1 cup unsalted butter
2 cups granulated sugar
1 cup brown sugar, packed
4 large eggs
1 teaspoon vanilla extract
1 cup all-purpose flour
1 cup unsweetened cocoa powder
1 teaspoon baking powder
1/2 teaspoon salt
For the Pumpkin Cheesecake Layer:
16 oz cream cheese, softened
1 cup pumpkin puree
3/4 cup granulated sugar
2 large eggs
1 teaspoon vanilla extract
1 teaspoon pumpkin pie spice
1/2 teaspoon cinnamon
Instructions
Preheat your oven to 350°F (175°C) and grease a 9×13 inch baking pan or line it with parchment paper for easy removal.
Prepare the Brownie Layer:
– In a large mixing bowl, melt the unsalted butter in the microwave or stovetop.
– Once melted, add granulated sugar and brown sugar to the bowl. Stir until combined.
– Beat in the eggs one at a time, mixing well after each addition. Then, add the vanilla extract and mix until smooth.
– In another bowl, sift together flour, cocoa powder, baking powder, and salt. Gradually fold the dry ingredients into the wet ingredients until just combined; do not overmix.
– Pour the brownie batter into the prepared baking pan and spread evenly.
Prepare the Pumpkin Cheesecake Layer:
– In a mixing bowl, beat the softened cream cheese until smooth.
– Add in the pumpkin puree, granulated sugar, eggs, vanilla extract, pumpkin pie spice, and cinnamon. Mix until well combined and creamy.
– Pour the pumpkin cheesecake mixture over the brownie layer in the baking pan, spreading it out carefully to cover the brownie layer.
Bake in the preheated oven for 30-35 minutes or until the edges are set and the center has a slight jiggle but isn’t liquid. A toothpick inserted into the brownie portion should come out mostly clean.
Once baked, remove from the oven and allow to cool in the pan at room temperature. Then, refrigerate for at least 2-3 hours or until completely chilled.
When ready to serve, lift the bars out of the pan using the parchment paper, if used, and cut into squares.
– Prep Time: 30 min | Total Time: 4 hrs | Servings: 12-16
– Presentation Tips: Serve chilled on a decorative plate, garnished with a dollop of whipped cream on top and a sprinkle of pumpkin pie spice for an extra festive touch!

Pumpkin Cheesecake Brownie Bars
Ingredients
- 1 cup unsalted butter
- 2 cups granulated sugar
- 1 cup brown sugar, packed
- 4 large eggs
- 1 teaspoon vanilla extract
- 1 cup all-purpose flour
- 1 cup unsweetened cocoa powder
- 1 teaspoon baking powder
- 0.5 teaspoon salt
- 16 oz cream cheese, softened
- 1 cup pumpkin puree
- 0.75 cup granulated sugar
- 2 large eggs
- 1 teaspoon vanilla extract
- 1 teaspoon pumpkin pie spice
- 0.5 teaspoon cinnamon
Instructions
- Preheat your oven to 350°F (175°C) and grease a 9x13 inch baking pan or line it with parchment paper for easy removal.
- In a large mixing bowl, melt the unsalted butter in the microwave or stovetop.
- Once melted, add granulated sugar and brown sugar to the bowl. Stir until combined.
- Beat in the eggs one at a time, mixing well after each addition. Then, add the vanilla extract and mix until smooth.
- In another bowl, sift together flour, cocoa powder, baking powder, and salt. Gradually fold the dry ingredients into the wet ingredients until just combined; do not overmix.
- Pour the brownie batter into the prepared baking pan and spread evenly.
- In a mixing bowl, beat the softened cream cheese until smooth.
- Add in the pumpkin puree, granulated sugar, eggs, vanilla extract, pumpkin pie spice, and cinnamon. Mix until well combined and creamy.
- Pour the pumpkin cheesecake mixture over the brownie layer in the baking pan, spreading it out carefully to cover the brownie layer.
- Bake in the preheated oven for 30-35 minutes or until the edges are set and the center has a slight jiggle but isn't liquid. A toothpick inserted into the brownie portion should come out mostly clean.
- Once baked, remove from the oven and allow to cool in the pan at room temperature. Then, refrigerate for at least 2-3 hours or until completely chilled.
- When ready to serve, lift the bars out of the pan using the parchment paper, if used, and cut into squares.


![To make these delicious scones, gather the following ingredients: - 2 cups all-purpose flour - 1/3 cup granulated sugar - 1 tablespoon baking powder - 1/4 teaspoon salt - 1/2 cup unsalted butter, chilled and cubed - 1/2 cup heavy cream - 1 large egg - 1 teaspoon vanilla extract - 1 cup fresh raspberries - 1/2 cup white chocolate chips You can customize your scones with some fun add-ins. Here are a few ideas: - 1/2 cup chopped nuts, like pecans or walnuts - 1/2 teaspoon cinnamon for a warm spice note - Zest from 1 lemon or orange for a citrus twist - A handful of dark chocolate chips for a richer flavor Using fresh, high-quality ingredients makes a big difference. For the best results, choose: - Flour: Go for a good brand of all-purpose flour. This helps with texture. - Butter: Use unsalted butter. It gives you control over the salt in your recipe. - Raspberries: Fresh raspberries are key. Look for plump, firm berries. - Chocolate: Choose high-quality white chocolate chips. They melt well and taste great. These choices enhance the flavor and texture of your scones. For an easy guide, check out the Full Recipe for more details. 1. Preheat your oven to 400°F (200°C). Line a baking sheet with parchment paper. 2. In a large bowl, whisk together the flour, sugar, baking powder, and salt. 3. Add the chilled butter to the dry mix. Use your fingers or a pastry cutter to blend until the mix looks like coarse crumbs. 4. In another bowl, whisk the cream, egg, and vanilla together. 5. Pour the cream mix into the flour mix. Stir gently until just combined. Do not overmix! 6. Fold in the fresh raspberries and white chocolate chips. Make sure they are evenly spread. 7. Turn the dough onto a floured surface. Knead gently a few times until it comes together. 8. Pat the dough into a circle about 1 inch thick. Cut it into 8 wedges with a sharp knife or pizza cutter. 9. Place the wedges on the baking sheet, leaving space between each. 10. Bake for 15-20 minutes until golden brown on top. 11. Remove from the oven. Let them cool slightly on a wire rack before serving. - Step 1: Make sure your oven is fully preheated. This helps the scones rise well. - Step 3: Keep the butter cold. This gives the scones a nice flaky texture. - Step 5: Mixing too much makes the scones tough. Mix until you see no dry flour. - Step 6: Gently fold, so you keep the raspberries whole. This adds a juicy burst of flavor. - Overmixing the dough: This results in tough scones. Mix just until combined. - Skipping the chilling: Cold ingredients help create a better texture. Don’t skip the cold butter! - Not measuring ingredients: Use exact measurements for the best results. Baking is a science. - Ignoring baking time: Check your scones at 15 minutes. They should be golden, not burnt. For the complete recipe, check out the Full Recipe section above. To make the best raspberry white chocolate scones, follow a few simple steps. First, keep your butter very cold. This helps create a fluffy texture. I suggest cubing the butter and chilling it before use. Second, mix the dry and wet ingredients gently. Overmixing makes scones tough, and we want them light and airy. Lastly, shape your dough carefully. Pat it down without pressing too hard to keep air pockets inside. Serve these scones warm for the best taste. You can dust them with powdered sugar for a sweet touch. Pair them with clotted cream for richness. If you like, add fresh raspberries on the side for extra flavor. These scones also shine at brunch or tea time, making them perfect for any gathering. Raspberry white chocolate scones go well with many drinks. A nice cup of Earl Grey tea complements their sweetness. You can also enjoy them with a light lemonade or even coffee. For spreads, try a tart raspberry jam to balance the sweetness. Each pairing enhances the flavors of the scones, making each bite delightful. For the full recipe, visit the [Full Recipe]. {{image_2}} You can play with the flavors of your scones. Instead of raspberries, try blueberries or strawberries for a fresh twist. You may also swap white chocolate for dark chocolate or milk chocolate. Each option gives a new taste. If you like nuts, add chopped almonds or pecans to the mix. These small changes can make a big difference. If you need gluten-free scones, use a gluten-free flour blend. Many blends work well in baking. Look for one that has xanthan gum. This will help the scones hold their shape. You can also use almond flour or coconut flour, but adjust the liquid in the recipe. These flours add a different flavor and texture. You can change the flavors with the seasons. In fall, add chopped apples and cinnamon for a warm taste. Winter calls for cranberry and orange zest. In spring, use lemon zest and poppy seeds for a bright, fresh flavor. Summer is perfect for peaches or cherries. Each season brings new fruits to enjoy in your scones. For the complete recipe, check the Full Recipe section. To keep your Raspberry White Chocolate Scones fresh, store them in an airtight container. This helps maintain their soft texture and delightful flavor. Place a piece of parchment paper between layers to prevent sticking. You can keep them at room temperature for up to two days. If you want to store them longer, the fridge is a good option, but it may dry them out a bit. When you're ready to enjoy your scones again, reheating is easy. Preheat your oven to 350°F (175°C). Place the scones on a baking sheet. Warm them for about 5-7 minutes. This will bring back their fresh-baked taste. You can also microwave them for about 10-15 seconds, but this might make them a bit soft. Freezing is a great way to save scones for later. Allow the scones to cool completely. Then, wrap each scone in plastic wrap. Place them in a freezer bag or container. They will stay fresh for up to three months. When you want to eat them, thaw overnight in the fridge. Then, reheat as mentioned above. This way, you can enjoy these tasty treats anytime! For the complete recipe, check out the Full Recipe. You can tell scones are done when they turn golden brown. The tops should feel firm to the touch. A toothpick inserted into the center should come out clean. If it has dough on it, bake them a bit longer. These signs help ensure your Raspberry White Chocolate Scones are baked just right! Yes, you can make the dough ahead of time! Chill the dough for up to 24 hours in the fridge. Wrap it tightly in plastic wrap. When you’re ready to bake, simply cut the dough into wedges and bake as directed. This saves time and lets you enjoy fresh scones at your convenience. If you need a substitute for white chocolate, try using dark chocolate chips or milk chocolate chips. You can also use dried fruit like cherries or apricots for a different flavor. Each option adds a unique twist to the scone. Experiment and find what you like best! For the complete recipe and specific steps, check the Full Recipe. We explored how to make perfect scones from scratch. We covered key ingredients, detailed instructions, and helpful tips. I shared common mistakes to avoid and fun variations to try. Storing and reheating tips ensure you enjoy fresh scones longer. Baking scones is easy and rewarding. With practice, your scones will impress everyone. Get creative and enjoy this tasty treat!](https://dailydishlab.com/wp-content/uploads/2025/07/7e56670c-1729-4c97-bf35-067a569313c1-768x768.webp)


