Pumpkin Chocolate Chip Bundt Cake Delightful Treat

Fall is here, and nothing says cozy like a slice of Pumpkin Chocolate Chip Bundt Cake! This treat combines rich pumpkin flavor with sweet chocolate chips for pure bliss. Whether you’re hosting a gathering or simply indulging, this cake is sure to impress. Follow my easy recipe to bake one today, and let’s make your kitchen smell amazing! Ready to get started? Let’s dive into the delightful details!
Why I Love This Recipe
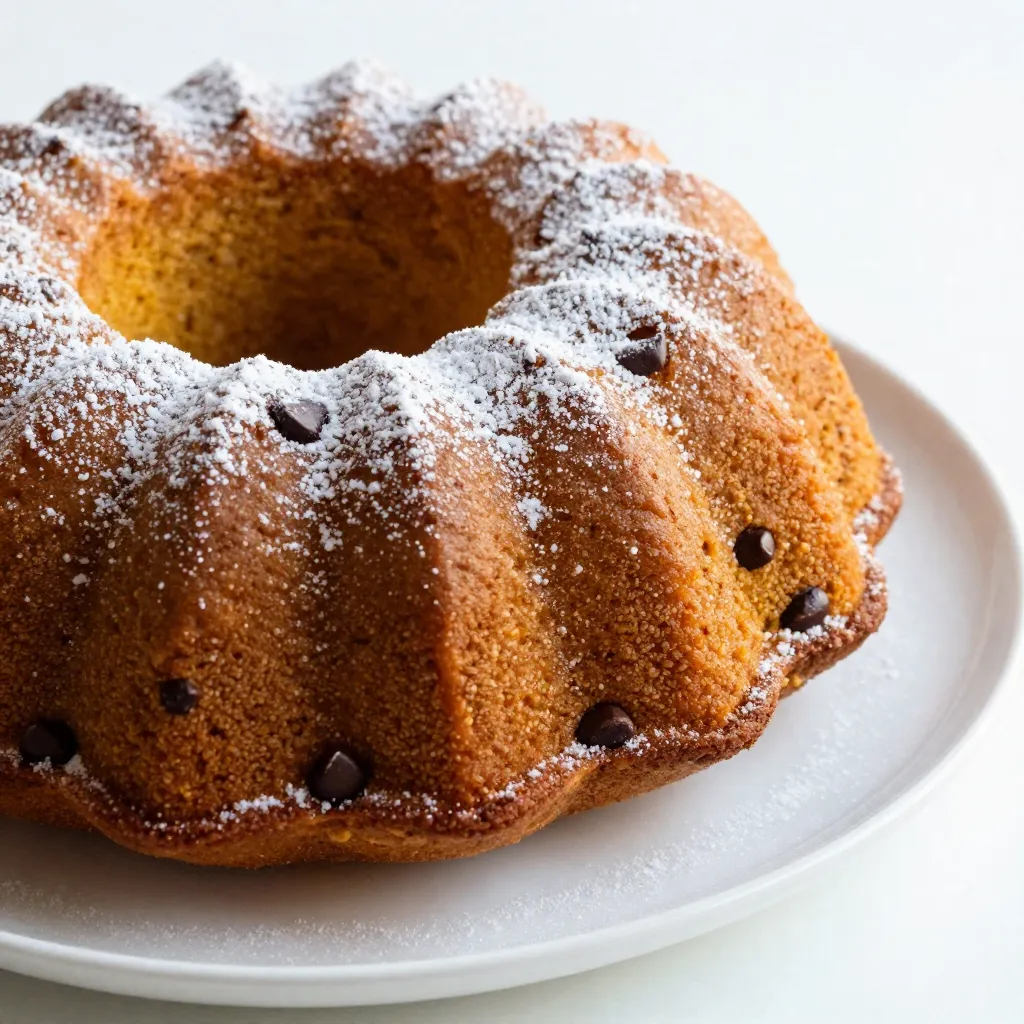
- Moist and Flavorful: This bundt cake is incredibly moist thanks to the pumpkin puree, which adds a delicious depth of flavor that is perfect for fall.
- Rich Chocolatey Goodness: The semi-sweet chocolate chips provide a delightful contrast to the spiced pumpkin, making every bite a sweet treat.
- Easy to Make: This recipe comes together quickly, with minimal prep time, allowing you to enjoy a homemade dessert without the fuss.
- Impressive Presentation: The bundt shape is visually stunning, making it a perfect centerpiece for any gathering or celebration.
Ingredients
List of Required Ingredients
- 2 cups pumpkin puree
- 1 ½ cups granulated sugar
- ½ cup packed brown sugar
- 1 cup vegetable oil
- 4 large eggs
- 2 teaspoons vanilla extract
- 3 cups all-purpose flour
- 2 teaspoons baking powder
- 1 teaspoon baking soda
- 1 teaspoon ground cinnamon
- ½ teaspoon ground nutmeg
- ½ teaspoon ground ginger
- ½ teaspoon salt
- 1 ½ cups semi-sweet chocolate chips
- Optional: powdered sugar for dusting
The key to making a great Pumpkin Chocolate Chip Bundt Cake lies in the right ingredients. Start with pumpkin puree. You can use canned or fresh, but I love the rich taste of fresh. The granulated and brown sugars add sweetness and depth. Vegetable oil keeps the cake moist.
Next, the eggs provide structure and richness. Vanilla extract enhances the cake’s flavor. In a bowl, mix together the dry ingredients: flour, baking powder, baking soda, cinnamon, nutmeg, ginger, and salt. These spices give warmth and holiday spirit.
Finally, don’t forget the chocolate chips! They create pockets of gooey sweetness throughout the cake. If you want an elegant touch, consider dusting the cake with powdered sugar before serving. This simple step makes it look special. Choose high-quality ingredients for the best flavor.

Step-by-Step Instructions
Prepping the Oven and Pan
- Preheat the oven to 350°F (175°C).
- Grease and flour the bundt pan. This step helps the cake release easily after baking.
Mixing the Ingredients
- In a large mixing bowl, combine the wet ingredients. This includes pumpkin puree, granulated sugar, brown sugar, vegetable oil, eggs, and vanilla extract. Whisk until smooth.
- In another bowl, whisk the dry ingredients. This includes flour, baking powder, baking soda, cinnamon, nutmeg, ginger, and salt.
Combining the Mixtures
- Gradually add the dry mix to the wet mixture. Stir gently until just combined. Be careful not to overmix; this keeps the cake light.
- Fold in the chocolate chips carefully. Make sure they are evenly spread throughout the batter.
Baking the Cake
- Pour the batter into the prepared bundt pan. Smooth the top with a spatula for an even bake.
- Bake in the preheated oven for 50-60 minutes. Check doneness with a toothpick. It should come out clean when inserted into the center.
Cooling and Unmolding
- Once the cake is baked, cool it in the pan for 15 minutes. This helps it set.
- Invert the cake onto a wire rack to cool completely. This keeps the bottom from getting soggy.
Tips & Tricks
Baking Tips for Perfection
- Avoid overmixing the batter: Mix just until combined. Overmixing makes the cake tough.
- Test cake with a toothpick for doneness: Insert a toothpick into the center. If it comes out clean, the cake is done.
Cake Presentation Suggestions
- Dust with powdered sugar: This adds a touch of sweetness and looks great.
- Serve with whipped cream and extra chocolate chips: This makes each slice more delightful and rich.
Common Mistakes to Avoid
- Using too much flour: Measure carefully. Too much flour can dry out your cake.
- Substituting key ingredients improperly: Use the right type of pumpkin puree and sugars for best results.
Pro Tips
- Use Fresh Pumpkin: If you opt for fresh pumpkin puree, roast the pumpkin until tender for the best flavor.
- Don’t Overmix: Mix the batter until just combined to ensure a light and airy cake texture.
- Chocolate Chip Choice: For a richer taste, try using dark chocolate chips or a mix of semi-sweet and milk chocolate.
- Cooling Time: Allow the cake to cool fully in the pan before inverting to avoid breaking.
Variations
Flavor Variations
You can change up the flavors in your pumpkin chocolate chip bundt cake. Try adding spices like cloves or allspice. This gives your cake a warm, cozy taste. You can also mix in nuts like walnuts or pecans. These nuts add a nice crunch and flavor contrast.
Diet-Friendly Options
If you need gluten-free options, use gluten-free flour. It works well without changing the taste much. For vegan versions, replace the eggs with flaxseed or applesauce. Both options keep the cake moist and tasty.
Serving Suggestions
This cake pairs well with a scoop of ice cream or a drizzle of caramel sauce. You can also make a layered dessert. Use pumpkin puree and chocolate ganache to create beautiful layers. This adds extra flavor and looks stunning on a plate.
Storage Info
Storing the Cake
To keep your Pumpkin Chocolate Chip Bundt Cake fresh, store it properly. Wrap the cooled cake in plastic wrap or foil. This keeps moisture in and prevents it from drying out. You can also place it in an airtight container. This method helps retain the cake’s rich flavor.
- Shelf life in the fridge: About 5 to 7 days.
- Shelf life at room temperature: Up to 3 days.
If you choose to store it at room temperature, make sure it is in a cool, dry place. Avoid direct sunlight to keep the cake nice.
Freezing the Cake
If you have extra cake, freezing is a great option. First, let the cake cool completely. Then, wrap it tightly in plastic wrap. After that, place it in a freezer-safe bag. This way, it stays fresh for a long time.
- Instructions for thawing: To thaw, move the cake to the fridge overnight. You can also leave it at room temperature for a few hours.
- Tips for maintaining texture and flavor: Avoid freezing for longer than three months. This helps keep the taste and texture just right. If you want to enjoy it later, keep chocolate chips separate. Add them just before serving.
FAQs
What is the best type of pumpkin puree to use?
You can use either canned or homemade pumpkin puree. Canned pumpkin is easy and saves time. It is also consistent in texture and flavor. Homemade pumpkin puree can be fresher and more flavorful. To make it, bake a pumpkin until soft, scoop out the flesh, and blend. Both options work, so choose what you like best.
Can I use different types of chocolate chips?
Yes! You can use dark, milk, or white chocolate chips. Dark chocolate gives a rich flavor. Milk chocolate is sweeter and creamier. White chocolate adds a unique sweetness. Feel free to mix them or use your favorite type.
How can I tell when the bundt cake is done baking?
To check if your cake is done, look for a few signs. The edges should pull away from the pan. The top should be rounded and springy. You can also use a toothpick. Insert it into the center; if it comes out clean, the cake is ready.
Can I make mini bundt cakes with this recipe?
Yes, you can make mini bundt cakes! Adjust the baking time and temperature. Bake them at 350°F (175°C) for 20-25 minutes. Keep an eye on them, as they bake faster than a full-sized bundt cake. Enjoy the bite-sized treats!
This blog post guides you through making a delicious bundt cake with pumpkin and chocolate chips. You learned about the key ingredients and steps for baking, cooling, and presenting the cake. I shared helpful tips on avoiding common mistakes and how to store your cake properly. With variations for flavor and dietary needs, you can enjoy this treat your way. Remember, baking is fun, and each cake is a chance to create something special. Embrace your creativity and enjoy every bite of your homemade cak

Pumpkin Chocolate Chip Bundt Cake
Ingredients
- 2 cups pumpkin puree
- 1.5 cups granulated sugar
- 0.5 cups packed brown sugar
- 1 cup vegetable oil
- 4 large eggs
- 2 teaspoons vanilla extract
- 3 cups all-purpose flour
- 2 teaspoons baking powder
- 1 teaspoon baking soda
- 1 teaspoon ground cinnamon
- 0.5 teaspoon ground nutmeg
- 0.5 teaspoon ground ginger
- 0.5 teaspoon salt
- 1.5 cups semi-sweet chocolate chips
- to taste powdered sugar for dusting
Instructions
- Preheat your oven to 350°F (175°C). Grease and flour a 10-inch bundt pan to ensure your cake releases easily after baking.
- In a large mixing bowl, combine the pumpkin puree, granulated sugar, brown sugar, vegetable oil, eggs, and vanilla extract. Whisk until the mixture is smooth and well combined.
- In a separate bowl, whisk together the flour, baking powder, baking soda, cinnamon, nutmeg, ginger, and salt.
- Gradually add the dry ingredients to the wet mixture, stirring until just combined. Be careful not to overmix.
- Fold in the chocolate chips gently, ensuring they are evenly distributed throughout the batter.
- Pour the batter into the prepared bundt pan, smoothing the top with a spatula.
- Bake in the preheated oven for 50-60 minutes, or until a toothpick inserted into the center comes out clean.
- Once baked, remove the cake from the oven and let it cool in the pan for about 15 minutes. Then, carefully invert it onto a wire rack to cool completely.
- If desired, dust with powdered sugar before serving for an elegant touch.


![To make Chocolate Swirl Banana Ice Cream, you will need: - 4 ripe bananas, sliced and frozen - 1 cup coconut milk (or any milk of choice) - 2 tablespoons maple syrup (adjust for sweetness) - 1 teaspoon vanilla extract - 1/4 cup cacao powder (or unsweetened cocoa powder) - A pinch of sea salt These ingredients come together to create a creamy and rich treat. The ripe bananas give sweetness, while the cacao powder adds that lovely chocolate flavor. If you have dietary needs, there are easy swaps. For dairy-free options, use almond milk or oat milk instead of coconut milk. You can replace maple syrup with agave syrup or honey for sweetness. Those who avoid sugar may use a sugar substitute like stevia. For the cacao powder, you can use carob powder for a different taste. This ice cream is not only tasty but also has some health benefits. Each serving contains: - Calories: Around 150 - Protein: 2g - Carbohydrates: 30g - Sugar: 12g (natural sugars from bananas) - Fat: 4g This treat is a great way to enjoy dessert while getting some nutrients from the bananas. It’s a fun way to cool down and feel good about what you eat. For the complete recipe, check out the [Full Recipe]. Start by gathering all your ingredients. You will need: - 4 ripe bananas, sliced and frozen - 1 cup coconut milk (or any milk of choice) - 2 tablespoons maple syrup (adjust for sweetness) - 1 teaspoon vanilla extract - 1/4 cup cacao powder (or unsweetened cocoa powder) - A pinch of sea salt Make sure your bananas are ripe. This will make your ice cream sweet and tasty. Slice the bananas and freeze them for a few hours. Now, let's blend! Take the frozen bananas and put them in a blender. Add the coconut milk, maple syrup, vanilla extract, and sea salt. Blend until everything is smooth and creamy. You may need to stop and scrape down the sides of the blender. This helps everything mix well. Once you see a creamy texture, transfer the banana mix to a big bowl. In a different bowl, mix the cacao powder with a splash of coconut milk. Stir until you make a smooth chocolate sauce. If it is too thick, add a little more milk until it is pourable. Now, drizzle the chocolate sauce over the banana mix in the large bowl. Use a spatula to gently swirl the chocolate into the banana mixture. Create those pretty marbled patterns! Once you finish swirling, transfer the mix into an airtight container. Smooth the top with your spatula and cover it tightly. Freeze it for 2-4 hours until it is firm enough to scoop. For the best experience, let the ice cream sit out for about 5 minutes before serving. This makes it easier to scoop. Enjoy the delightful taste of your homemade Chocolate Swirl Banana Ice Cream! Check out the Full Recipe for more details. To get the right texture, freeze your bananas well. I slice them and freeze them overnight. This gives a creamy base. When blending, add coconut milk slowly. Start with a little, then add more if needed. Blend until smooth, but don’t overdo it. If it's too soft, freeze it longer. You can easily boost the flavor of your ice cream. Try adding a pinch of cinnamon. It adds warmth and depth. You can also swap maple syrup for honey or agave. Each sweetener gives a unique taste. For a nutty twist, mix in some almond extract. This brings a fun twist to the classic flavor. Serve your ice cream in chilled bowls. This keeps it cold longer. Scoop it out after letting it sit for five minutes. This makes scooping easier. Top with fresh banana slices and a drizzle of chocolate sauce. For extra crunch, sprinkle cacao nibs on top. This adds texture and looks pretty too. For the full recipe, check the main article. {{image_2}} If you want a dairy-free treat, use coconut milk. It adds creaminess and a light flavor. You can also try almond milk or oat milk. Both work well in this recipe. Just make sure to pick a milk that you enjoy. You can make your ice cream even better with mix-ins. Try adding chopped nuts or shredded coconut. Chocolate chips are also a fun choice. For toppings, fresh fruit, crushed cookies, or granola add texture and flavor. Drizzle extra chocolate sauce on top for a sweet touch. Feel free to get creative with flavors. Add peanut butter for a rich taste. You might also try adding berries like strawberries or raspberries for a fruity twist. A pinch of cinnamon gives a warm note. Each of these options makes your chocolate swirl banana ice cream unique! Remember, you can find the full recipe above. Enjoy making your ice cream! To keep your chocolate swirl banana ice cream fresh, you need to store it right. Here are some tips to help you. First, always let your ice cream cool to room temperature. This helps to avoid ice crystals. After mixing, transfer it to a container. Make sure it’s airtight. This keeps the air out and prevents freezer burn. If you want to enjoy it later, freeze it for up to a month. Use a sturdy container for your ice cream. Glass and plastic containers work well. Make sure the lid fits tightly. This keeps the ice cream safe from other smells in the freezer. If you want to scoop easily, choose a shallow container. It makes it simple to reach every part of the ice cream. Chocolate swirl banana ice cream stays fresh for about two weeks. After that, it can lose flavor and texture. It’s best to eat it within this time frame for the best taste. If it sits too long, it might become icy. Now, you can enjoy your delightful chocolate swirl banana ice cream, knowing how to store it right! For the full recipe, check out the earlier section. To make chocolate swirl banana ice cream, start by blending frozen bananas, coconut milk, maple syrup, vanilla extract, and sea salt. Blend until smooth. Next, mix cacao powder with some coconut milk to create a chocolate sauce. After blending, transfer the banana mix to a bowl. Drizzle the chocolate sauce over it and gently swirl it in. Finally, put the mixture in an airtight container and freeze it for 2-4 hours. For the full recipe, check out the details above. Yes, you can use any milk you like. Almond milk, soy milk, or oat milk work well too. Each type will give a slightly different taste and texture. Choose the milk that fits your diet or taste. Store homemade ice cream in an airtight container. This keeps it fresh and prevents ice crystals. Make sure to smooth the top before sealing to avoid air pockets. It stays fresh in the freezer for about 1-2 weeks. This blog post covered how to make chocolate swirl banana ice cream. We talked about the right ingredients, step-by-step instructions, and helpful tips. You learned how to customize the recipe with different flavors and toppings. I shared storage advice to keep your ice cream fresh. Now you can enjoy a tasty treat that fits your diet. Get ready to impress your friends and family with your new skills!](https://dailydishlab.com/wp-content/uploads/2025/07/482899ed-90ac-4dc0-8cba-52d6130bf4d8-768x768.webp)


![To make these delicious pancakes, gather the following ingredients: - 1 cup all-purpose flour - 1 tablespoon baking powder - 1 teaspoon ground cinnamon - 1/2 teaspoon ground nutmeg - 1/4 teaspoon salt - 1 cup pumpkin puree (canned or fresh) - 1 cup milk (or non-dairy alternative) - 1 large egg - 2 tablespoons brown sugar - 1 teaspoon vanilla extract - 2 tablespoons melted butter (or coconut oil) - For the cinnamon swirl: - 2 tablespoons brown sugar - 1 teaspoon ground cinnamon - 1 tablespoon melted butter You can swap some ingredients for different options. Here are a few ideas: - For all-purpose flour, try whole wheat flour for a heartier pancake. - If you want a dairy-free option, use almond milk or oat milk instead of regular milk. - Replace the large egg with a flax egg (1 tablespoon ground flaxseed mixed with 2.5 tablespoons water). - Coconut oil can replace butter for a dairy-free pancake. Using fresh pumpkin can give your pancakes a vibrant taste. Fresh pumpkin has a rich texture and a sweet flavor. However, canned pumpkin works well too. It is convenient and saves time. Canned pumpkin is often cooked and pureed, making it ready to use. Both options can provide the delicious taste you want. So, choose based on your time and preference. To make Cinnamon Swirl Pumpkin Pancakes, start by gathering your ingredients. In a large bowl, whisk together the flour, baking powder, ground cinnamon, nutmeg, and salt. This helps the dry ingredients mix well. In another bowl, blend the pumpkin puree, milk, egg, brown sugar, vanilla extract, and melted butter until smooth. Pour this mixture into the dry ingredients and stir gently. Remember, a few lumps are okay; overmixing can make pancakes tough. Next, prepare the cinnamon swirl. In a small bowl, mix brown sugar, ground cinnamon, and melted butter until it forms a paste. Preheat your skillet over medium heat. Lightly grease it with cooking spray or butter. For each pancake, pour about 1/4 cup of batter onto the skillet. Use the back of a spoon to create a swirl with the cinnamon mix on top of the batter. Cook the pancakes until bubbles form on the surface, about 2-3 minutes. Then, carefully flip them and cook for another 1-2 minutes until golden brown. Repeat this process until you finish all the batter and swirl. These steps will give you fluffy and flavorful pancakes. To achieve the right pancake texture, keep these tips in mind: - Use fresh ingredients. Fresh baking powder gives better rise. - Avoid overmixing the batter. This keeps pancakes light and fluffy. - Let the batter rest for a few minutes. This helps the gluten relax. - Adjust your heat. If pancakes brown too quickly, reduce the heat. These small adjustments can make a big difference in your pancake outcome. The cinnamon swirl is what makes these pancakes special. Here’s how to incorporate it perfectly: - When you pour the batter, do it in a circular motion. This helps the swirl blend nicely. - Use a spoon to create a gentle spiral. Don’t press too hard; you want a light touch. - If you have leftover swirl, drizzle it on top when serving. This will enhance the flavor and visual appeal of your pancakes. If you want more tips or the full recipe, check out the details I provided earlier. Enjoy your cooking! To make your pancakes fluffy, use a light hand when mixing. Overmixing can lead to tough pancakes. Mix until just combined, leaving some lumps in the batter. Also, let the batter rest for a few minutes before cooking. This helps the baking powder to activate and creates a lighter texture. Use a non-stick skillet or griddle for even cooking, and keep the heat at medium. This way, you avoid burning the outside while the inside remains raw. If you want thicker pancakes, add a bit more flour. For thinner pancakes, add a little milk. You can also change the spices to match your taste. Love nutmeg? Add a bit more! Prefer a sweeter pancake? Increase the brown sugar slightly. Always taste your batter before cooking to get it just right. You can even mix in chocolate chips or nuts for extra flavor. Serve your pancakes warm with maple syrup or honey. A dollop of whipped cream adds a nice touch, too. For a fun twist, sprinkle some chopped pecans or walnuts on top. You can also add a sprinkle of cinnamon for added warmth. If you want to make it a full breakfast, serve alongside crispy bacon or fresh fruit. These pancakes also pair well with a cup of hot coffee or chai tea. For the full recipe, check out the complete instructions above. {{image_2}} You can make these pancakes gluten-free. Swap the all-purpose flour for a gluten-free blend. Look for one that works well in baking. You can also use almond flour or oat flour. Just keep in mind that the texture may change slightly. Adding a little xanthan gum helps to bind the batter. This keeps your pancakes light and fluffy. To make this recipe vegan, use a non-dairy milk like almond or oat milk. Replace the egg with a flax egg. Just mix one tablespoon of ground flaxseed with three tablespoons of water. Let it sit for five minutes to thicken. You can also use vegan butter or coconut oil in place of regular butter. These swaps keep the pancakes rich and tasty without any dairy or eggs. Spice it up! You can add different flavors to your pancakes. Try adding a dash of ginger or allspice for a warm kick. Chopped nuts, like walnuts or pecans, add a nice crunch. You can also fold in chocolate chips for a sweet treat. For a fruity twist, add blueberries or cranberries. Each variation gives a new taste to your pancakes. These ideas let you customize your breakfast to fit your mood. For the full recipe, check out the *Full Recipe* section. After you enjoy your cinnamon swirl pumpkin pancakes, store leftovers properly. Let the pancakes cool to room temperature. Then, stack them with parchment paper in between each. This helps prevent them from sticking. Place the stack in an airtight container or wrap them tightly in plastic wrap. Keep them in the fridge for up to three days. If you want to save pancakes for later, freezing is a great option. Place cooled pancakes in a single layer on a baking sheet. Freeze them for about an hour. Once frozen, transfer them to a freezer-safe bag. This prevents them from sticking together. They can last up to two months in the freezer. To reheat, you can use a microwave or a toaster oven. For the microwave, heat them for about 30 seconds. Check if they are warm enough. For the toaster oven, set it to a low temperature and heat until warmed through. Pancakes in the fridge should be eaten within three days. If they start to smell sour or look dry, it’s time to toss them. Frozen pancakes can last up to two months. Be sure to check for freezer burn or ice crystals before eating. If they seem off, it’s best to err on the side of caution. Enjoy your delicious cinnamon swirl pumpkin pancakes at their best! For the full recipe, check out the [Full Recipe]. Yes, you can make the batter ahead of time. Mix your dry and wet ingredients separately, then store them in the fridge. Just remember to combine them when you're ready to cook. This makes your mornings easier and faster! You can use several alternatives to milk. Almond milk, soy milk, or oat milk work well. If you want a creamier taste, try coconut milk. Each option adds a unique flavor to your pancakes. Look for bubbles on the surface of the pancakes. When bubbles form, it’s time to flip them. Cook until they turn golden brown on both sides. A good pancake should feel firm but springy to the touch. Enjoy your cooking! For the full recipe, check out the details above. In this blog post, we explored how to make delicious cinnamon swirl pumpkin pancakes. We covered the essential ingredients and suggested alternatives, like fresh versus canned pumpkin. You learned step-by-step instructions for perfect pancakes and tips for cooking and serving. We also shared variations, including gluten-free and vegan options. Finally, we went over storage tips to keep leftovers fresh. Enjoy making these pancakes! They’re easy, tasty, and perfect for any meal.](https://dailydishlab.com/wp-content/uploads/2025/07/40c25aa9-222c-4f53-9c69-0bb881f505c1-768x768.webp)