Raspberry Lemon Mini Cheesecakes Delightful and Easy

Craving a sweet treat that’s both refreshing and simple? Let me introduce you to Raspberry Lemon Mini Cheesecakes! These delightful desserts are easy to make and bursting with bright, tangy flavors. Whether you want a quick snack or a show-stopping dessert for guests, these mini cheesecakes are perfect. Follow along as I share all the tips and tricks you need for a cheesecake that impresses every time!
Why I Love This Recipe
- Delicious Flavor Combination: The tartness of raspberries perfectly complements the creamy lemon cheesecake, creating a delightful balance of flavors in every bite.
- Easy to Make: This mini cheesecake recipe is simple and quick, making it perfect for both beginners and experienced bakers alike.
- Perfect Portion Size: These mini cheesecakes are the ideal serving size for any occasion, allowing everyone to enjoy a sweet treat without overindulging.
- Versatile and Customizable: You can easily adjust the sweetness or add different toppings, making it a versatile dessert option for various tastes.
Ingredients
Main Ingredients for Cheesecake
For the creamy filling, you need:
- 16 oz cream cheese, softened
- 1/2 cup granulated sugar
- 2 large eggs
- 1 teaspoon vanilla extract
- Zest of 1 lemon
- 1/4 cup fresh lemon juice
- 1 cup raspberries (fresh or frozen)
These ingredients blend to create a rich and tangy taste. The cream cheese forms the base, while the sugar adds sweetness. Eggs help to set the filling. Vanilla, lemon zest, and juice provide bright flavor.
Ingredients for Crust
To make the crust, gather:
- 1 cup graham cracker crumbs
- 2 tablespoons granulated sugar
- 1/4 cup unsalted butter, melted
This crust gives a sweet and crunchy base. The graham crackers add texture. Sugar enhances the flavor, and melted butter binds it all together.
Optional Garnishes and Sweeteners
You can add a few extras for flair:
- 2 tablespoons honey (optional, for sweetness)
- Fresh raspberries for topping
These optional garnishes make your mini cheesecakes pop. Honey can add more sweetness, while fresh raspberries give a beautiful finish.

Step-by-Step Instructions
Prepping the Oven and Muffin Tin
First, preheat your oven to 325°F (160°C). This step is key to a great bake. Next, line a muffin tin with paper liners. You need about 12 liners for this recipe. The liners help with easy removal later.
Making the Crust
In a mixing bowl, combine 1 cup of graham cracker crumbs, 2 tablespoons of sugar, and 1/4 cup of melted unsalted butter. Stir the mixture until the crumbs are fully coated. This gives a nice buttery flavor. Now, take about 2 tablespoons of the crust mix and press it into the bottom of each muffin liner. Use the back of a spoon or your fingers to pack it tightly. This forms the base for your cheesecakes.
Preparing the Cheesecake Filling
For the filling, grab a large mixing bowl. Beat 16 oz of softened cream cheese and 1/2 cup of sugar together until smooth and creamy. This will take about 2-3 minutes. Add 2 large eggs one at a time, mixing well after each addition. Next, add 1 teaspoon of vanilla extract, the zest of 1 lemon, and 1/4 cup of fresh lemon juice. Mix until everything blends together smoothly. Finally, gently fold in 1 cup of raspberries. Be careful not to break them too much. You want some whole berries for texture.
Baking and Cooling Process
Now, spoon the cheesecake filling over the baked crusts. Fill each liner about 3/4 full. Place the muffin tin back in the oven and bake for 18-20 minutes. The edges should be set, while the center remains slightly jiggly. Once baked, turn off the oven and let the cheesecakes cool inside with the door ajar for about 30 minutes. This helps prevent cracks. After that, allow them to cool completely at room temperature. Finally, refrigerate for at least 4 hours or overnight to let them firm up. Enjoy your perfect Raspberry Lemon Mini Cheesecakes!
Pro Tips
- Chill the Cream Cheese: Ensure your cream cheese is at room temperature before mixing. This will help achieve a smooth and lump-free cheesecake filling.
- Use Fresh Raspberries: For the best flavor and texture, opt for fresh raspberries. If using frozen, make sure to thaw and drain them well before folding into the batter.
- Prevent Cracking: Allow the cheesecakes to cool gradually in the oven with the door slightly ajar. This step helps prevent cracks from forming on the surface.
- Garnish Just Before Serving: For the freshest taste, drizzle honey and add raspberries just before serving to maintain their vibrant color and flavor.
Tips & Tricks
Achieving the Perfect Cheesecake Texture
To make your mini cheesecakes smooth and creamy, start with softened cream cheese. Cold cream cheese will not mix well. Beat it for 2-3 minutes until fluffy. This helps incorporate air, giving a light texture. Add eggs one at a time for the best blend. This keeps your cheesecake from being dense.
How to Avoid Cracks on the Cheesecake
Cracks happen when cheesecakes cool too fast. After baking, turn off the oven and leave the door slightly open. Let them sit for 30 minutes inside. This gentle cooling helps prevent cracks. Also, do not overbake. The center should jiggle a bit. It will firm up as it cools.
Recommended Serving Suggestions
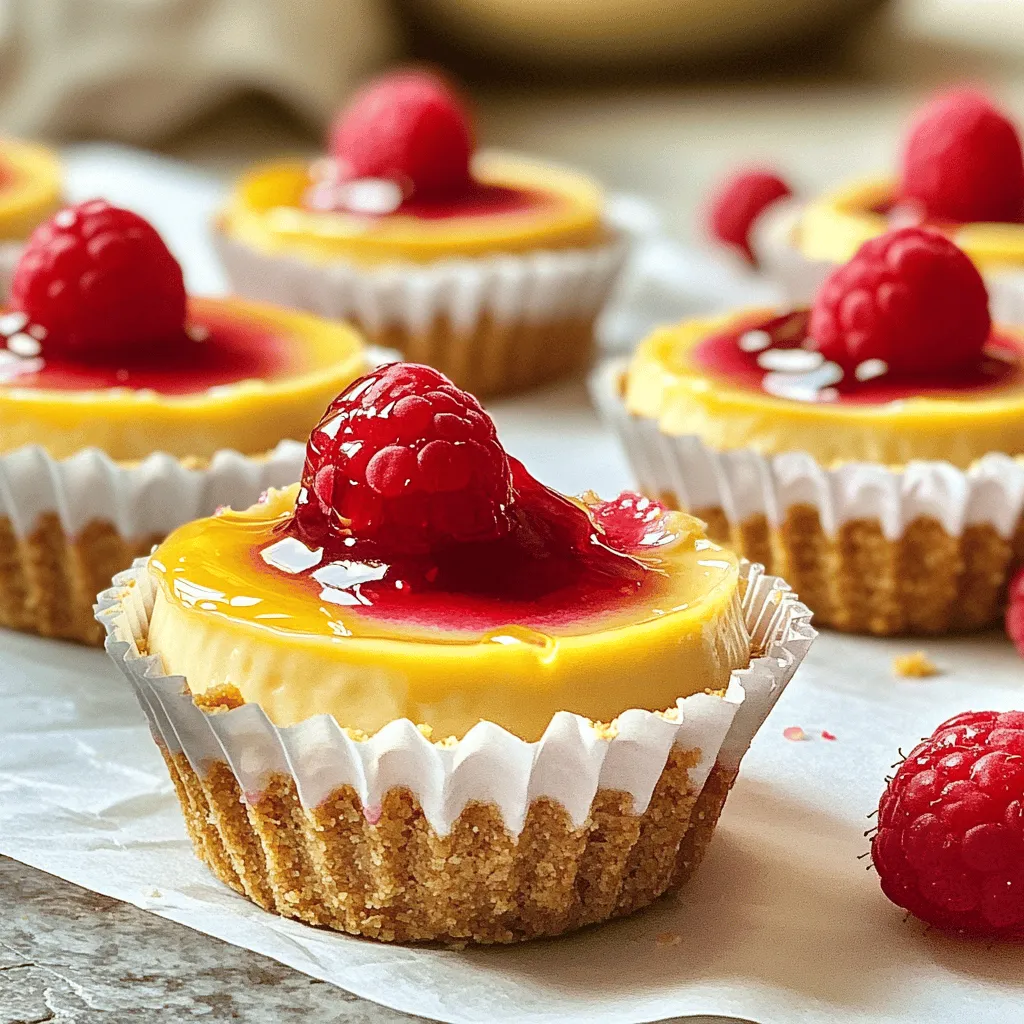
Serve your cheesecakes chilled for the best taste. Top with fresh raspberries for a pop of color. A drizzle of honey adds sweetness and shine. These mini cheesecakes pair well with whipped cream. For a twist, try a scoop of vanilla ice cream on the side.

Variations
Alternative Crust Options
You can switch up the crust to make these mini cheesecakes even more fun. Instead of graham crackers, try using crushed almond cookies. They add a nutty flavor that pairs well with the tangy lemon. You could also use Oreo cookies for a chocolate twist. Just crush them into fine crumbs and mix with melted butter. This change brings a unique taste that everyone will enjoy.
Different Fruit Add-ins
While raspberries shine in this recipe, you can use other fruits too. Blueberries add a burst of sweetness. Strawberries offer a classic flavor that everyone loves. You can even mix in some chopped peaches or cherries for a seasonal touch. Just make sure to adjust the sugar if you use sweeter fruits. Each fruit brings its own flavor and charm to these mini cheesecakes.
Vegan or Gluten-Free Adaptations
For a vegan version, replace cream cheese with a plant-based option. You can use cashew cream or silken tofu blended smooth. For the eggs, use flaxseed meal mixed with water for a binding effect. To make it gluten-free, use gluten-free graham crackers or almond flour for the crust. These changes keep the taste delicious while catering to different diets. You won’t lose flavor or texture with these swaps.
Storage Info
Proper Refrigeration Techniques
To keep your raspberry lemon mini cheesecakes fresh, store them in the fridge. Place them in an airtight container. This prevents them from absorbing other smells. You can also cover them tightly with plastic wrap. Just make sure they are completely cool before covering. They will stay good this way for about four days.
Freezing Instructions for Mini Cheesecakes
You can freeze mini cheesecakes for later enjoyment. First, let them cool completely. Then, remove them from the muffin tin. Wrap each cheesecake in plastic wrap. After that, place them in a freezer bag or airtight container. They can last in the freezer for up to three months. When you are ready to eat them, thaw them in the fridge overnight.
Shelf Life and Best Practices
These delightful treats have a short but sweet shelf life. In the fridge, they last about four days. If you freeze them, they can last up to three months. To enjoy them at their best, eat them fresh within a few days. However, if you freeze them, they will still taste great after thawing. Just remember to follow proper storage steps for the best flavor.
FAQs
Can I make Raspberry Lemon Mini Cheesecakes ahead of time?
Yes, you can make these cheesecakes a day in advance. Store them in the fridge. This allows the flavors to blend well. Just cover them with plastic wrap. They will taste fresh and delicious when served.
How to tell when cheesecakes are done baking?
The cheesecakes are done when the edges are set. The center should be slightly jiggly. You can check by gently shaking the pan. If it jiggles like gelatin, it is ready. Remember, it will firm up as it cools.
What should I do if my cheesecake cracks?
If your cheesecake cracks, don’t worry! It can still taste great. Try these tips:
- Bake at a lower temperature to prevent cracking.
- Cool the cheesecakes slowly in the oven.
- Use a water bath during baking for even heat.
If it cracks, cover it with fruit or whipped cream for a pretty fix.
In this blog post, we covered how to make delicious mini cheesecakes. We explored key ingredients and the step-by-step baking process. You learned tips to avoid cracks and achieve the right texture. We also discussed fun variations, storage methods, and answered common questions.
Now, you can create mini cheesecakes with confidence. Enjoy experimenting with flavors and toppings. With practice, your cheesecakes will delight everyone!

Raspberry Lemon Mini Cheesecakes
Ingredients
1 cup graham cracker crumbs
2 tablespoons granulated sugar
1/4 cup unsalted butter, melted
16 oz cream cheese, softened
1/2 cup granulated sugar
2 large eggs
1 teaspoon vanilla extract
Zest of 1 lemon
1/4 cup fresh lemon juice
1 cup raspberries (fresh or frozen)
2 tablespoons honey (optional, for sweetness)
Instructions
Preheat your oven to 325°F (160°C). Line a muffin tin with paper liners (this recipe should yield about 12 mini cheesecakes).
Prepare the crust: In a mixing bowl, combine graham cracker crumbs, 2 tablespoons of sugar, and melted butter. Mix until the crumbs are well coated.
Press the mixture into the bottom of each muffin liner, about 2 tablespoons per liner, using the back of a spoon or your fingers to pack it tightly.
Bake the crusts in the preheated oven for 8-10 minutes or until lightly golden. Remove from the oven and allow to cool slightly.
Prepare the cheesecake filling: In a large mixing bowl, beat the softened cream cheese with 1/2 cup of sugar until smooth and creamy (about 2-3 minutes).
Add eggs one at a time, mixing well after each addition. Then add in vanilla extract, lemon zest, and lemon juice. Mix until fully incorporated and smooth.
Fold in the raspberries gently, trying not to break them too much to keep some whole for texture.
Spoon the filling over the baked crusts, filling each liner about 3/4 full.
Bake the cheesecakes in the preheated oven for 18-20 minutes or until the edges are set and the center is slightly jiggly.
Turn off the oven and let the cheesecakes cool in the oven with the door ajar for another 30 minutes to prevent cracking.
Cool completely at room temperature, then refrigerate for at least 4 hours or overnight to firm up.
Optional garnish: Before serving, drizzle with honey and top with fresh raspberries for an extra touch.
Prep Time: 20 minutes | Total Time: 5 hours (including cooling) | Servings: 12

Raspberry Lemon Mini Cheesecakes
Ingredients
- 1 cup graham cracker crumbs
- 2 tablespoons granulated sugar
- 1/4 cup unsalted butter, melted
- 16 oz cream cheese, softened
- 1/2 cup granulated sugar
- 2 large eggs
- 1 teaspoon vanilla extract
- 1 lemon zest
- 1/4 cup fresh lemon juice
- 1 cup raspberries (fresh or frozen)
- 2 tablespoons honey (optional, for sweetness)
Instructions
- Preheat your oven to 325°F (160°C). Line a muffin tin with paper liners (this recipe should yield about 12 mini cheesecakes).
- Prepare the crust: In a mixing bowl, combine graham cracker crumbs, 2 tablespoons of sugar, and melted butter. Mix until the crumbs are well coated.
- Press the mixture into the bottom of each muffin liner, about 2 tablespoons per liner, using the back of a spoon or your fingers to pack it tightly.
- Bake the crusts in the preheated oven for 8-10 minutes or until lightly golden. Remove from the oven and allow to cool slightly.
- Prepare the cheesecake filling: In a large mixing bowl, beat the softened cream cheese with 1/2 cup of sugar until smooth and creamy (about 2-3 minutes).
- Add eggs one at a time, mixing well after each addition. Then add in vanilla extract, lemon zest, and lemon juice. Mix until fully incorporated and smooth.
- Fold in the raspberries gently, trying not to break them too much to keep some whole for texture.
- Spoon the filling over the baked crusts, filling each liner about 3/4 full.
- Bake the cheesecakes in the preheated oven for 18-20 minutes or until the edges are set and the center is slightly jiggly.
- Turn off the oven and let the cheesecakes cool in the oven with the door ajar for another 30 minutes to prevent cracking.
- Cool completely at room temperature, then refrigerate for at least 4 hours or overnight to firm up.
- Optional garnish: Before serving, drizzle with honey and top with fresh raspberries for an extra touch.


![To make Chocolate Swirl Banana Ice Cream, you will need: - 4 ripe bananas, sliced and frozen - 1 cup coconut milk (or any milk of choice) - 2 tablespoons maple syrup (adjust for sweetness) - 1 teaspoon vanilla extract - 1/4 cup cacao powder (or unsweetened cocoa powder) - A pinch of sea salt These ingredients come together to create a creamy and rich treat. The ripe bananas give sweetness, while the cacao powder adds that lovely chocolate flavor. If you have dietary needs, there are easy swaps. For dairy-free options, use almond milk or oat milk instead of coconut milk. You can replace maple syrup with agave syrup or honey for sweetness. Those who avoid sugar may use a sugar substitute like stevia. For the cacao powder, you can use carob powder for a different taste. This ice cream is not only tasty but also has some health benefits. Each serving contains: - Calories: Around 150 - Protein: 2g - Carbohydrates: 30g - Sugar: 12g (natural sugars from bananas) - Fat: 4g This treat is a great way to enjoy dessert while getting some nutrients from the bananas. It’s a fun way to cool down and feel good about what you eat. For the complete recipe, check out the [Full Recipe]. Start by gathering all your ingredients. You will need: - 4 ripe bananas, sliced and frozen - 1 cup coconut milk (or any milk of choice) - 2 tablespoons maple syrup (adjust for sweetness) - 1 teaspoon vanilla extract - 1/4 cup cacao powder (or unsweetened cocoa powder) - A pinch of sea salt Make sure your bananas are ripe. This will make your ice cream sweet and tasty. Slice the bananas and freeze them for a few hours. Now, let's blend! Take the frozen bananas and put them in a blender. Add the coconut milk, maple syrup, vanilla extract, and sea salt. Blend until everything is smooth and creamy. You may need to stop and scrape down the sides of the blender. This helps everything mix well. Once you see a creamy texture, transfer the banana mix to a big bowl. In a different bowl, mix the cacao powder with a splash of coconut milk. Stir until you make a smooth chocolate sauce. If it is too thick, add a little more milk until it is pourable. Now, drizzle the chocolate sauce over the banana mix in the large bowl. Use a spatula to gently swirl the chocolate into the banana mixture. Create those pretty marbled patterns! Once you finish swirling, transfer the mix into an airtight container. Smooth the top with your spatula and cover it tightly. Freeze it for 2-4 hours until it is firm enough to scoop. For the best experience, let the ice cream sit out for about 5 minutes before serving. This makes it easier to scoop. Enjoy the delightful taste of your homemade Chocolate Swirl Banana Ice Cream! Check out the Full Recipe for more details. To get the right texture, freeze your bananas well. I slice them and freeze them overnight. This gives a creamy base. When blending, add coconut milk slowly. Start with a little, then add more if needed. Blend until smooth, but don’t overdo it. If it's too soft, freeze it longer. You can easily boost the flavor of your ice cream. Try adding a pinch of cinnamon. It adds warmth and depth. You can also swap maple syrup for honey or agave. Each sweetener gives a unique taste. For a nutty twist, mix in some almond extract. This brings a fun twist to the classic flavor. Serve your ice cream in chilled bowls. This keeps it cold longer. Scoop it out after letting it sit for five minutes. This makes scooping easier. Top with fresh banana slices and a drizzle of chocolate sauce. For extra crunch, sprinkle cacao nibs on top. This adds texture and looks pretty too. For the full recipe, check the main article. {{image_2}} If you want a dairy-free treat, use coconut milk. It adds creaminess and a light flavor. You can also try almond milk or oat milk. Both work well in this recipe. Just make sure to pick a milk that you enjoy. You can make your ice cream even better with mix-ins. Try adding chopped nuts or shredded coconut. Chocolate chips are also a fun choice. For toppings, fresh fruit, crushed cookies, or granola add texture and flavor. Drizzle extra chocolate sauce on top for a sweet touch. Feel free to get creative with flavors. Add peanut butter for a rich taste. You might also try adding berries like strawberries or raspberries for a fruity twist. A pinch of cinnamon gives a warm note. Each of these options makes your chocolate swirl banana ice cream unique! Remember, you can find the full recipe above. Enjoy making your ice cream! To keep your chocolate swirl banana ice cream fresh, you need to store it right. Here are some tips to help you. First, always let your ice cream cool to room temperature. This helps to avoid ice crystals. After mixing, transfer it to a container. Make sure it’s airtight. This keeps the air out and prevents freezer burn. If you want to enjoy it later, freeze it for up to a month. Use a sturdy container for your ice cream. Glass and plastic containers work well. Make sure the lid fits tightly. This keeps the ice cream safe from other smells in the freezer. If you want to scoop easily, choose a shallow container. It makes it simple to reach every part of the ice cream. Chocolate swirl banana ice cream stays fresh for about two weeks. After that, it can lose flavor and texture. It’s best to eat it within this time frame for the best taste. If it sits too long, it might become icy. Now, you can enjoy your delightful chocolate swirl banana ice cream, knowing how to store it right! For the full recipe, check out the earlier section. To make chocolate swirl banana ice cream, start by blending frozen bananas, coconut milk, maple syrup, vanilla extract, and sea salt. Blend until smooth. Next, mix cacao powder with some coconut milk to create a chocolate sauce. After blending, transfer the banana mix to a bowl. Drizzle the chocolate sauce over it and gently swirl it in. Finally, put the mixture in an airtight container and freeze it for 2-4 hours. For the full recipe, check out the details above. Yes, you can use any milk you like. Almond milk, soy milk, or oat milk work well too. Each type will give a slightly different taste and texture. Choose the milk that fits your diet or taste. Store homemade ice cream in an airtight container. This keeps it fresh and prevents ice crystals. Make sure to smooth the top before sealing to avoid air pockets. It stays fresh in the freezer for about 1-2 weeks. This blog post covered how to make chocolate swirl banana ice cream. We talked about the right ingredients, step-by-step instructions, and helpful tips. You learned how to customize the recipe with different flavors and toppings. I shared storage advice to keep your ice cream fresh. Now you can enjoy a tasty treat that fits your diet. Get ready to impress your friends and family with your new skills!](https://dailydishlab.com/wp-content/uploads/2025/07/482899ed-90ac-4dc0-8cba-52d6130bf4d8-768x768.webp)

