Raspberry White Chocolate Muffins Tasty and Simple Recipe

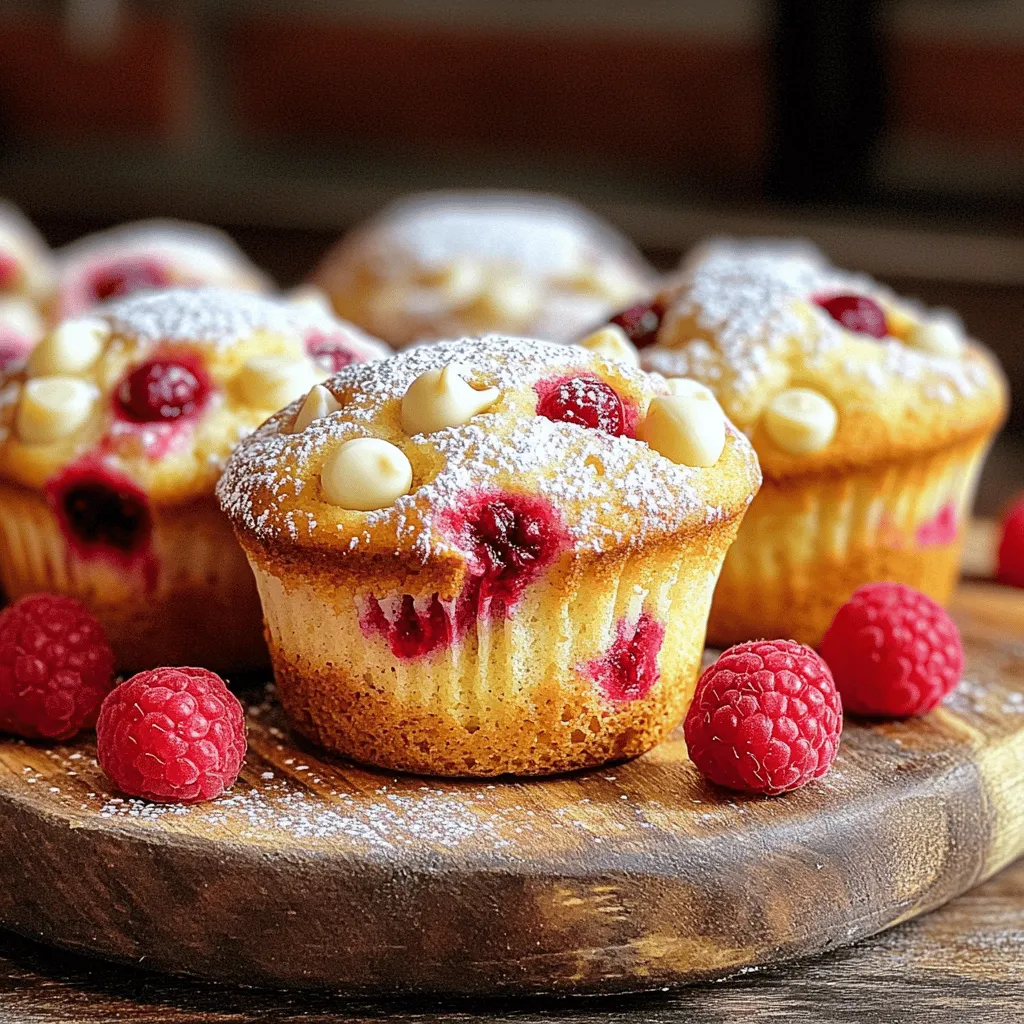
Ready to bake something delicious? These Raspberry White Chocolate Muffins are a perfect treat! I’ll take you through simple steps and fresh ingredients to create moist, sweet muffins. Whether you’re an experienced baker or just getting started, this easy recipe will impress your family and friends. Let’s dive into the fun of making these tasty muffins that burst with flavor in every bite!
Why I Love This Recipe
- Delicious Flavor Combination: The tartness of fresh raspberries perfectly balances the sweetness of white chocolate, creating a delightful treat.
- Easy to Make: This muffin recipe is simple and quick, making it perfect for both novice and experienced bakers.
- Versatile Ingredients: Feel free to substitute with other berries or add nuts for a personalized twist!
- Beautiful Presentation: These muffins look stunning with their vibrant color, especially when served warm with a dusting of powdered sugar.
Ingredients
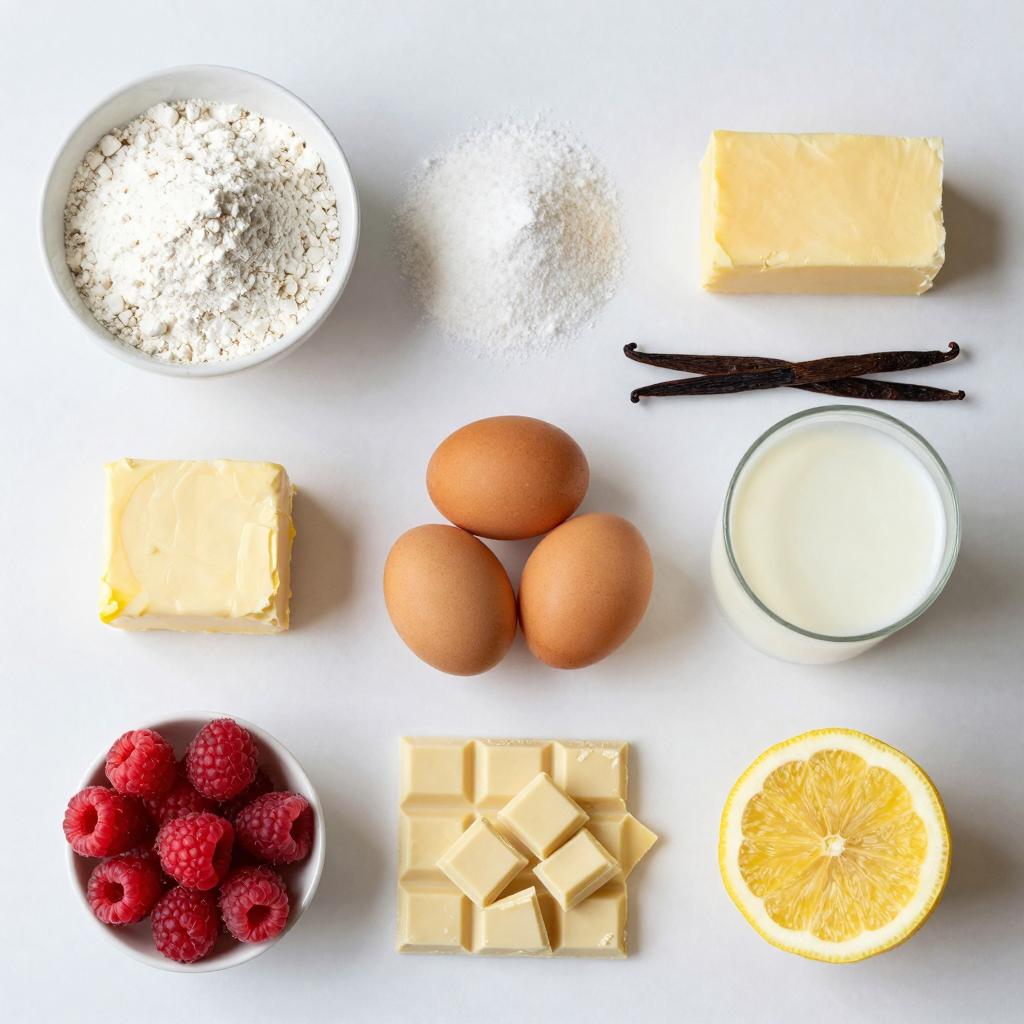
To make Raspberry White Chocolate Muffins, you need some simple ingredients. Here’s what you will need:
- 1 ½ cups all-purpose flour
- ½ cup granulated sugar
- 2 teaspoons baking powder
- ½ teaspoon baking soda
- ¼ teaspoon salt
- 1/3 cup unsalted butter, melted
- 1 large egg
- 1 teaspoon vanilla extract
- ½ cup whole milk
- 1 cup fresh raspberries (or frozen, thawed)
- ½ cup white chocolate chips
- Zest of 1 lemon (optional for extra flavor)
Each ingredient plays a role in making these muffins tasty. The flour gives structure. The sugar adds sweetness. Baking powder and baking soda make the muffins rise. Salt enhances the flavors. Butter keeps them moist. The egg binds everything together. Vanilla extract adds warmth. Whole milk ensures a tender crumb. Raspberries bring tartness, while white chocolate adds creamy sweetness. Lemon zest brightens the taste, if you choose to add it.
By using fresh or frozen raspberries, you can enjoy these muffins year-round. Just remember to thaw the frozen ones before mixing. This simple ingredient list makes it easy to whip up a batch anytime. Happy baking!

Step-by-Step Instructions
Prepping the Oven and Muffin Tin
First, set your oven to 375°F (190°C). This temperature helps the muffins rise nicely. Next, prepare your muffin tin. Line each cup with paper liners or spray them with cooking spray. This step keeps the muffins from sticking.
Mixing the Dry Ingredients
In a large bowl, combine the dry ingredients. Use 1 ½ cups of all-purpose flour, ½ cup of granulated sugar, 2 teaspoons of baking powder, ½ teaspoon of baking soda, and ¼ teaspoon of salt. Whisk them together until they blend well. This mix gives the muffins their structure.
Preparing the Wet Ingredients
Now, let’s melt the butter. You can do this in the microwave or on the stove. After it melts, let it cool a bit. In a new bowl, add 1 large egg, 1 teaspoon of vanilla extract, and ½ cup of whole milk to the cooled butter. Whisk these until combined. This mixture adds moisture and flavor.
Combining Ingredients
Pour the wet mixture into the dry mix. Gently stir until everything is just combined. Don’t worry if it looks a little lumpy. It’s crucial to avoid overmixing, as this keeps the muffins soft. Next, fold in 1 cup of fresh raspberries and ½ cup of white chocolate chips. If you want more zing, add the zest of one lemon.
Baking the Muffins
Now, it’s time to fill the muffin cups. Divide the batter evenly, filling each cup about ⅔ full. This allows room for the muffins to rise. Place the tin in your preheated oven and bake for 18-20 minutes. To check if they are done, insert a toothpick in the center of a muffin. If it comes out clean, they’re ready! Once baked, let them cool in the pan for about 5 minutes before moving them to a wire rack. This cooling helps them set perfectly.
Pro Tips
- Use Fresh Raspberries: Fresh raspberries will provide the best flavor and texture. If you opt for frozen, ensure they are fully thawed and drained to prevent excess moisture in the batter.
- Don’t Overmix: Gently fold the wet and dry ingredients together until just combined. Overmixing can lead to dense muffins, so a few lumps are perfectly fine.
- Cool Slightly Before Serving: Let the muffins cool in the pan for about 5 minutes before transferring to a wire rack. This helps them set and maintain a moist texture.
- Enhance Flavor with Lemon Zest: Adding lemon zest not only brightens the flavor of the muffins but also complements the sweetness of the white chocolate and tartness of the raspberries beautifully.
Tips & Tricks
Baking Tips for Moist Muffins
To make moist muffins, avoid overmixing. When you mix your batter, stop as soon as it comes together. Some lumps are okay. Overmixing can make muffins tough. Accurate measuring also matters. Use dry measuring cups for flour. Scoop the flour gently and level it off with a knife. This gives you the right amount without packing it down.
Enhancing Flavor
Want to boost flavor? Try adding lemon zest! It gives a bright taste that pairs well with raspberries. You can also swap in other mix-ins. Consider nuts like pecans or almonds for crunch. You can even use different fruits like blueberries or strawberries.
Presentation Tips
For a pretty look, serve your muffins warm. Dust them with powdered sugar right before serving. This adds a sweet touch and makes them look fancy. Place a few fresh raspberries on top for color. Use a nice platter to make your muffins stand out. Enjoy the beauty and taste!

Variations
Alternative Ingredients
You can change the nuts in this recipe. Try using chopped pecans or almonds. They will add a nice crunch. You can also switch the chocolate chips. Use dark chocolate or milk chocolate if you prefer. Each type brings a new taste to the muffins.
Dietary Modifications
If you need gluten-free options, use almond flour or a gluten-free blend. These can work well in muffins. For vegan adaptations, replace the egg with a flax egg. You can also use plant-based milk and vegan butter. These swaps keep the muffins tasty and suitable for everyone.
Seasonal Variations
You can mix in seasonal fruits for a unique twist. In summer, use blueberries or strawberries. In the fall, try diced apples or pears. Each fruit adds its own flavor and makes the muffins special for any season.
Storage Info
How to Store Muffins
To keep your raspberry white chocolate muffins fresh, store them at room temperature. Place them in an airtight container. This keeps them soft and moist. If you plan to eat them within a couple of days, room temperature is perfect. For longer freshness, you can refrigerate them. Just remember to seal them well to avoid drying out.
Freezing Muffins
Freezing your muffins is easy and a great way to save some for later. First, let them cool completely. Then, wrap each muffin tightly in plastic wrap. Place them in a freezer bag or container. Make sure to remove as much air as possible. To reheat, simply take a muffin out and let it thaw on the counter. You can warm it in the microwave for about 15-20 seconds or in the oven at 350°F (175°C) for about 10 minutes.
Shelf Life
When stored properly, your muffins will stay fresh for about 2-3 days at room temperature. In the fridge, they can last up to a week. If you freeze them, expect to enjoy them for up to three months. Just be sure to keep track of the date!
FAQs
Can I use frozen raspberries instead of fresh?
Yes, you can use frozen raspberries. Just make sure to thaw them first. Drain any excess liquid before adding them to the batter. This prevents the muffins from getting too wet. Frozen raspberries also work well, and they still taste great!
What can I substitute for white chocolate?
If you want a different flavor, you can use dark chocolate or milk chocolate chips. You can also try butterscotch or peanut butter chips for a unique twist. Each will bring its own taste to your muffins, so pick what you like best!
How can I make these muffins healthier?
You can reduce the sugar by using less granulated sugar. Try using applesauce or mashed bananas to add sweetness with fewer calories. For healthier fats, you can swap butter for coconut oil or use yogurt instead. These changes can make your muffins lighter!
Can these muffins be made in advance?
Yes, you can prepare the batter ahead of time. Just store it in the fridge for a few hours before baking. You can also bake and freeze the muffins. Just reheat them in the oven when you’re ready to enjoy. This makes for quick snacks!
This blog post covered how to make tasty raspberry white chocolate muffins. We discussed the essential ingredients and the step-by-step method for creating moist, flavorful muffins. You learned tips for enhancing flavor and presentation, plus ways to tailor the recipe for dietary needs.
Baking can be fun and rewarding. Keep experimenting with flavors and ingredients to make this recipe your own. Enjoy your baking journey!

Raspberry White Chocolate Muffins
Ingredients
1 ½ cups all-purpose flour
½ cup granulated sugar
2 teaspoons baking powder
½ teaspoon baking soda
¼ teaspoon salt
1/3 cup unsalted butter, melted
1 large egg
1 teaspoon vanilla extract
½ cup whole milk
1 cup fresh raspberries (or frozen, thawed)
½ cup white chocolate chips
Zest of 1 lemon (optional for extra flavor)
Instructions
Preheat your oven to 375°F (190°C) and line a muffin tin with paper liners or lightly grease each cup.
In a large mixing bowl, whisk together the flour, sugar, baking powder, baking soda, and salt until well combined.
In a separate bowl, melt the butter in the microwave or on the stove. Allow it to cool slightly.
Add the egg, vanilla extract, and whole milk to the melted butter, and whisk until just combined.
Pour the wet ingredients into the dry ingredients, and gently stir until combined. Be careful not to overmix; it’s okay if there are a few lumps.
Fold in the fresh raspberries and white chocolate chips. If using, also fold in the lemon zest for an added zing.
Divide the batter evenly among the muffin cups, filling each about ⅔ full.
Bake in the preheated oven for 18-20 minutes, or until a toothpick inserted into the center of a muffin comes out clean.
Once baked, remove from the oven and allow to cool in the pan for about 5 minutes, then transfer the muffins to a wire rack to cool completely.
Prep Time, Total Time, Servings: 15 minutes | 30 minutes | Makes 12 muffins
– Presentation Tips: Serve warm and dust with powdered sugar for an elegant touch. Consider adding a few fresh raspberries on top for color and texture, and place on a decorative platter for a lovely presentation. Enjoy!

Raspberry White Chocolate Muffins
Ingredients
- 1.5 cups all-purpose flour
- 0.5 cup granulated sugar
- 2 teaspoons baking powder
- 0.5 teaspoon baking soda
- 0.25 teaspoon salt
- 0.33 cup unsalted butter, melted
- 1 large egg
- 1 teaspoon vanilla extract
- 0.5 cup whole milk
- 1 cup fresh raspberries (or frozen, thawed)
- 0.5 cup white chocolate chips
- 1 zest lemon (optional for extra flavor)
Instructions
- Preheat your oven to 375°F (190°C) and line a muffin tin with paper liners or lightly grease each cup.
- In a large mixing bowl, whisk together the flour, sugar, baking powder, baking soda, and salt until well combined.
- In a separate bowl, melt the butter in the microwave or on the stove. Allow it to cool slightly.
- Add the egg, vanilla extract, and whole milk to the melted butter, and whisk until just combined.
- Pour the wet ingredients into the dry ingredients, and gently stir until combined. Be careful not to overmix; it's okay if there are a few lumps.
- Fold in the fresh raspberries and white chocolate chips. If using, also fold in the lemon zest for an added zing.
- Divide the batter evenly among the muffin cups, filling each about ⅔ full.
- Bake in the preheated oven for 18-20 minutes, or until a toothpick inserted into the center of a muffin comes out clean.
- Once baked, remove from the oven and allow to cool in the pan for about 5 minutes, then transfer the muffins to a wire rack to cool completely.


![- 2 cups fresh strawberries - 1/4 cup granulated sugar - 1 teaspoon vanilla extract - 2 cups whipped cream - 1 pound pound cake - 1 cup vanilla pudding - Mint leaves for garnish Fresh strawberries are the star of this dish. Choose ripe, sweet ones for the best flavor. The sugar helps draw out their juices, creating a tasty syrup. Vanilla extract adds depth to the whipped cream and pudding, enhancing the overall taste. I like to use a pound cake for its light, soft texture. You can buy it or make it from scratch. Vanilla pudding adds creaminess and richness to the layers. Finally, mint leaves add a pop of color and a refreshing touch on top. - Flavor variations for whipped cream - Additional fruits to mix in - Alternative cake options You can personalize your trifle with various options. For whipped cream, try adding lemon zest or almond extract for a new twist. Mix in more fruits like blueberries or raspberries for added flavor and color. If you want to change the cake, you could use angel food cake or sponge cake. Both options keep the dessert light and airy. Feel free to play with flavors and textures to make your own unique trifle. For the full recipe, check the earlier section. First, toss 2 cups of sliced strawberries with 1/4 cup of granulated sugar. This simple step helps bring out their sweet flavor. Let them sit for about 15 minutes. This process is called macerating. As the strawberries sit, they release their juices. These juices will add moisture and sweetness to your trifle. Grab your trifle dish or a large glass bowl. Start by layering the ingredients. Place cubes of pound cake at the bottom. Next, drizzle some of the strawberry juice over the cake. This makes the cake soft and tasty. Now, spread a layer of vanilla pudding over the soaked cake. Add the macerated strawberries on top. Make sure to distribute them evenly. Spoon a layer of whipped cream over the strawberries. Smooth it out gently. Repeat these layers until your dish is full. Finish with one last layer of whipped cream. To make your trifle look pretty, garnish the top. Place a few whole strawberries and some fresh mint leaves on the whipped cream. This adds a pop of color. Chill your trifle in the fridge for at least 1 hour. This helps the flavors blend together. For a fun twist, serve it in individual glass cups. It makes for a charming presentation. Enjoy your Strawberry Shortcake Trifle Delightful Summer Treat! For a stunning trifle, focus on layering. Start with a layer of pound cake cubes. Soak them with the juice from the strawberries. This adds flavor and keeps the cake moist. Next, pour a layer of vanilla pudding. It should be smooth but not too runny. If your pudding is too thick, add a splash of milk. This will help it spread easily. After pudding, add the strawberries. Place them evenly for a nice look. Finally, top with whipped cream. A gentle swirl makes it pretty. Repeat these steps until you fill your dish. End with whipped cream on top for a lovely finish. You can save time by using store-bought items. Grab pre-made vanilla pudding and whipped cream. This cuts down on prep time. You can also use ready-made pound cake. Just cube it, and you are set. If you're in a rush, layer ingredients in jars. This is fast and fun for serving. You can make individual servings quickly. Plus, it looks great at parties! Even with shortcuts, your trifle will taste amazing. You can still enjoy the full flavors of the Strawberry Shortcake Trifle with these easy steps. For the full recipe, check out the details above. {{image_2}} You can switch up the classic Strawberry Shortcake Trifle in fun ways. One tasty option is the Chocolate Strawberry Shortcake Trifle. Use chocolate cake instead of pound cake. Layer it with strawberries and chocolate pudding. Top it all with whipped cream. This twist adds rich flavors and a fun look. Another great choice is a lemon-infused variation. Substitute lemon pudding for vanilla pudding. You can also add lemon zest to the whipped cream. This will give the trifle a bright, zesty taste. It complements the strawberries nicely. You’ll have a refreshing treat perfect for hot days. If you need gluten-free options, use gluten-free cake. You can find mixes in stores or make your own. Just make sure the other ingredients are also gluten-free. This way, everyone can enjoy this dessert. For vegan adaptations, swap the whipped cream with a plant-based version. Use coconut cream or almond whipped cream. Replace the pudding with a vegan version too. You can make it with silken tofu and a bit of sweetener. These changes keep the trifle tasty while meeting dietary needs. For the full recipe, click here: [Full Recipe]. To store leftovers, cover the trifle with plastic wrap. Make sure it fits tightly to keep air out. You can also use a lid if your dish has one. This keeps the trifle fresh and tasty. The shelf life of the trifle is about 2-3 days in the fridge. After that, the layers may start to blend together. The strawberries can lose their texture, too. Always check for freshness before you dig in. If you want to refresh the trifle before serving, here are some tips. First, scoop out the top layer and set it aside. This lets you see if the layers need some help. Add fresh whipped cream to the top for a light touch. You can also add more sliced strawberries to make it look pretty. If the cake is too soft, consider adding a new layer of pound cake. This can help restore some of the texture and taste. Enjoy your delightful summer treat! Can I use frozen strawberries? Yes, you can use frozen strawberries. Thaw them first and drain any extra juice. This way, they still add great flavor to your trifle. How do I make it ahead of time? You can make your trifle a day before you serve it. Just layer everything and cover it well. Chill it in the fridge overnight. This helps the flavors mix nicely. What can I substitute for pound cake? If you don’t have pound cake, you can use angel food cake or sponge cake. Both options keep the trifle light and fluffy. You can also use cookies for a fun twist. For the full recipe, check the earlier section. Enjoy your delicious strawberry shortcake trifle! In this post, we covered how to make a delicious strawberry shortcake trifle. I shared the key ingredients, like fresh strawberries, whipped cream, and pound cake. You learned step-by-step instructions for preparation, assembly, and presentation. Tips helped you perfect your trifle and save time. Remember to explore flavor variations and dietary options. The trifle is easy to store and refresh, ensuring you enjoy every bite. Now, it's time to create your own tasty masterpiece!](https://dailydishlab.com/wp-content/uploads/2025/07/b9031d10-5e28-4fea-a2af-b8fc9fc435a5-768x768.webp)


