Savory Slow Cooker Butternut Squash Lentil Curry

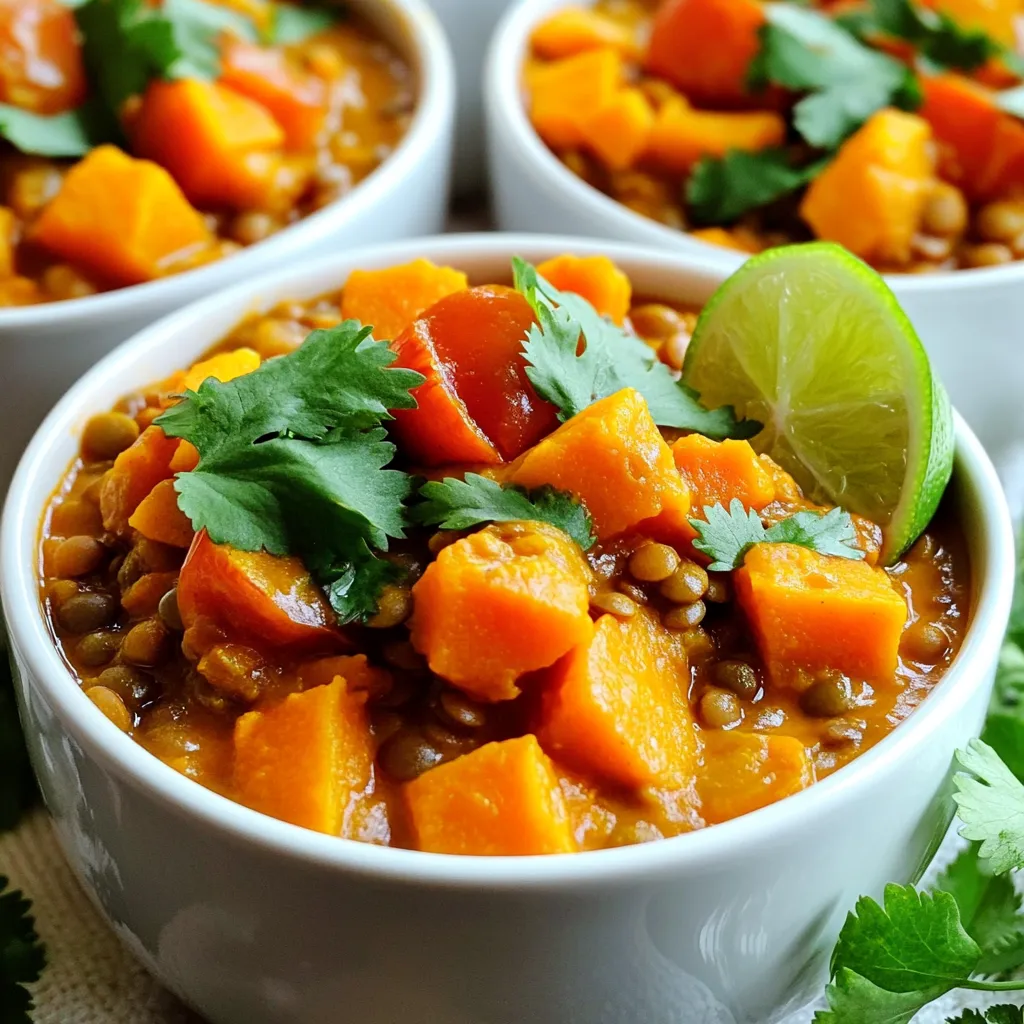
Craving a warm, hearty meal that’s packed with flavor and nutrition? You’re in the right place! This Savory Slow Cooker Butternut Squash Lentil Curry is not only easy to make, but it also warms your soul with every bite. Let me walk you through the simple steps to create this comforting dish, plus tips to customize it just for you. Get ready to fill your home with delicious smells and your belly with goodness!
Why I Love This Recipe
- Easy Preparation: This recipe is incredibly simple, allowing you to throw everything in the slow cooker and let it do the work for you.
- Flavorful and Aromatic: The combination of spices and coconut milk creates a rich, aromatic curry that is sure to delight your taste buds.
- Nutritious Ingredients: Packed with healthy ingredients like butternut squash and lentils, this curry is both nourishing and satisfying.
- Versatile Serving Options: Enjoy it over rice or quinoa, and customize with your favorite garnishes like cilantro or lime for added freshness.
Ingredients
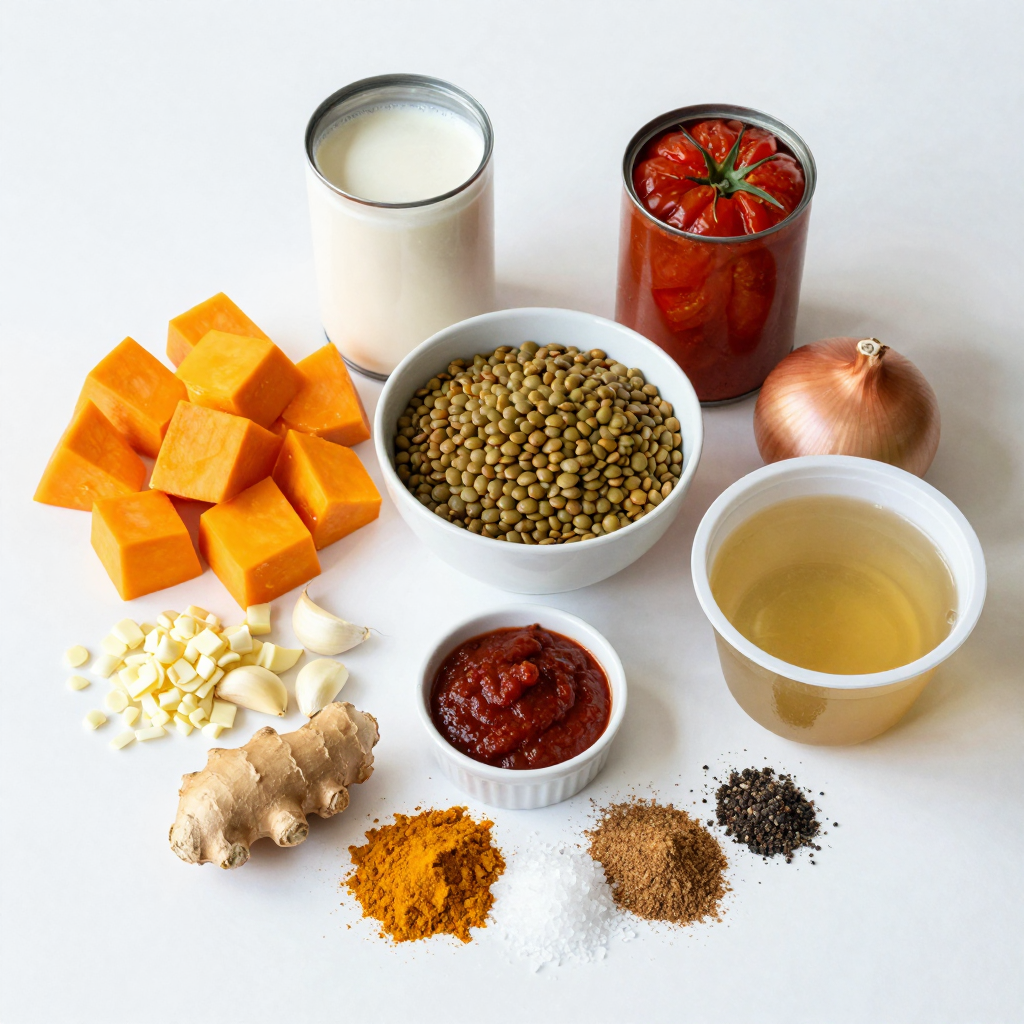
List of Ingredients for Slow Cooker Butternut Squash Lentil Curry
- 1 medium butternut squash, peeled and diced
- 1 cup green or brown lentils, rinsed
- 1 can (14 oz) coconut milk
- 1 can (14 oz) diced tomatoes
- 1 onion, chopped
- 3 cloves garlic, minced
- 1 tablespoon ginger, grated
- 2 tablespoons red curry paste
- 1 teaspoon ground cumin
- 1 teaspoon ground coriander
- 1 teaspoon turmeric powder
- 1 teaspoon salt (adjust to taste)
- 1/2 teaspoon black pepper
- 4 cups vegetable broth
- Fresh cilantro, for garnish
- Cooked rice or quinoa, for serving
Optional Ingredients for Added Flavor
You can add these items to boost the taste:
- 1 tablespoon lime juice
- 1 tablespoon soy sauce
- A pinch of cayenne pepper for heat
- 1 cup spinach for extra greens
Ingredient Substitutions
If you don’t have some items, try these swaps:
- Use sweet potatoes instead of butternut squash.
- Swap green or brown lentils for red lentils for a different texture.
- Coconut milk can be replaced with almond milk, though it will change the flavor.
- Use vegetable stock instead of broth for a lighter taste.
Each ingredient brings its own charm to this dish. I find that the butternut squash adds natural sweetness, while lentils give it heartiness. Using fresh herbs, like cilantro, at the end really brightens the flavors. Enjoy your cooking adventure!

Step-by-Step Instructions
Preparation Instructions
To start, gather your fresh ingredients. You will need:
- 1 medium butternut squash, peeled and diced
- 1 cup green or brown lentils, rinsed
- 1 can (14 oz) coconut milk
- 1 can (14 oz) diced tomatoes
- 1 onion, chopped
- 3 cloves garlic, minced
- 1 tablespoon ginger, grated
- 2 tablespoons red curry paste
- 1 teaspoon ground cumin
- 1 teaspoon ground coriander
- 1 teaspoon turmeric powder
- 1 teaspoon salt (adjust to taste)
- 1/2 teaspoon black pepper
- 4 cups vegetable broth
- Fresh cilantro, for garnish
- Cooked rice or quinoa, for serving
First, peel and dice the butternut squash. This can be tricky, so take your time. Rinse the lentils under cold water to remove dust. Chop the onion finely and mince the garlic. Grate the ginger for a nice, fresh flavor.
Next, place all these ingredients into your slow cooker. Add the diced squash, lentils, onion, garlic, and ginger into the pot. Make sure to stir well, so everything mixes together.
Slow Cooking Instructions
Now, add the spices. This includes the red curry paste, ground cumin, ground coriander, turmeric, salt, and black pepper. Mix these in thoroughly.
Pour in the coconut milk and diced tomatoes. Then, add the vegetable broth. Give everything a good stir again to combine all the flavors.
Cover the slow cooker. You can set it on low for 6-8 hours or high for 3-4 hours. The goal is to have tender lentils and squash.
Tips for Achieving the Perfect Texture
Once the cooking time is up, check the curry. Stir it gently. If you want a creamier texture, mash some squash against the sides of the slow cooker. This will add a nice body to the dish.
Taste the curry before serving. Adjust the seasoning to your liking. If it needs more salt or spice, add a little more.
Serve this hearty curry hot over rice or quinoa. Don’t forget to sprinkle fresh cilantro on top for a burst of flavor!
Pro Tips
- Choose the Right Squash: Opt for a firm, heavy butternut squash for the best flavor and texture. Avoid any with soft spots or blemishes.
- Adjusting Spice Levels: If you like your curry spicier, add more red curry paste or a pinch of cayenne pepper to enhance the heat.
- Make It Creamy: For an extra creamy texture, blend a portion of the curry with an immersion blender before serving.
- Customize Your Garnish: Experiment with different garnishes like toasted coconut flakes or chopped peanuts for added crunch and flavor.
Tips & Tricks
How to Enhance the Flavor
To boost the taste of your curry, use fresh spices. Ground spices lose flavor over time. Try to use whole spices and grind them before use. Add a squeeze of lime juice before serving. This adds brightness and freshness. You can also mix in some chopped spinach or kale for extra nutrition. These greens will cook down nicely in the curry.
Serving Suggestions and Pairings
Serve your butternut squash lentil curry over a bed of cooked rice or quinoa. The grains soak up the rich sauce. You can also pair it with warm naan or pita bread. This makes for a hearty meal. For a refreshing touch, add a simple salad with cucumber and tomatoes. This balances the warm flavors of the curry.
Presentation Tips for Serving
Presentation matters in making your dish look appealing. Serve the curry in deep bowls. Top with a sprinkle of fresh cilantro for color. A wedge of lime on the side adds a nice touch. You can also add a dollop of yogurt or coconut cream for creaminess. This makes the dish look gourmet and inviting.

Variations
Vegetarian and Vegan Variations
This dish is naturally both vegetarian and vegan. It shines with plant-based goodness. The main ingredients are butternut squash and lentils. They provide protein, fiber, and nutrients. You can easily enjoy this meal without any animal products.
Alternative Ingredients for Different Flavors
You can switch things up with your choice of lentils. Try red lentils for a softer texture. You can also add different vegetables, like carrots or spinach. They will enhance both flavor and nutrition. If you prefer a nutty taste, replace coconut milk with almond milk. For added depth, you might use vegetable stock instead of broth.
Spicy vs. Mild Recipe Options
If you like heat, add more red curry paste or fresh chilies. You can also sprinkle in some cayenne pepper. For a milder taste, reduce the curry paste. You can also add a dollop of yogurt on top to cool it down. Adjusting spice levels makes this dish perfect for everyone.
Storage Info
How to Store Leftovers
You can store leftovers in an airtight container. Make sure the curry is cool before sealing. Place it in the fridge for up to four days. If you want to keep it longer, freezing is a better option.
Freezing Instructions
To freeze, use freezer-safe containers or bags. Portion out the curry for easy meals later. Label each bag with the date. You can freeze the curry for up to three months. Just remember, it’s best to freeze before adding fresh cilantro.
Reheating Tips
When ready to eat, thaw the curry in the fridge overnight. Reheat it in a pot on the stove over low heat. Stir frequently to avoid burning. You can also use a microwave. Heat in short bursts, stirring in between. Add a splash of vegetable broth if it seems too thick.
FAQs
Can I use different types of lentils?
Yes, you can use other lentils. Green and brown lentils work well. They hold their shape better. You can also try red lentils. They cook faster and become softer. This may change the curry’s texture but keeps it tasty.
How can I make this curry spicier?
To add spice, increase the curry paste. You can also add red pepper flakes. Fresh chopped chili peppers can boost heat, too. Adjust to your taste. Just remember to taste as you go. Balance is key to a great dish.
Is it possible to make this recipe in a regular pot instead of a slow cooker?
Yes, you can cook this curry on the stove. Use a large pot. Sauté the onion, garlic, and ginger first. Then add the butternut squash and lentils. Pour in the liquids and spices. Simmer on low for about 30-40 minutes until everything is tender.
What are the health benefits of butternut squash and lentils?
Butternut squash is rich in vitamins A and C. It supports good vision and a strong immune system. Lentils provide protein and fiber. They keep you full and support digestive health. Together, they make a nutritious and hearty meal.
In this article, we covered the essential ingredients for slow cooker butternut squash lentil curry. You learned about preparation steps, cooking tips, and how to enhance flavor. We explored different variations and storage methods. Remember, this dish can be customized to fit your taste. Use what you have and experiment. It makes a delicious, healthy meal that you’ll enjoy over and over. Dive into this recipe and add your unique touch! Enjoy every bite.

Slow Cooker Butternut Squash Lentil Curry
Ingredients
1 medium butternut squash, peeled and diced
1 cup green or brown lentils, rinsed
1 can (14 oz) coconut milk
1 can (14 oz) diced tomatoes
1 onion, chopped
3 cloves garlic, minced
1 tablespoon ginger, grated
2 tablespoons red curry paste
1 teaspoon ground cumin
1 teaspoon ground coriander
1 teaspoon turmeric powder
1 teaspoon salt (adjust to taste)
1/2 teaspoon black pepper
4 cups vegetable broth
Fresh cilantro, for garnish
Cooked rice or quinoa, for serving
Instructions
In a slow cooker, combine the diced butternut squash, rinsed lentils, chopped onion, minced garlic, and grated ginger.
Add the red curry paste, ground cumin, ground coriander, turmeric powder, salt, and black pepper to the mixture. Stir well to combine.
Pour in the can of coconut milk and the can of diced tomatoes along with the vegetable broth. Mix thoroughly until everything is evenly distributed.
Cover the slow cooker and set it on low for 6-8 hours or on high for 3-4 hours, until the lentils and squash are tender.
Once cooked, give the curry a good stir. Taste and adjust seasoning if necessary. If you prefer a creamier texture, mash some of the squash against the sides of the slow cooker.
Serve hot over cooked rice or quinoa and garnish with fresh cilantro.
Prep Time, Total Time, Servings: 15 minutes | 6-8 hours (slow cook time) | 4 servings
– Presentation Tips: Serve the curry in deep bowls with a sprinkle of fresh cilantro on top and a wedge of lime on the side for an added zing!

Slow Cooker Butternut Squash Lentil Curry
Ingredients
- 1 medium butternut squash, peeled and diced
- 1 cup green or brown lentils, rinsed
- 1 can (14 oz) coconut milk
- 1 can (14 oz) diced tomatoes
- 1 medium onion, chopped
- 3 cloves garlic, minced
- 1 tablespoon ginger, grated
- 2 tablespoons red curry paste
- 1 teaspoon ground cumin
- 1 teaspoon ground coriander
- 1 teaspoon turmeric powder
- 1 teaspoon salt (adjust to taste)
- 0.5 teaspoon black pepper
- 4 cups vegetable broth
- 1 bunch fresh cilantro, for garnish
- 1 serving cooked rice or quinoa, for serving
Instructions
- In a slow cooker, combine the diced butternut squash, rinsed lentils, chopped onion, minced garlic, and grated ginger.
- Add the red curry paste, ground cumin, ground coriander, turmeric powder, salt, and black pepper to the mixture. Stir well to combine.
- Pour in the can of coconut milk and the can of diced tomatoes along with the vegetable broth. Mix thoroughly until everything is evenly distributed.
- Cover the slow cooker and set it on low for 6-8 hours or on high for 3-4 hours, until the lentils and squash are tender.
- Once cooked, give the curry a good stir. Taste and adjust seasoning if necessary. If you prefer a creamier texture, mash some of the squash against the sides of the slow cooker.
- Serve hot over cooked rice or quinoa and garnish with fresh cilantro.


![- 6 boneless, skinless chicken thighs - 1/4 cup honey - 1/4 cup soy sauce - 1 tablespoon rice vinegar - 4 cloves garlic, minced - 1 tablespoon fresh ginger, grated For this dish, the main star is the chicken thighs. They are juicy and tender. The honey adds sweetness, while soy sauce brings depth. Rice vinegar gives a nice tang. Garlic and ginger add a burst of flavor. - 2 green onions, thinly sliced - Sesame seeds Garnishes make the dish pop. Green onions add a fresh crunch. Sesame seeds add a nutty touch. These small details can elevate your meal. - 2 tablespoons olive oil - Salt and pepper to taste - 1 teaspoon sesame oil Seasoning is key for great taste. Olive oil helps with cooking and flavor. Salt and pepper enhance the natural flavors. Sesame oil adds a rich aroma. You can adjust these to fit your taste. For the complete recipe, check out the [Full Recipe]. To start, gather your ingredients. In a medium bowl, whisk together: - 1/4 cup honey - 1/4 cup soy sauce - 1 tablespoon rice vinegar - 4 cloves garlic, minced - 1 tablespoon fresh ginger, grated - 2 tablespoons olive oil - 1 teaspoon sesame oil Mix until smooth. This honey garlic blend will give your chicken a sweet and tangy taste. Next, place the 6 boneless, skinless chicken thighs into a large resealable plastic bag or bowl. Pour the marinade over the chicken. Make sure each piece gets coated well. Seal the bag or cover the bowl. Refrigerate the chicken for at least 30 minutes. For even better flavor, marinate for up to 4 hours. You can choose to grill or pan-sear your chicken. - Grilling: Preheat your grill to medium-high heat. - Pan-searing: Heat a large skillet over medium heat. Once ready, take the chicken out of the marinade. Let the excess marinade drip off. Season your chicken with salt and pepper. Cook the chicken thighs for about 6-7 minutes on each side. Make sure they reach an internal temperature of 165°F (75°C) and get a nice caramelized look. In the last few minutes, you can brush some reserved marinade over the chicken. Just remember, only use marinade that has not touched raw chicken. Enjoy your meal! The full recipe is easy to follow, making a delicious dish. For the best flavor, marinate your chicken thighs for at least 30 minutes. You can let them sit for up to 4 hours for a bolder taste. Use a large resealable bag or a bowl to coat the chicken fully. Make sure you flip the bag or stir the bowl occasionally. This helps the marinade reach every spot. To check if your chicken is done, use a meat thermometer. The safe internal temperature is 165°F (75°C). This ensures the chicken is juicy and safe to eat. Always wash your hands and surfaces after touching raw chicken. It’s key to avoid cross-contamination. For serving, place the chicken thighs on a big platter. Drizzle some honey or leftover marinade over them for extra shine. Serve with steamed rice or colorful stir-fried vegetables for a complete meal. Garnish with green onions and sesame seeds for a beautiful look. Enjoy your dish! {{image_2}} You can add a bright flavor to your honey garlic chicken thighs. Just include some orange or lemon zest. This little move gives your dish a fresh taste. The citrus adds a nice zing that works well with the sweet honey. Simply mix the zest into your marinade for a tasty twist! Want to kick it up a notch? Try adding chili flakes or sriracha. This gives your chicken a spicy kick that balances the sweetness of the honey. Start with a little, then taste as you go. You can adjust the heat to match your preference. It’s a fun way to switch up the flavor! If you're looking for a lighter meal, use skinless chicken thighs. This keeps your dish flavorful without the extra fat. You can also swap regular soy sauce for low-sodium soy sauce. This small change makes your honey garlic chicken healthier while still tasting great. Small tweaks can lead to big benefits! For the full recipe, check out the detailed instructions to create your flavorful dish. Store your leftover honey garlic chicken thighs in an airtight container. This keeps them fresh. Ensure they cool down before sealing. They will stay good for up to four days in the fridge. If you want to eat them later, avoid leaving them out for more than two hours. This helps prevent bacteria growth. You can freeze cooked chicken thighs too. First, let them cool completely. Then, wrap each thigh in plastic wrap. Place them in a freezer-safe bag or container. They will last up to three months in the freezer. When you're ready to eat, move them to the fridge for overnight thawing. To reheat, use the oven for best results. Preheat the oven to 350°F (175°C). Place the chicken on a baking sheet and cover with foil. Heat for about 15-20 minutes, or until warmed through. You can also use a microwave. Just place the chicken on a plate, cover it, and heat for about 1-2 minutes. Check every 30 seconds to avoid overcooking. Reheating this way keeps the chicken juicy and tasty. For more detailed steps, check the Full Recipe. To make Honey Garlic Chicken Thighs, follow these simple steps: 1. Prepare the marinade by mixing honey, soy sauce, rice vinegar, minced garlic, grated ginger, olive oil, and sesame oil in a bowl. 2. Marinate the chicken in a bag or bowl for at least 30 minutes. 3. Cook the chicken on a grill or in a pan for about 6-7 minutes per side. 4. Glaze the chicken with some reserved marinade in the last minutes of cooking. 5. Rest and serve the chicken after cooking, garnished with green onions and sesame seeds. This process creates juicy, flavorful chicken with a sticky glaze that you will love. You have many options for side dishes that pair well with Honey Garlic Chicken Thighs: - Steamed rice - Stir-fried vegetables - Quinoa salad - Garlic mashed potatoes - Roasted broccoli Each of these sides complements the sweet and savory notes of the chicken. Yes, you can use chicken breasts, but there are pros and cons: - Pros: Chicken breasts are leaner and cook faster. - Cons: They can dry out more easily than thighs if overcooked. Chicken thighs offer more flavor and tenderness, making them a great choice for this recipe. Yes, this recipe is perfect for meal prep. Here are some tips: - Cook a larger batch and store in airtight containers. - Divide into single servings for easy lunches or dinners. - Keep the chicken in the fridge for up to four days or freeze for longer storage. Meal prepping makes it easy to enjoy delicious Honey Garlic Chicken Thighs all week! For the complete cooking process, check out the [Full Recipe]. This blog post covered a simple recipe for Honey Garlic Chicken Thighs. We explored the main ingredients, the marinade process, and cooking methods. I shared tips on marinating, cooking, and presenting your dish. You also learned about variations and how to store leftovers. In closing, enjoy the rich flavor of this dish. It’s easy to make, healthy, and perfect for sharing. Experiment with the variations to keep your meals exciting. Whether you grill or pan-sear, this recipe is sure to impress. Happy cooking!](https://dailydishlab.com/wp-content/uploads/2025/07/290d04f4-f0f3-4f16-8110-9751a8193952-768x768.webp)


