Sesame Crusted Ahi Tuna Salad Fresh and Flavorful Dish

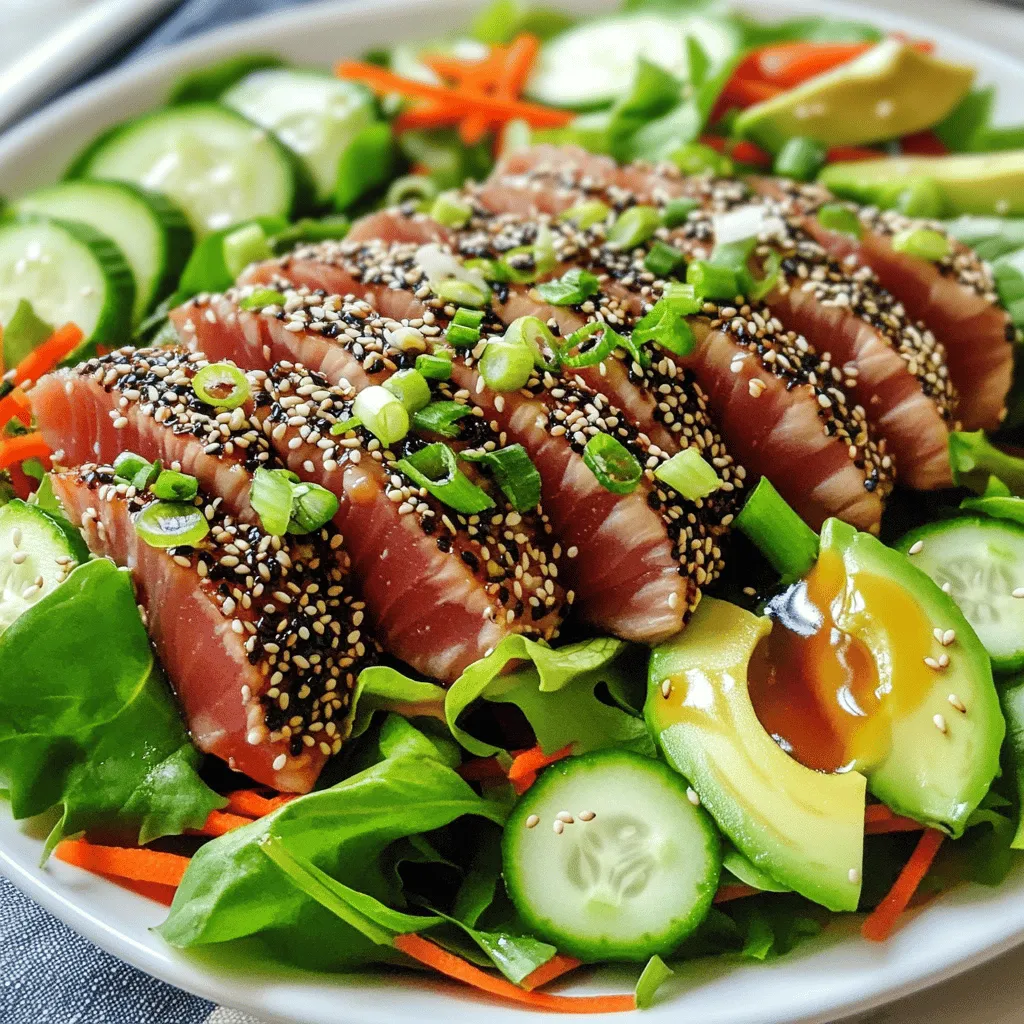
If you’re craving a fresh and flavorful meal, look no further than this Sesame Crusted Ahi Tuna Salad. This dish features perfectly seared ahi tuna coated in sesame seeds, paired with crisp greens and a tasty dressing. I’ll share simple steps and helpful tips to make the best version of this vibrant salad at home. Get ready to impress your taste buds and your dinner guests with this delightful recipe!
Why I Love This Recipe
- Fresh and Flavorful: This salad combines high-quality Ahi tuna with a variety of fresh vegetables, creating a vibrant and nutritious dish that is bursting with flavor.
- Quick and Easy: With a total preparation time of just 30 minutes, this recipe is perfect for a quick weeknight dinner or a light lunch.
- Healthy Option: Packed with lean protein and healthy fats from the avocado and olive oil, this salad is not only delicious but also a great choice for health-conscious eaters.
- Elegant Presentation: The colorful ingredients and sesame-crusted tuna make for an impressive presentation, perfect for entertaining or special occasions.
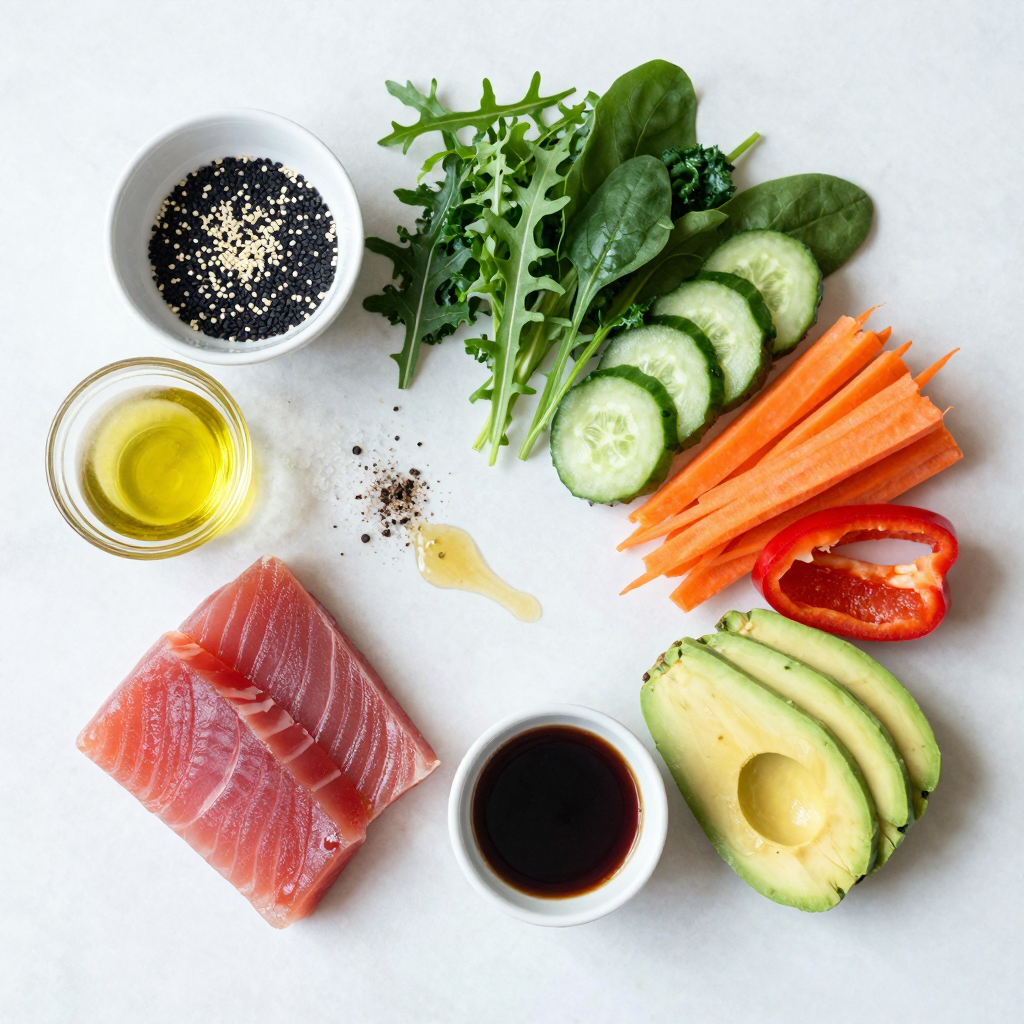
Ingredients
Ahi Tuna Steaks
For this recipe, you need 2 Ahi tuna steaks, each about 6 ounces. Ahi tuna is fresh and rich in flavor. It cooks quickly and is perfect for searing.
Sesame Seed Coating
The coating is a mix of 1/4 cup black sesame seeds and 1/4 cup white sesame seeds. This blend adds texture and a nutty taste. The seeds stick well to the tuna, creating a crunchy crust.
Salad Components
You will use 4 cups of mixed salad greens, which can include arugula, spinach, and baby kale. For added crunch, include 1 cucumber sliced thin, 1 carrot shredded, 1/2 red bell pepper sliced, and 1 avocado sliced. These ingredients bring freshness and color to your dish.
Dressing Ingredients
For the dressing, gather 2 tablespoons of soy sauce (or tamari for a gluten-free option), 1 tablespoon of rice vinegar, 1 tablespoon of sesame oil, and 1 teaspoon of honey or agave syrup. This combination creates a flavorful sauce to tie the salad together.

Step-by-Step Instructions
Preparing the Ahi Tuna
First, take your Ahi tuna steaks and pat them dry. Use paper towels to remove excess moisture. This step helps the tuna sear well. Next, season both sides lightly with salt and pepper. Don’t overdo it; just a pinch will do.
Coating Tuna with Sesame Seeds
Now, let’s coat the tuna. On a flat plate, mix the black and white sesame seeds. Press each tuna steak into the seeds. Make sure to coat all sides evenly. This adds a crunchy texture and nutty flavor.
Searing the Tuna Steaks
In a non-stick skillet, pour in the olive oil. Heat it over medium-high heat. Once the oil is hot, gently place the sesame-crusted tuna steaks in the pan. Sear each side for about 2 minutes for medium-rare. Adjust the time if you like it cooked more. When done, remove them from heat and let them rest for a couple of minutes.
Assembling the Salad
While the tuna rests, prepare the salad. In a large bowl, combine the mixed salad greens, sliced cucumber, shredded carrot, sliced red bell pepper, and avocado. Toss everything together gently. This mix adds color and crunch to your dish.
Making the Dressing
Now, let’s whip up the dressing. In a small bowl, whisk together the soy sauce, rice vinegar, sesame oil, and honey or agave syrup. Mix until well combined. This dressing brings a sweet and savory kick to your salad.
Serving the Salad
Once the tuna has rested, slice it against the grain into thin strips. To serve, divide the salad mixture onto plates. Top each salad with the sliced tuna. Drizzle the dressing over the top. If you want, add sliced green onions and extra sesame seeds for garnish. Enjoy your fresh and flavorful meal!
Pro Tips
- Use Fresh Tuna: Always choose the freshest Ahi tuna available for the best flavor and texture. Look for bright red color and firm texture.
- Experiment with Cooking Time: For a perfect medium-rare finish, sear the tuna for about 2 minutes on each side. Adjust time based on your preference for doneness.
- Dress Just Before Serving: To keep the salad greens crisp, drizzle the dressing just before serving rather than letting it sit.
- Garnish for Visual Appeal: Enhance the presentation by garnishing with sliced green onions and a sprinkle of extra sesame seeds for a pop of color and texture.
Tips & Tricks
Selecting Fresh Ahi Tuna
When picking Ahi tuna, look for bright color. Fresh tuna should have a deep red hue. The flesh must feel firm and moist. Avoid any fish that smells strong or has brown spots. Buying from a trusted fishmonger is key. Ask for sushi-grade tuna to ensure quality.
Cooking Times for Tuna
Cooking times depend on your preference. For medium-rare, sear the tuna for about 2 minutes on each side. If you like it more cooked, add another minute per side. Remember, tuna cooks quickly. Overcooking can make it tough and dry. Always let it rest for a few minutes after cooking.
Presentation Tips
To impress, arrange your salad with care. Use a large plate and layer the greens first. Place sliced tuna on top in a fan shape. Drizzle the dressing in an artistic swirl. Finish with extra sesame seeds and green onions for color. A beautiful presentation makes the dish more inviting.

Variations
Alternative Proteins
If you want to switch up the protein, try salmon or chicken. Both work well with the sesame crust. Cook the salmon the same way as the tuna. For chicken, use thin breast slices. Adjust cooking time to ensure they stay juicy.
Vegan or Vegetarian Versions
To make this dish vegan, use marinated tofu instead of tuna. Press the tofu to remove excess water. Coat it with sesame seeds and sear it just like the tuna. For a vegetarian twist, consider using tempeh. Both options offer great texture and flavor.
Additional Salad Toppings
Feel free to add more toppings to your salad. I love adding sliced radishes for crunch. You can also include edamame or roasted chickpeas for protein. Try adding fruit like mango or berries for a sweet touch. Fresh herbs like cilantro or mint can enhance the flavor too!
Storage Info
Storing Leftover Salad
To store leftover salad, place it in an airtight container. This keeps the greens fresh. Use a container that is not too big, so the salad does not move around. You can store it in the fridge for up to two days. If the salad has dressing, it may get soggy. If you can, store the dressing separately. This keeps the salad crisp until you are ready to eat it.
Best Practices for Tuna Storage
Store leftover tuna in a sealed container. You should refrigerate it right away. It will stay fresh for one to two days. If you want to keep it longer, consider freezing it. Wrap the tuna tightly in plastic wrap before placing it in a freezer bag. This helps avoid freezer burn. Thaw it in the fridge when you are ready to use it.
Reheating Tips for Tuna
Reheat tuna carefully to avoid overcooking. The best way is to use a skillet. Heat it on low and add a bit of oil. Place the tuna in the skillet and heat for about one minute per side. You can also use the microwave, but do this with care. Use low power and cover the tuna to keep it moist. Heat for 30 seconds at a time, checking often. Enjoy your meal while keeping the flavors fresh!
FAQs
What is Ahi Tuna?
Ahi tuna is a type of fish, also known as yellowfin tuna. It has a firm texture and a rich flavor. Ahi is popular for sushi and sashimi due to its quality. You can find it in many seafood markets. When buying, look for bright red flesh with a clean smell.
How do I make the salad more filling?
To make the salad more filling, add heartier ingredients. Consider adding grains like quinoa or farro. You can also include beans for extra protein. Nuts or seeds, like almonds or pumpkin seeds, add crunch and nutrition. Finally, toss in some cheese, like feta or goat cheese, for creaminess.
Can I use pre-packaged salad greens?
Yes, you can use pre-packaged salad greens. They save time and make prep easier. Look for fresh mixes with arugula, spinach, or baby kale. Just rinse them well before use. This ensures you have a clean and crisp salad base.
What can I substitute for sesame oil?
If you don’t have sesame oil, try using peanut oil or olive oil. Both add flavor and work well in the dressing. You can also use a mix of sunflower oil and a dash of soy sauce for a similar taste. Adjust the amount to your preference.
How to tell when Ahi Tuna is done cooking?
To check if Ahi tuna is done, look for color. The outside should be brown, while the inside stays pink. For medium-rare, cook for about 2 minutes per side. If you prefer it more cooked, increase the time slightly. A food thermometer should read 125°F for medium-rare.
We explored the key ingredients for a tasty ahi tuna salad. You learned how to prepare and sear the tuna, coat it with sesame seeds, and mix a flavorful dressing. The tips covered selecting fresh fish and presentation ideas. I also shared variations for different diets and how to store leftovers properly. Remember, mastering this dish brings health and flavor to your meals. Enjoy your cooking journey and impress your friends with this refreshing salad!

Sesame Crusted Ahi Tuna Salad
Ingredients
2 Ahi tuna steaks (about 6 ounces each)
1/4 cup black sesame seeds
1/4 cup white sesame seeds
2 tablespoons olive oil
Salt and pepper to taste
4 cups mixed salad greens (arugula, spinach, baby kale)
1 cucumber, thinly sliced
1 carrot, shredded
1/2 red bell pepper, sliced
1 avocado, sliced
2 tablespoons soy sauce (or tamari for gluten-free)
1 tablespoon rice vinegar
1 tablespoon sesame oil
1 teaspoon honey or agave syrup
Optional: sliced green onions and sesame seeds for garnish
Instructions
Prepare the Ahi Tuna: Pat the tuna steaks dry with paper towels. Season both sides lightly with salt and pepper.
Coat with Sesame Seeds: On a plate, combine the black and white sesame seeds. Press each tuna steak into the sesame seeds, coating all sides evenly.
Sear the Tuna: In a non-stick skillet, heat the olive oil over medium-high heat. Once hot, add the sesame-crusted tuna steaks. Sear for about 2 minutes on each side for medium-rare, adjusting time slightly if you prefer them more cooked. Remove from heat and let rest for a couple of minutes.
Prepare the Salad: In a large bowl, combine the mixed salad greens, cucumber, carrot, red bell pepper, and avocado. Toss gently to mix.
Make the Dressing: In a small bowl, whisk together the soy sauce, rice vinegar, sesame oil, and honey or agave syrup until well combined.
Slice the Tuna: Once rested, slice the tuna steaks against the grain into thin strips.
Assemble the Salad: Divide the salad mixture onto plates. Top with the sliced tuna. Drizzle with dressing and garnish with green onions and extra sesame seeds if desired.
Prep Time: 15 min | Total Time: 30 min | Servings: 2
– Presentation Tips: Arrange the salad ingredients artfully on the plate, placing the sliced tuna attractively on top. Drizzle the dressing artistically around the plate and sprinkle with extra sesame seeds for an elegant touch.

Sesame Crusted Ahi Tuna Salad
Ingredients
- 2 steaks Ahi tuna
- 0.25 cup black sesame seeds
- 0.25 cup white sesame seeds
- 2 tablespoons olive oil
- to taste Salt and pepper
- 4 cups mixed salad greens (arugula, spinach, baby kale)
- 1 cucumber, thinly sliced
- 1 carrot, shredded
- 0.5 red bell pepper, sliced
- 1 avocado, sliced
- 2 tablespoons soy sauce (or tamari for gluten-free)
- 1 tablespoon rice vinegar
- 1 tablespoon sesame oil
- 1 teaspoon honey or agave syrup
- optional sliced green onions and sesame seeds for garnish
Instructions
- Prepare the Ahi Tuna: Pat the tuna steaks dry with paper towels. Season both sides lightly with salt and pepper.
- Coat with Sesame Seeds: On a plate, combine the black and white sesame seeds. Press each tuna steak into the sesame seeds, coating all sides evenly.
- Sear the Tuna: In a non-stick skillet, heat the olive oil over medium-high heat. Once hot, add the sesame-crusted tuna steaks. Sear for about 2 minutes on each side for medium-rare, adjusting time slightly if you prefer them more cooked. Remove from heat and let rest for a couple of minutes.
- Prepare the Salad: In a large bowl, combine the mixed salad greens, cucumber, carrot, red bell pepper, and avocado. Toss gently to mix.
- Make the Dressing: In a small bowl, whisk together the soy sauce, rice vinegar, sesame oil, and honey or agave syrup until well combined.
- Slice the Tuna: Once rested, slice the tuna steaks against the grain into thin strips.
- Assemble the Salad: Divide the salad mixture onto plates. Top with the sliced tuna. Drizzle with dressing and garnish with green onions and extra sesame seeds if desired.


![To make the best honey soy sauce chicken marinade, you'll need some simple ingredients. Each one adds its own special touch. Here’s what you’ll need: - 4 bone-in, skin-on chicken thighs - 1/4 cup low sodium soy sauce - 1/4 cup honey - 2 tablespoons sesame oil - 2 cloves garlic, finely minced - 1 tablespoon fresh ginger, grated - 1 tablespoon rice vinegar - 1/2 teaspoon black pepper - 1/2 teaspoon red pepper flakes (optional for heat) - 2 green onions, finely chopped - A sprinkle of sesame seeds This mix of flavors comes together to create a sweet and savory marinade. The honey gives a nice glaze, while the soy sauce adds depth. Garlic and ginger bring in warmth. You can adjust the red pepper flakes based on how spicy you like it. I enjoy this recipe for its simplicity and taste. You can find the full recipe in the Honey Soy Glaze Chicken Delight section. To start, gather your ingredients. In a medium bowl, combine the low sodium soy sauce, honey, sesame oil, minced garlic, grated ginger, rice vinegar, black pepper, and red pepper flakes. Use a whisk to mix everything well. This step is key as it brings out all the flavors. You want a smooth blend that coats the chicken nicely. Next, take your chicken thighs. Place them in a large Ziploc bag or a shallow dish. Pour the marinade over the chicken, making sure it covers each piece. Seal the bag tightly or cover the dish with plastic wrap. Let the chicken marinate in the fridge for at least 2 hours. For the best flavor, let it sit overnight. This allows the chicken to soak up all those tasty flavors. Now it's time to bake. Preheat your oven to 375°F (190°C). While it heats up, prepare your baking sheet by lining it with parchment paper or aluminum foil. This makes for easy clean-up later. After marinating, take the chicken out of the bag or dish. Place the thighs skin-side up on the baking sheet. Bake the chicken for 35-40 minutes. Every 15 minutes, baste it with the reserved marinade. This keeps the chicken juicy and adds even more flavor. You know it’s done when the internal temperature hits 165°F (74°C). Once ready, let the chicken rest for 5 minutes before serving. This keeps it tender and full of flavor. For a final touch, sprinkle chopped green onions and sesame seeds on top. This adds a nice crunch and makes your dish look great. If you want more details, check out the Full Recipe. Marinating is key to great flavor. I recommend marinating your chicken for at least two hours. But if you can wait, do it overnight. This time lets the flavors soak in well. You can adjust the taste too. If you like it sweeter, add more honey. For saltiness, use a bit more soy sauce. Just remember, balance is the goal. You want a marinade that excites your taste buds without being overpowering. Baking your chicken at 375°F (190°C) works best. This temperature ensures even cooking. Bake for 35 to 40 minutes. Use a meat thermometer to check for doneness. Chicken should reach 165°F (74°C) inside. To keep it juicy, baste the chicken with the marinade every 15 minutes. This step adds flavor and keeps the meat moist. After baking, let it rest for about five minutes. This helps the juices redistribute, giving you a tender bite. Garnishing makes a big difference. I love using chopped green onions and sesame seeds for a nice touch. They add color and crunch. When it comes to sides, think rice or steamed vegetables. They complement the honey soy sauce chicken well. You could also serve it with a light salad for some freshness. For more ideas, check out the [Full Recipe]. {{image_4}} You can change the protein in the recipe. Try using pork, beef, or tofu. Each option brings its own taste. Pork absorbs the sauce well, while tofu soaks up flavors beautifully. You can also switch the vinegar. Rice vinegar is mild, but apple cider vinegar adds a fruity touch. If you want a strong flavor, use balsamic vinegar. Each vinegar creates a different taste profile. To amp up the flavor, think about adding spices or herbs. Garlic and ginger are great, but you can try adding five-spice powder for a warm kick. Fresh herbs like cilantro or basil can freshen the dish. You can also mix in fruit juices. Pineapple juice gives sweetness and a tropical twist. Orange juice is another sweet option that works well. This adds a nice layer to the marinade. Grilling the chicken gives it a smoky taste. It creates a char that is hard to beat. Just make sure to monitor the heat to avoid burning. Slow-cooking is another excellent method. It makes the chicken very tender and juicy. The longer it cooks, the more the flavors blend. You can set it in the morning and enjoy it by dinner. For the full recipe, check out the Honey Soy Glaze Chicken Delight. You can keep leftover marinade in the fridge for up to five days. Store it in an airtight container. Make sure to label the container with the date. If you want to keep it longer, freeze it! Use a freezer-safe bag or container. Just remember to leave some room for expansion as it freezes. Frozen marinade can last for about three months. Once your chicken is cooked, let it cool down. After cooling, place it in a sealed container. Store it in the fridge for up to four days. For longer storage, you can freeze the chicken. Wrap it tightly in plastic wrap or foil, then place it in a freezer bag. Cooked chicken can last up to three months in the freezer. To reheat, you can use the microwave or oven. For the microwave, place the chicken on a plate and cover it with a damp paper towel. Heat it in short bursts, checking often. If using the oven, preheat to 350°F (175°C) and bake for about 15-20 minutes. The marinade can last in the fridge for five days. If frozen, it is good for three months. Cooked chicken can stay fresh in the fridge for four days. If you freeze it, it can last up to three months. Always check for any signs of spoilage before using. To add heat, try adding red pepper flakes. Start with a half teaspoon. If you want more spice, use a full teaspoon. You can also add fresh chopped chili peppers. Sriracha sauce is another great option. Mix any of these into your marinade for a nice kick. Yes, you can use boneless chicken. Boneless thighs or breasts work well. Just remember, they will cook faster. Check for doneness at about 25-30 minutes. Use a meat thermometer to ensure the chicken reaches 165°F (74°C) for safety. The flavor will still be great with boneless cuts. This dish pairs well with steamed rice or quinoa. You can also serve it with stir-fried vegetables. A fresh salad or roasted sweet potatoes make nice sides too. For a fun twist, try serving it with Asian-style slaw. Each option adds a different texture and flavor. Absolutely! If you want more, just double all the ingredients. Use the same marinating time. Cooking time may vary a bit. If using more chicken, check it at the same time. You may need an extra 5-10 minutes to ensure it’s cooked through. The prep time is about 15 minutes. You will need at least 2 hours for marinating. Cooking the chicken takes about 40 minutes. So, in total, you are looking at around 2 hours and 55 minutes. For best flavor, marinate overnight if you can. Check out the Full Recipe for all the details! You now have a complete guide for making honey soy sauce chicken. We covered the ingredients to create a tasty marinade, along with each step to bake the chicken perfectly. Tips for adjusting flavors, serving ideas, and variations make this dish even better. Remember, marinating is key for flavor. Enjoy experimenting with new ingredients and cooking methods. This recipe is simple, fun, and delicious. You’ll impress everyone at your next meal. Let your creativity shine as you cook!](https://dailydishlab.com/wp-content/uploads/2025/06/bd272301-b7e3-46d4-98e1-9d012cb49af4-768x768.webp)

![To make this creamy spinach stuffed salmon, you need simple and fresh ingredients. Here’s what you will use: - 4 salmon fillets, skinless - 2 cups fresh spinach, chopped - 1 cup cream cheese, softened - 1/2 cup feta cheese, crumbled - 1/4 cup grated Parmesan cheese - 2 cloves garlic, minced - 1 tablespoon olive oil - 1 teaspoon lemon juice - Salt and pepper to taste These ingredients create a rich, flavorful filling that pairs perfectly with salmon. The cream cheese adds creaminess, while feta offers tang. Spinach gives a fresh taste. Adding garnishes makes the dish look great and taste even better. Here are some options: - Fresh dill or parsley - Lemon wedges These garnishes add color and freshness. They also enhance the flavor of your dish. Having the right tools helps make cooking easier. You will need: - A skillet - A mixing bowl - A baking dish - Toothpicks (if needed) - A knife These tools help you prepare and cook the salmon. They ensure everything goes smoothly. If you want to see the full recipe, check it out here: [Full Recipe]. To start, gather your ingredients. You need: - 4 salmon fillets, skinless - 2 cups fresh spinach, chopped - 1 cup cream cheese, softened - 1/2 cup feta cheese, crumbled - 1/4 cup grated Parmesan cheese - 2 cloves garlic, minced - 1 tablespoon olive oil - 1 teaspoon lemon juice - Salt and pepper to taste - Fresh dill or parsley, for garnish First, preheat your oven to 375°F (190°C). This step helps cook the salmon evenly. Next, heat a skillet over medium heat. Add the olive oil and sauté minced garlic for about 1 minute. You want it fragrant but not burnt. Then, add the chopped spinach to the skillet. Cook until it wilts, which takes about 2-3 minutes. Remove the skillet from heat and let the spinach cool a bit. In a bowl, mix the softened cream cheese, feta cheese, grated Parmesan, sautéed spinach, lemon juice, salt, and pepper. Stir until combined, creating a creamy filling. Now, take your salmon fillets and place them on a cutting board. Make a slit in the side of each fillet. This creates a pocket for your filling. Next, generously fill each pocket with the creamy mixture. If needed, use toothpicks to secure the openings. Place the stuffed salmon fillets in a lightly greased baking dish. Bake in the preheated oven for 20-25 minutes. The salmon should cook through and flake easily with a fork. This timing ensures a moist and flavorful dish. To ensure you cook the salmon just right, use a meat thermometer. The internal temperature should reach 145°F (63°C). This helps you avoid overcooking, which can make the fish dry. Let the salmon rest for a few minutes after baking. This allows the juices to redistribute. For a beautiful finish, garnish with fresh dill or parsley. Serve it on a bed of sautéed asparagus or a light salad for a colorful plate. Enjoy your creamy spinach stuffed salmon! If you want the full recipe, check out the [Full Recipe]. When picking salmon, freshness is key. Look for bright, shiny skin without any brown spots. The flesh should be firm and spring back when you press it. Wild-caught salmon often has a richer taste than farmed salmon. If you can, ask your fishmonger for the best catch of the day. You can prepare this dish ahead for a busy weeknight. Make the creamy spinach filling and stuff the salmon up to one day before cooking. Wrap the salmon tightly in plastic wrap and store it in the fridge. This way, the flavors meld nicely. Just bake it when you’re ready to eat! Avoid these pitfalls for the best results. First, do not overstuff the salmon. Too much filling can make it hard to cook evenly. Second, don’t skip the resting time after baking. Letting it rest helps the juices settle. Lastly, be careful not to overcook the salmon. It should flake easily but still be moist. Enjoy your delicious meal! {{image_2}} You can switch up the cheeses in this recipe. Cream cheese gives a rich taste. Feta adds a nice tang. You can try goat cheese for a creamy twist. Mozzarella works well for a mild flavor. Each cheese brings a unique taste to the dish. Want to make this dish lighter? Use low-fat cream cheese. You can also swap out feta for a lower-fat cheese. Instead of olive oil, try using a cooking spray. This will cut down on extra calories while keeping the flavors intact. Adding fresh herbs can boost the dish's taste. Try basil or thyme for a fresh kick. A sprinkle of red pepper flakes adds heat if you want spice. For a zesty touch, squeeze more lemon juice before serving. These simple changes bring new life to the salmon. For the full recipe, check the details above. To store leftovers of creamy spinach stuffed salmon, let it cool first. Place the salmon in an airtight container. Keep it in the fridge for up to three days. This helps maintain its flavor and texture. If you have extra stuffing, store it in a separate container. Reheat the salmon gently to avoid drying it out. Preheat your oven to 350°F (175°C). Place the salmon on a baking sheet. Cover it with foil to keep moisture in. Heat for about 10-15 minutes. You can also use a microwave. Heat it on low power in short intervals. Check to ensure it warms evenly. You can freeze creamy spinach stuffed salmon for longer storage. Wrap each piece tightly in plastic wrap. Then, place it in a freezer-safe bag. It can last for up to three months in the freezer. To thaw, move it to the fridge overnight before reheating. This keeps the salmon moist and tasty. For the best results, avoid refreezing after thawing. Yes, you can use frozen salmon. Just make sure to thaw it first. Place it in the fridge overnight or submerge it in cold water for faster thawing. Frozen salmon works well, but fresh salmon gives the best flavor and texture. You can pair this dish with many sides. Here are a few ideas: - Sautéed asparagus - Lemon rice - Garlic mashed potatoes - A light salad with vinaigrette - Steamed broccoli These sides will balance the rich flavors of the salmon. To check if salmon is cooked, look for a few signs: - The flesh should be opaque and flake easily with a fork. - The internal temperature should reach 145°F (63°C). - The color should change from bright pink to pale pink. These tips will help ensure your salmon is safe and tasty. For the full recipe, check the details above. In this article, we covered how to make creamy spinach stuffed salmon. We looked at key ingredients, preparation, and baking steps. I shared tips for choosing the best salmon, making ahead, and avoiding common mistakes. You also learned about tasty cheese swaps and ways to enhance flavor. Lastly, I explained how to store, reheat, and freeze leftovers. Enjoy this dish that combines ease and flavor. With practice, you’ll master it!](https://dailydishlab.com/wp-content/uploads/2025/07/597501d1-48c7-4a9b-bedb-1c262109b33c-768x768.webp)

