Sheet-Pan Honey Garlic Shrimp Fajitas Delight

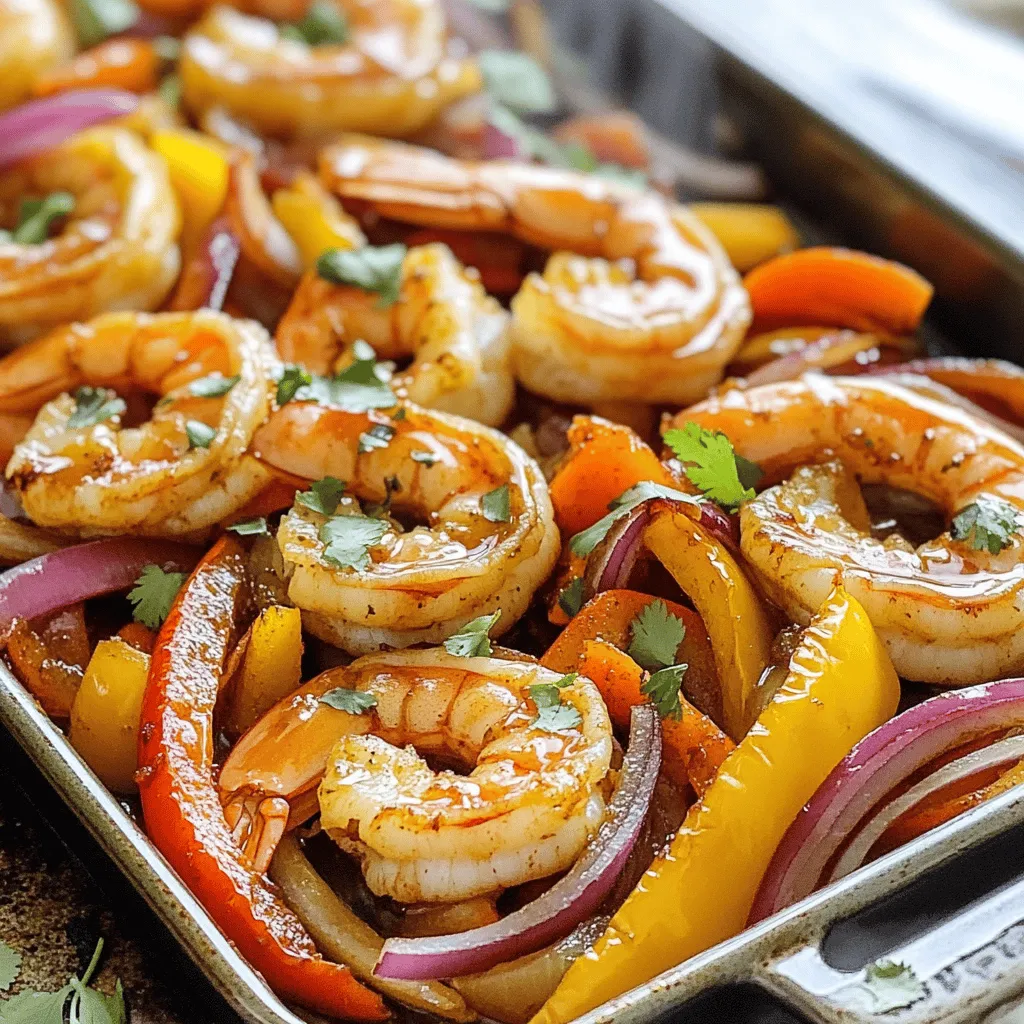
Get ready to delight your taste buds with my Sheet-Pan Honey Garlic Shrimp Fajitas! This easy, quick meal packs incredible flavor and is perfect for busy nights. You’ll grill large shrimp, colorful bell peppers, and red onion all on one pan. Toss in a sweet and zesty honey garlic sauce, and you’ll have a dish everyone loves. Let’s dive into the simple steps to create your new favorite recipe!
Why I Love This Recipe
- Quick and Easy: This recipe comes together in just 25 minutes, making it perfect for busy weeknights.
- Flavorful Combination: The honey garlic sauce combined with spices adds a delicious depth of flavor to the shrimp and veggies.
- One-Pan Wonder: Baking everything on a single sheet pan means less cleanup and more time to enjoy your meal.
- Customizable: You can easily swap in your favorite vegetables or adjust the spices to suit your taste.
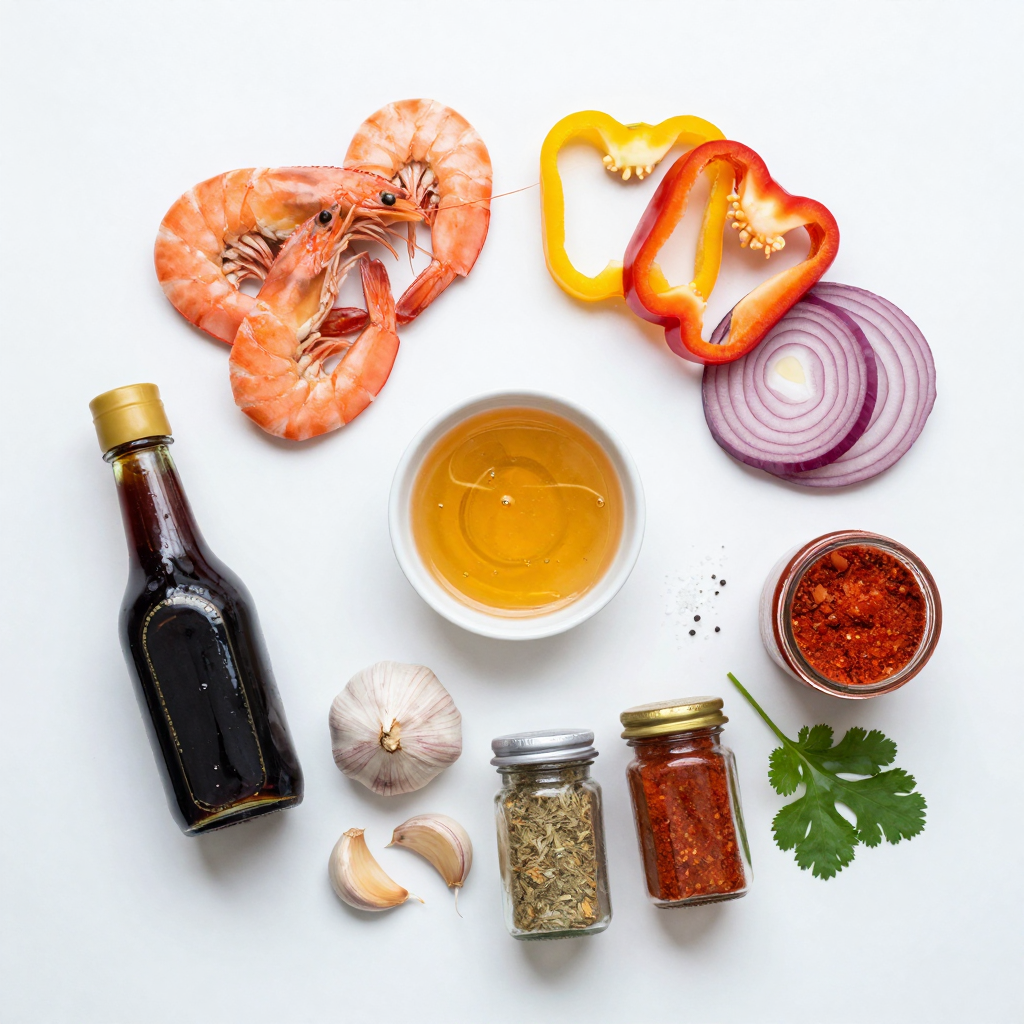
Ingredients
Main Ingredients
- 1 lb large shrimp, peeled and deveined
- 1 red bell pepper, sliced
- 1 yellow bell pepper, sliced
- 1 red onion, sliced
These main ingredients form the base of your sheet-pan honey garlic shrimp fajitas. The shrimp bring a sweet and tender bite, while the bell peppers and onion add crunch and color.
Honey Garlic Sauce Components
- 3 tablespoons honey
- 2 tablespoons soy sauce
- 3 cloves garlic, minced
This honey garlic sauce is the star of the dish. The honey adds a sweet touch, and the soy sauce gives it depth. Garlic brings in a warm, savory note, making each bite a flavor explosion.
Seasonings and Garnishes
- 2 tablespoons olive oil
- 1 tablespoon chili powder
- 1 teaspoon cumin
- 1 teaspoon paprika
- Fresh cilantro for garnish
- Tortillas for serving
The olive oil helps to cook the shrimp and veggies evenly. Chili powder, cumin, and paprika add a nice kick. Fresh cilantro gives a bright finish, and tortillas are perfect for wrapping up all the tasty goodness.

Step-by-Step Instructions
Preparing the Oven and Ingredients
- Preheat the oven to 400°F (200°C).
- Peel and devein one pound of large shrimp.
- Slice one red bell pepper and one yellow bell pepper.
- Slice one red onion.
First, I love to get my oven ready. Preheating it to 400°F makes sure the shrimp cooks fast. While the oven heats, I prepare the shrimp and veggies. I peel and devein the shrimp, which takes only a few minutes. Slicing the bell peppers and onion is simple. I aim for thin pieces to cook evenly.
Making the Honey Garlic Sauce
- Whisk together honey, soy sauce, garlic, olive oil, and spices.
For the honey garlic sauce, I grab a small bowl. I add three tablespoons of honey and two tablespoons of soy sauce. Then, I mince three cloves of garlic and toss them in. Next, I pour in two tablespoons of olive oil. I use one tablespoon of chili powder, one teaspoon of cumin, and one teaspoon of paprika. I sprinkle in some salt and pepper. I whisk everything until it blends well. This sauce adds great flavor to the shrimp and veggies.
Assembling the Sheet Pan
- Arrange shrimp and vegetables.
- Pour sauce over the mixture and coat evenly.
- Bake and monitor cooking time.
On a large sheet pan, I lay out the shrimp with the sliced peppers and onion. I spread them in a single layer. Then, I take the honey garlic sauce and pour it over the shrimp and veggies. I make sure every piece gets coated well. Now, it’s time to bake. I slide the pan into the oven and set a timer for 12-15 minutes. I check to see if the shrimp turns pink and the veggies get soft. Once they are done, I pull the pan out. This dish smells amazing and is ready to eat!
Pro Tips
- Marinate for More Flavor: Allow the shrimp to marinate in the honey garlic mixture for at least 30 minutes before baking to enhance the flavor.
- Customize Your Veggies: Feel free to add other vegetables like zucchini or mushrooms for added texture and flavor.
- Watch the Shrimp: Keep an eye on the shrimp while baking to avoid overcooking; they are done when they turn pink and opaque.
- Serve with Fresh Toppings: Consider adding avocado, lime wedges, or a dollop of sour cream for a fresh finish to your fajitas.
Tips & Tricks
Perfecting the Shrimp Fajitas
To achieve perfectly cooked shrimp, keep a close eye on the time. Bake them for 12 to 15 minutes. When they turn pink and opaque, they are done. Overcooking makes them tough.
If you find your vegetables soggy, try cutting them thicker. This helps them stay crisp. Also, don’t overcrowd the pan. Give everything space to roast nicely.
Serving Suggestions
For the best tortillas, choose soft flour tortillas. They wrap well and hold the filling. Corn tortillas add a nice flavor, too. Warm them in a skillet for a few seconds before serving.
Pair your fajitas with fresh salsa or guacamole. A side of rice or beans works well, too. For drinks, try a light beer or a citrusy margarita.
Cooking Equipment Recommendations
For even cooking, use a heavy-duty sheet pan. A non-stick option helps with easy cleanup. Ensure the pan is large enough for all the ingredients.
Gather simple utensils, like a whisk for the sauce and a spatula for mixing. A good knife makes slicing the veggies quick and easy. A large cutting board helps with prep.

Variations
Ingredient Substitutions
You can swap the shrimp for chicken or tofu. Chicken gives a hearty bite, while tofu adds a nice texture. Both work well with the honey garlic sauce. For veggies, try zucchini or corn. Zucchini adds a fresh crunch, and corn gives a sweet pop. Feel free to mix and match until you find your favorite combo.
Flavor Enhancements
Want more heat? Add jalapeños or a splash of hot sauce. They can kick up the spice level nicely. Fresh herbs like cilantro or parsley can brighten the dish. Just chop them and sprinkle them on top before serving. They add a burst of flavor that pairs well with the honey garlic sauce.
Dietary Adaptations
If you need gluten-free options, use tamari instead of soy sauce. It tastes just as great in the sauce. For a vegan version, swap the shrimp for chickpeas. They soak up the sauce well and add protein. These changes keep the dish tasty while meeting your dietary needs.
Storage Info
Refrigeration Guidelines
To store leftovers, let your shrimp fajitas cool down first. Place them in an airtight container. This keeps the flavors fresh and tasty. Use a container that seals well. I recommend glass or BPA-free plastic. These containers work best for keeping food safe.
Reheating Instructions
When you want to reheat shrimp fajitas, use the oven or a skillet. For the oven, set it to 350°F (175°C). Spread the fajitas on a baking sheet. Heat for about 10 minutes. Check that the shrimp are hot. If you use a skillet, warm it over medium heat. Stir gently to keep the shrimp from sticking. This method helps keep the shrimp juicy.
Freezing Options
To freeze shrimp fajitas, first let them cool completely. Place them in freezer-safe bags. Remove as much air as possible. This helps prevent freezer burn. You can freeze the honey garlic sauce separately. Just store it in a small container. This way, you can use it for another meal later.
FAQs
How long do shrimp fajitas last?
Shrimp fajitas last about three days in the fridge. To store them, let them cool first. Place them in an airtight container. This keeps them fresh and safe to eat later. If you want to keep them longer, consider freezing them. They can last up to two months in the freezer. Just make sure you use freezer-safe bags or containers.
Can I make the honey garlic sauce ahead of time?
Yes, you can make the honey garlic sauce ahead of time. This saves you time when cooking. Store the sauce in a sealed container in the fridge. It will stay fresh for about a week. You can also freeze it if you want to keep it for longer. Just thaw it before using.
What sides go well with shrimp fajitas?
Several sides pair well with shrimp fajitas. Here are some suggestions:
- Mexican rice
- Refried beans
- Guacamole
- Salsa
- Corn salad
These sides add flavor and texture to your meal. Enjoy them with your fajitas for a complete dining experience.
This blog post covered how to make delicious shrimp fajitas with a honey garlic sauce. We discussed key ingredients like shrimp, bell peppers, and red onion, plus the steps to prepare everything. Tips for perfect cooking, serving ideas, and variations made it easy to adapt the dish.
In closing, these shrimp fajitas are simple yet packed with flavor. You can tailor them to fit your taste or diet. Enjoy your cooking journey!

Sheet-Pan Honey Garlic Shrimp Fajitas
Ingredients
1 lb large shrimp, peeled and deveined
1 red bell pepper, sliced
1 yellow bell pepper, sliced
1 red onion, sliced
3 tablespoons honey
2 tablespoons soy sauce
3 cloves garlic, minced
2 tablespoons olive oil
1 tablespoon chili powder
1 teaspoon cumin
1 teaspoon paprika
Salt and pepper, to taste
Fresh cilantro, for garnish
Tortillas, for serving
Instructions
Preheat your oven to 400°F (200°C).
In a small bowl, whisk together honey, soy sauce, minced garlic, olive oil, chili powder, cumin, paprika, salt, and pepper until well combined.
On a large sheet pan, arrange the shrimp, sliced red and yellow bell peppers, and sliced red onion in a single layer.
Pour the honey garlic mixture over the shrimp and vegetables, ensuring everything is coated evenly.
Bake in the preheated oven for about 12-15 minutes, or until the shrimp are pink and cooked through, and the vegetables are tender and slightly charred.
Remove from the oven and let cool slightly before serving.
Warm the tortillas in a dry skillet or microwave.
Serve the shrimp and veggies in the tortillas and garnish with fresh cilantro.
Prep Time: 10 minutes | Total Time: 25 minutes | Servings: 4

Sheet-Pan Honey Garlic Shrimp Fajitas
Ingredients
- 1 lb large shrimp, peeled and deveined
- 1 unit red bell pepper, sliced
- 1 unit yellow bell pepper, sliced
- 1 unit red onion, sliced
- 3 tablespoons honey
- 2 tablespoons soy sauce
- 3 cloves garlic, minced
- 2 tablespoons olive oil
- 1 tablespoon chili powder
- 1 teaspoon cumin
- 1 teaspoon paprika
- to taste unit salt and pepper
- for garnish unit fresh cilantro
- for serving unit tortillas
Instructions
- Preheat your oven to 400°F (200°C).
- In a small bowl, whisk together honey, soy sauce, minced garlic, olive oil, chili powder, cumin, paprika, salt, and pepper until well combined.
- On a large sheet pan, arrange the shrimp, sliced red and yellow bell peppers, and sliced red onion in a single layer.
- Pour the honey garlic mixture over the shrimp and vegetables, ensuring everything is coated evenly.
- Bake in the preheated oven for about 12-15 minutes, or until the shrimp are pink and cooked through, and the vegetables are tender and slightly charred.
- Remove from the oven and let cool slightly before serving.
- Warm the tortillas in a dry skillet or microwave.
- Serve the shrimp and veggies in the tortillas and garnish with fresh cilantro.

![Here’s what you need for the Greek Yogurt Chicken Salad: - 2 cups cooked chicken breast, shredded - 1 cup plain Greek yogurt - 1/2 cup celery, diced - 1/2 cup red grapes, halved - 1/4 cup walnuts, toasted and chopped - 1/4 cup red onion, finely chopped - 2 tablespoons fresh dill, chopped - 1 tablespoon lemon juice - Salt and pepper to taste Each ingredient adds flavor and texture to this tasty salad. The chicken gives protein, while Greek yogurt makes it creamy. The celery brings crunch, and the grapes add a sweet touch. Walnuts give a nice bite, and dill adds freshness. I always prefer fresh ingredients for my salads. Fresh celery makes the dish crisp. Fresh dill offers a bright flavor that dried can't match. Use fresh grapes for sweetness. Dried ingredients can work in some recipes, but not here. They lack the same flavor and texture. You can swap some ingredients to fit your taste. Try using plain yogurt if you don't have Greek yogurt. For a nut-free version, leave out the walnuts. You can also use chicken thighs for a richer taste. Add other fruits like apples or berries to mix it up. This recipe is flexible, so feel free to get creative! Check the Full Recipe for more ideas. Start by gathering your ingredients. You need cooked chicken, Greek yogurt, and some fresh veggies. In a large bowl, add 2 cups of shredded chicken and 1 cup of plain Greek yogurt. Mix them well until the chicken gets fully coated. Next, toss in 1/2 cup of diced celery, 1/2 cup of halved red grapes, and 1/4 cup of toasted walnuts. Add 1/4 cup of finely chopped red onion and 2 tablespoons of fresh dill. Lastly, drizzle in 1 tablespoon of lemon juice and sprinkle with salt and pepper. Gently fold the mix together. Make sure everything is blended well. Shredding chicken can be simple. First, use cooked chicken breasts for the best taste. You can use two forks to pull apart the chicken. Alternatively, you can shred it with your hands for a quicker method. If you have a stand mixer, it can shred chicken in seconds. Just place the chicken in the bowl and mix on low speed. This will save time and give you perfect shreds. Chilling your chicken salad is key. After mixing, cover the bowl with plastic wrap or a lid. Place it in the refrigerator for at least 30 minutes. This helps the flavors blend well. The chill makes every bite refreshing. Once chilled, serve your salad on leafy greens. You can also wrap it in whole grain wraps. Enjoy your tasty Greek yogurt chicken salad! For the full recipe, check out the details above. To season your Greek yogurt chicken salad, start with salt and pepper. These basics bring out the flavors. You can add a squeeze of lemon juice for a fresh taste. Fresh dill adds a nice herby note. Mix and taste as you go. Adjust the seasoning to suit your preference. Remember, seasoning makes all the difference. For the best flavor, use fresh ingredients. Fresh celery and grapes add crunch and sweetness. Toast the walnuts before adding them. This step brings out their rich flavor. Mixing the salad and letting it chill helps the flavors blend. A cold salad is refreshing and tasty. Consider adding a splash of vinegar for extra zing. One common mistake is over-seasoning. It’s easy to add too much salt or spice. Start with a little, and taste it first. Another mistake is not chilling the salad long enough. The flavors need time to meld. Lastly, avoid using dry chicken. Always use moist, cooked chicken for a better texture. For the full recipe, check out the Greek Yogurt Chicken Salad with a Twist. {{image_2}} Greek yogurt is a great ingredient for this salad. It is thick and creamy. It has less sugar and more protein than regular yogurt. This means it helps you feel full longer. Greek yogurt also has probiotics. These good bacteria can aid digestion. Using Greek yogurt instead of mayo makes the dish healthier. It cuts down on fat while adding flavor. Plus, it adds calcium, which is good for bones. Each serving of Greek yogurt chicken salad gives you balanced nutrition. Here’s what you get: - Calories: About 300 - Protein: Around 30 grams - Fat: About 15 grams - Carbohydrates: Roughly 20 grams - Fiber: 2 grams The chicken provides lean protein. The yogurt adds healthy fats. The fruits and veggies offer fiber and vitamins. This makes it a nutritious choice for lunch or dinner. Traditional chicken salad often uses mayo. This adds more fat and calories. In contrast, Greek yogurt chicken salad is lighter. It has less saturated fat and more protein. This means it is better for your heart. You can enjoy it without feeling guilty. Greek yogurt chicken salad also has a fresh taste. It’s a fun twist on a classic dish. You get all the flavor without the heaviness. Try this recipe [Full Recipe] for a refreshing meal! You can change up your Greek yogurt chicken salad by adding more veggies. Try these options for a fresh twist: - Cucumbers: Diced cucumbers add crunch and hydration. - Bell Peppers: Use red, yellow, or green for color and sweetness. - Carrots: Grated carrots add a nice texture and a hint of sweetness. - Spinach: Chopped spinach can boost the nutrition and flavor. Mixing in different vegetables will keep your salad exciting and tasty. You can swap the chicken for other proteins too. Here are some ideas: - Turkey: Use shredded turkey for a leaner option. - Chickpeas: For a vegetarian choice, add canned chickpeas. They’re full of protein. - Tuna: Try canned tuna for a seafood twist. It pairs well with Greek yogurt. - Hard-Boiled Eggs: Chopped hard-boiled eggs can add creaminess and protein. These changes can make your dish unique and fun. Experimenting with flavors can elevate your Greek yogurt chicken salad. Here are some tasty combinations: - Curry Powder: Add a teaspoon for a warm and spicy kick. - Honey Mustard: Mix in a tablespoon for sweetness and tang. - Smoked Paprika: A pinch can add depth and a smoky flavor. - Fresh Herbs: Experiment with parsley, basil, or cilantro for freshness. These combinations can make your salad more exciting and delicious. For the full recipe, check out the Greek Yogurt Chicken Salad with a Twist. Yes, you can make Greek yogurt chicken salad ahead of time. This salad tastes even better after chilling. The flavors mix well when it sits. I suggest making it a day before you plan to serve it. Just keep it in the fridge until you're ready. You can serve Greek yogurt chicken salad in many ways. Here are some great ideas: - On a bed of leafy greens - In whole grain wraps - With whole-grain crackers - Alongside fresh veggies Each option adds a nice touch to your meal. Store any leftover Greek yogurt chicken salad in an airtight container. It can last up to three days in the fridge. If you see any signs of spoilage, like an off smell or change in texture, toss it out. Always check before eating to stay safe. For the best taste, enjoy it fresh! For the full recipe, check above. In this post, we explored the best ingredients for Greek yogurt chicken salad, differentiating between fresh and dried options. I shared step-by-step instructions for preparation. You learned tips for shredding chicken and chilling before serving. We discussed ways to season and enhance flavors, plus common mistakes to avoid. This salad is a healthy choice, thanks to Greek yogurt. With numerous variations, you can customize it to your taste. Now, you can create a delicious and nutritious meal that everyone will love. Enjoy your cooking!](https://dailydishlab.com/wp-content/uploads/2025/06/31d756a5-2ed8-48b3-ac28-3df00374ee45-768x768.webp)


