Sheet Pan Italian Chicken Caprese Flavorful Delight

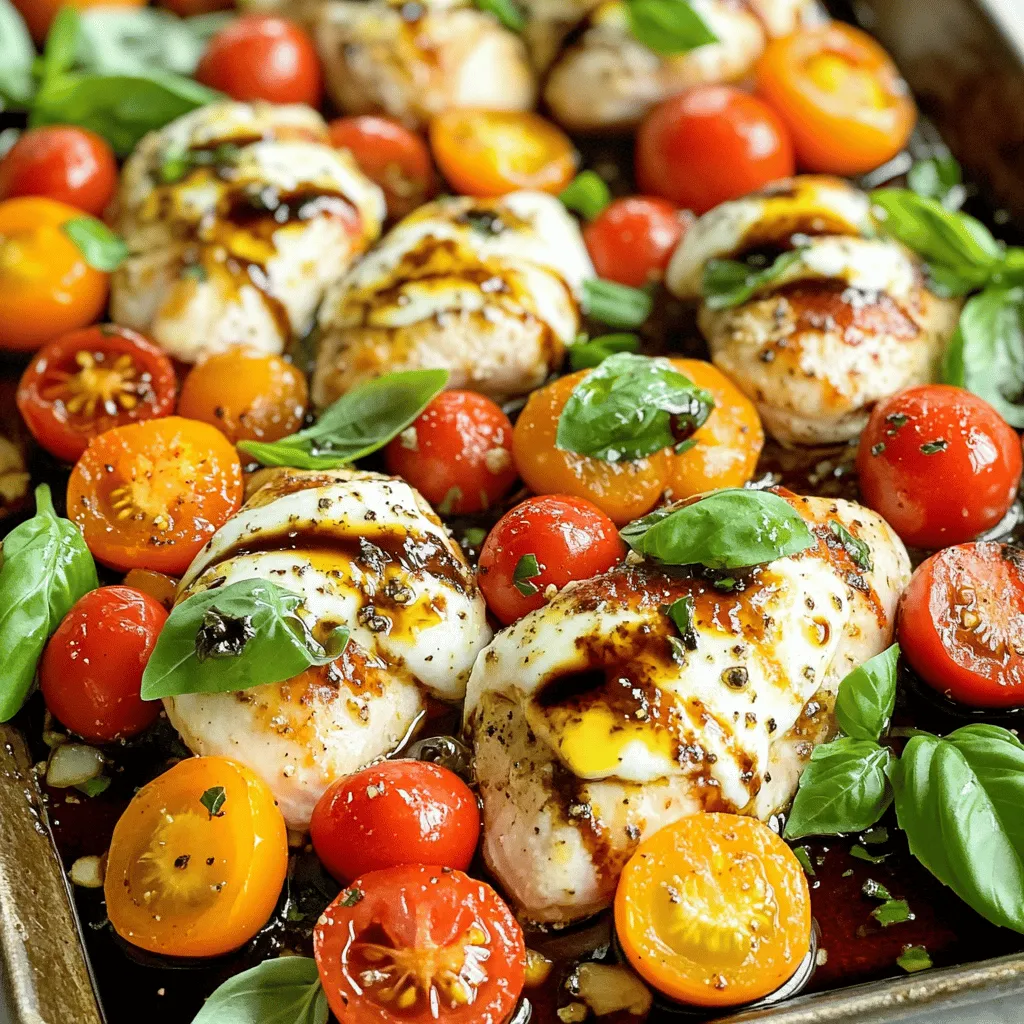
Are you ready to impress your family with a new dinner recipe? My Sheet Pan Italian Chicken Caprese packs fresh flavors and is easy to make. With juicy chicken, ripe tomatoes, and creamy cheese all roasted together, it’s a delight for your taste buds. Plus, clean-up is a breeze! Join me as we explore simple steps to create this meal that everyone will love. Let’s dive right in!
Why I Love This Recipe
- Easy Preparation: This dish comes together quickly with minimal prep time, making it perfect for busy weeknights.
- One-Pan Wonder: Cooking everything on a single sheet pan means less cleanup and more time to enjoy your meal.
- Fresh Ingredients: The combination of juicy cherry tomatoes, creamy mozzarella, and fragrant basil elevates the flavor profile.
- Customizable: You can easily modify the recipe by adding your favorite vegetables or adjusting the seasonings to suit your taste.
Ingredients
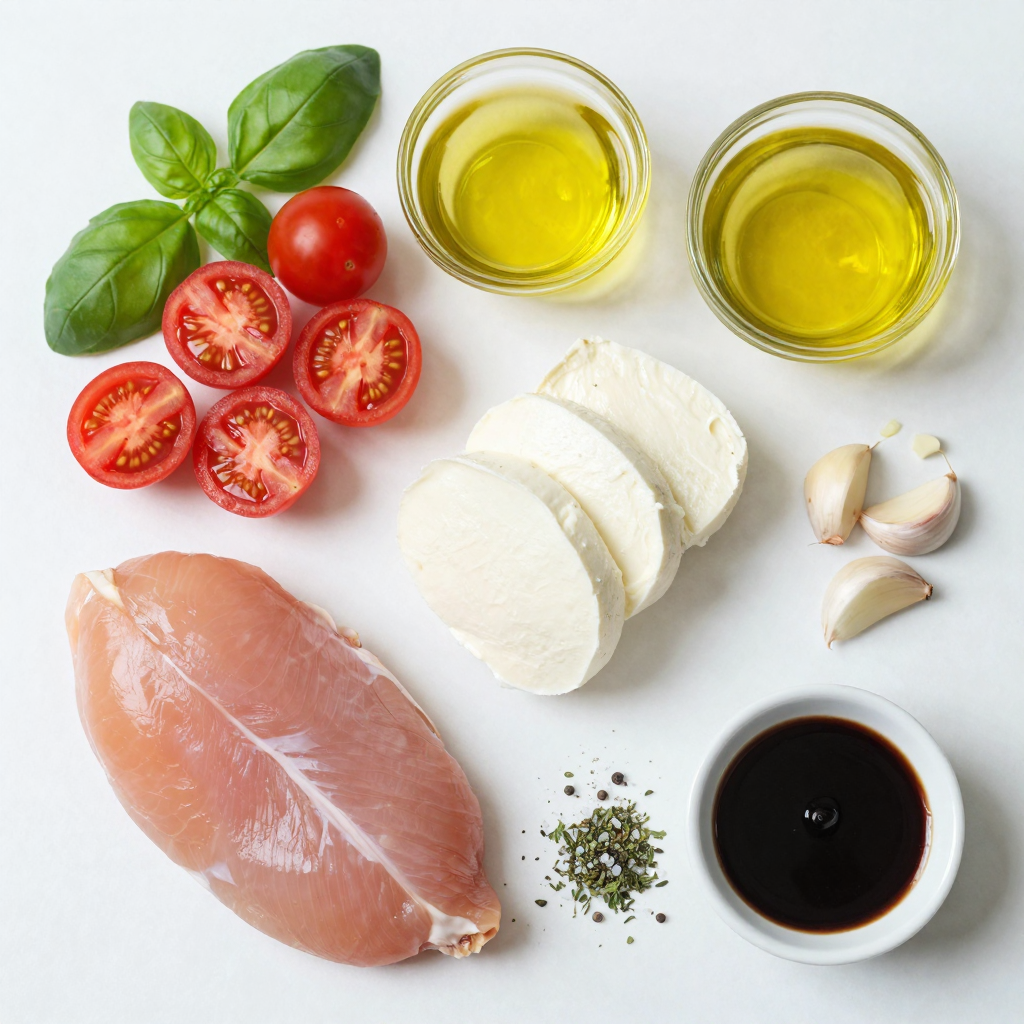
Main ingredients for Sheet Pan Italian Chicken Caprese
For this tasty dish, you will need:
- 4 boneless, skinless chicken breasts
- 2 cups cherry tomatoes, halved
- 8 ounces fresh mozzarella cheese, sliced
- 1 cup fresh basil leaves
These ingredients bring together fresh flavors and great textures. The chicken is juicy, while the tomatoes add a burst of sweetness. The mozzarella melts beautifully, making every bite creamy.
Seasoning components
To make the chicken really pop, gather these seasonings:
- 3 tablespoons olive oil
- 2 cloves garlic, minced
- 1 teaspoon dried oregano
- Salt and pepper to taste
The olive oil helps the chicken stay moist. Garlic adds depth, while oregano gives an Italian twist. Salt and pepper enhance all the flavors.
Optional garnishes and serving suggestions
Once your dish is ready, consider these garnishes:
- Balsamic glaze for drizzling
- Extra basil leaves for decoration
Balsamic glaze adds a sweet tang that pairs well with the chicken and tomatoes. Serving on a large platter with basil looks beautiful and inviting.

Step-by-Step Instructions
Preparation of the chicken
Start by preheating your oven to 400°F (200°C). This helps the chicken cook evenly. Next, line a large baking sheet with parchment paper. This step makes cleanup easy. Take the four boneless, skinless chicken breasts and place them on the sheet. In a small bowl, mix three tablespoons of olive oil, two minced garlic cloves, one teaspoon of dried oregano, and a pinch of salt and pepper. Brush this mixture on both sides of each chicken breast. This adds flavor and moisture, making the chicken more tasty.
Assembling and seasoning the dish
Now, it’s time to add more color and flavor. Scatter two cups of halved cherry tomatoes around the chicken. These juicy tomatoes will roast nicely. Drizzle a little more olive oil over the tomatoes and season them with salt and pepper. This step enhances their sweetness.
Baking process and timing
Place the baking sheet in the preheated oven. Bake the chicken for about 25 minutes. This is the time it takes for the chicken to reach 165°F (74°C) inside. After 25 minutes, remove the baking sheet from the oven. Place a slice of fresh mozzarella cheese on top of each chicken breast. Return the baking sheet to the oven for an extra five minutes. This allows the cheese to melt and get bubbly. Once done, take it out and add fresh basil leaves on top. Drizzle balsamic glaze over the chicken and tomatoes. Let it rest for a few minutes before serving. Enjoy this flavorful dish with your family or friends!
Pro Tips
- Marinate for More Flavor: For even juicier chicken, marinate the chicken breasts in the olive oil mixture for at least 30 minutes prior to cooking.
- Use Fresh Ingredients: Fresh basil and ripe cherry tomatoes will enhance the flavor of this dish significantly, so opt for the freshest ingredients you can find.
- Customize Your Cheese: Feel free to experiment with different types of cheese, such as provolone or goat cheese, for a unique twist on the classic Caprese flavor.
- Serve with a Side: This dish pairs wonderfully with a side of garlic bread or a fresh green salad to complete your meal.
Tips & Tricks
How to ensure perfectly baked chicken
To get juicy chicken, start with the right temperature. Preheat your oven to 400°F (200°C). Use a meat thermometer to check the internal temperature. It should reach 165°F (74°C). This ensures the chicken is safe to eat. You can also marinate the chicken for extra flavor. Let it sit in the olive oil mixture for at least 30 minutes. This helps the chicken to soak up the tasty spices.
Best practices for cheese melting
For the best cheese melt, use fresh mozzarella. Slice it thick, about half an inch. This allows it to melt nicely without burning. Add the cheese halfway through cooking. This gives it time to melt but not overcook. If you want it extra bubbly, broil it for a minute at the end. Keep a close eye so it doesn’t burn.
Flavor enhancement tips with balsamic glaze
Balsamic glaze adds a rich sweetness. Drizzle it over the chicken and tomatoes just before serving. It brings a pop of flavor that balances the dish. For a stronger taste, reduce balsamic vinegar in a small pot. Cook it on low heat until thickened. This intensifies the flavor even more. You can also add a sprinkle of fresh basil for a fresh taste.

Variations
Alternative proteins to use
If you want to change things up, try using other proteins. You can use turkey breasts instead of chicken. They have a nice flavor and stay juicy. You can also use pork tenderloin. Just cut it into thick slices. Fish like salmon works well too. It cooks fast and tastes great with the fresh toppings. The key is to adjust the cooking time based on the protein you choose.
Vegetarian version ideas
For a meatless option, focus on hearty veggies. You can use portobello mushrooms as the base. They are meaty and soak up flavors well. Eggplant is another great choice. Slice it thick and layer it like the chicken. Add zucchini or bell peppers for color and taste. Keep the same seasonings and cheese for that Italian flair. This version is just as delightful and full of flavor.
Different cheese options
While fresh mozzarella is classic, you can switch it up. Try burrata for a rich and creamy twist. It melts wonderfully and adds a luxurious feel. Feta cheese is another option. It offers a tangy taste that pairs well with the tomatoes. If you love sharp flavors, go for aged provolone or fontina. Each cheese gives a unique touch to your dish while keeping it delicious.
Storage Info
Tips for storing leftovers
After you enjoy your Sheet Pan Italian Chicken Caprese, let it cool. Place leftovers in an airtight container. Store it in the fridge. It will stay fresh for up to three days. If you want to keep it longer, consider freezing it.
Reheating instructions
When you’re ready to eat leftovers, preheat your oven to 350°F (175°C). Place the chicken and tomatoes on a baking sheet. Cover it with foil to keep moisture in. Heat for about 15 minutes or until hot. You can also use a microwave. Just heat in short bursts, checking often.
Freezing guidelines
To freeze, wrap each chicken breast tightly in plastic wrap. Then place them in a freezer bag. Remove all air to avoid freezer burn. You can freeze the dish for up to three months. When ready to eat, thaw it in the fridge overnight before reheating.
FAQs
What can I serve with Sheet Pan Italian Chicken Caprese?
You can serve this dish with many sides. Pasta is a great choice. A simple salad works well too. Garlic bread adds a nice touch. You might enjoy roasted veggies alongside it. These options bring out the flavors of the chicken.
Can I make this dish ahead of time?
Yes, you can prepare it ahead of time. Marinate the chicken and cut the veggies. Store them in the fridge until you are ready to cook. This can save you time during a busy weeknight.
How long does it take to cook chicken in the oven?
Cooking chicken in the oven takes about 30 minutes. For this recipe, you bake it for 25 minutes first. After that, you add cheese and bake for 5 more minutes. Ensure your chicken reaches 165°F inside.
Is this recipe gluten-free?
Yes, this recipe is gluten-free. The ingredients do not contain any gluten. Just make sure your balsamic glaze is also gluten-free. Enjoy this dish without worry!
You now have all you need to make Sheet Pan Italian Chicken Caprese. We covered the main ingredients, easy preparation steps, and tips for perfect results. Remember to explore variations for different flavors and store leftovers properly. This dish is flexible and fun, making it great for any kitchen. Keep these points in mind, and you’ll create a meal that everyone loves. Enjoy your cooking adventure and transform simple ingredients into a delicious feast.

Sheet Pan Italian Chicken Caprese
Ingredients
4 boneless, skinless chicken breasts
2 cups cherry tomatoes, halved
8 ounces fresh mozzarella cheese, sliced
1 cup fresh basil leaves
3 tablespoons olive oil
2 cloves garlic, minced
1 teaspoon dried oregano
Salt and pepper to taste
Balsamic glaze for drizzling
Instructions
Preheat your oven to 400°F (200°C) and line a large baking sheet with parchment paper for easy cleanup.
In a small bowl, mix together the olive oil, minced garlic, dried oregano, salt, and pepper. Set aside.
Place the chicken breasts on the prepared baking sheet. Brush both sides of the chicken with the olive oil mixture.
Scatter the halved cherry tomatoes around the chicken on the baking sheet. Drizzle a little more olive oil over the tomatoes and season with salt and pepper.
Bake in the preheated oven for about 25 minutes, or until the chicken reaches an internal temperature of 165°F (74°C).
After 25 minutes, remove the baking sheet from the oven. Place a slice of fresh mozzarella cheese on top of each chicken breast.
Return the baking sheet to the oven and bake for an additional 5 minutes, or until the cheese is melted and bubbly.
Remove from the oven and top with fresh basil leaves. Drizzle balsamic glaze over the chicken and tomatoes for an extra flavor boost.
Let it rest for a few minutes before serving.
Prep Time: 10 minutes | Total Time: 35 minutes | Servings: 4
– Presentation Tips: Serve the chicken on a large platter garnished with extra basil leaves and a drizzle of balsamic glaze. Add the roasted tomatoes around the chicken for a colorful presentation.

Sheet Pan Italian Chicken Caprese
Ingredients
- 4 pieces boneless, skinless chicken breasts
- 2 cups cherry tomatoes, halved
- 8 ounces fresh mozzarella cheese, sliced
- 1 cup fresh basil leaves
- 3 tablespoons olive oil
- 2 cloves garlic, minced
- 1 teaspoon dried oregano
- to taste salt and pepper
- for drizzling balsamic glaze
Instructions
- Preheat your oven to 400°F (200°C) and line a large baking sheet with parchment paper for easy cleanup.
- In a small bowl, mix together the olive oil, minced garlic, dried oregano, salt, and pepper. Set aside.
- Place the chicken breasts on the prepared baking sheet. Brush both sides of the chicken with the olive oil mixture.
- Scatter the halved cherry tomatoes around the chicken on the baking sheet. Drizzle a little more olive oil over the tomatoes and season with salt and pepper.
- Bake in the preheated oven for about 25 minutes, or until the chicken reaches an internal temperature of 165°F (74°C).
- After 25 minutes, remove the baking sheet from the oven. Place a slice of fresh mozzarella cheese on top of each chicken breast.
- Return the baking sheet to the oven and bake for an additional 5 minutes, or until the cheese is melted and bubbly.
- Remove from the oven and top with fresh basil leaves. Drizzle balsamic glaze over the chicken and tomatoes for an extra flavor boost.
- Let it rest for a few minutes before serving.

![To make this dish, you need fresh seafood and pasta. Here are the main ingredients: - 8 oz (225g) linguine or spaghetti - 1 lb (450g) shrimp, peeled and deveined - 1 lb (450g) scallops, patted dry These ingredients give you the perfect base for a seafood pasta that tastes like a dream. Seasoning can make or break your dish. Here are the key seasonings and additions: - 3 tablespoons olive oil, divided - 3 cloves garlic, minced - 1 cup cherry tomatoes, halved - 1 teaspoon red pepper flakes (adjust to taste) - 1 lemon, zested and juiced - 1 cup fresh spinach, roughly chopped - Salt and pepper to taste - Fresh parsley, chopped, for garnish These flavors blend beautifully, making your pasta lively and bright. You can use different types of pasta for this dish. I recommend: - Linguine - Spaghetti Both options work well. They hold the sauce nicely and pair well with the seafood. For a twist, try fettuccine or penne. Each adds its own charm to the dish. For the complete recipe, check out the [Full Recipe]. Start by filling a large pot with water. Add a pinch of salt to the water. Bring the water to a rolling boil. Once boiling, add 8 ounces of linguine or spaghetti. Cook it according to the package instructions until it's al dente. Before you drain it, save 1 cup of the pasta water. Drain the pasta and set it aside, keeping it warm. Grab a large skillet and place it over medium heat. Pour in 2 tablespoons of olive oil. Wait until the oil shimmers, then add 1 pound of shrimp, peeled and deveined. Cook the shrimp for about 2-3 minutes on each side. They should turn pink and opaque. Once done, use a slotted spoon to transfer the shrimp to a plate and set them aside. In the same skillet, add 1 tablespoon of olive oil. Gently place 1 pound of dry scallops in a single layer. Avoid crowding the pan. Sear the scallops for about 2-3 minutes without moving them. This helps form a golden crust. Flip the scallops over and sear the other side for another 2 minutes. Once cooked, remove them from the skillet and set them aside with the shrimp. Now it’s time to make the sauce. In the leftover oil, add 3 cloves of minced garlic and 1 teaspoon of red pepper flakes. Sauté for about 30 seconds until you smell the garlic. Be careful not to burn it! Then, add 1 cup of halved cherry tomatoes. Cook for 3-4 minutes until they soften and release their juices. Turn down the heat and stir in the juice and zest from 1 lemon. Add the cooked pasta directly to the skillet. Toss everything gently to combine. Use the reserved pasta water a little at a time. This creates a light, silky sauce. Toss in 1 cup of roughly chopped fresh spinach. Cook for 1 more minute until the spinach wilts. Carefully fold in the sautéed shrimp and scallops. Make sure they are evenly mixed throughout the pasta. Season with salt and pepper to taste. If you want more heat, add extra red pepper flakes. Now, plate the pasta in shallow bowls. Make sure each bowl has equal portions of seafood. Garnish with freshly chopped parsley for a colorful finish. Cooking shrimp and scallops just right is key. Shrimp cooks fast. It takes about 2-3 minutes per side. When they turn pink, they are done. Scallops need a little more time. Sear them for about 2-3 minutes on each side. They should have a nice golden crust. Keep an eye on them. Overcooked seafood can become tough. To boost the taste, try adding lemon zest and juice. This gives a fresh flavor. You can also toss in some fresh herbs like basil or dill. A pinch of red pepper flakes adds a nice kick. If you love cheese, sprinkle some grated Parmesan on top before serving. It melts beautifully over the warm pasta. Make your dish look as good as it tastes. Serve the pasta in shallow bowls. This allows the seafood to shine. Top with fresh parsley for a pop of color. You can also add a lemon wedge on the side for a bright touch. A drizzle of olive oil right before serving makes it look fancy. With these tips, your shrimp and scallop pasta will impress everyone at the table. For the full recipe, check above. {{image_4}} You can boost the nutrition of your shrimp and scallop pasta by adding vegetables. Fresh vegetables add color and flavor. Try these options: - Zucchini: Cut it into thin ribbons or small cubes. Sauté it for a few minutes until tender. - Bell Peppers: Slice them into strips and add them with the garlic for a sweet crunch. - Asparagus: Chop into pieces and add it in the last few minutes of cooking. - Broccoli: Steam it briefly before tossing it into the pasta for a healthy addition. Adding vegetables not only makes your meal more balanced, but it also adds great texture and flavor! While shrimp and scallops are delicious, you can mix up the proteins in this dish. Here are some tasty alternatives: - Chicken: Use bite-sized pieces of cooked chicken for a heartier meal. - Mussels: Add these tasty shellfish for a unique twist and a rich flavor. - Crab: Lump crab meat offers a sweet taste that pairs well with the pasta. Feel free to experiment with different proteins. Each option brings its own flavor and charm to the dish. Changing the sauce can completely alter the dish. Here are some sauce ideas to consider: - Creamy Alfredo: Replace the olive oil with heavy cream for a rich, creamy texture. - Pesto: Toss in fresh basil pesto before serving for a vibrant and herby flavor. - Tomato Sauce: Use a light marinara sauce for a classic Italian touch. Each sauce option adds a new layer of taste to your pasta. Explore these variations to find your favorite! For the complete recipe, check out the Full Recipe. To keep your shrimp and scallop pasta fresh, first let it cool. Place the pasta in an airtight container. Make sure to separate the seafood if possible. It helps keep everything fresh. Store it in the fridge for up to three days. This way, you can enjoy it later without losing flavor. When you are ready to eat, reheat the pasta gently. Use a skillet over low heat. Add a splash of water or olive oil to keep it moist. Stir frequently to heat evenly. This method helps keep the shrimp and scallops tender. Avoid using a microwave, as it can make them rubbery. You can freeze shrimp and scallop pasta if you want to save it longer. Use a freezer-safe container or bag. Make sure to remove as much air as possible. It will keep for up to two months. When you are ready to eat, thaw it in the fridge overnight. Reheat it slowly to keep the flavors and textures intact. For the full recipe, check the details above. I recommend using linguine or spaghetti for this dish. Both types hold the sauce well. Their long strands capture all the flavors from the shrimp and scallops. You want a pasta that balances with the seafood. Yes, frozen shrimp and scallops work great here. Just thaw them beforehand. This makes sure they cook evenly. The flavor stays fresh and delicious, even with frozen seafood. To make the dish less spicy, reduce or skip the red pepper flakes. You could also add a bit more lemon juice for a fresh taste. This will balance the flavor without adding heat. I suggest a light salad or garlic bread. A fresh green salad adds a nice crunch. Garlic bread complements the dish and soaks up the sauce well. Both options enhance your dining experience without overpowering it. You can find the full recipe for Seaside Delight Shrimp and Scallop Pasta in the earlier sections of this article. It provides all the details you need to create this tasty meal. In this blog post, we explored how to make delicious shrimp and scallop pasta. We reviewed main ingredients, seasonings, and pasta types. I shared step-by-step instructions, cooking times, and tips for flavor and presentation. We also discussed variations like adding vegetables and different sauces. Lastly, I provided storage methods and answered common FAQs. Cooking this dish can be easy and fun. You can impress your family and friends with your new skills. Enjoy creating and tasting your pasta dish!](https://dailydishlab.com/wp-content/uploads/2025/06/c6436c47-e976-4ac6-abd7-ac1aef5e871c-768x768.webp)
![To make the best honey soy sauce chicken marinade, you'll need some simple ingredients. Each one adds its own special touch. Here’s what you’ll need: - 4 bone-in, skin-on chicken thighs - 1/4 cup low sodium soy sauce - 1/4 cup honey - 2 tablespoons sesame oil - 2 cloves garlic, finely minced - 1 tablespoon fresh ginger, grated - 1 tablespoon rice vinegar - 1/2 teaspoon black pepper - 1/2 teaspoon red pepper flakes (optional for heat) - 2 green onions, finely chopped - A sprinkle of sesame seeds This mix of flavors comes together to create a sweet and savory marinade. The honey gives a nice glaze, while the soy sauce adds depth. Garlic and ginger bring in warmth. You can adjust the red pepper flakes based on how spicy you like it. I enjoy this recipe for its simplicity and taste. You can find the full recipe in the Honey Soy Glaze Chicken Delight section. To start, gather your ingredients. In a medium bowl, combine the low sodium soy sauce, honey, sesame oil, minced garlic, grated ginger, rice vinegar, black pepper, and red pepper flakes. Use a whisk to mix everything well. This step is key as it brings out all the flavors. You want a smooth blend that coats the chicken nicely. Next, take your chicken thighs. Place them in a large Ziploc bag or a shallow dish. Pour the marinade over the chicken, making sure it covers each piece. Seal the bag tightly or cover the dish with plastic wrap. Let the chicken marinate in the fridge for at least 2 hours. For the best flavor, let it sit overnight. This allows the chicken to soak up all those tasty flavors. Now it's time to bake. Preheat your oven to 375°F (190°C). While it heats up, prepare your baking sheet by lining it with parchment paper or aluminum foil. This makes for easy clean-up later. After marinating, take the chicken out of the bag or dish. Place the thighs skin-side up on the baking sheet. Bake the chicken for 35-40 minutes. Every 15 minutes, baste it with the reserved marinade. This keeps the chicken juicy and adds even more flavor. You know it’s done when the internal temperature hits 165°F (74°C). Once ready, let the chicken rest for 5 minutes before serving. This keeps it tender and full of flavor. For a final touch, sprinkle chopped green onions and sesame seeds on top. This adds a nice crunch and makes your dish look great. If you want more details, check out the Full Recipe. Marinating is key to great flavor. I recommend marinating your chicken for at least two hours. But if you can wait, do it overnight. This time lets the flavors soak in well. You can adjust the taste too. If you like it sweeter, add more honey. For saltiness, use a bit more soy sauce. Just remember, balance is the goal. You want a marinade that excites your taste buds without being overpowering. Baking your chicken at 375°F (190°C) works best. This temperature ensures even cooking. Bake for 35 to 40 minutes. Use a meat thermometer to check for doneness. Chicken should reach 165°F (74°C) inside. To keep it juicy, baste the chicken with the marinade every 15 minutes. This step adds flavor and keeps the meat moist. After baking, let it rest for about five minutes. This helps the juices redistribute, giving you a tender bite. Garnishing makes a big difference. I love using chopped green onions and sesame seeds for a nice touch. They add color and crunch. When it comes to sides, think rice or steamed vegetables. They complement the honey soy sauce chicken well. You could also serve it with a light salad for some freshness. For more ideas, check out the [Full Recipe]. {{image_4}} You can change the protein in the recipe. Try using pork, beef, or tofu. Each option brings its own taste. Pork absorbs the sauce well, while tofu soaks up flavors beautifully. You can also switch the vinegar. Rice vinegar is mild, but apple cider vinegar adds a fruity touch. If you want a strong flavor, use balsamic vinegar. Each vinegar creates a different taste profile. To amp up the flavor, think about adding spices or herbs. Garlic and ginger are great, but you can try adding five-spice powder for a warm kick. Fresh herbs like cilantro or basil can freshen the dish. You can also mix in fruit juices. Pineapple juice gives sweetness and a tropical twist. Orange juice is another sweet option that works well. This adds a nice layer to the marinade. Grilling the chicken gives it a smoky taste. It creates a char that is hard to beat. Just make sure to monitor the heat to avoid burning. Slow-cooking is another excellent method. It makes the chicken very tender and juicy. The longer it cooks, the more the flavors blend. You can set it in the morning and enjoy it by dinner. For the full recipe, check out the Honey Soy Glaze Chicken Delight. You can keep leftover marinade in the fridge for up to five days. Store it in an airtight container. Make sure to label the container with the date. If you want to keep it longer, freeze it! Use a freezer-safe bag or container. Just remember to leave some room for expansion as it freezes. Frozen marinade can last for about three months. Once your chicken is cooked, let it cool down. After cooling, place it in a sealed container. Store it in the fridge for up to four days. For longer storage, you can freeze the chicken. Wrap it tightly in plastic wrap or foil, then place it in a freezer bag. Cooked chicken can last up to three months in the freezer. To reheat, you can use the microwave or oven. For the microwave, place the chicken on a plate and cover it with a damp paper towel. Heat it in short bursts, checking often. If using the oven, preheat to 350°F (175°C) and bake for about 15-20 minutes. The marinade can last in the fridge for five days. If frozen, it is good for three months. Cooked chicken can stay fresh in the fridge for four days. If you freeze it, it can last up to three months. Always check for any signs of spoilage before using. To add heat, try adding red pepper flakes. Start with a half teaspoon. If you want more spice, use a full teaspoon. You can also add fresh chopped chili peppers. Sriracha sauce is another great option. Mix any of these into your marinade for a nice kick. Yes, you can use boneless chicken. Boneless thighs or breasts work well. Just remember, they will cook faster. Check for doneness at about 25-30 minutes. Use a meat thermometer to ensure the chicken reaches 165°F (74°C) for safety. The flavor will still be great with boneless cuts. This dish pairs well with steamed rice or quinoa. You can also serve it with stir-fried vegetables. A fresh salad or roasted sweet potatoes make nice sides too. For a fun twist, try serving it with Asian-style slaw. Each option adds a different texture and flavor. Absolutely! If you want more, just double all the ingredients. Use the same marinating time. Cooking time may vary a bit. If using more chicken, check it at the same time. You may need an extra 5-10 minutes to ensure it’s cooked through. The prep time is about 15 minutes. You will need at least 2 hours for marinating. Cooking the chicken takes about 40 minutes. So, in total, you are looking at around 2 hours and 55 minutes. For best flavor, marinate overnight if you can. Check out the Full Recipe for all the details! You now have a complete guide for making honey soy sauce chicken. We covered the ingredients to create a tasty marinade, along with each step to bake the chicken perfectly. Tips for adjusting flavors, serving ideas, and variations make this dish even better. Remember, marinating is key for flavor. Enjoy experimenting with new ingredients and cooking methods. This recipe is simple, fun, and delicious. You’ll impress everyone at your next meal. Let your creativity shine as you cook!](https://dailydishlab.com/wp-content/uploads/2025/06/bd272301-b7e3-46d4-98e1-9d012cb49af4-768x768.webp)
![- 2 cans (15 oz each) of white beans (cannellini or great northern), drained and rinsed - 1 medium onion, chopped - 4 cloves garlic, minced - 4 cups vegetable broth - 1 cup coconut milk (or heavy cream for a richer flavor) - 2 tablespoons olive oil - 1 teaspoon dried thyme - 1 teaspoon smoked paprika - Salt and pepper to taste - Fresh parsley, chopped (for garnish) When making creamy garlic white bean soup, you need simple and fresh ingredients. White beans serve as the base. They provide creaminess and protein. I prefer cannellini or great northern beans. Both are soft and smooth. A medium onion adds depth and sweetness to the soup. Garlic brings strong flavor. I use four cloves for a nice kick. Vegetable broth adds rich taste. You can use homemade or store-bought broth. Coconut milk gives the soup its creamy texture. For a richer taste, heavy cream works well too. Olive oil is essential for sautéing the onion and garlic. Dried thyme and smoked paprika add warmth and earthiness. Season with salt and pepper to make the flavors pop. Finally, fresh parsley brightens the dish when you serve it. This soup is easy to make and very satisfying. You can find the full recipe for this dish above. This soup is not only tasty but also healthy. It is high in fiber and protein due to the beans. The coconut milk adds healthy fats. Each serving provides a good balance of nutrients. You can change some ingredients to suit your taste. If you want a different bean, try chickpeas or navy beans. Red onion works well instead of yellow. For a spicy kick, add a pinch of red pepper flakes. If you need a dairy-free option, stick with coconut milk. This soup is flexible and can fit many diets. Start by gathering all your ingredients. You need two cans of white beans, an onion, garlic, vegetable broth, coconut milk, olive oil, dried thyme, smoked paprika, salt, and pepper. Chop the onion into small pieces. Mince the garlic cloves. Drain and rinse the beans well to remove excess sodium. This prep work makes cooking quick and easy. In a large pot, heat the olive oil over medium heat. Once hot, add the chopped onion. Sauté for about five minutes or until the onion turns clear. Next, add the minced garlic. Cook it for two more minutes. This helps to release the garlic’s flavor. Stir in the drained white beans, thyme, smoked paprika, salt, and pepper. Mix everything well to coat the beans in flavor. Now, pour in the vegetable broth. Bring the mixture to a boil. When it starts to boil, lower the heat and let it simmer for 15 to 20 minutes. This time allows the flavors to blend. After simmering, it’s time to blend the soup. I recommend using an immersion blender for this. Blend until the soup is smooth and creamy. If you want some texture, blend just half of the soup. This way, you still have chunks of beans to enjoy. Stir in the coconut milk and heat the soup for another five minutes. Taste it and adjust the seasoning if needed. Serve hot and garnish with fresh parsley. For the full recipe, check out the details above. Enjoy your creamy garlic white bean soup! To make your soup nice and creamy, blend well. I use an immersion blender. This tool lets you puree the soup right in the pot. If you want some texture, blend only half. For extra creaminess, add coconut milk or heavy cream. This makes the soup rich and smooth. Good seasonings can make a big difference. I love using dried thyme and smoked paprika. These give the soup depth and warmth. You can also add a pinch of cayenne for some heat. Don't forget to taste and adjust the salt and pepper. This will bring out all the flavors. Serve your soup hot, topped with fresh parsley. This adds color and a fresh taste. You can pair it with crusty bread or a light salad. For a complete meal, try adding grilled chicken or sautéed greens. Enjoy it with friends or family for a cozy meal. Check out the Full Recipe for more tips! {{image_2}} You can easily add protein to your creamy garlic white bean soup. For a heartier meal, try adding cooked chicken or turkey. Just shred the meat and stir it in during the last few minutes of cooking. If you want a plant-based option, add cooked quinoa or chickpeas. Both will blend well with the creamy texture of the soup without overpowering its flavor. This soup is naturally vegetarian. To make it vegan, simply use coconut milk instead of heavy cream. The coconut milk gives a rich taste and keeps it creamy. You can also add nutritional yeast for a cheesy flavor without dairy. This way, you can enjoy a warm, fulfilling dish that fits your dietary needs. To boost the flavor, try adding fresh herbs like rosemary or basil. They add a nice touch and aroma. You can also play with spices. A pinch of red pepper flakes gives a nice kick. If you love a smoky flavor, add more smoked paprika. For a fresh twist, squeeze a little lemon juice right before serving. These simple changes keep the soup exciting each time you make it. For the full recipe, check out the detailed cooking steps! Store any leftover creamy garlic white bean soup in an airtight container. Make sure it is cool before sealing the lid. You can keep it in the fridge for up to four days. If you want to enjoy it later, storing it properly will keep it fresh. You can freeze this soup for longer storage. Use freezer-safe containers or bags. Leave some space at the top, as the soup will expand when it freezes. The soup can last in the freezer for up to three months. When you're ready to eat it, thaw it in the fridge overnight. To reheat the soup, pour it into a pot over medium heat. Stir it gently as it warms. You can also microwave it in a safe bowl. Heat in short bursts, stirring in between. If the soup seems too thick, add a splash of vegetable broth or water to reach your desired consistency. Enjoy it warm for a cozy meal! For the full recipe, check out the link provided. Creamy garlic white bean soup lasts about 4 to 5 days in the fridge. Keep it in a sealed container. This way, it stays fresh and safe to eat. Always check for any off smells or changes in color before enjoying leftovers. Yes, you can use dried beans. Just soak them overnight before cooking. Use about 1 cup of dried beans for this soup recipe. After soaking, cook them until tender, then follow the recipe as usual. This adds a nice texture and flavor to your soup. You can serve white bean soup with crusty bread or a fresh salad. Grilled cheese sandwiches also pair nicely. For a heartier meal, try a side of roasted vegetables. These sides can bring out the yummy garlic flavor in the soup. Yes, you can make this soup ahead of time. It tastes even better the next day as the flavors blend. Just store it in the fridge after cooking. Reheat it on the stove when ready to serve. Absolutely! This soup is packed with fiber and plant-based protein. White beans are great for your heart. The garlic adds flavor and has health benefits too. It’s a wholesome choice for any meal. Yes, this soup freezes well. Let it cool completely before transferring it to freezer-safe containers. It can last for up to 3 months in the freezer. Just thaw in the fridge overnight and reheat when ready to eat. If you want a kick, add red pepper flakes or hot sauce. Stir in these spicy additions during cooking. This will give your creamy garlic white bean soup a warm, zesty flavor that wakes up your taste buds. For a richer flavor, you can use heavy cream instead of coconut milk. This will give the soup a creamier texture. You can also add more garlic for a stronger taste. Experiment with flavors to find your perfect mix. To make the soup more filling, add diced potatoes or carrots during cooking. You can also stir in cooked grains like quinoa or rice. These options will add bulk and nutrients to your meal. Yes! Fresh parsley adds a nice touch. You can also use croutons or a drizzle of olive oil for extra flavor. Garnishing makes the soup look appealing and adds a bit of crunch. For the full recipe, check out the [Full Recipe]. This blog post covered how to make creamy garlic white bean soup. We went through ingredients, nutritional info, and cooking steps. I shared tips for a creamy texture and flavor must-haves. You learned about serving options and variations too. In summary, this soup is easy and healthy. Feel free to customize it to fit your taste. Enjoy making it for friends, family, or yourself!](https://dailydishlab.com/wp-content/uploads/2025/07/b682e594-aaaa-4098-8015-8011c3b1faa4-768x768.webp)

![- 1 lb ground beef or turkey - 1 small onion, finely chopped - 2 cloves garlic, minced - 1 cup shredded cheddar cheese - 1 cup marinara sauce - 1 tablespoon Worcestershire sauce - 1 teaspoon dried oregano - Salt and freshly ground black pepper to taste - 4 large garlic bread rolls (choose ones with a sturdy texture, like ciabatta or French rolls) - 2 tablespoons butter, softened To make Cheesy Garlic Bread Sloppy Joes, gather the main ingredients first. Ground beef or turkey forms the base of this dish. Add finely chopped onion and minced garlic for flavor. The cheese brings creaminess, while marinara sauce provides the tangy depth. Next, boost the taste with flavor enhancers. Worcestershire sauce adds a savory kick. Dried oregano gives an aromatic touch. Don’t forget salt and black pepper to balance the flavors. Finally, select sturdy garlic bread rolls. These rolls will hold up well to the filling. A good butter spread on the inside adds richness. For the full recipe, check out the [Full Recipe]. 1. Start by heating a large skillet over medium heat. Add 1 lb of ground beef or turkey. Cook it for about 5 to 7 minutes. Break it apart with a spatula as it cooks. You want it to brown evenly. 2. Once the meat is browned, add 1 small finely chopped onion and 2 cloves of minced garlic. Sauté these for 3 to 4 minutes. The onion should turn translucent and smell great. Stir often so nothing sticks. 3. Mix in 1 cup of marinara sauce, 1 tablespoon of Worcestershire sauce, and 1 teaspoon of dried oregano. Add salt and freshly ground black pepper to taste. Let this simmer for about 10 minutes. Stir now and then. This helps the flavors blend and the sauce thicken. 4. While the meat mixture simmers, preheat your oven to 375°F (190°C). This temperature is perfect for toasting. 5. Prepare your garlic bread rolls by cutting them in half horizontally. You want to spread a thin layer of softened butter on the inside of each half. Choose sturdy rolls like ciabatta or French rolls for the best texture. 6. Place the buttered rolls on a baking sheet, cut sides up. Toast them in the oven for about 5 to 7 minutes. Look for golden brown edges to know they are ready. 7. Once the rolls are toasted, remove them from the oven. Generously scoop the hearty meat mixture onto the bottom halves of the toasted garlic bread. 8. Sprinkle 1 cup of shredded cheddar cheese on each loaded bottom half. Make sure you cover it evenly for a nice cheesy topping. 9. Return the baking sheet with the cheesy, loaded rolls to the oven. Bake for an additional 5 minutes, or until the cheese is melted and bubbly. 10. Finally, take them out and garnish with finely chopped fresh parsley. This adds a nice pop of color. Serve right away, placing the top halves of the garlic bread on the side for your guests to add to their sandwiches. For the complete recipe, check out the Full Recipe section above. To boost the taste of your Cheesy Garlic Bread Sloppy Joes, consider these tips: - Seasoning suggestions: Add a pinch of smoked paprika for a smoky kick. A dash of cayenne pepper can give it some heat. You can also try a teaspoon of Italian herbs for extra flavor. - Cheese alternatives: Cheddar cheese is great, but you can mix it up. Try mozzarella for a gooey texture or pepper jack for some spice. For perfect results, follow these cooking tips: - Best stovetop practices: Use medium heat to brown meat evenly. Stir the meat regularly to avoid burning. Cook the onions until soft for great flavor. - Oven settings for perfect toasting: Preheat your oven to 375°F (190°C). Toast the rolls until they are golden but not too hard. A few minutes is all you need. Make your meal even better with these ideas: - Complementary side dishes: Serve with potato chips or a fresh side salad. Both add nice crunch and contrast to your sloppy joes. - Garnishing with parsley: Sprinkle freshly chopped parsley on top for a pop of color. It also adds a fresh taste that brightens the dish. For a full recipe, check out the Cheesy Garlic Bread Sloppy Joes. {{image_4}} You can swap ground beef or turkey for other meats. Ground chicken works great and is leaner. If you prefer a plant-based option, use lentils or a meat substitute. Both choices keep the dish tasty and filling. Boost the flavor by adding spices. Chili powder adds a nice kick. You can also mix in vegetables like bell peppers or mushrooms. These additions make the filling even heartier and more nutritious. The type of bread can change your cheesy garlic bread sloppy joes. Try using different rolls like hoagie or brioche. Each bread adds its own flavor and texture. Experiment to find your perfect match. For the full recipe, check out the [Full Recipe]. To keep Cheesy Garlic Bread Sloppy Joes fresh, store them properly. Place leftovers in an airtight container. This helps keep the flavors intact. Store in the fridge for up to three days. Make sure to let them cool before sealing. When reheating, you have two good options: the microwave and the oven. The microwave is quick but may make the bread soggy. Heat on medium power for about one to two minutes. The oven gives a better result. Preheat to 350°F (175°C) and heat for about 10 minutes. This keeps the bread crispy while warming the filling. Freezing is a great choice for longer storage. To freeze, let the sloppy joes cool completely. Then, scoop the filling into a freezer-safe bag. Remove as much air as possible and seal. You can freeze the mixture for up to three months. To thaw, place the bag in the fridge overnight. Heat it up in the microwave or oven when you're ready to enjoy. Making Cheesy Garlic Bread Sloppy Joes takes about 30 minutes from start to finish. You will spend roughly 10 minutes prepping the ingredients. Cooking the meat and mixing everything takes about 10 more minutes. Finally, baking the rolls takes another 5 to 7 minutes. This timing makes it a quick and tasty meal option. Yes, you can prepare the meat mixture ahead of time. Cook the ground beef or turkey, onions, and garlic as directed. Let it cool, then store it in an airtight container in the fridge for up to three days. When you're ready, simply reheat the mixture and continue with the recipe. This saves time during busy weeknights. If you don't have garlic bread rolls, don't worry! You can use other sturdy breads. Options like ciabatta, French rolls, or even bagels work well. Just make sure they can hold the meat mixture without falling apart. You can also make your own garlic bread by spreading butter and garlic on regular rolls before toasting them. Enjoy experimenting with different breads! This blog covered how to make Cheesy Garlic Bread Sloppy Joes, highlighting key ingredients like beef, cheese, and marinara. I shared step-by-step instructions and helpful tips to boost flavor. You can also explore various meat and bread options to suit your taste. Remember, leftovers store well and reheating is quick. This dish offers easy meals and fun variations. Try making it your own! Enjoying your time in the kitchen makes cooking rewarding and enjoyable.](https://dailydishlab.com/wp-content/uploads/2025/06/1eb0e08b-e1bd-4549-a6fe-2db60bc0ee8e-768x768.webp)
