Sheet Pan Lemon Herb Salmon and Asparagus Delight

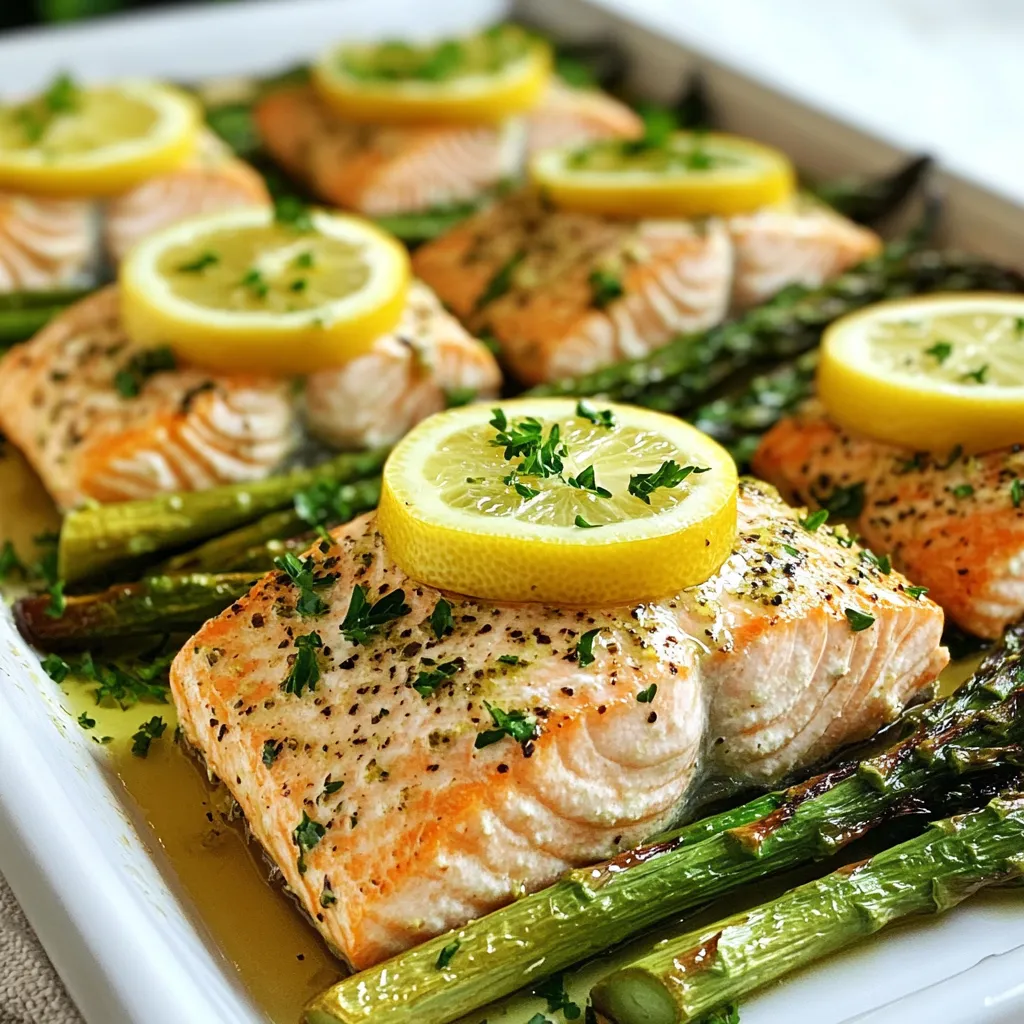
Ready for a quick and tasty meal? Sheet Pan Lemon Herb Salmon and Asparagus is easy to make! In just a few steps, you can serve a flavorful dish that pleases everyone at the table. With fresh salmon, bright lemon, and crisp asparagus, this recipe packs a punch. Let’s dive into the ingredients and see how you can create this delightful meal today!
Why I Love This Recipe
- Quick and Easy: This sheet pan recipe is perfect for busy weeknights, taking just 25-30 minutes from prep to table.
- Flavor Explosion: The combination of fresh lemon, herbs, and garlic creates a vibrant and zesty flavor that elevates the salmon and asparagus.
- Healthy and Nutritious: Salmon is packed with omega-3 fatty acids, while asparagus adds fiber and essential vitamins, making this dish a wholesome option.
- Minimal Cleanup: Baking everything on a single sheet pan means less mess and easier cleanup, allowing you to enjoy your meal without stress.
Ingredients
To make Sheet Pan Lemon Herb Salmon and Asparagus, you need simple and fresh ingredients. Each one adds flavor and nutrition to the dish. Here’s what you will need:
- 4 salmon fillets (6 oz each)
- 1 bunch asparagus, trimmed
- 2 tablespoons olive oil
- 2 tablespoons fresh lemon juice
- 1 tablespoon lemon zest
- 3 cloves garlic, minced
- 1 teaspoon dried oregano
- 1 teaspoon dried thyme
- Salt and pepper to taste
- Lemon slices, for garnish
- Fresh parsley, for garnish
These ingredients work together to create a bright and tasty meal. The salmon offers healthy fats and protein. Asparagus adds crunch and vitamins. The lemon and herbs make everything pop with flavor. You can find these ingredients at your local grocery store.

Step-by-Step Instructions
Prepping the Ingredients
First, I preheat the oven to 400°F (200°C). This heat will cook the salmon well. I line a large sheet pan with parchment paper. This step makes cleanup easy and helps the food not stick.
Making the Lemon Herb Mixture
Next, I make the lemon herb mixture. In a small bowl, I whisk together:
- 2 tablespoons of olive oil
- 2 tablespoons of fresh lemon juice
- 1 tablespoon of lemon zest
- 3 cloves of garlic, minced
- 1 teaspoon of dried oregano
- 1 teaspoon of dried thyme
- Salt and pepper to taste
This mixture adds bright flavor to the salmon.
Arranging on the Sheet Pan
Now, I arrange the food on the sheet pan. I place the salmon fillets on one side of the pan. Each fillet gets a generous brush of the lemon herb mixture. On the other side, I add the trimmed asparagus. I drizzle the remaining mixture over the asparagus and season it with more salt and pepper.
Baking the Dish
I place the sheet pan in the hot oven and bake for 15-20 minutes. The salmon should flake easily with a fork, and the asparagus should be tender. For a golden touch, I broil the salmon and asparagus for an extra 2-3 minutes. This gives it a nice color and adds flavor. After baking, I remove the pan and garnish the salmon with lemon slices and freshly chopped parsley.
Tips & Tricks
Achieving the Perfect Salmon
To check if your salmon is done, look for a few signs. The flesh should turn from bright pink to a pale pink color. Use a fork to gently poke the thickest part of the fillet. If it flakes easily, it is ready.
The flaking test is simple. Take a fork and gently press down on the salmon. If it separates easily, you achieved perfect doneness. If it resists, give it a few more minutes in the oven.
Enhancing Flavor
Want to kick up the flavor? Try adding spices like paprika or cumin. These will give your dish a warm, savory twist. You can also add a touch of red pepper flakes for heat.
Herbs are another great way to enhance flavor. Instead of oregano and thyme, you can use dill or basil. These herbs pair well with both salmon and asparagus.
Presentation Tips
Garnishing makes your dish pop. Sprinkle fresh parsley over the salmon just before serving. Add lemon slices on top for a bright touch. They also give a fresh aroma and flavor.
For serving, place the salmon and asparagus on a large platter. This makes it easy for everyone to help themselves. You can also serve with a side of rice or a fresh salad for a complete meal.
Pro Tips
- Fresh Ingredients: Always use fresh salmon and asparagus for the best flavor and texture. Fresh ingredients can elevate the dish significantly.
- Marinade Time: If you have extra time, let the salmon marinate in the lemon herb mixture for 30 minutes before cooking. This helps to infuse more flavor.
- Even Cooking: Make sure to cut the asparagus to a uniform size for even cooking. Thicker stalks may need a few extra minutes in the oven.
- Garnish for Presentation: Don’t skip the garnish! A sprinkle of fresh parsley and lemon slices not only add color but also enhance the dish’s overall appeal.

Variations
Ingredient Swaps
You can switch salmon for other fish. Try trout or cod for a different taste. Both options work well with the lemon herb mix. You can also swap asparagus for green beans or broccoli. These veggies add nice crunch and flavor.
Flavor Infusions
Adding citrus fruits can boost flavor. Try oranges or limes for a twist. You can also use spices like paprika or cumin for warmth. Marinating the salmon makes it more tasty. Let it soak in the lemon herb mix for at least 30 minutes before cooking.
Dietary Adjustments
To make this dish gluten-free, check your seasonings. Most are safe, but always read labels. For low-carb versions, skip the lemon slices and use more veggies. Cauliflower or zucchini are great choices for a filling meal.
Storage Info
Leftover Storage
After enjoying your meal, you may have some leftovers. To store your salmon and asparagus, start by letting them cool to room temperature. Then, place them in an airtight container. Store in the refrigerator for up to three days. If you want to keep them longer, you can freeze your leftovers. Wrap each portion tightly in plastic wrap and then place in a freezer bag. This way, the meal stays fresh for about three months.
Reheating Guidelines
When you’re ready to eat your leftovers, reheating is key. The best way to reheat salmon is in the oven. Preheat your oven to 350°F (175°C). Place the salmon and asparagus on a baking sheet. Cover with foil to keep moisture in. Heat for about 10-15 minutes, or until warmed through.
To keep the flavor and texture, avoid using the microwave. Microwaving can make the salmon dry and rubbery. Always check if the salmon is warm in the center before serving. Enjoy your meal just like it was fresh out of the oven!
FAQs
How long does it take to cook salmon on a sheet pan?
It takes about 15-20 minutes to cook salmon on a sheet pan at 400°F (200°C). The salmon is ready when it flakes easily with a fork. Cooking times may vary slightly depending on the thickness of the fillets.
Can I use frozen salmon for this recipe?
Yes, you can use frozen salmon. Just make sure to thaw it first for even cooking. You can thaw it overnight in the fridge or place it in cold water for quicker results. Adjust the cooking time as needed since frozen salmon may take a few extra minutes to cook.
What vegetables can I pair with salmon?
You can pair salmon with many vegetables. Some great options include:
- Broccoli
- Green beans
- Brussels sprouts
- Bell peppers
- Carrots
These veggies add flavor and color to your meal, making it healthy and vibrant.
How to tell if the salmon is fully cooked?
To check if the salmon is fully cooked, use a fork to gently flake it at the thickest part. If it flakes easily and looks opaque, it is done. The ideal internal temperature for cooked salmon is 145°F (63°C). A meat thermometer can help you check this accurately.
This guide covered how to cook tasty salmon with asparagus on a sheet pan. We discussed the needed ingredients and prep steps to get started. You learned how to mix the lemon herb mixture and arrange everything on the pan. Tips on perfect cooking and serving ideas added more flavor. Lastly, we explored tasty variations and how to store leftovers. Enjoy this easy recipe anytime. With simple steps, you can make a delicious meal that impresses. Now, get cookin

Zesty Sheet Pan Lemon Herb Salmon & Asparagus
Ingredients
- 4 fillets salmon (6 oz each)
- 1 bunch asparagus, trimmed
- 2 tablespoons olive oil
- 2 tablespoons fresh lemon juice
- 1 tablespoon lemon zest
- 3 cloves garlic, minced
- 1 teaspoon dried oregano
- 1 teaspoon dried thyme
- to taste salt and pepper
- for garnish lemon slices
- for garnish fresh parsley
Instructions
- Preheat your oven to 400°F (200°C).
- Line a large sheet pan with parchment paper for easy cleanup.
- In a small bowl, whisk together olive oil, lemon juice, lemon zest, minced garlic, dried oregano, dried thyme, salt, and pepper.
- Place the salmon fillets on one side of the sheet pan. Brush each fillet generously with the lemon herb mixture.
- On the other side of the pan, arrange the trimmed asparagus. Drizzle the remaining lemon herb mixture over the asparagus and season with additional salt and pepper.
- Place the sheet pan in the preheated oven and bake for 15-20 minutes, or until the salmon flakes easily with a fork and the asparagus is tender.
- For an extra touch, broil the salmon and asparagus for an additional 2-3 minutes at the end of baking time to achieve a nice golden color.
- Remove the sheet pan from the oven and garnish the salmon with lemon slices and freshly chopped parsley before serving.
Notes

Zesty Sheet Pan Lemon Herb Salmon & Asparagus
Ingredients
- 4 fillets salmon
- 1 bunch asparagus
- 2 tablespoons olive oil
- 1 lemon zested and juiced
- 2 teaspoons dried oregano
- 2 teaspoons garlic powder
- salt to taste salt
- pepper to taste pepper
Instructions
- Preheat the oven to 400°F (200°C).
- On a large sheet pan, arrange the salmon fillets and asparagus.
- Drizzle olive oil, lemon juice, and sprinkle lemon zest, oregano, garlic powder, salt, and pepper over the salmon and asparagus.
- Toss the asparagus to coat evenly and place the pan in the oven.
- Bake for 15-20 minutes, or until the salmon is cooked through and flakes easily with a fork.
- Serve immediately, garnished with additional lemon slices if desired.


![For these tasty bowls, you need: - 2 boneless, skinless chicken breasts - 1 cup jasmine rice - 1 cucumber, thinly sliced - 1 carrot, julienned - Fresh cilantro leaves for garnishing - Lime wedges for serving - Sliced red chili (optional, for heat) These ingredients create a base full of flavor and texture. The chicken offers protein, while the jasmine rice adds a nice touch of sweetness. The veggies give crunch and freshness. The marinade brings all the flavors together. Here’s what you need: - 3 tablespoons fish sauce - 2 tablespoons honey - 1 tablespoon soy sauce (low-sodium is fine) - 2 cloves garlic, minced - 1 tablespoon fresh ginger, grated - 1/2 teaspoon black pepper This mix makes the chicken tender and packed with taste. Fish sauce adds a salty depth, while honey balances it with sweetness. Garlic and ginger provide warmth and depth. Feel free to add more veggies to your bowls. Some great options include: - Bell peppers, sliced - Snap peas, trimmed - Radishes, thinly sliced You can also switch up the garnishes. Consider adding: - Chopped green onions - Sesame seeds - Fresh mint leaves These additions enhance the meal's look and flavor. They also add extra nutrients, making your meal even better. For the full recipe, check out the Vietnamese Chicken Meal Prep Bowls section. To start, you need to make the marinade. In a mixing bowl, whisk together: - 3 tablespoons fish sauce - 2 tablespoons honey - 1 tablespoon soy sauce - 2 cloves garlic, minced - 1 tablespoon fresh ginger, grated - 1/2 teaspoon black pepper Mix well until everything blends together. This marinade gives the chicken a great flavor. Next, add the chicken breasts to the bowl. Make sure each breast is coated with the marinade. Cover the bowl and let it sit in the fridge for at least 30 minutes. If you have time, let it marinate for up to 2 hours for more flavor. While the chicken marinates, it’s time to cook the jasmine rice. In a medium pot, combine: - 1 cup jasmine rice - 1 3/4 cups water or low-sodium chicken broth - A pinch of salt Bring the mixture to a boil over medium-high heat. Once it boils, lower the heat and cover with a lid. Let it simmer for about 15 minutes until the rice is fluffy. After cooking, keep it covered for an extra 5 minutes. This helps the rice steam and become perfect. Now, heat a non-stick skillet on medium-high heat. Add a little cooking oil once it’s hot. Carefully place the marinated chicken in the skillet. Cook each side for 6-7 minutes. You want the chicken to be golden-brown and fully cooked. Use a meat thermometer to ensure it reaches 165°F (75°C). Once cooked, take the chicken out of the skillet. Let it rest for a few minutes on a cutting board. After it rests, slice the chicken into thin strips. This makes it tender and easy to eat. Now for the fun part: assembling the bowls! Start by dividing the cooked jasmine rice into 4 airtight containers. Top each serving of rice with sliced chicken. Then, add: - Thinly sliced cucumber - Julienned carrots Garnish each bowl with fresh cilantro leaves. Place lime wedges on the side for a burst of flavor when you eat. If you like some heat, add sliced red chili on top. Allow the bowls to cool before sealing them with lids. You can store them in the fridge for up to 4 days. These meal prep bowls are perfect for quick lunches or dinners. For the complete recipe, check out the [Full Recipe]. To make meal prep easy, I like to set up a workspace. First, gather all your tools. This includes cutting boards, knives, and bowls. Having everything close by cuts down on time. I also recommend cooking in batches. Make extra rice or chicken. This way, you can use them in other meals too. To ensure juicy chicken, marinate it well. A good marinade adds flavor and moisture. I suggest marinating for at least 30 minutes. For best results, go for 2 hours. When cooking, use medium-high heat. This helps create a nice golden color. Always check the chicken's temperature. It should reach 165°F (75°C). Letting it rest after cooking is key. This keeps the juices in the meat. There are many ways to boost flavor in your meal prep bowls. Try adding fresh herbs like mint or basil. You can also squeeze lime juice over each bowl. For extra crunch, add chopped peanuts or cashews. If you like spice, toss in some sliced chili. These small touches make a big difference. For the full recipe, check out the complete guide on Vietnamese Chicken Meal Prep Bowls. {{image_4}} You can easily swap chicken for other proteins. Shrimp is a great choice. Cook the shrimp for just 2-3 minutes until they turn pink. Tofu works well too. Use firm tofu and press it first to remove extra moisture. This helps it absorb flavors. Another option is beef. Use thinly sliced flank steak instead of chicken. Cook it quickly over high heat for a tender bite. If you want a vegetarian or vegan meal prep bowl, try using tempeh or seitan. Both have a great texture and soak up flavors well. Marinate them just like the chicken. Cook tempeh for about 5-7 minutes in a skillet. For a vegan option, skip the fish sauce and use soy sauce instead. You can also add more veggies like bell peppers or mushrooms for added taste and nutrition. Make your bowls unique with different toppings. Try adding sliced radishes for crunch. You can also add avocado for creaminess. Fresh herbs like mint or basil work wonders too. For extra flavor, drizzle some sriracha or hoisin sauce on top. You can even add nuts for a tasty crunch. These simple tweaks let you enjoy a new meal every time. To see the full recipe, check out the [Full Recipe]. To keep your Vietnamese Chicken Meal Prep Bowls fresh, use airtight containers. Divide the bowls into four portions. Store rice, chicken, and veggies separately if you can. This will help maintain texture and flavor. Let the meal prep bowls cool before sealing them. This step helps prevent steam from making everything soggy. When you're ready to enjoy your meal prep bowls, use the microwave. Place a bowl in the microwave for 1-2 minutes. Stir halfway through to heat evenly. Check that the chicken reaches 165°F (75°C) before eating. If you prefer, you can reheat on the stove. Just add a splash of water to prevent sticking. These bowls last for up to four days in the fridge. After that, the flavors may fade. Always check for any off smells or changes in color before eating. If you want to store them longer, consider freezing. Just make sure to label them, so you know what's inside. Enjoy your delicious meal prep with confidence! To make Vietnamese Chicken Meal Prep Bowls, start with chicken breasts. First, mix fish sauce, honey, soy sauce, garlic, ginger, and black pepper in a bowl. This creates a tasty marinade. Coat the chicken in this marinade and let it sit for 30 minutes in the fridge. While it marinates, cook jasmine rice in water or broth for about 15 minutes. Heat a skillet, add oil, and cook the chicken for 6-7 minutes on each side until it’s golden and reaches 165°F. Slice the chicken and assemble the bowls with rice, chicken, cucumber, and carrots. Don’t forget the cilantro and lime! For more details, check the Full Recipe. Vietnamese Chicken Meal Prep Bowls pair well with light sides. Here are some great choices: - Steamed broccoli - Pickled vegetables - Fresh spring rolls - Asian-style slaw - Edamame These sides add color and different textures to your meal. They also keep the meal fresh and exciting. Yes, you can freeze Vietnamese Chicken Meal Prep Bowls. Just make sure to cool them completely before sealing them in airtight containers. They can last in the freezer for up to three months. When you want to eat them, thaw them in the fridge overnight and reheat in the microwave. This keeps your meal fresh and tasty. Vietnamese Chicken Meal Prep Bowls are healthy and balanced. Here is a rough idea of the nutrition per serving: - Calories: 400 - Protein: 30g - Carbohydrates: 45g - Fat: 10g - Fiber: 3g - Sugar: 6g This dish provides protein, carbs, and healthy fats. You can adjust ingredients for your dietary needs. In this blog post, we covered the key ingredients and step-by-step instructions for making Vietnamese Chicken Meal Prep Bowls. We discussed marinades and cooking tips to ensure great flavor. You can also explore various protein options and learn how to store and reheat these bowls effectively. These meal prep bowls are easy to customize and perfect for busy days. With simple steps and tasty ingredients, you can enjoy delicious, healthy meals throughout the week. Happy cooking!](https://dailydishlab.com/wp-content/uploads/2025/06/450469d4-7878-479c-828a-ae6f4f51905d-768x768.webp)
![For a tasty Rustic Vegetable Soup, you need fresh, quality ingredients. Here’s the complete list: - Fresh vegetables for Rustic Vegetable Soup - 2 tablespoons olive oil - 1 large onion, diced - 3 cloves garlic, minced - 2 carrots, sliced - 2 celery stalks, diced - 1 zucchini, chopped - 1 bell pepper, diced (any color) - 2 cups kale or spinach, chopped - 1 can (15 oz) diced tomatoes with juice - 6 cups vegetable broth - 1 cup green beans, trimmed and cut into pieces - Spices and herbs used in the recipe - 1 teaspoon dried thyme - 1 teaspoon dried oregano - Salt and pepper to taste - Optional garnishes and serving suggestions - Fresh parsley, chopped (for garnish) - Crusty bread on the side for a cozy meal These ingredients blend to create a hearty and healthy delight. Each vegetable adds flavor, texture, and nutrition. The herbs elevate the taste, making each bite comforting and satisfying. You can find the full recipe included to guide you through the cooking process. Enjoy! To start, wash your vegetables well. This helps keep them clean and safe. Dice the onion into small pieces. Mince the garlic finely for strong flavor. Slice the carrots into rounds. Chop the celery into small bits. Cut the zucchini and bell pepper into chunks. For greens, chop the kale or spinach into bite-size pieces. When prepping, use a sharp knife. This makes cutting easier and safer. Have all your vegetables ready before cooking. It helps the cooking go smoothly. 1. In a large pot, heat 2 tablespoons of olive oil over medium heat. 2. Add the diced onion and sauté for about 5 minutes. You want it to look translucent. 3. Stir in the minced garlic. Cook for an additional minute until it smells great. 4. Add the sliced carrots and diced celery. Cook for another 5 minutes, stirring now and then. 5. Next, add the chopped zucchini and bell pepper. Sauté for 3-4 minutes more. 6. Pour in the can of diced tomatoes with juice. Then add 6 cups of vegetable broth. Stir well. 7. Season with dried thyme, oregano, salt, and pepper. Bring the pot to a gentle boil. 8. Reduce the heat and let the soup simmer for about 20 minutes. 9. After 20 minutes, add the green beans and chopped kale or spinach. Simmer for another 10 minutes. 10. Taste the soup and adjust the seasoning if needed. Then, remove it from the heat. Before serving, taste the soup again. You can add more salt or pepper to improve the flavor. For a nice touch, garnish each bowl with fresh parsley. It adds color and a fresh taste. Serve the soup hot. Pair it with crusty bread for a cozy meal. Enjoy your hearty and healthy Rustic Vegetable Soup! To boost the taste of your Rustic Vegetable Soup, try adding a splash of lemon juice. This brightens the flavors and adds a nice zing. A dash of hot sauce can also bring warmth without overpowering the soup. You can switch out the vegetables based on what you have. If you don’t have zucchini, use yellow squash or even diced potatoes. For a different taste, add a handful of fresh herbs like basil or thyme. These simple swaps can change the soup's profile while keeping it delicious. Want to pack more health benefits into your soup? Toss in an extra cup of chopped spinach or Swiss chard. You can also add frozen peas or corn for added sweetness and color. For protein, consider mixing in canned beans like chickpeas or white beans. These add creaminess and texture. You can also stir in cooked lentils or diced tofu for a heartier meal. Each of these options helps make your soup filling and nutritious. One common mistake is overcooking the vegetables. Keep an eye on them so they stay tender but not mushy. To ensure great texture, add harder vegetables like carrots and celery first, then softer ones like zucchini and greens later. Another tip is to taste your soup as it cooks. Adjust the seasoning gradually. Too much salt can overwhelm the flavors. Lastly, don’t skip the garnish. Fresh parsley adds color and a fresh finish to your dish, making it more inviting. For a complete guide, check the [Full Recipe]. {{image_2}} You can mix up your Rustic Vegetable Soup by trying different veggies. Instead of kale, use Swiss chard or spinach. For a twist, add parsnips or sweet potatoes. These choices add flavor and color to your soup. Also, think about the season. In spring, use asparagus and peas. In fall, add squash or pumpkin. This keeps your soup fresh and exciting! If you want a vegan soup, skip the chicken broth. Use vegetable broth instead. You can find many low-sodium broths that taste great. For gluten-free options, check labels on broth and seasonings. Many brands offer gluten-free choices. Just make sure to read the labels. Also, reduce salt to make it heart-friendly. Rustic Vegetable Soup can take on flavors from around the world. Add Italian herbs like basil and rosemary for a Mediterranean vibe. If you want a Mexican twist, include corn, cilantro, and lime juice. Try adding curry powder for an Indian touch. Each region brings unique ingredients, making your soup special. Mix and match to find your favorite blend! Store your Rustic Vegetable Soup in airtight containers. Glass or BPA-free plastic works best. Allow the soup to cool before sealing the container. This helps keep it fresh and safe. You can refrigerate the soup for up to four days. For longer storage, freeze the soup in portions. Use freezer-safe bags or containers. To reheat your soup, use the stove or microwave. On the stove, heat it in a pot over low heat. Stir often to keep the flavors blended. In the microwave, use a microwave-safe bowl and cover it. Heat in short bursts, stirring in between. This helps the soup heat evenly. If the soup seems thick, add a splash of broth or water to refresh it. Your Rustic Vegetable Soup lasts up to four days in the fridge. In the freezer, it can last for three months. Look for signs of spoilage, such as an off smell or strange color. If the soup has a slimy texture, it’s best to throw it out. Always trust your senses when it comes to food safety. Yes, you can make Rustic Vegetable Soup in a slow cooker. To adapt the recipe, follow these steps: 1. Prep the ingredients: Chop all your vegetables as noted in the full recipe. 2. Sauté first (optional): For better flavor, you can sauté the onion and garlic in a pan with olive oil before adding them to the slow cooker. 3. Combine ingredients: Place all prepared vegetables, diced tomatoes, broth, and seasonings in the slow cooker. Stir well. 4. Set the cooker: Cover and cook on low for 6-8 hours or on high for 3-4 hours. 5. Add greens last: In the last 30 minutes, stir in the green beans and kale or spinach for a fresh touch. Using a slow cooker makes this soup even easier. It gives the flavors time to blend well. Rustic Vegetable Soup pairs well with many sides. Here are some ideas: - Crusty bread: A slice of warm, crusty bread is perfect for dipping. - Grilled cheese sandwich: This classic combo adds a nice, cheesy touch. - Salad: A fresh green salad complements the soup's warmth. - Cheese platter: Serve some cheese and crackers for a fun twist. These sides enhance your meal and make it more filling. If you want to add some heat, try these tips: - Red pepper flakes: Add 1/2 teaspoon of red pepper flakes when you add the broth. - Hot sauce: Stir in your favorite hot sauce to taste. - Chopped jalapeños: Mix in some diced jalapeños for a fresh kick. - Spicy sausage: For meat lovers, add some cooked spicy sausage to the mix. These options let you customize your soup to your taste. Enjoy experimenting! You now know how to make a great Rustic Vegetable Soup. We covered all the steps, from fresh ingredients to final touches. I shared tips for enhancing flavors and avoiding common mistakes. You can even try different variations and dietary choices. Remember, you can store leftovers well and reheat them easily. Use these tips to make your soup delicious and nutritious. Enjoy your time cooking, and don’t be afraid to experiment!](https://dailydishlab.com/wp-content/uploads/2025/06/be0ed940-93e5-4fac-8d99-be122a53b01a-768x768.webp)