Sheet Pan Lemon Herb Shrimp Asparagus Delight

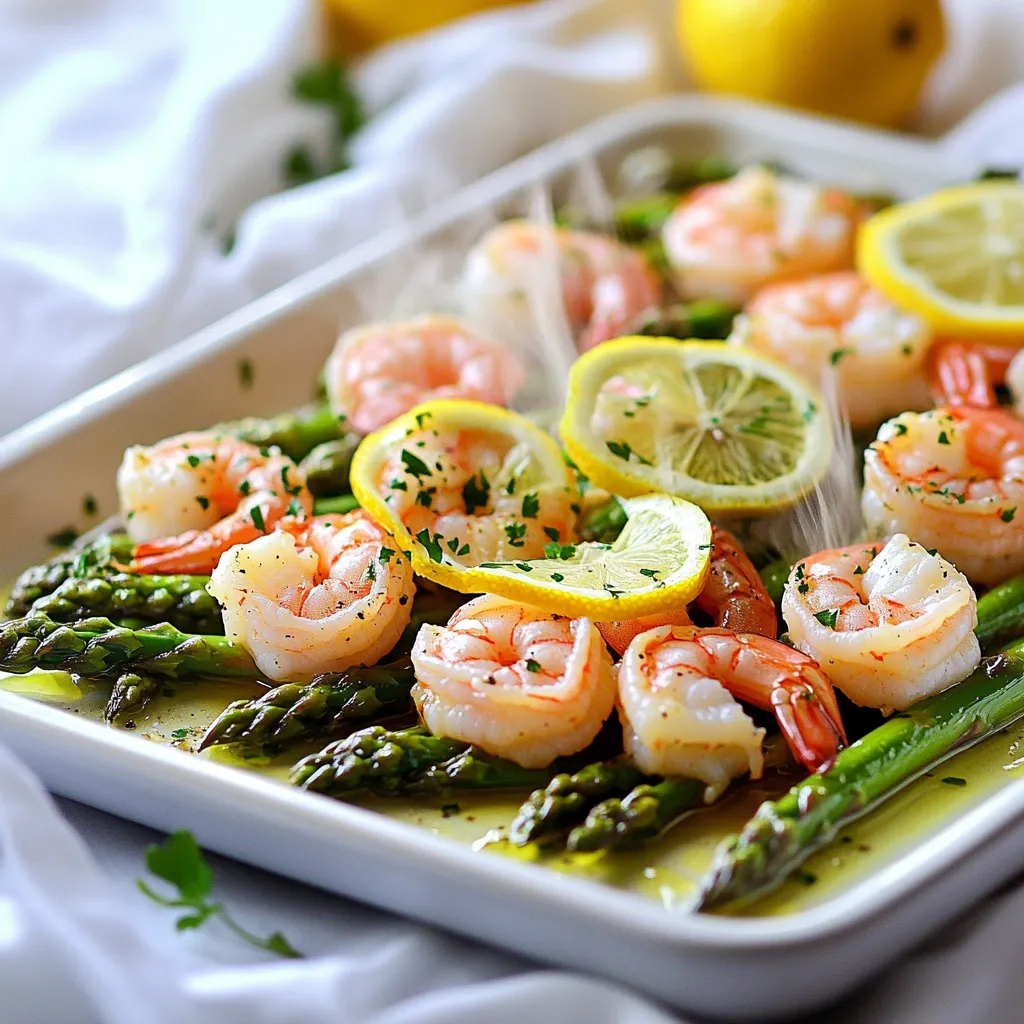
Looking for a quick, tasty meal? You’ll love my Sheet Pan Lemon Herb Shrimp Asparagus Delight! This simple recipe combines juicy shrimp and fresh asparagus, all seasoned with citrusy lemon and aromatic herbs. In just a few steps, you can create a vibrant, delicious dish that’s perfect for busy weeknights or impressing guests. Ready to dive in? Let’s get cooking!
Why I Love This Recipe
- Quick and Easy: This sheet pan recipe is perfect for busy weeknights, taking only 25 minutes from prep to table.
- Flavor Packed: The combination of lemon, garlic, and herbs creates a vibrant flavor that enhances both the shrimp and asparagus.
- Healthy and Nutritious: With fresh shrimp and asparagus, this dish is low in calories but high in protein and vitamins.
- Minimal Cleanup: Baking everything on one sheet pan means less time spent on dishes and more time enjoying your meal.
Ingredients
Main Ingredients
- 1 pound large shrimp, peeled and deveined
- 1 bunch asparagus, trimmed
- 3 tablespoons olive oil
Seasoning and Flavoring
- 2 lemons (1 for juice, 1 sliced)
- 3 cloves garlic, minced
- 1 teaspoon dried oregano
- 1 teaspoon dried thyme
Additional Seasoning
- 1 teaspoon smoked paprika
- Salt and pepper to taste
- Fresh parsley, chopped (for garnish)
This dish shines with fresh, simple ingredients. Large shrimp bring a sweet touch. Asparagus adds crunch and bright color. Olive oil ties it all together, making each bite rich and smooth.
Lemons are key for flavor. You use juice for zest and slices for aroma. Garlic adds depth and warmth. Dried herbs, like oregano and thyme, bring earthiness. They blend well with shrimp and asparagus.
Smoked paprika gives a hint of smokiness. Just a teaspoon adds a unique twist. Salt and pepper enhance all the flavors. Fresh parsley adds a pop of color and freshness on top.
Gather these ingredients to create a dish that’s not just tasty, but also easy to make!

Step-by-Step Instructions
Preparation Steps
1. Preheat the oven: Start by setting your oven to 400°F (200°C). This helps cook the shrimp and asparagus evenly.
2. Mix ingredients in a bowl: In a large mixing bowl, add the shrimp, trimmed asparagus, olive oil, juice from one lemon, minced garlic, oregano, thyme, smoked paprika, salt, and pepper. Toss everything together until the shrimp and asparagus are well coated.
Arranging on the Sheet Pan
1. Lining the pan with parchment paper: Take a baking sheet and line it with parchment paper. This makes cleanup easy and prevents sticking.
2. Layering shrimp and asparagus: Arrange the shrimp and asparagus in a single layer on the sheet pan. Make sure they are not crowded to allow for even cooking. Place lemon slices on top for extra flavor.
Baking the Dish
1. Cooking time and temperature: Bake the dish in your preheated oven for 12-15 minutes. The shrimp will turn pink and opaque, while the asparagus will be tender yet still crisp.
2. Tips for checking doneness: To check if the shrimp are done, look for their pink color. If they curl up tightly, they’re cooked. The asparagus should be bright green and tender but not mushy.
Pro Tips
- Use Fresh Ingredients: For the best flavor, use fresh shrimp and asparagus. Frozen shrimp can be used, but make sure to thaw them properly before cooking.
- Don’t Overcook the Shrimp: Keep an eye on the shrimp as they cook. They should turn pink and opaque, which usually takes about 12-15 minutes.
- Experiment with Herbs: Feel free to mix up the dried herbs. Fresh herbs like basil or cilantro can provide a different flavor profile that complements the dish.
- Serve with a Side: Pair this dish with a light salad or some crusty bread to soak up the delicious lemony juices.
Tips & Tricks
Perfecting the Shrimp
- Choosing the right size shrimp
I recommend using large shrimp for this dish. They cook faster and stay juicy. Look for shrimp that are firm and have a nice color. Avoid any that smell off or feel mushy.
- Signs of perfectly cooked shrimp
Perfectly cooked shrimp should turn pink and opaque. They should curl slightly but not be tight. Overcooked shrimp can become rubbery, so keep an eye on them.
Cooking Asparagus
- How to trim asparagus
To trim asparagus, hold the stalk near the bottom and bend it gently. It will naturally snap at the right spot. This removes the tough end that you don’t want to eat.
- Alternate cooking times for thicker stalks
If you have thicker stalks, they may need a bit more time. Consider adding them to the pan a few minutes before the shrimp to ensure they cook evenly.
Flavor Enhancements
- Additional herbs and spices
You can play with the flavors. Try adding fresh basil or dill for a twist. A pinch of red pepper flakes can add a nice kick.
- Serving suggestions with sauces
Serve this dish with a simple garlic butter sauce or a drizzle of balsamic glaze. These will elevate the flavors and make your meal feel gourmet.

Variations
Ingredient Substitutions
If shrimp is not your thing, try scallops or chicken. Both options cook well and taste great. For a vegetarian version, use firm tofu or chickpeas. These alternatives add protein and a nice texture.
Different Flavor Profiles
Want to spice things up? Add red pepper flakes for heat. This simple change can make your dish exciting! For a Mediterranean twist, sprinkle feta cheese on top after baking. It adds creaminess and tang to each bite.
Serving Suggestions
Pair this dish with grains like quinoa or rice. These sides soak up the lemony sauce well. You could also serve it with a fresh side salad. The crisp greens add crunch and balance to the meal. Enjoy the colorful plate!
Storage Info
Storing Leftovers
To keep your shrimp and asparagus fresh, store leftovers in the fridge. Use an airtight container. This helps keep the flavors intact. Always cool the dish to room temperature before sealing it. Try to eat leftovers within two days for the best taste.
Reheating Instructions
Reheat your dish gently. A microwave works, but it can overcook the shrimp. Instead, use a pan on low heat. Add a splash of water or broth to keep it moist. Stir occasionally until warm. This method helps keep the shrimp and asparagus tender.
Freezing Options
You can freeze this dish, but it’s best to freeze it uncooked. Prepare the shrimp and asparagus, then place them in a freezer-safe bag. Remove as much air as possible. For cooked shrimp, let it cool first. To thaw, move it to the fridge overnight before cooking. This keeps the shrimp from becoming tough.
FAQs
How long should I bake shrimp?
Bake shrimp for 12 to 15 minutes. This time ensures the shrimp turn pink and opaque. If you bake them too long, they may become tough. Keep an eye on them as they cook.
Can I prepare this dish in advance?
Yes, you can prepare this dish in advance. Mix the shrimp and asparagus with olive oil and seasonings a few hours ahead. Place the mix in the fridge until you are ready to bake. Just remember to bake it fresh for the best taste.
What sides would complement this recipe?
Serve this dish with rice or quinoa for a filling meal. A light salad with greens also pairs well. You can add crusty bread to soak up juices. Lemon wedges on the side give an extra zing.
This dish uses large shrimp and fresh asparagus for a tasty meal. You mix these with olive oil, garlic, and herbs for great flavor. After preheating the oven, arrange the shrimp and asparagus on a lined sheet pan. Bake until the shrimp is just right.
Try different herbs or serve with grains for a twist. Remember to store any leftovers properly. With these tips, you can enjoy this dish again. Happy cooking!

Sheet Pan Lemon Herb Shrimp Asparagus
Ingredients
1 pound large shrimp, peeled and deveined
1 bunch asparagus, trimmed
3 tablespoons olive oil
2 lemons (1 for juice, 1 sliced)
3 cloves garlic, minced
1 teaspoon dried oregano
1 teaspoon dried thyme
1 teaspoon smoked paprika
Salt and pepper to taste
Fresh parsley, chopped (for garnish)
Instructions
Preheat your oven to 400°F (200°C).
In a large mixing bowl, combine the shrimp, asparagus, olive oil, juice of one lemon, minced garlic, oregano, thyme, smoked paprika, salt, and pepper. Toss everything until well coated.
Line a sheet pan with parchment paper for easy cleanup. Arrange the shrimp and asparagus in a single layer on the pan.
Place the lemon slices on top of the shrimp and asparagus for added flavor.
Bake in the preheated oven for 12-15 minutes, or until the shrimp are pink and opaque, and the asparagus is tender yet crisp.
Remove the pan from the oven and garnish with freshly chopped parsley.
Serve immediately with lemon wedges on the side for an extra burst of flavor.
Prep Time: 10 mins | Total Time: 25 mins | Servings: 4

Sheet Pan Lemon Herb Shrimp Asparagus
Ingredients
- 1 pound large shrimp, peeled and deveined
- 1 bunch asparagus, trimmed
- 3 tablespoons olive oil
- 2 lemons 1 for juice, 1 sliced
- 3 cloves garlic, minced
- 1 teaspoon dried oregano
- 1 teaspoon dried thyme
- 1 teaspoon smoked paprika
- to taste Salt and pepper
- to taste Fresh parsley, chopped (for garnish)
Instructions
- Preheat your oven to 400°F (200°C).
- In a large mixing bowl, combine the shrimp, asparagus, olive oil, juice of one lemon, minced garlic, oregano, thyme, smoked paprika, salt, and pepper. Toss everything until well coated.
- Line a sheet pan with parchment paper for easy cleanup. Arrange the shrimp and asparagus in a single layer on the pan.
- Place the lemon slices on top of the shrimp and asparagus for added flavor.
- Bake in the preheated oven for 12-15 minutes, or until the shrimp are pink and opaque, and the asparagus is tender yet crisp.
- Remove the pan from the oven and garnish with freshly chopped parsley.
- Serve immediately with lemon wedges on the side for an extra burst of flavor.


![For a great Italian wedding soup, you need a few key items: - 1 cup acini di pepe pasta (or any small pasta) - 1 tablespoon olive oil - 1 medium onion, diced - 2 cloves garlic, minced - 2 medium carrots, diced - 2 celery stalks, diced - 6 cups chicken broth (low sodium) - 1 teaspoon dried oregano - 1 teaspoon dried thyme - Salt and pepper to taste - 1 cup fresh spinach or Swiss chard, chopped - ½ cup grated Parmesan cheese - 1 pound ground turkey (or chicken) - 1 teaspoon Italian seasoning - ¼ cup fresh parsley, chopped (for garnish) These ingredients work together to create a warm, comforting soup. The acini di pepe pasta adds a fun texture. The fresh veggies provide crunch and flavor. The meatballs bring hearty satisfaction. You can switch up some ingredients for your taste. Here are a few ideas: - Use spinach or Swiss chard for greens. Both add color and nutrients. - Add extra spices like red pepper flakes or fresh herbs to boost flavor. These optional ingredients let you personalize your soup. Don’t be afraid to experiment and make it your own. When it’s time to serve, pair your soup with some tasty options: - Serve with a slice of crusty bread for dipping. - A light salad on the side adds freshness to the meal. For garnishing, top your soup with fresh parsley and a sprinkle of Parmesan cheese. This makes the soup look extra special and inviting. For the complete cooking directions, check the Full Recipe. Enjoy crafting this delicious dish! To start, heat olive oil in a large pot over medium heat. Add the diced onion and sauté it until it turns soft and clear, about 3-4 minutes. Then, toss in the minced garlic, diced carrots, and celery. Cook these veggies for another 5 minutes. This step builds a great flavor base for the soup. Next, pour in 6 cups of chicken broth and bring it to a boil. The broth adds depth and richness to the soup. In a bowl, mix ground turkey with Italian seasoning, salt, and pepper. This simple mix creates tasty meatballs. Form the meat into small balls, about 1 inch wide. Once the broth is boiling, carefully add the meatballs. Reduce the heat to a gentle simmer. Let them cook for about 10 minutes. This allows the meatballs to cook fully while adding flavor to the broth. Next, stir in the acini di pepe pasta. Cook it according to the package instructions, usually about 7-9 minutes. The pasta adds heartiness to the soup. When the pasta is almost done, add chopped spinach or Swiss chard. Stir it in and let it wilt into the soup. This adds a fresh taste and bright color. Finally, mix in the grated Parmesan cheese. This adds creaminess and a savory finish. Taste and adjust salt and pepper if needed. Let the soup rest for a few minutes before serving. Enjoy this Italian wedding soup with a crusty bread slice for a complete meal. For the full recipe, check [Full Recipe]. Seasoning is key. I always add salt and pepper at each step. This builds deep flavor. Use homemade broth when you can. It gives a rich taste that store-bought broth lacks. If you use store-bought, choose low-sodium to control salt levels. Add herbs like oregano and thyme to boost the flavor. Fresh herbs work even better than dried. To save time, prep ingredients ahead. Chop veggies and form meatballs the night before. Store them in the fridge until you are ready. Cook pasta separately to keep it firm. This stops the pasta from becoming mushy in the soup. You can also cook it in a large pot of salted water while making the soup. For great meatballs, mix ground turkey with breadcrumbs and egg. This keeps them moist and tender. Aim for a consistency that holds shape but is not too dense. Choose acini di pepe pasta for the best texture. It adds a nice bite and fits perfectly in the soup. You can use small shells or ditalini if needed, but nothing beats the classic choice. {{image_2}} You can change the soup to fit your needs. If you have dietary restrictions, try these swaps: - Ground meat: Use ground beef or pork instead of turkey. - Pasta: If you don't have acini di pepe, use small shells or ditalini. - Broth: Use vegetable broth for a vegetarian version. - Greens: If you can't find spinach, try kale or arugula. These substitutions keep the soup tasty while meeting your needs. Italian wedding soup has many faces. Each region adds its own twist: - Southern Italy: You might find a spicier version with hot sausage. - Northern Italy: Some recipes use beef broth instead of chicken broth. - Local ingredients: Different herbs and vegetables may appear based on what's fresh. These regional touches highlight the rich culture behind this dish. Make the soup your own by adding fun ingredients: - Extra veggies: Try adding peas, green beans, or zucchini for more texture. - Legumes: Toss in some cannellini beans for added protein and fiber. - Spices: A dash of red pepper flakes or smoked paprika can change the flavor. These creative twists keep your Italian wedding soup exciting and flavorful. For the full recipe, check out Italian Love Soup . To store leftover Italian wedding soup, let it cool first. Pour it into an airtight container. This keeps the soup fresh and tasty. Store it in the fridge for up to three days. If you want to keep it longer, freezing is great too. Pour the soup into freezer-safe containers. Leave some space at the top for expansion. This helps prevent spills. To reheat the soup, you can use the stove or microwave. If using the stove, heat it over medium heat until it's hot. Stir it often to avoid sticking. For the microwave, place it in a microwave-safe bowl. Heat in one-minute intervals, stirring in between, until hot. In the fridge, this soup lasts about three days. After that, it may spoil. Signs of spoilage include an off smell or changes in color. If you see mold, throw it away. Always check your leftovers before eating. Making a large batch of Italian wedding soup is smart. You can enjoy it for several meals. Just double or triple the recipe. Store it in portions for easy meals later. On busy days, you can reheat the soup quickly. Use the microwave or stove as mentioned. This way, you have a warm meal ready in no time. With the soup on hand, you can enjoy a hearty dish without much fuss. For the full recipe, check out the Italian Love Soup. Italian wedding soup is a tasty dish from Italy. The name comes from "matrimonio," meaning marriage. It reflects the blend of flavors from meat and greens. This soup combines meatballs, small pasta, and fresh greens. It offers a hearty and warm meal, perfect for family gatherings. The dish showcases Italian cooking's charm, bringing people together at the table. Yes, you can make Italian wedding soup ahead of time. To do this, prepare the soup base without the pasta. Store it in an airtight container in the fridge for up to three days. When ready to serve, reheat the soup and add the pasta. This keeps the pasta from getting mushy. You can also freeze the soup base. Just remember to add the pasta when you reheat it. There are many fun ways to change up Italian wedding soup. You can swap out ground turkey for ground beef or pork. Try adding different greens, like kale or escarole, for variety. Using different types of pasta can also change the texture. For a unique twist, add beans for extra protein. Feel free to get creative and make it your own! To boost flavor, use fresh herbs like basil or dill. Adding a squeeze of lemon juice brightens the soup. You can also mix in red pepper flakes for a bit of heat. Consider using homemade broth for richer taste. Don't forget to taste and adjust salt and pepper. These simple tweaks can make your soup even more delicious. For the full recipe, please check the Italian Love Soup section. Italian Wedding Soup blends rich flavors with fresh ingredients. We covered key ingredients like pasta, meat, and vegetables. You learned how to make this dish step-by-step, from cooking the base to preparing meatballs. Tips and tricks help enhance flavors and save time. Variations allow for personal twists, accommodating dietary needs. Lastly, we discussed how to store your soup safely. With these insights, you can create a tasty and satisfying Italian Wedding Soup. Enjoy your cooking experience!](https://dailydishlab.com/wp-content/uploads/2025/07/6044dbfa-4b21-481c-9945-f2312ef87f99-768x768.webp)
![- 2 cups cooked rice (white or brown) - 1 lb boneless, skinless chicken breasts, diced - 2 cups broccoli florets (fresh or frozen) - 1 cup heavy cream - 1 cup chicken broth - 1 cup grated Parmesan cheese - 2 cups shredded mozzarella cheese - 2 tablespoons olive oil - 3 cloves garlic, minced - 1 teaspoon Italian seasoning - Salt and pepper to taste - Fresh parsley, chopped (for garnish) When creating my Chicken and Rice Skillet Alfredo Bake, I focus on fresh and simple ingredients. The rice serves as the base, and you can use either white or brown rice. Both options bring a nice texture. I always use boneless, skinless chicken breasts because they are lean and cook quickly. Adding broccoli is a great way to boost nutrition. You can use fresh florets or frozen ones, whichever you have on hand. The heavy cream and chicken broth create a rich sauce that binds everything together. I love using both Parmesan and mozzarella cheese. Parmesan adds a sharp flavor, while mozzarella gives a creamy melt. Olive oil is my go-to for sautéing the chicken. Garlic brings a wonderful aroma and taste to the dish. Italian seasoning adds depth to the flavor. Finally, I season with salt and pepper to enhance all the ingredients. A sprinkle of fresh parsley adds a pop of color and freshness to finish the dish. This recipe is perfect for families or a cozy dinner with friends. You can find the full recipe [here]. - Preheat your oven to 375°F (190°C). Getting the oven hot is key to a great bake. This helps the cheese melt perfectly and gives a nice color to the top. - Heat olive oil over medium heat. - Season and cook diced chicken until no longer pink (5-7 mins). In a large skillet, add olive oil. Let it heat for a minute. Then, toss in your seasoned chicken. You want to cook it until it’s no longer pink. This usually takes about 5 to 7 minutes. Stir often to make sure it cooks evenly. - Add garlic, rice, and broccoli to the skillet. - Combine the cream mixture and cheese before baking. Once the chicken is cooked, add minced garlic. Cook it for just a minute until fragrant. Then, stir in the cooked rice and broccoli. Mix well. In a bowl, whisk together heavy cream, chicken broth, and half the Parmesan cheese. Pour this over the chicken and rice. Stir until everything is combined. This step is crucial because it brings all the flavors together. It’s the heart of the dish. After mixing, sprinkle the top with mozzarella and the rest of the Parmesan. Now, your dish is ready for the oven! For the full recipe, refer to the above ingredients and steps. - Make sure the chicken is cooked through but not dry. - To check, cut into a piece. It should be white, not pink. If it is still pink, keep cooking it for a bit longer. - Choose the right type of rice for the perfect texture. - I suggest using long-grain rice. It holds up well when mixed with sauce. Brown rice gives a nutty taste, while white rice is softer. - Garnish with freshly chopped parsley for color. - Just a sprinkle adds bright green and freshness to your dish. It makes it look fancy! - Serve with a side salad for a balanced meal. - A simple green salad with a light dressing can complement the creamy dish well. It adds crunch and freshness. These tips can help you create a tasty Chicken and Rice Skillet Alfredo Bake that looks great on the table. For the full recipe, check the above section. {{image_2}} You can easily change this recipe to fit your needs. Here are some quick ideas: - Use cauliflower rice for a low-carb version. This swap keeps the dish tasty and light. - Substitute chicken with shrimp or tofu for different proteins. Both options add unique flavors and textures. Want to spice things up? Here are some flavor additions: - Add spicy seasonings for heat. A pinch of cayenne or red pepper flakes can make it pop. - Incorporate different vegetables like bell peppers or spinach. These veggies not only add color but also boost nutrition. Feel free to mix and match these ideas to create your perfect Chicken and Rice Skillet Alfredo Bake. Your taste buds will thank you! For the full recipe, check out the details above. Store your Chicken and Rice Skillet Alfredo Bake in an airtight container. It keeps well in the fridge for up to three days. If you have extra portions, freezing them is a great option. For freezing, use freezer-safe bags or containers. Remove as much air as possible to prevent freezer burn. Label the container with the date before placing it in the freezer. You can reheat your dish in the microwave or oven. For the microwave, place a portion in a bowl and cover it with a damp paper towel. Heat for one to two minutes, stirring halfway. For the oven, preheat it to 350°F (175°C). Place the dish in an oven-safe container, cover it with foil, and heat for about 20 minutes. This method helps keep the cheese nice and melty. To maintain texture, add a splash of cream or broth before reheating. This helps prevent it from drying out. Enjoy your comforting meal again! - Can I make this dish ahead of time? Yes, you can. Prepare the dish up to the baking step, then store it in the fridge. When ready, bake it for about 25 minutes at 375°F (190°C). This makes it easy for busy days. - How do I know when the chicken is cooked through? The chicken should be white and no longer pink in the center. You can also use a meat thermometer. It should read 165°F (74°C) to ensure it's safe to eat. - What can I serve with Chicken and Rice Skillet Alfredo Bake? This dish pairs well with a fresh side salad or steamed vegetables. You can also serve garlic bread for added comfort. - Is it possible to make this dish gluten-free? Yes, you can make it gluten-free. Just use gluten-free pasta or rice. Check that your chicken broth does not contain gluten. This way, everyone can enjoy the meal! For the full recipe, check out the detailed instructions above and enjoy a hearty comfort meal! This Chicken and Rice Skillet Alfredo Bake is simple and tasty. We covered every step, from selecting fresh ingredients to storing leftovers. Remember, you can customize the recipe with different proteins and spices. This dish is perfect for a quick dinner. Keep experimenting with flavors and textures. Enjoy the cooking process and have fun with your food. Your family will love this meal!](https://dailydishlab.com/wp-content/uploads/2025/06/4392da79-0369-4862-8466-e1a2d5a9e46b-768x768.webp)


