Sheet Pan Teriyaki Meatball Veggies Easy Family Meal

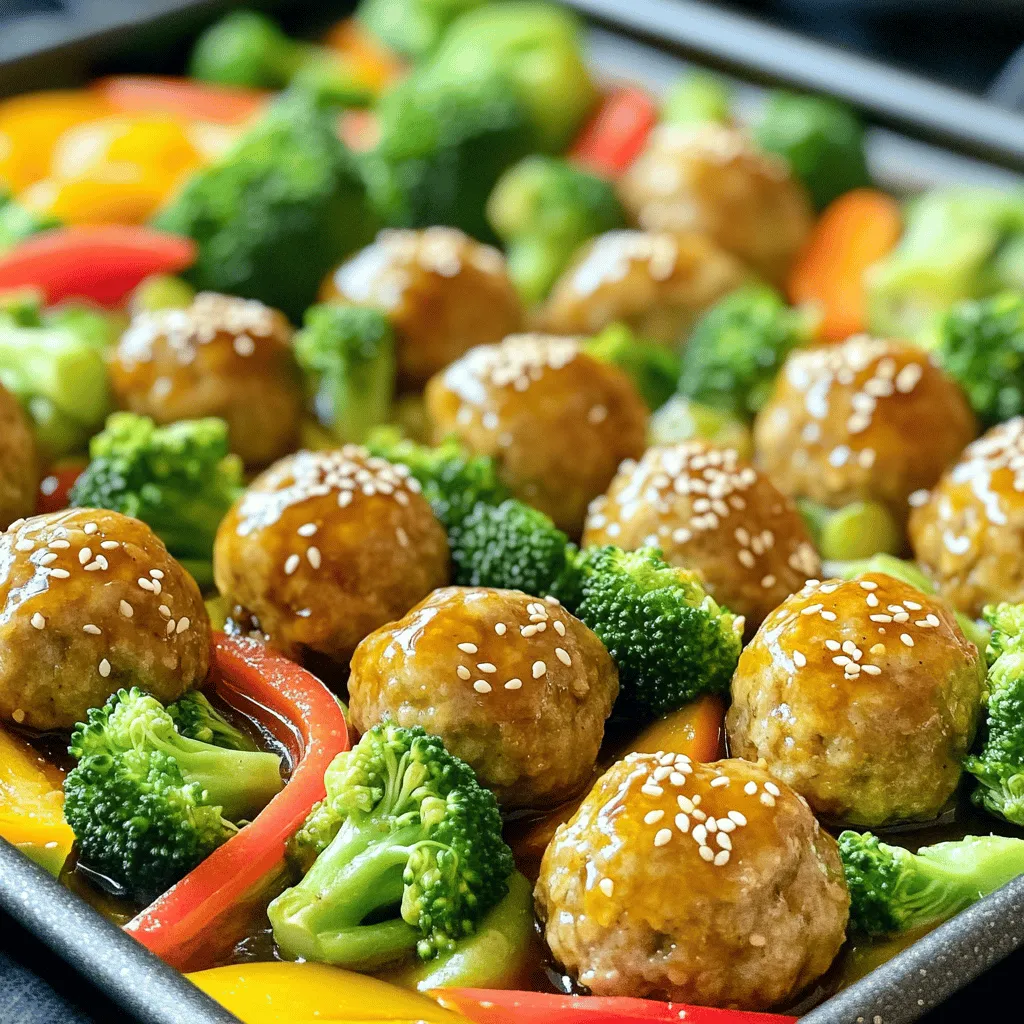
Looking for an easy and delicious family meal? Try my Sheet Pan Teriyaki Meatball Veggies! This recipe combines juicy meatballs with crisp vegetables, all glazed in tasty teriyaki sauce. It’s quick to make and clean-up is a breeze. Gather your loved ones around the table for a meal that’s fun, flavorful, and effortless. Let’s dive into the simple steps to make this satisfying dish!
Why I Love This Recipe
- Flavorful and Savory: The combination of ground chicken or turkey with teriyaki sauce creates a deliciously savory flavor that’s hard to resist.
- Healthy and Colorful Veggies: This recipe includes a variety of vegetables that not only add color to your plate but also pack in essential nutrients.
- Easy Cleanup: Using a sheet pan means less mess in the kitchen, making this meal perfect for busy weeknights.
- Quick and Satisfying: With a total cooking time of just 40 minutes, you can have a wholesome meal on the table in no time!
Ingredients
Meatball Ingredients
- 1 pound ground chicken or turkey
- 1/2 cup breadcrumbs
- 1/4 cup green onions, finely chopped
- 2 cloves garlic, minced
- 1 tablespoon ginger, grated
- 1 egg, beaten
- 1/4 cup teriyaki sauce (plus more for drizzling)
- 1 teaspoon sesame oil
- Salt and pepper to taste
Vegetable Ingredients
- 2 cups broccoli florets
- 1 red bell pepper, sliced
- 1 carrot, thinly sliced
- 1 tablespoon olive oil
Teriyaki Sauce and Seasoning
You will need teriyaki sauce for the meatballs and drizzling. This sauce brings a sweet and savory flavor. I use store-bought teriyaki sauce for ease. If you want, you can make your own too. Just mix soy sauce, honey, garlic, and ginger. Adjust the taste as you like. Sesame oil adds a nice touch. It gives a slight nutty flavor to the meatballs. Salt and pepper help to enhance all these flavors. Make sure to season well!

Step-by-Step Instructions
Preparing the Oven and Baking Sheet
Start by preheating your oven to 400°F (200°C). This step is key for cooking the meatballs and veggies. Next, line a large baking sheet with parchment paper. This makes for easy cleanup and helps the food not stick.
Mixing the Meatball Mixture
In a large bowl, add 1 pound of ground chicken or turkey. Mix in 1/2 cup of breadcrumbs, 1/4 cup of finely chopped green onions, and 2 minced garlic cloves. Don’t forget the 1 tablespoon of grated ginger. Pour in 1/4 cup of teriyaki sauce, then add 1 teaspoon of sesame oil. Season with salt and pepper. Finally, add 1 beaten egg. Mix everything well until it’s all combined.
Shaping and Arranging on the Sheet Pan
Now, shape the meatball mixture into 1-inch balls. Place them evenly on one side of your prepared baking sheet. This keeps them from sticking together.
Roasting the Meatballs and Vegetables
In another bowl, toss 2 cups of broccoli florets, 1 sliced red bell pepper, and 1 thinly sliced carrot with 1 tablespoon of olive oil. Season with salt and pepper. Arrange the veggies on the other side of the baking sheet. Roast everything in the oven for 20-25 minutes. The meatballs should reach an internal temperature of 165°F (74°C). After that, drizzle more teriyaki sauce over everything and pop it back in the oven for 5 more minutes. This will caramelize the flavors. Finally, garnish with sesame seeds and let it cool for a few minutes before serving.
Pro Tips
- Use Fresh Ingredients: Fresh vegetables and herbs will enhance the flavor of your meatballs and veggies significantly.
- Adjust the Spice Level: If you like a little heat, consider adding red pepper flakes to the meatball mixture for an extra kick.
- Make Ahead: You can prepare and shape the meatballs in advance, then refrigerate them until you’re ready to bake.
- Customize Your Veggies: Feel free to swap in your favorite vegetables, such as snap peas or zucchini, depending on what’s in season.
Tips & Tricks
Ensuring Meatballs Retain Moisture
To keep your meatballs moist, use ground chicken or turkey. These meats are lean, so they need help to stay juicy. Mixing in breadcrumbs helps too. They soak up moisture and add a nice texture. Don’t skip the egg; it binds the mix and keeps them soft. Avoid overcooking; meatballs should reach 165°F. This way, they stay tender and juicy.
Vegetable Preparation Tips
For the best veggies, cut them evenly. This way, they cook at the same rate. Broccoli florets should be bite-sized, while carrot slices should be thin. This helps them cook through and get tender. Toss the veggies in olive oil, salt, and pepper. This adds flavor and helps them roast nicely. You can also mix in other veggies, like snap peas or zucchini, for variety.
Cleaning and Handling Equipment
Start with a clean sheet pan. Line it with parchment paper for easy cleanup. Use a large bowl for mixing; it makes combining ingredients easier. After shaping your meatballs, use a spoon to transfer them to the pan. This keeps your hands clean and makes the process quick. Rinse tools right after use to prevent sticking and make washing easier later.

Variations
Substitute Proteins for Meatballs
You can easily change the meat in these meatballs. Instead of ground chicken or turkey, try ground beef, pork, or even plant-based options like lentils or chickpeas. Each protein gives a different taste and texture. If you go for beef, the meatballs will be richer. Plant-based proteins can make this dish lighter, perfect for veggie lovers.
Different Vegetables to Use
This recipe is very flexible with veggies. You can swap the broccoli, bell pepper, and carrot for your favorites. Think snap peas, zucchini, or even sweet potatoes. Just cut them to the same size for even cooking. Mixing colors adds fun and makes the dish more appealing. Plus, it gives you different flavors and nutrients.
Homemade vs. Store-Bought Teriyaki Sauce
You can use store-bought teriyaki sauce for ease. It saves time and still tastes great. But if you want to try making it at home, it’s simple and fun! Just mix soy sauce, honey, ginger, and garlic. You can control the sweetness and saltiness. Homemade sauce can be fresher and tailored to your taste.
Storage Info
Refrigerating Leftovers
After your meal, let the leftovers cool to room temperature. Place the meatballs and veggies in an airtight container. They will stay fresh for up to four days in the fridge. Make sure to store them separately if possible. This keeps the meatballs from getting soggy.
Freezing Instructions
To freeze leftovers, first let them cool completely. Then, transfer them to a freezer-safe container. You can also use freezer bags. Remove as much air as you can. This helps prevent freezer burn. Leftovers can last for up to three months in the freezer. When you’re ready to eat, simply thaw in the fridge overnight.
Reheating Tips
Reheat your meal in the oven or microwave. For the oven, set it to 350°F (175°C). Place the meatballs and veggies on a baking sheet. Heat for about 15 minutes or until warm. For the microwave, use a microwave-safe dish. Heat in short bursts, stirring in between, until hot. Enjoy your tasty meal again!
FAQs
Can I use a different type of meat?
Yes, you can. Ground beef, pork, or lamb work great too. Just remember that cooking times may change. Beef and pork may require longer cooking. Check the internal temperature to ensure safety. Aim for 165°F (74°C) for all meats.
How can I make this recipe gluten-free?
To make it gluten-free, use gluten-free breadcrumbs. You can find these in most stores. Also, choose a gluten-free teriyaki sauce. Many brands offer options without gluten. Always check the label to be sure.
What can I serve with Sheet Pan Teriyaki Meatball Veggies?
This dish pairs well with rice or quinoa. You could also serve it over noodles for a fun twist. A simple green salad adds freshness too. Feel free to get creative with sides that you love.
How long do leftovers last in the fridge?
Leftovers stay good in the fridge for about 3 to 4 days. Store them in an airtight container. If you want to keep them longer, consider freezing. They can last up to 3 months in the freezer. Just reheat when you’re ready to enjoy!
You now have all you need to make delicious sheet pan teriyaki meatballs and veggies. We covered ingredients, step-by-step instructions, and tips for the best results. Don’t forget to try the variations to suit your taste. Store leftovers properly to enjoy later. Use this guide to impress your family and friends with your cooking. You can create a tasty meal that’s easy and fun. Enjoy your cooking adventure with these tasty meatballs!

Sheet Pan Teriyaki Meatball Veggies
Ingredients
1 pound ground chicken or turkey
1/2 cup breadcrumbs
1/4 cup green onions, finely chopped
2 cloves garlic, minced
1 tablespoon ginger, grated
1 egg, beaten
1/4 cup teriyaki sauce (plus more for drizzling)
1 teaspoon sesame oil
Salt and pepper to taste
2 cups broccoli florets
1 red bell pepper, sliced
1 carrot, thinly sliced
1 tablespoon olive oil
Sesame seeds for garnish
Instructions
Preheat your oven to 400°F (200°C) and line a large baking sheet with parchment paper for easy cleanup.
In a large bowl, combine the ground chicken (or turkey), breadcrumbs, green onions, minced garlic, grated ginger, beaten egg, teriyaki sauce, sesame oil, salt, and pepper. Mix until all ingredients are well incorporated.
Shape the mixture into 1-inch meatballs and place them evenly on one side of the prepared baking sheet.
In another bowl, toss the broccoli, red bell pepper, and carrot slices with olive oil, salt, and pepper until evenly coated. Arrange the vegetables on the other side of the baking sheet.
Roast everything in the preheated oven for about 20-25 minutes, or until the meatballs are cooked through (internal temperature should reach 165°F/74°C) and the vegetables are tender.
Drizzle additional teriyaki sauce over the meatballs and veggies, and return to the oven for an extra 5 minutes to caramelize slightly.
Remove the sheet from the oven, garnish with sesame seeds, and let cool for a few minutes before serving.
Prep Time: 15 minutes | Total Time: 40 minutes | Servings: 4

Sheet Pan Teriyaki Meatball Veggies
Ingredients
- 1 pound ground chicken or turkey
- 0.5 cup breadcrumbs
- 0.25 cup green onions, finely chopped
- 2 cloves garlic, minced
- 1 tablespoon ginger, grated
- 1 egg beaten
- 0.25 cup teriyaki sauce (plus more for drizzling)
- 1 teaspoon sesame oil
- to taste salt and pepper
- 2 cups broccoli florets
- 1 red bell pepper sliced
- 1 carrot thinly sliced
- 1 tablespoon olive oil
- for garnish sesame seeds
Instructions
- Preheat your oven to 400°F (200°C) and line a large baking sheet with parchment paper for easy cleanup.
- In a large bowl, combine the ground chicken (or turkey), breadcrumbs, green onions, minced garlic, grated ginger, beaten egg, teriyaki sauce, sesame oil, salt, and pepper. Mix until all ingredients are well incorporated.
- Shape the mixture into 1-inch meatballs and place them evenly on one side of the prepared baking sheet.
- In another bowl, toss the broccoli, red bell pepper, and carrot slices with olive oil, salt, and pepper until evenly coated. Arrange the vegetables on the other side of the baking sheet.
- Roast everything in the preheated oven for about 20-25 minutes, or until the meatballs are cooked through (internal temperature should reach 165°F/74°C) and the vegetables are tender.
- Drizzle additional teriyaki sauce over the meatballs and veggies, and return to the oven for an extra 5 minutes to caramelize slightly.
- Remove the sheet from the oven, garnish with sesame seeds, and let cool for a few minutes before serving.


![- 1 lb boneless, skinless chicken breasts, sliced into thin strips - 2 tablespoons olive oil - 1 tablespoon lime juice - 1 teaspoon ground cumin - 1 teaspoon chili powder - 1 teaspoon garlic powder - 1 teaspoon onion powder - Salt and pepper to taste - 1 red bell pepper, sliced - 1 green bell pepper, sliced - 1 medium onion, sliced - 4 small flour tortillas For a great chicken fajita, the main ingredients matter. Start with fresh chicken. You want boneless, skinless breasts. Slice them thin for quick cooking. The next star is the bell peppers. I love a mix of red and green. They add color and crunch. Don't forget the onion. It adds sweetness when cooked. Seasonings make the fajitas pop. Ground cumin gives warmth. Chili powder adds a nice kick. Garlic and onion powders boost the flavor. A splash of lime juice brightens everything up. Always use salt and pepper to taste. - Fresh cilantro - Sour cream - Guacamole Garnishes can elevate your meal. Fresh cilantro adds a burst of freshness. Sour cream brings creaminess and coolness. Guacamole adds richness. You can mix and match these sides for a fun twist. - Skillet or cast-iron pan - Mixing bowl - Tongs You don't need fancy tools to make fajitas. A good skillet or cast-iron pan heats evenly. A mixing bowl works well for marinating chicken. Tongs help flip the chicken and veggies easily. With these basics, you're ready for a tasty night! For the full recipe, check out the link provided. Marinating the chicken Start by slicing 1 pound of boneless, skinless chicken breasts into thin strips. In a large bowl, mix the chicken with 2 tablespoons of olive oil, 1 tablespoon of lime juice, 1 teaspoon of ground cumin, 1 teaspoon of chili powder, 1 teaspoon of garlic powder, 1 teaspoon of onion powder, and salt and pepper. Stir until the chicken is well coated. Let it marinate for at least 15 minutes. This step adds flavor and keeps the chicken juicy. Cooking the chicken Preheat a large skillet or cast-iron pan over medium-high heat. Once hot, add the marinated chicken to the skillet. Cook the chicken for about 5 to 7 minutes. Stir it occasionally until the chicken is cooked through and lightly browned. Remove the chicken from the skillet and set it aside on a plate. Preparing bell peppers and onions While the chicken cools, slice 1 red bell pepper, 1 green bell pepper, and 1 medium onion. These veggies will add color and crunch to your fajitas. Cooking the vegetables In the same skillet, add the sliced bell peppers and onion. Sauté them for about 3 to 4 minutes. You want them tender but still crisp. The leftover flavor from the chicken will enhance the veggies. Tossing chicken and vegetables together After the vegetables are cooked, add the chicken back into the skillet. Toss everything together for another 2 minutes to heat it all through. This step mixes the flavors perfectly. Heating the tortillas Warm 4 small flour tortillas in a separate dry skillet or microwave for a few seconds. This makes them soft and easy to fold. Now you are ready to serve your chicken fajitas! Enjoy this simple yet tasty dish with fresh cilantro, sour cream, and guacamole. For the full recipe, check the details above. Marinating the chicken is key for great taste. It allows flavors to soak in well. I recommend marinating for at least 30 minutes. If you have time, longer is better. Use these seasonings for a tasty mix: - 1 teaspoon ground cumin - 1 teaspoon chili powder - 1 teaspoon garlic powder - 1 teaspoon onion powder - Salt and pepper to taste These spices add warmth and depth. They make the chicken truly delicious. To get the best results, heat your skillet to medium-high. A hot skillet helps brown the chicken. Stir the chicken often while cooking. This keeps it from sticking and helps it cook evenly. Cook for 5-7 minutes until the chicken is done. The edges should look golden brown. When cooking the veggies, sauté them for about 3-4 minutes. You want them tender but still crisp. This gives a nice texture to your fajitas. Serving fajitas is fun and easy! Start by placing a warm tortilla on a plate. Add a generous scoop of the chicken and veggie mix in the center. Top it off with fresh cilantro for color and flavor. You can also serve sour cream and guacamole on the side. This adds creaminess and richness to each bite. For a colorful plate, think about adding lime wedges too. They add a bright touch and a zesty kick. Enjoy your meal! {{image_2}} If you want to switch up the protein in your chicken fajitas, you have great options. You can use beef or shrimp for a different taste. Beef fajitas are juicy and rich. Shrimp cooks fast and adds a seafood twist. For those who prefer no meat, try using firm tofu or portobello mushrooms. These vegetarian options soak up spices well and taste great. The spice level is key to making fajitas your own. You can keep them mild, go for medium, or make them hot. To add heat, use jalapeños or serrano peppers. You can also add hot sauce or chili flakes. Start with small amounts and taste as you go. This way, you can find that perfect balance you love. Choosing the right tortilla can change your fajitas. Flour tortillas are soft and chewy, while corn tortillas are more traditional with a nice crunch. If you need gluten-free options, there are great corn tortillas available. You can also find gluten-free flour tortillas. Each choice will give your dish a different feel and flavor. For the full recipe, click [Full Recipe]. To keep your chicken fajitas fresh, store them in the fridge. Use an airtight container. Make sure to cool them first. They stay good for about 3 to 4 days. If you want to keep them longer, freeze your fajitas. Place them in a freezer-safe bag. They can last up to 3 months in the freezer. Reheating your fajitas can be easy. Use a skillet over medium heat for the best results. This method keeps the chicken and veggies nice and warm. You can also use a microwave. Just heat in short bursts. Stir in between to avoid hot spots. To keep your fajitas from getting soggy, don't cover them tightly while reheating. Chicken fajitas are safe to eat for 3 to 4 days in the fridge. If you freeze them, they last up to 3 months. Check for signs of spoilage before eating. Look for any off smells or changes in color. If they seem odd, it’s best to toss them. Enjoy your meal safely! For the full recipe, check out [Full Recipe]. To make chicken fajitas from scratch, follow these steps: 1. Marinate the Chicken: In a bowl, mix sliced chicken with olive oil, lime juice, cumin, chili powder, garlic powder, onion powder, salt, and pepper. Ensure each piece is well coated. 2. Cook the Chicken: Heat a skillet over medium-high heat. Add the marinated chicken and cook for 5-7 minutes. Stir until it turns golden brown and is cooked through. 3. Sauté the Veggies: Remove the chicken and set it aside. In the same skillet, add sliced bell peppers and onion. Cook for about 3-4 minutes until they are tender yet crisp. 4. Combine: Return the chicken to the skillet. Toss everything together for 2 more minutes to blend flavors. 5. Warm Tortillas: Heat flour tortillas in a dry skillet or microwave for a few seconds. 6. Serve: Place the chicken and veggies in the center of each tortilla. Add fresh cilantro, and serve with sour cream and guacamole. For the full recipe, check out the complete guide. Yes, you can use frozen chicken for fajitas. However, there are a few things to consider: - Thawing: Thaw the chicken in the fridge overnight or use the defrost setting on your microwave. - Cooking Time: Frozen chicken may take longer to cook. Ensure it reaches an internal temperature of 165°F. - Flavor: Fresh chicken may absorb marinades better than frozen. If using frozen, marinate it after thawing for better flavor. Toppings can enhance your chicken fajitas. Here are popular choices: - Fresh Cilantro: Adds brightness to each bite. - Sour Cream: Provides a creamy texture and coolness. - Guacamole: Offers rich flavor and creaminess. - Shredded Cheese: Adds a savory touch. - Salsa: Brings extra zest and freshness. - Lime Wedges: A squeeze of lime can brighten the dish. Feel free to mix and match to find your perfect topping combination! In this article, we explored classic chicken fajitas, from ingredients to cooking steps. You learned about marinating chicken, sautéing veggies, and the best serving tips. I also shared ways to customize flavors and storage info. Remember, a good fajita needs quality ingredients and care. Enjoy experimenting with different proteins and spice levels! Fajitas are fun and easy, so get cooking and share your delicious results.](https://dailydishlab.com/wp-content/uploads/2025/06/66375333-28c8-40a4-a8c4-3c36aa5b429f-768x768.webp)


![- 2 cups cooked rice (white or brown) - 1 lb boneless, skinless chicken breasts, diced - 2 cups broccoli florets (fresh or frozen) - 1 cup heavy cream - 1 cup chicken broth - 1 cup grated Parmesan cheese - 2 cups shredded mozzarella cheese - 2 tablespoons olive oil - 3 cloves garlic, minced - 1 teaspoon Italian seasoning - Salt and pepper to taste - Fresh parsley, chopped (for garnish) When creating my Chicken and Rice Skillet Alfredo Bake, I focus on fresh and simple ingredients. The rice serves as the base, and you can use either white or brown rice. Both options bring a nice texture. I always use boneless, skinless chicken breasts because they are lean and cook quickly. Adding broccoli is a great way to boost nutrition. You can use fresh florets or frozen ones, whichever you have on hand. The heavy cream and chicken broth create a rich sauce that binds everything together. I love using both Parmesan and mozzarella cheese. Parmesan adds a sharp flavor, while mozzarella gives a creamy melt. Olive oil is my go-to for sautéing the chicken. Garlic brings a wonderful aroma and taste to the dish. Italian seasoning adds depth to the flavor. Finally, I season with salt and pepper to enhance all the ingredients. A sprinkle of fresh parsley adds a pop of color and freshness to finish the dish. This recipe is perfect for families or a cozy dinner with friends. You can find the full recipe [here]. - Preheat your oven to 375°F (190°C). Getting the oven hot is key to a great bake. This helps the cheese melt perfectly and gives a nice color to the top. - Heat olive oil over medium heat. - Season and cook diced chicken until no longer pink (5-7 mins). In a large skillet, add olive oil. Let it heat for a minute. Then, toss in your seasoned chicken. You want to cook it until it’s no longer pink. This usually takes about 5 to 7 minutes. Stir often to make sure it cooks evenly. - Add garlic, rice, and broccoli to the skillet. - Combine the cream mixture and cheese before baking. Once the chicken is cooked, add minced garlic. Cook it for just a minute until fragrant. Then, stir in the cooked rice and broccoli. Mix well. In a bowl, whisk together heavy cream, chicken broth, and half the Parmesan cheese. Pour this over the chicken and rice. Stir until everything is combined. This step is crucial because it brings all the flavors together. It’s the heart of the dish. After mixing, sprinkle the top with mozzarella and the rest of the Parmesan. Now, your dish is ready for the oven! For the full recipe, refer to the above ingredients and steps. - Make sure the chicken is cooked through but not dry. - To check, cut into a piece. It should be white, not pink. If it is still pink, keep cooking it for a bit longer. - Choose the right type of rice for the perfect texture. - I suggest using long-grain rice. It holds up well when mixed with sauce. Brown rice gives a nutty taste, while white rice is softer. - Garnish with freshly chopped parsley for color. - Just a sprinkle adds bright green and freshness to your dish. It makes it look fancy! - Serve with a side salad for a balanced meal. - A simple green salad with a light dressing can complement the creamy dish well. It adds crunch and freshness. These tips can help you create a tasty Chicken and Rice Skillet Alfredo Bake that looks great on the table. For the full recipe, check the above section. {{image_2}} You can easily change this recipe to fit your needs. Here are some quick ideas: - Use cauliflower rice for a low-carb version. This swap keeps the dish tasty and light. - Substitute chicken with shrimp or tofu for different proteins. Both options add unique flavors and textures. Want to spice things up? Here are some flavor additions: - Add spicy seasonings for heat. A pinch of cayenne or red pepper flakes can make it pop. - Incorporate different vegetables like bell peppers or spinach. These veggies not only add color but also boost nutrition. Feel free to mix and match these ideas to create your perfect Chicken and Rice Skillet Alfredo Bake. Your taste buds will thank you! For the full recipe, check out the details above. Store your Chicken and Rice Skillet Alfredo Bake in an airtight container. It keeps well in the fridge for up to three days. If you have extra portions, freezing them is a great option. For freezing, use freezer-safe bags or containers. Remove as much air as possible to prevent freezer burn. Label the container with the date before placing it in the freezer. You can reheat your dish in the microwave or oven. For the microwave, place a portion in a bowl and cover it with a damp paper towel. Heat for one to two minutes, stirring halfway. For the oven, preheat it to 350°F (175°C). Place the dish in an oven-safe container, cover it with foil, and heat for about 20 minutes. This method helps keep the cheese nice and melty. To maintain texture, add a splash of cream or broth before reheating. This helps prevent it from drying out. Enjoy your comforting meal again! - Can I make this dish ahead of time? Yes, you can. Prepare the dish up to the baking step, then store it in the fridge. When ready, bake it for about 25 minutes at 375°F (190°C). This makes it easy for busy days. - How do I know when the chicken is cooked through? The chicken should be white and no longer pink in the center. You can also use a meat thermometer. It should read 165°F (74°C) to ensure it's safe to eat. - What can I serve with Chicken and Rice Skillet Alfredo Bake? This dish pairs well with a fresh side salad or steamed vegetables. You can also serve garlic bread for added comfort. - Is it possible to make this dish gluten-free? Yes, you can make it gluten-free. Just use gluten-free pasta or rice. Check that your chicken broth does not contain gluten. This way, everyone can enjoy the meal! For the full recipe, check out the detailed instructions above and enjoy a hearty comfort meal! This Chicken and Rice Skillet Alfredo Bake is simple and tasty. We covered every step, from selecting fresh ingredients to storing leftovers. Remember, you can customize the recipe with different proteins and spices. This dish is perfect for a quick dinner. Keep experimenting with flavors and textures. Enjoy the cooking process and have fun with your food. Your family will love this meal!](https://dailydishlab.com/wp-content/uploads/2025/06/4392da79-0369-4862-8466-e1a2d5a9e46b-768x768.webp)