Simple Roasted Sweet Potatoes Flavorful and Easy Recipe

Are you ready to enjoy a tasty treat that’s both simple and good for you? In this article, I’ll show you how to make simple roasted sweet potatoes. With just a few ingredients and easy steps, you will unlock flavors that excite your taste buds. Whether you want a side dish or a healthy snack, this recipe is perfect. Let’s dive into the world of sweet potatoes and get cooking!
Why I Love This Recipe
- Easy Preparation: This recipe requires minimal effort, making it perfect for busy weeknights or quick side dishes.
- Flavorful Combination: The blend of smoked paprika, cumin, and cayenne pepper adds a unique and delicious depth to the sweet potatoes.
- Health Benefits: Sweet potatoes are packed with vitamins and nutrients, making this dish a nutritious choice for your meals.
- Versatile Dish: These roasted sweet potatoes can be served as a side, added to salads, or enjoyed as a snack on their own.
Ingredients
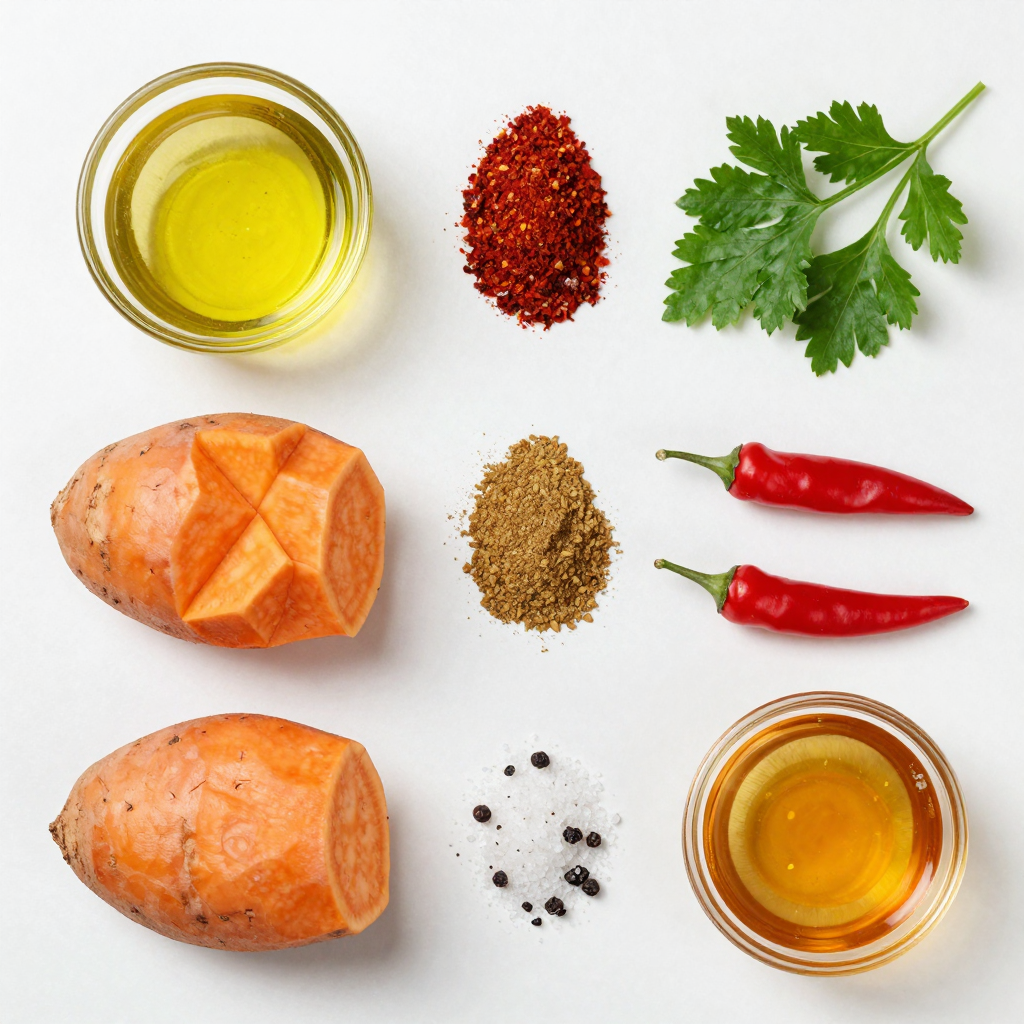
Essential Ingredients for Simple Roasted Sweet Potatoes
- 4 medium sweet potatoes
- 3 tablespoons olive oil
- 1 teaspoon smoked paprika
These simple ingredients create a flavorful base. Sweet potatoes bring a natural sweetness and creaminess. Olive oil helps them roast well, adding crispness. Smoked paprika gives a warm, smoky flavor that elevates the dish.
Seasoning and Flavor Enhancements
- 1 teaspoon ground cumin
- 1/2 teaspoon cayenne pepper
- Salt and black pepper
Ground cumin adds a rich, earthy taste, while cayenne pepper brings heat. Adjust the cayenne to your spice level. Salt and black pepper enhance all the flavors. Use these spices to make your sweet potatoes exciting and better.
Optional Garnishes
- 2 tablespoons maple syrup
- Fresh parsley, chopped
Maple syrup adds a sweet glaze that caramelizes as the sweet potatoes roast. Fresh parsley adds a pop of color and a hint of freshness. You can skip these if you want, but they add extra flavor and visual appeal.

Step-by-Step Instructions
Preparing the Sweet Potatoes
First, peel the sweet potatoes. Use a sharp peeler for ease. Once peeled, cut them into even cubes. Aim for 1-inch pieces to ensure even cooking. Next, preheat your oven to 425°F (220°C). This temperature helps caramelize the sugars in the sweet potatoes.
Mixing Ingredients
In a large bowl, add the cubed sweet potatoes. Pour in 3 tablespoons of olive oil. Olive oil gives them a nice flavor and helps crisp them up. Now, add 1 teaspoon of smoked paprika and 1 teaspoon of ground cumin. These spices add warmth and depth. For a kick, stir in 1/2 teaspoon of cayenne pepper, along with salt and black pepper to taste. Mix everything until the sweet potatoes are well coated.
For a touch of sweetness, drizzle 2 tablespoons of maple syrup over the seasoned sweet potatoes. Toss again. The syrup will caramelize during roasting, enhancing the flavor.
Roasting Process
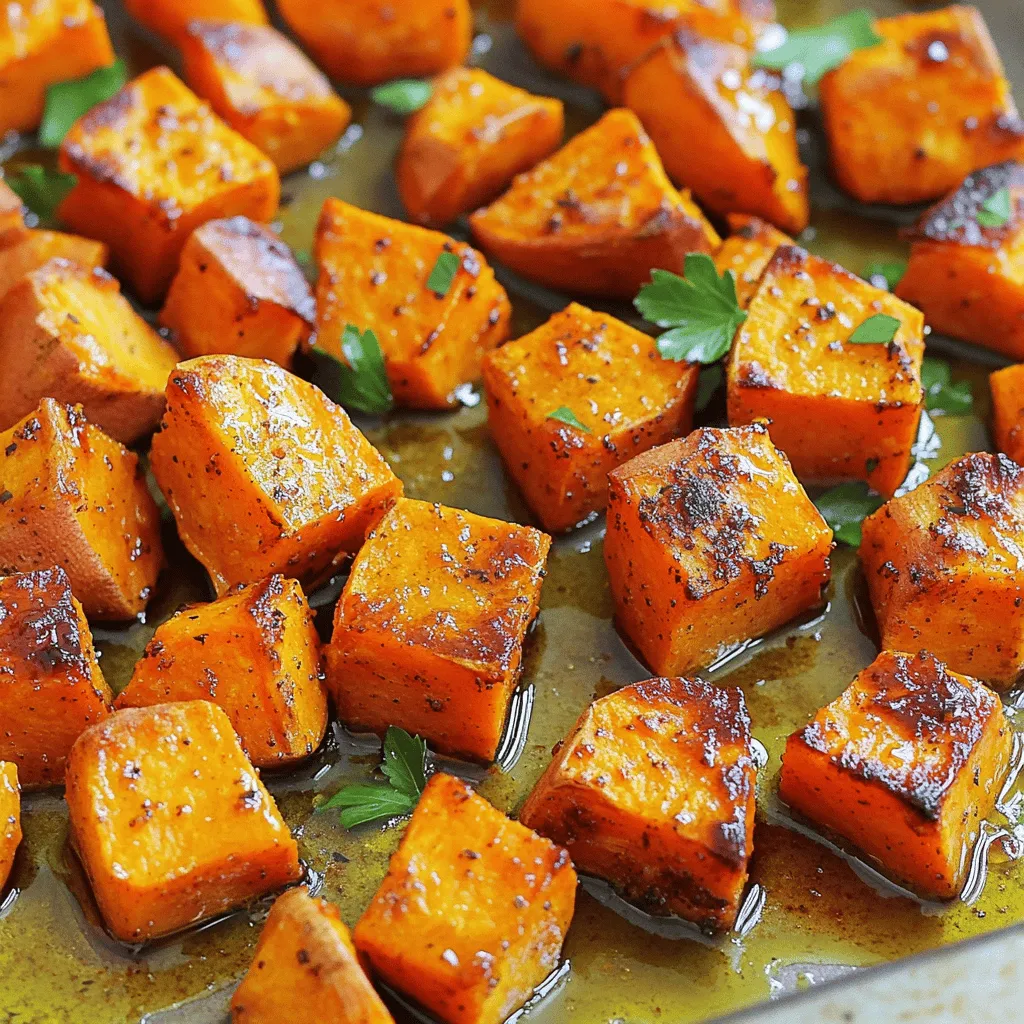
Now, spread the sweet potatoes evenly on a lined baking sheet. Make sure to keep them in a single layer. If they are too crowded, they won’t roast well. Place them in the preheated oven and roast for about 25 to 30 minutes. Be sure to flip them halfway through cooking. This ensures they brown evenly and become tender.
Once they are golden and soft, take them out of the oven. Let them cool slightly before serving. Add some chopped fresh parsley for a pop of color. Enjoy your deliciously spiced roasted sweet potatoes!
Pro Tips
- Choose the Right Sweet Potatoes: Look for firm, unblemished sweet potatoes for the best flavor and texture.
- Keep Them Uniform: Cut the sweet potatoes into even cubes to ensure they roast evenly and cook at the same rate.
- Adjust the Spice Level: Feel free to increase or decrease the amount of cayenne pepper based on your heat preference.
- Storage Tips: Store any leftovers in an airtight container in the refrigerator for up to 3 days. Reheat in the oven for best results.
Tips & Tricks
Perfecting the Roasting Technique
To make the best roasted sweet potatoes, set your oven to 425°F (220°C). This temperature helps the sweet potatoes cook evenly. An oven that is too hot can burn the outside before the inside cooks.
Spacing is key when you arrange the sweet potatoes on the baking sheet. Place them in a single layer. If you crowd them, they will steam instead of roast. This can lead to mushy potatoes.
Adjusting Flavor to Your Preference
You can easily change the flavor of your sweet potatoes. Try adding spices like garlic powder or cinnamon. These spices can add warmth and depth. You can also add a pinch more cayenne for heat or leave it out for a milder taste.
If you want to control the spice level, start with less cayenne. You can always add more later. This way, you can find the right heat for your taste buds.
Cooking Time Recommendations
The cooking time for sweet potatoes can vary. Factors like cube size and oven performance matter. Generally, roast them for about 25-30 minutes.
You know they are ready when they are tender and golden brown. A fork should easily pierce them. If they are still firm, give them a few more minutes. Follow these tips to ensure perfect roasted sweet potatoes every time.

Variations
Flavor Variations
You can change the flavor of roasted sweet potatoes easily. Try different spice mixes for variety. Here are some great combinations:
- Cinnamon and nutmeg: This gives a warm, sweet taste.
- Curry powder: For a spicy and earthy flavor.
- Garlic powder: Adds a savory touch.
Instead of maple syrup, use honey for a different sweet flavor. Honey caramelizes well and gives a unique taste. Just remember, honey is sweeter, so use a little less.
Serving Suggestions
Roasted sweet potatoes pair well with many foods. They work great with proteins like chicken, fish, or beans. You can also add them to salads for a tasty twist.
Try these ideas:
- Add to a grain bowl: Mix with quinoa, greens, and a dressing.
- Toss in green salads: They add color and nutrition.
- Blend into a wrap: Use with hummus and fresh veggies.
Dietary Adjustments
You can make this recipe vegan easily. Just ensure you use maple syrup or another plant-based sweetener.
If you need a gluten-free option, you’re in luck! Sweet potatoes are naturally gluten-free. Just check all your spices and oils are gluten-free to keep it safe.
You can enjoy this dish no matter your diet!
Storage Info
Storing Leftover Roasted Sweet Potatoes
To keep your roasted sweet potatoes fresh, use an airtight container. Glass or plastic containers work well. Make sure they are completely cool before sealing. This helps prevent steam buildup, which can make them soggy.
Keep the container in the refrigerator. It can last for up to four days. If you notice any moisture, you can place a paper towel inside. This will absorb excess water.
Reheating Tips
When it’s time to enjoy those leftovers, reheating is simple. The best way is to use an oven. Preheat it to 350°F (175°C). Spread the sweet potatoes on a baking sheet and heat for about 10-15 minutes. This method keeps them crispy.
If you are in a hurry, the microwave works too. Place them in a microwave-safe dish and cover it. Heat for 1-2 minutes, checking often. This way, you avoid overcooking.
Freezing Roasted Sweet Potatoes
Freezing roasted sweet potatoes is easy and great for meal prep. Start by spreading them on a baking sheet. Freeze them for about an hour, so they don’t stick together. Once frozen, transfer them to a freezer-safe bag.
To thaw, place them in the refrigerator overnight. For reheating, use the oven at 350°F (175°C) for about 15-20 minutes. You can also microwave them, but the oven keeps them crispy and tasty.
FAQs
How long does it take to roast sweet potatoes?
Roasting sweet potatoes usually takes about 25 to 30 minutes. The size of the sweet potatoes affects the time. If they are small, check them at 20 minutes. Larger pieces may need up to 35 minutes. You want them tender and golden brown. Always flip them halfway for even cooking.
Can I use other types of potatoes for this recipe?
Yes, you can use other potatoes like red or Yukon gold. They have different textures and flavors. However, they may not be as sweet as sweet potatoes. Adjust the spices to match the potato type. For example, white potatoes may need more seasoning.
What’s the best way to peel sweet potatoes quickly?
A sharp vegetable peeler works best for peeling sweet potatoes. Start at one end and move to the other. You can also cook them a bit to soften the skin. When they cool, the skin peels off easily. This method saves the most flesh.
In this post, we’ve explored how to make simple roasted sweet potatoes. You learned the key ingredients, step-by-step cooking instructions, and some handy tips. Remember to adjust flavors for your taste, and don’t shy away from trying different spices. Storing leftovers and reheating them properly ensures you enjoy your sweet potatoes again. With these techniques, you can create delicious and healthy meals easily. Enjoy your cooking journey!

Simple Roasted Sweet Potatoes
Ingredients
4 medium sweet potatoes, peeled and cubed
3 tablespoons olive oil
1 teaspoon smoked paprika
1 teaspoon ground cumin
1/2 teaspoon cayenne pepper (adjust for spice level)
Salt and black pepper to taste
2 tablespoons maple syrup
Fresh parsley, chopped (for garnish)
Instructions
Preheat your oven to 425°F (220°C) and line a large baking sheet with parchment paper for easy cleanup.
In a large bowl, combine the cubed sweet potatoes, olive oil, smoked paprika, ground cumin, cayenne pepper, salt, and black pepper. Toss until the sweet potatoes are well coated with the spices.
Drizzle the maple syrup over the seasoned sweet potatoes and toss again to combine. The syrup will caramelize during roasting, adding a lovely sweetness.
Spread the sweet potatoes evenly on the prepared baking sheet in a single layer. Ensure they are not overcrowded to allow for even roasting.
Roast in the preheated oven for about 25-30 minutes, flipping them halfway through, until they are tender and golden brown.
Remove from the oven and let them cool slightly before serving.
Garnish with chopped fresh parsley for added color and freshness.
Prep Time: 10 minutes | Total Time: 40 minutes | Servings: 4

Simple Roasted Sweet Potatoes
Ingredients
- 4 medium sweet potatoes, peeled and cubed
- 3 tablespoons olive oil
- 1 teaspoon smoked paprika
- 1 teaspoon ground cumin
- 0.5 teaspoon cayenne pepper
- to taste Salt and black pepper
- 2 tablespoons maple syrup
- as needed Fresh parsley, chopped (for garnish)
Instructions
- Preheat your oven to 425°F (220°C) and line a large baking sheet with parchment paper for easy cleanup.
- In a large bowl, combine the cubed sweet potatoes, olive oil, smoked paprika, ground cumin, cayenne pepper, salt, and black pepper. Toss until the sweet potatoes are well coated with the spices.
- Drizzle the maple syrup over the seasoned sweet potatoes and toss again to combine. The syrup will caramelize during roasting, adding a lovely sweetness.
- Spread the sweet potatoes evenly on the prepared baking sheet in a single layer. Ensure they are not overcrowded to allow for even roasting.
- Roast in the preheated oven for about 25-30 minutes, flipping them halfway through, until they are tender and golden brown.
- Remove from the oven and let them cool slightly before serving.
- Garnish with chopped fresh parsley for added color and freshness.


![To make Easy Chicken and Dumplings, you'll need the following: - Chicken and vegetables needed: - 1 lb boneless, skinless chicken thighs, cut into bite-sized pieces - 1 medium onion, diced - 2 carrots, sliced - 2 celery stalks, sliced - 1 cup frozen peas - Spices and seasonings: - 4 cups chicken broth - 2 cloves garlic, minced - 1 teaspoon dried thyme - 1 teaspoon dried parsley - Salt and pepper to taste - Dumpling ingredients: - 2 cups all-purpose flour - 1 tablespoon baking powder - 1 teaspoon salt - 1 cup milk - 4 tablespoons unsalted butter, melted These ingredients create a warm and comforting meal. The chicken provides protein, while the vegetables add flavor and texture. The spices bring everything together, making each bite delightful. Don't forget the dumplings, as they are the star of the dish! For the full recipe, check out the details above. Start by sautéing the vegetables. In a large pot, heat a drizzle of olive oil over medium heat. Add the diced onion, sliced carrots, and sliced celery. Cook them for about 5 to 7 minutes until they are soft. This step adds a lot of flavor to the soup. Next, add the minced garlic. Cook it for another minute. This will make your kitchen smell amazing. Now, stir in the chicken pieces, dried thyme, dried parsley, salt, and pepper. Cook until the chicken is no longer pink. This should take about 5 minutes. After that, pour in the chicken broth. Bring it to a gentle boil. Once boiling, reduce the heat to low and let it simmer for 15 to 20 minutes. This helps all the flavors blend together perfectly. While the soup simmers, it’s time to make the dumplings. In a mixing bowl, combine 2 cups of all-purpose flour, 1 tablespoon of baking powder, and 1 teaspoon of salt. Mix these dry ingredients well. Now, stir in 1 cup of milk and 4 tablespoons of melted butter. Mix until just combined. Be careful not to overmix. Overmixing can make the dumplings tough. You want them light and fluffy. Once your soup is ready, gently fold in 1 cup of frozen peas. Then, drop spoonfuls of the dumpling batter into the simmering broth. Cover the pot with a lid. Let the dumplings cook undisturbed for about 15 to 20 minutes. This is key to getting them fluffy. Check your dumplings after 15 minutes. They should puff up and be cooked through. Taste the soup and adjust the seasoning if needed. For the full recipe, refer to the section above. Enjoy your comforting chicken and dumplings! To make chicken and dumplings shine, adjust your seasonings. Taste as you go. You may want more salt or herbs. This helps to bring out all the flavors. Each chicken piece needs to soak up those seasonings. Choosing the right chicken parts is key too. I recommend boneless thighs. They stay juicy and tender. You can also use breasts, but they may dry out faster. Experiment with what you like best. Sautéing and simmering are the heart of this dish. Start by sautéing the veggies well. It brings out their flavors. Keep the heat at medium. Too high, and you risk burning them. Simmering is just as important. Let the soup bubble gently. This helps all the tastes blend. For fluffy dumplings, don’t overmix the batter. Stir until just combined. This keeps them light and airy. Garnishing adds a lovely touch to your meal. Fresh parsley makes a simple, bright garnish. You can also sprinkle black pepper for a little kick. As for sides, serve with crusty bread or a fresh salad. These pair well with the rich soup. They balance the meal perfectly. Enjoy your comforting chicken and dumplings! For the complete recipe, check out the [Full Recipe]. {{image_2}} You can change up your chicken and dumplings with different veggies. Instead of carrots, try zucchini or bell peppers. Swap celery for green beans. These changes keep your dish fresh and exciting. If you want to use other proteins, you have options. Use shredded rotisserie chicken for quick prep. You can even try turkey or tofu for a meatless dish. Each choice brings unique flavors and textures. To boost flavor, add herbs and spices. Fresh thyme or rosemary works great. You can also sprinkle in a bit of paprika for warmth. These small tweaks make a big difference. Don’t stop at herbs. Incorporate other ingredients like corn or mushrooms. They add layers of taste and texture. You can also stir in a splash of cream for richness. All these enhancements make your meal even more delicious. For the full recipe, check out the Comforting Chicken and Dumplings section. After enjoying your easy chicken and dumplings, store any leftovers safely. Place them in an airtight container. This helps keep the flavors fresh. You can refrigerate the leftovers for up to three days. Always let the soup cool down before sealing it up. If you want to store it for longer, freezing is a great option. Use freezer-safe containers or bags. Make sure you remove as much air as possible to prevent freezer burn. You can freeze the chicken and dumplings for up to three months. Just remember to label your containers with the date. When it's time to enjoy your leftovers, reheating properly is key. The best way is to use the stovetop. Pour the chicken and dumplings into a pot over low heat. Stir often to heat it evenly. This method helps keep the dish moist. If you're short on time, you can use the microwave. Place the soup in a microwave-safe bowl. Cover it loosely to avoid spills. Heat it in short bursts, stirring in between. This keeps the dumplings from getting too tough. Sometimes, the soup may thicken after storing. If that happens, add a splash of chicken broth or water. Stir it well to adjust the consistency. Enjoy your comforting meal just like the first time! For a complete guide to making this dish, check out the Full Recipe. How to make chicken and dumplings from scratch? To make chicken and dumplings from scratch, start with fresh chicken, vegetables, and spices. Cook them in a pot with broth. For dumplings, mix flour, baking powder, and milk. Drop the dumpling batter into the simmering broth. Cook until the dumplings puff up. Can I use canned chicken broth? Yes, you can use canned chicken broth. It saves time and still tastes good. Just choose a low-sodium option if you prefer less salt. This makes your dish healthier and more flavorful. Can I substitute frozen peas? Yes, you can use other frozen vegetables. Carrots, corn, or green beans work well. They add different flavors and colors to your dish. What can I use instead of all-purpose flour? You can use gluten-free flour if needed. Almond flour or oat flour are good choices too. They can change the taste slightly but still make tasty dumplings. How long do dumplings take to cook? Dumplings take about 15-20 minutes to cook. You should not lift the lid while they cook. This helps them steam properly and stay fluffy. Can I make the dumplings ahead of time? It’s best to cook the dumplings fresh. However, you can prepare the batter ahead. Keep it in the fridge until you're ready to cook. This way, they stay light and fluffy. For a full recipe, check out the recipe section. This blog post explored how to make delicious chicken and dumplings. We started with the key ingredients, then moved on to preparing the soup and making the dumplings. I shared tips to ensure the perfect flavor and texture. You can also try variations for extra flair and learn how to store leftovers well. With these steps, anyone can create a warm, comforting dish. So, don’t hesitate to get started. Your homemade chicken and dumplings await!](https://dailydishlab.com/wp-content/uploads/2025/06/b55448b9-18f4-4b40-ba69-553d058622be-768x768.webp)

![- 1 lb ground beef or turkey - 1 packet taco seasoning - 1 can black beans, rinsed and drained - 1 cup corn, frozen or canned - 1 large head of romaine lettuce, chopped For a tasty loaded taco salad, you need a few key items. The star is ground beef or turkey. This meat gives the salad its savory flavor. Next, you will need taco seasoning. This mix adds spice and zest. Black beans bring in protein and fiber. They also add a nice texture. Corn sweetens the dish and adds a pop of color. Lastly, chopped romaine lettuce makes a great base. It stays crisp and fresh. - 1 cup cherry tomatoes, halved - 1 avocado, diced - 1 cup shredded cheddar cheese - 1/2 cup sour cream - 1/4 cup fresh cilantro, chopped Now, let’s talk toppings! Cherry tomatoes add a juicy bite and bright color. Diced avocado brings creaminess and healthy fats. Shredded cheddar cheese gives a rich flavor and melty touch. Sour cream adds a cool contrast to the spices. Finally, fresh cilantro brings a burst of herbal taste. You can mix these toppings in or add them on top for a fun look. - Salsa, for drizzling - Tortilla chips, for garnish - Lime wedges, for serving - Salt and pepper to taste If you want to jazz up your salad, consider add-ins. Salsa adds more flavor and a bit of heat. Crushed tortilla chips give a crunchy texture. Lime wedges offer a zesty kick when squeezed over the top. Don’t forget to season with salt and pepper to taste. These optional items can turn a good salad into a great one. For the full recipe, check out the complete guide! 1. Brown the ground beef or turkey: Heat a large skillet over medium heat. Add the ground meat and cook until it turns brown. This usually takes about 5 to 7 minutes. Stir often to ensure it cooks evenly. 2. Drain excess fat: Once the meat is browned, carefully drain any extra fat. This step keeps your salad lighter and healthier. 3. Add taco seasoning and simmer: Open the taco seasoning packet and sprinkle it over the meat. Follow the instructions on the packet. Typically, you will add some water and let it simmer for about 5 minutes. This allows the flavors to blend perfectly. 1. Create a base with lettuce: Take a large serving bowl and layer the chopped romaine lettuce at the bottom. This will be your fresh and crunchy base. 2. Layer with cooked meat and other ingredients: Evenly distribute the cooked meat over the lettuce. Next, add a layer of black beans, followed by corn, cherry tomatoes, and diced avocado. Each layer adds texture and flavor. 3. Add toppings and garnishes: Sprinkle shredded cheddar cheese on top. Then, add dollops of sour cream and drizzle salsa over everything. Finally, garnish with fresh cilantro and crushed tortilla chips for that extra crunch. 1. Present in a large bowl or individual bowls: You can serve this salad in one large bowl for sharing or in individual bowls for each guest. 2. Arrange in sections for visual appeal: To make your salad eye-catching, arrange the ingredients in sections. This way, each component shines and looks delicious. Consider adding a sprinkle of cheese and a few extra tortilla chips on top for even more visual appeal. For more detailed steps and tips, check out the Full Recipe for Loaded Taco Salad. To make your loaded taco salad shine, adjust the seasoning to your taste. You might want more spice or salt. Taste as you go to get it just right. Fresh ingredients boost flavor. Try to use ripe tomatoes and crisp lettuce. Fresh cilantro adds a bright touch, too. You can save time by preparing ingredients in advance. Chop your veggies the night before. This way, you can mix the salad fast. Canned or frozen items work well. Black beans from a can save time and taste great. Frozen corn can also cut down on prep time. The way you present your salad matters. Create colorful layers to catch the eye. Start with green lettuce and add bright tomatoes. Layering makes it look fun and tasty. Garnish with extra tortilla chips and cheese for crunch. This adds flair and makes your dish pop. {{image_2}} You can easily switch the meat in your loaded taco salad. If you prefer, use shredded chicken or tofu. Shredded chicken adds a tender texture. Tofu gives a nice bite and works well for vegetarians. You can even try black bean burgers for a fun twist. These options keep the dish tasty while meeting different dietary needs. Feel free to get creative with ingredients. You can use different beans, like pinto or kidney beans. Each type brings its own flavor and texture. Cheese is another area to explore—try pepper jack for a spicy kick or queso fresco for a milder taste. For the greens, mix it up with spinach or arugula. These changes can give your salad a fresh spin. Don't forget about the dressing! A creamy ranch pairs well with the flavors in your salad. If you want a zing, try a vinaigrette for brightness. For those who love heat, add a spicy chipotle dressing. It amps up the flavor and makes the salad even more exciting. Each dressing can change your taco salad experience, so have fun experimenting! For the full recipe, check [Full Recipe]. To keep your loaded taco salad fresh, store it in an airtight container. This step keeps moisture out and preserves flavors. It’s best to keep the meat and toppings separate. This way, your salad stays crisp and tasty. You can refrigerate the salad for up to 3 days. Make sure to eat it within this time for the best taste. I recommend avoiding freezing. Freezing can change the texture of the ingredients, especially the lettuce and tomatoes. When you are ready to enjoy leftovers, reheat the meat separately. This method helps maintain the meat's flavor and warmth. After reheating, add fresh toppings like avocado and cilantro. This keeps your salad looking and tasting great. For a full recipe, check out the loaded taco salad instructions above. You can make your loaded taco salad even better with fun toppings. Consider adding: - Jalapeños for heat - Olives for saltiness - Bell peppers for crunch - Radishes for a fresh bite - Greek yogurt as a sour cream swap - Fresh corn for sweetness Feel free to mix and match toppings. The more colors, the better it looks! Yes, you can prepare parts of your taco salad ahead of time! Here are some tips: - Cook the meat and store it in the fridge for up to three days. - Chop your veggies and keep them in airtight containers. - Wait to add toppings like avocado and sour cream until right before serving. This keeps them fresh. Layering is key for both taste and looks. Here’s how I do it: 1. Start with a base of romaine lettuce. 2. Add the cooked meat evenly over the lettuce. 3. Next, layer black beans, corn, tomatoes, and avocado. 4. Sprinkle cheese on top for a nice finish. 5. Finally, dollop sour cream and drizzle salsa for flavor. This way, each bite is packed with flavor! Making a lighter taco salad is simple. Try these swaps: - Use lean ground turkey or chicken instead of beef. - Swap sour cream for Greek yogurt to cut calories. - Add more veggies like spinach or kale instead of lettuce. - Use low-fat cheese or skip it altogether for fewer calories. These changes keep your salad tasty and nutritious! For the full recipe, check out the Loaded Taco Salad section. This blog post showed you how to make a delicious loaded taco salad. You learned about essential ingredients, cooking steps, and tasty toppings. I shared tips for flavor and presentation, plus fun variations and storage info. Now you can create your own loaded taco salad that fits your taste. Enjoy experimenting with the ingredients. Make it colorful and flavorful, and share it with friends!](https://dailydishlab.com/wp-content/uploads/2025/06/0bf67b06-348e-48f5-b73f-4698b039c9e8-768x768.webp)
![For these tasty bowls, you need: - 2 boneless, skinless chicken breasts - 1 cup jasmine rice - 1 cucumber, thinly sliced - 1 carrot, julienned - Fresh cilantro leaves for garnishing - Lime wedges for serving - Sliced red chili (optional, for heat) These ingredients create a base full of flavor and texture. The chicken offers protein, while the jasmine rice adds a nice touch of sweetness. The veggies give crunch and freshness. The marinade brings all the flavors together. Here’s what you need: - 3 tablespoons fish sauce - 2 tablespoons honey - 1 tablespoon soy sauce (low-sodium is fine) - 2 cloves garlic, minced - 1 tablespoon fresh ginger, grated - 1/2 teaspoon black pepper This mix makes the chicken tender and packed with taste. Fish sauce adds a salty depth, while honey balances it with sweetness. Garlic and ginger provide warmth and depth. Feel free to add more veggies to your bowls. Some great options include: - Bell peppers, sliced - Snap peas, trimmed - Radishes, thinly sliced You can also switch up the garnishes. Consider adding: - Chopped green onions - Sesame seeds - Fresh mint leaves These additions enhance the meal's look and flavor. They also add extra nutrients, making your meal even better. For the full recipe, check out the Vietnamese Chicken Meal Prep Bowls section. To start, you need to make the marinade. In a mixing bowl, whisk together: - 3 tablespoons fish sauce - 2 tablespoons honey - 1 tablespoon soy sauce - 2 cloves garlic, minced - 1 tablespoon fresh ginger, grated - 1/2 teaspoon black pepper Mix well until everything blends together. This marinade gives the chicken a great flavor. Next, add the chicken breasts to the bowl. Make sure each breast is coated with the marinade. Cover the bowl and let it sit in the fridge for at least 30 minutes. If you have time, let it marinate for up to 2 hours for more flavor. While the chicken marinates, it’s time to cook the jasmine rice. In a medium pot, combine: - 1 cup jasmine rice - 1 3/4 cups water or low-sodium chicken broth - A pinch of salt Bring the mixture to a boil over medium-high heat. Once it boils, lower the heat and cover with a lid. Let it simmer for about 15 minutes until the rice is fluffy. After cooking, keep it covered for an extra 5 minutes. This helps the rice steam and become perfect. Now, heat a non-stick skillet on medium-high heat. Add a little cooking oil once it’s hot. Carefully place the marinated chicken in the skillet. Cook each side for 6-7 minutes. You want the chicken to be golden-brown and fully cooked. Use a meat thermometer to ensure it reaches 165°F (75°C). Once cooked, take the chicken out of the skillet. Let it rest for a few minutes on a cutting board. After it rests, slice the chicken into thin strips. This makes it tender and easy to eat. Now for the fun part: assembling the bowls! Start by dividing the cooked jasmine rice into 4 airtight containers. Top each serving of rice with sliced chicken. Then, add: - Thinly sliced cucumber - Julienned carrots Garnish each bowl with fresh cilantro leaves. Place lime wedges on the side for a burst of flavor when you eat. If you like some heat, add sliced red chili on top. Allow the bowls to cool before sealing them with lids. You can store them in the fridge for up to 4 days. These meal prep bowls are perfect for quick lunches or dinners. For the complete recipe, check out the [Full Recipe]. To make meal prep easy, I like to set up a workspace. First, gather all your tools. This includes cutting boards, knives, and bowls. Having everything close by cuts down on time. I also recommend cooking in batches. Make extra rice or chicken. This way, you can use them in other meals too. To ensure juicy chicken, marinate it well. A good marinade adds flavor and moisture. I suggest marinating for at least 30 minutes. For best results, go for 2 hours. When cooking, use medium-high heat. This helps create a nice golden color. Always check the chicken's temperature. It should reach 165°F (75°C). Letting it rest after cooking is key. This keeps the juices in the meat. There are many ways to boost flavor in your meal prep bowls. Try adding fresh herbs like mint or basil. You can also squeeze lime juice over each bowl. For extra crunch, add chopped peanuts or cashews. If you like spice, toss in some sliced chili. These small touches make a big difference. For the full recipe, check out the complete guide on Vietnamese Chicken Meal Prep Bowls. {{image_4}} You can easily swap chicken for other proteins. Shrimp is a great choice. Cook the shrimp for just 2-3 minutes until they turn pink. Tofu works well too. Use firm tofu and press it first to remove extra moisture. This helps it absorb flavors. Another option is beef. Use thinly sliced flank steak instead of chicken. Cook it quickly over high heat for a tender bite. If you want a vegetarian or vegan meal prep bowl, try using tempeh or seitan. Both have a great texture and soak up flavors well. Marinate them just like the chicken. Cook tempeh for about 5-7 minutes in a skillet. For a vegan option, skip the fish sauce and use soy sauce instead. You can also add more veggies like bell peppers or mushrooms for added taste and nutrition. Make your bowls unique with different toppings. Try adding sliced radishes for crunch. You can also add avocado for creaminess. Fresh herbs like mint or basil work wonders too. For extra flavor, drizzle some sriracha or hoisin sauce on top. You can even add nuts for a tasty crunch. These simple tweaks let you enjoy a new meal every time. To see the full recipe, check out the [Full Recipe]. To keep your Vietnamese Chicken Meal Prep Bowls fresh, use airtight containers. Divide the bowls into four portions. Store rice, chicken, and veggies separately if you can. This will help maintain texture and flavor. Let the meal prep bowls cool before sealing them. This step helps prevent steam from making everything soggy. When you're ready to enjoy your meal prep bowls, use the microwave. Place a bowl in the microwave for 1-2 minutes. Stir halfway through to heat evenly. Check that the chicken reaches 165°F (75°C) before eating. If you prefer, you can reheat on the stove. Just add a splash of water to prevent sticking. These bowls last for up to four days in the fridge. After that, the flavors may fade. Always check for any off smells or changes in color before eating. If you want to store them longer, consider freezing. Just make sure to label them, so you know what's inside. Enjoy your delicious meal prep with confidence! To make Vietnamese Chicken Meal Prep Bowls, start with chicken breasts. First, mix fish sauce, honey, soy sauce, garlic, ginger, and black pepper in a bowl. This creates a tasty marinade. Coat the chicken in this marinade and let it sit for 30 minutes in the fridge. While it marinates, cook jasmine rice in water or broth for about 15 minutes. Heat a skillet, add oil, and cook the chicken for 6-7 minutes on each side until it’s golden and reaches 165°F. Slice the chicken and assemble the bowls with rice, chicken, cucumber, and carrots. Don’t forget the cilantro and lime! For more details, check the Full Recipe. Vietnamese Chicken Meal Prep Bowls pair well with light sides. Here are some great choices: - Steamed broccoli - Pickled vegetables - Fresh spring rolls - Asian-style slaw - Edamame These sides add color and different textures to your meal. They also keep the meal fresh and exciting. Yes, you can freeze Vietnamese Chicken Meal Prep Bowls. Just make sure to cool them completely before sealing them in airtight containers. They can last in the freezer for up to three months. When you want to eat them, thaw them in the fridge overnight and reheat in the microwave. This keeps your meal fresh and tasty. Vietnamese Chicken Meal Prep Bowls are healthy and balanced. Here is a rough idea of the nutrition per serving: - Calories: 400 - Protein: 30g - Carbohydrates: 45g - Fat: 10g - Fiber: 3g - Sugar: 6g This dish provides protein, carbs, and healthy fats. You can adjust ingredients for your dietary needs. In this blog post, we covered the key ingredients and step-by-step instructions for making Vietnamese Chicken Meal Prep Bowls. We discussed marinades and cooking tips to ensure great flavor. You can also explore various protein options and learn how to store and reheat these bowls effectively. These meal prep bowls are easy to customize and perfect for busy days. With simple steps and tasty ingredients, you can enjoy delicious, healthy meals throughout the week. Happy cooking!](https://dailydishlab.com/wp-content/uploads/2025/06/450469d4-7878-479c-828a-ae6f4f51905d-768x768.webp)