Spicy Chipotle Shrimp Quesadillas Flavorful Recipe

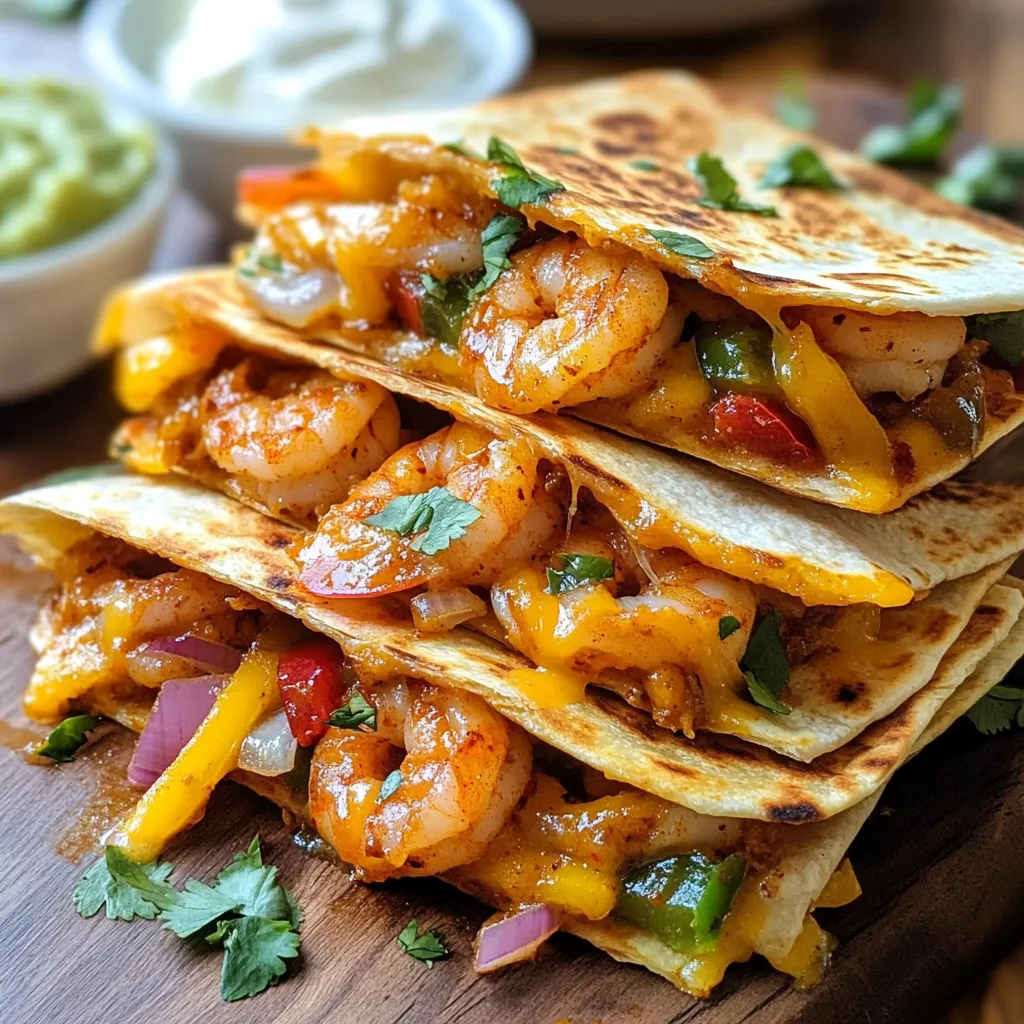
Get ready to spice up your meal with my Spicy Chipotle Shrimp Quesadillas! This easy recipe packs a punch with bold flavors from juicy shrimp, chipotle sauce, and fresh veggies. Whether you’re hosting a dinner or just want a quick lunch, these quesadillas are sure to impress. Let’s dive into the ingredients and steps that make this dish both fun to cook and delicious to eat!
Why I Love This Recipe
- Bold Flavors: The combination of chipotle and spices gives these quesadillas a delightful kick that elevates the shrimp to a new level.
- Quick and Easy: This recipe comes together in just 25 minutes, making it perfect for a weeknight dinner or a last-minute gathering.
- Customizable: You can easily adjust the spice level or add your favorite veggies to make these quesadillas your own.
- Perfect for Sharing: These quesadillas are great for parties or family dinners, allowing everyone to enjoy delicious, cheesy bites together.
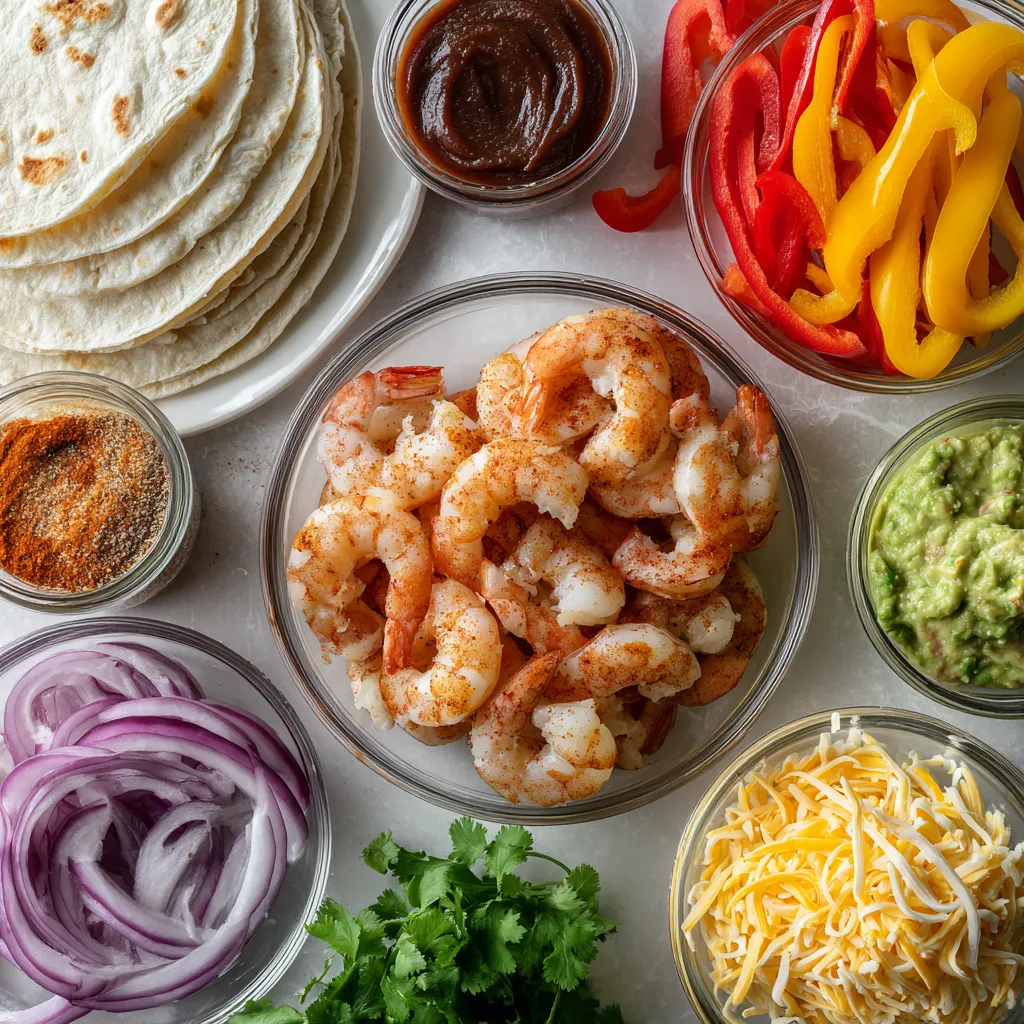
Ingredients
Main Ingredients
- 1 lb large shrimp, peeled and deveined
- 2 tablespoons chipotle sauce or chipotle pepper in adobo
- 1 tablespoon olive oil
Seasoning and Vegetables
- 1 teaspoon garlic powder
- 1 teaspoon cumin
- 1 teaspoon smoked paprika
- 1 bell pepper, thinly sliced
- 1 small red onion, thinly sliced
Tortillas and Cheese
- 4 flour tortillas
- 2 cups shredded cheese (cheddar or Mexican blend)
- Fresh cilantro for garnish
I love using fresh shrimp for this recipe. You want to peel and devein them first. This makes each bite clean and tasty. The chipotle sauce gives a smoky kick. You can use chipotle peppers in adobo if you want a stronger flavor.
For seasoning, I add garlic powder, cumin, and smoked paprika. These spices bring warmth and depth. The bell pepper and red onion add color and crunch. Make sure to slice them thinly for even cooking.
The tortillas hold everything together. Flour tortillas work best here. They get nice and crispy. I use shredded cheddar or a Mexican blend for that gooey, cheesy goodness. Don’t forget fresh cilantro for garnish! It adds a pop of color and freshness.

Step-by-Step Instructions
Preparing the Shrimp
To start, you need to marinate the shrimp. In a bowl, mix the shrimp with chipotle sauce, garlic powder, cumin, smoked paprika, salt, and pepper. Make sure every shrimp gets a good coating. Let it sit for about 10 minutes. This helps the shrimp soak up the flavors.
Next, heat a tablespoon of olive oil in a large skillet over medium heat. Add the marinated shrimp to the skillet. Cook them for about 2-3 minutes on each side. You want them to turn pink and be cooked through. Once done, remove the shrimp from the skillet and set them aside.
Sautéing Vegetables
Now, let’s cook the veggies. In the same skillet, add the sliced bell pepper and onion. Sauté them for about 4-5 minutes. You want them to soften but still keep some crunch. This adds a nice texture to your quesadillas.
After the veggies are cooked, return the shrimp to the skillet. Mix them with the sautéed vegetables. Cook everything together for one more minute. This lets the flavors blend well.
Assembling and Cooking Quesadillas
Now it’s time to assemble your quesadillas. Take a clean skillet and place a tortilla over medium heat. Sprinkle half of the tortilla with cheese. Next, add a portion of the shrimp and vegetable mix on top. Then, sprinkle a little more cheese on top.
Carefully fold the tortilla in half. Cook for about 2-3 minutes on each side. You want the tortilla to be golden and crispy, and the cheese to melt perfectly.
Repeat this step with the remaining tortillas and filling. Once done, slice each quesadilla into wedges. Serve them warm and enjoy the delicious flavors!
Tips & Tricks
Cooking Techniques
To achieve perfect shrimp texture, start with fresh shrimp. Cook them just until they turn pink. This usually takes about 2-3 minutes per side. Overcooking makes shrimp tough.
For a crispy quesadilla, use a clean skillet over medium heat. Heat the tortilla until golden brown. Don’t rush this step. Use enough cheese to help hold the quesadilla together.
Flavor Enhancements
To boost flavor, try adding extra spices. A pinch of cayenne or chili powder can kick up the heat. Fresh herbs like cilantro or parsley add bright notes.
For sauce variations, consider using salsa verde or a creamy avocado sauce. These can create a different taste profile while keeping the dish exciting.
Serving Suggestions
When serving your quesadillas, pair them with fresh sides. A simple salad or seasoned rice complements the dish well.
For presentation, arrange the quesadillas on a colorful platter. Garnish with chopped cilantro. Add small bowls of sour cream and guacamole for dipping. This makes the dish look inviting and fun!
Pro Tips
- Use Fresh Shrimp: Fresh shrimp will provide the best flavor and texture for your quesadillas. If using frozen shrimp, ensure they are completely thawed and patted dry before marinating.
- Customize Spice Levels: Adjust the amount of chipotle sauce or pepper to suit your heat preference. For milder quesadillas, use less sauce or a different mild pepper.
- Experiment with Cheeses: Try mixing different types of cheese, such as Monterey Jack or pepper jack, for a unique flavor and melty texture.
- Keep Tortillas Warm: To prevent tortillas from cracking, keep them warm in a clean kitchen towel while you prepare the quesadillas.

Variations
Protein Swaps
You can swap shrimp for many proteins in these quesadillas. Chicken works well. Just cook it until golden and juicy. Ground beef is another great choice. Season it similar to shrimp. For a plant-based option, use tofu or tempeh. Both soak up flavors nicely. Cook them until crispy for added texture.
Vegetarian Option
To make a vegetarian quesadilla, focus on flavor-packed veggies. Use mushrooms, zucchini, or spinach. You can also add black beans for protein. Season these veggies with chipotle sauce and spices for a kick. This way, you keep the bold taste without any meat.
Spicy vs Mild
You can adjust the heat level easily. If you love spice, use more chipotle sauce. You can even add jalapeños for an extra kick. For a milder version, skip the chipotle sauce. Instead, use just a pinch of smoked paprika. This gives flavor without too much heat.
Storage Info
Refrigeration
To store leftovers safely, let the quesadillas cool down first. Then, wrap each one in plastic wrap or aluminum foil. Place them in an airtight container or a resealable bag. Store in the fridge for up to three days. This will keep them fresh and tasty.
Reheating Instructions
When you’re ready to eat, reheating is key to keeping that good texture. The best method is to use a skillet. Heat it on medium-low. Place the quesadilla in the skillet for about 2-3 minutes on each side. This warms them up and keeps them crispy. You can also use an oven. Preheat it to 350°F (175°C). Bake the quesadillas for about 10 minutes. This method works well too.
Freezing Quesadillas
If you want to freeze them, follow these steps. First, let them cool completely. Then, wrap each quesadilla in plastic wrap. Place them in a freezer-safe bag or container. They can last in the freezer for about 2-3 months. When you want to eat them, thaw them in the fridge overnight. Reheat as mentioned before. Enjoy the same great flavor!
FAQs
What can I use instead of chipotle sauce?
If you want a milder flavor, try these options:
- Use smoked paprika for a smoky touch.
- Add regular salsa for a fresh taste.
- Try a mix of ketchup and hot sauce.
- Use a bit of adobo sauce without the chipotle.
These options keep the dish tasty without too much heat. You can adjust the amounts to fit your taste.
Can I make quesadillas ahead of time?
Yes, you can prepare quesadillas in advance. Here are some tips:
- Cook the shrimp and veggies, then cool them down.
- Store them in an airtight container in the fridge.
- Assemble the quesadillas right before cooking.
This way, you save time and still enjoy fresh quesadillas.
How do I make quesadillas crispy?
To achieve that perfect crispiness, follow these steps:
- Use a clean skillet for each quesadilla.
- Preheat the skillet before adding the tortilla.
- Use enough cheese to help bind the tortilla.
- Cook each side for 2-3 minutes until golden brown.
These methods ensure a crunchy exterior while keeping the inside melty and warm.
In this blog post, I shared how to make delicious chipotle shrimp quesadillas. You learned about the main ingredients, step-by-step instructions, and tips for perfecting your dish. Remember, you can customize your quesadillas with different proteins, spices, or veggies. Store leftovers properly to enjoy them later, and follow the reheating tips for the best taste. By using these techniques, you can serve a meal that impresses everyone. Enjoy cooking and sharing your tasty quesadilla

Spicy Chipotle Shrimp Quesadillas
Ingredients
- 1 lb large shrimp, peeled and deveined
- 2 tablespoons chipotle sauce (or 1 chipotle pepper in adobo sauce, finely chopped)
- 1 teaspoon garlic powder
- 1 teaspoon cumin
- 1 teaspoon smoked paprika
- to taste salt and pepper
- 1 tablespoon olive oil
- 1 piece bell pepper, thinly sliced (any color)
- 1 small red onion, thinly sliced
- 4 pieces flour tortillas
- 2 cups shredded cheese (cheddar or Mexican blend)
- to taste fresh cilantro, chopped (for garnish)
- to serve sour cream and guacamole
Instructions
- In a bowl, combine the shrimp, chipotle sauce, garlic powder, cumin, smoked paprika, salt, and pepper. Mix well until the shrimp are evenly coated.
- Heat the olive oil in a large skillet over medium heat. Add the shrimp and cook for about 2-3 minutes on each side until they are pink and cooked through. Remove the shrimp from the skillet and set aside.
- In the same skillet, add the sliced bell pepper and onion. Sauté for about 4-5 minutes until softened.
- Return the cooked shrimp to the skillet, mixing them with the vegetables. Cook for an additional minute to heat through and blend flavors.
- Remove the skillet from heat.
- In another, clean skillet, place a tortilla over medium heat. Sprinkle half of the tortilla with a generous amount of cheese, then add a portion of the shrimp and vegetable mixture on top, followed by a little more cheese.
- Fold the tortilla in half carefully and cook for 2-3 minutes on each side, or until the tortilla is golden and crispy, and the cheese has melted.
- Repeat with the remaining tortillas and filling.
- Once done, slice each quesadilla into wedges and serve warm.


![- 2 pounds baby potatoes - 4 tablespoons unsalted butter, melted - 4 cloves garlic, minced - 1 tablespoon fresh parsley, chopped - 1 teaspoon sea salt - ½ teaspoon black pepper - ¼ teaspoon smoked paprika (optional) - Lemon zest (from 1 lemon) - Large pot - Baking sheet - Parchment paper - Measuring cup - Fork or potato masher Gather these ingredients to make your smashed potatoes shine. The baby potatoes are key; they cook evenly and have a great texture. The garlic brings a rich taste, while the butter adds a smooth finish. Fresh parsley not only brightens the dish but also adds color. You’ll also need some basic tools. The large pot helps cook the potatoes, and the baking sheet is perfect for roasting. Parchment paper prevents sticking, making cleanup easy. A measuring cup ensures you get the butter just right. Lastly, a fork or masher helps you smash the potatoes to the perfect flatness without breaking them apart. For a full experience, check the [Full Recipe] for step-by-step guidance. - Preheat your oven to 450°F (230°C). - Fill a large pot with water and add a pinch of salt. - Bring the pot to a boil over high heat. - Add 2 pounds of baby potatoes to the pot. - Cook the potatoes until fork-tender, about 15-20 minutes. - Drain the potatoes and let them cool for about 5 minutes. - Line a baking sheet with parchment paper. - Place the cooled potatoes on the sheet. - Use the bottom of a measuring cup or a fork to smash each potato gently. - In a small bowl, mix 4 tablespoons of melted butter with 4 minced garlic cloves. - Add 1 teaspoon of sea salt and ½ teaspoon of black pepper. - If you want, add ¼ teaspoon of smoked paprika. - Brush or drizzle this garlic butter over each smashed potato. - Bake the potatoes in the preheated oven for 20-25 minutes. - Keep an eye on them until they are golden and crispy on the edges. - Remove from the oven and sprinkle with fresh parsley and lemon zest before serving. - You can find the Full Recipe for more details. To get the best crispy texture, adjust your baking time. Bake the smashed potatoes for 20-25 minutes. If you want them crispier, leave them in for a few more minutes. Just keep an eye on them! The size of the potatoes also plays a big role. Use baby potatoes for even cooking. Smaller potatoes smash well and bake faster. For more flavor, try adding different spices. Smoked paprika adds a nice smoky taste. You can also sprinkle in some onion powder or chili flakes for heat. When it comes to garlic, fresh garlic gives the best taste. I recommend using whole cloves and mincing them yourself. This ensures the garlic flavor is strong and fresh. Presentation is key! Serve your smashed potatoes on a big white platter. Drizzle any leftover garlic butter over the top. Garnish with fresh parsley for a pop of color. Fresh herbs like chives or thyme also look great and add flavor. This makes your dish not only tasty but also beautiful to serve. {{image_2}} You can switch up your potato choice for smashed potatoes. While baby potatoes work great, try red or yellow potatoes for a different taste. These potatoes add creaminess and a slight sweetness. If you want to swap butter, olive oil is a fantastic choice. It brings a rich flavor and is a bit healthier. You can also use coconut oil for a unique twist. Adding cheese can elevate your smashed potatoes. Grated Parmesan adds a salty, nutty taste. For a creamier option, use cheddar cheese. Just sprinkle it on top before the final bake. You can also play with spices. Try adding rosemary or thyme for an earthy flavor. Smoked paprika adds warmth and a hint of smokiness. Experiment with different spices to find your favorite combo. Want to make this dish vegan? Simply replace butter with a plant-based butter. Use a neutral oil, like canola, for the garlic mixture. If you need low-sodium options, cut back on salt. Use fresh herbs instead to boost flavor. Lemon juice can also add brightness without extra salt. For more details, check out the Full Recipe. To keep your smashed potatoes fresh, store them in the fridge. Place leftovers in an airtight container. This helps prevent moisture loss. Use a glass or plastic container with a tight lid. They will stay good for about 3 to 5 days. If you want to keep them longer, consider freezing instead. When it's time to enjoy your leftovers, you have several options. The best way to reheat smashed potatoes is in the oven. Preheat your oven to 350°F (175°C). Place the potatoes on a baking sheet and cover them with foil. This keeps them moist. Bake for about 15 minutes. If you want a crispy finish, remove the foil for the last 5 minutes. To avoid soggy potatoes, do not microwave them. Microwaving can make the texture mushy. For longer storage, freezing is a great option. Cool the smashed potatoes completely before freezing. Place them in a freezer-safe bag or container. Make sure to squeeze out any extra air. They can last up to 2 months in the freezer. When you’re ready to eat them, thaw in the fridge overnight. Reheat them in the oven for the best texture. Avoid thawing in the microwave to keep them from getting soggy. To make your smashed potatoes extra crispy, I suggest two key steps. First, ensure your oven is hot, around 450°F (230°C). This helps achieve that golden crunch. Second, after smashing the potatoes, brush them well with garlic butter. This adds flavor and helps crisp up the edges. Yes, you can prepare the garlic butter ahead of time. Simply melt the butter and mix in minced garlic and other ingredients. Store it in the fridge for up to a week. This way, your cooking process becomes quicker when you’re ready to make the potatoes. Smashed potatoes pair well with many dishes. They go great with roasted chicken, grilled steak, or even a fresh salad. You can also serve them with a dip or sauce for added flavor. Feel free to get creative! Absolutely! While parsley is a classic choice, you can use other herbs too. Fresh chives, thyme, or rosemary work wonderfully. This gives your smashed potatoes a unique twist and flavor profile. Smashed potatoes can last in the fridge for about 3 to 5 days. Store them in an airtight container to keep them fresh. When ready to eat, just reheat them in the oven for the best texture. - [Explore the complete Garlic Butter Smashed Potatoes recipe here.](#) This post covered how to make Garlic Butter Smashed Potatoes. We discussed ingredients, steps, tips, and variations. You learned how to prepare, smash, and bake potatoes for a crispy treat. I shared ways to enhance flavor and provided storage advice. With this recipe, you can impress anyone at your next meal. Enjoy experimenting and making it your own!](https://dailydishlab.com/wp-content/uploads/2025/07/1cd4206a-28a3-462f-8de7-03118f6b2243-768x768.webp)
![- 4 cups fresh broccoli florets - 1 cup cherry tomatoes, halved - 1/2 cup red onion, finely chopped - 1/2 cup dried cranberries - 1/2 cup sunflower seeds - 1/2 cup shredded sharp cheddar cheese - 1/2 cup Greek yogurt - 2 tablespoons apple cider vinegar - 1 tablespoon honey - Salt and pepper to taste For this classic broccoli salad, you start with fresh produce. I love using bright green broccoli florets. They add a lovely crunch and color. Cherry tomatoes bring sweetness, while red onion adds a nice bite. Next, we add some fun components. Dried cranberries offer a sweet contrast. Sunflower seeds give a nutty flavor and crunch. Shredded sharp cheddar cheese adds richness. Now, let’s not forget about the dressing. I prefer Greek yogurt for creaminess. Apple cider vinegar adds a tangy kick. Honey sweetens the mix just right. Finally, a sprinkle of salt and pepper rounds it all out. With these ingredients, you create a dish that is both nutritious and refreshing! For the full recipe, check out the Broccoli Bliss Salad. To start, we need to blanch the broccoli florets. Blanching means cooking them quickly. Bring a pot of water to a boil. Add the florets and boil for just 2 to 3 minutes. This makes the broccoli bright green and keeps it crunchy. After boiling, drain the broccoli right away. Next, you should immerse it in ice water. This stops the cooking process and keeps the color bright. Once chilled, drain the broccoli well and pat it dry with a clean towel. Now, it's time to mix our salad. In a large bowl, combine the blanched broccoli, cherry tomatoes, red onion, dried cranberries, sunflower seeds, and shredded cheddar cheese. Each ingredient adds a unique flavor and texture. In a separate small bowl, prepare the dressing. Whisk together Greek yogurt, apple cider vinegar, honey, salt, and pepper until smooth. This dressing is creamy and tangy. Pour it over the salad mixture and toss gently. Make sure every piece is well coated in dressing. After mixing, taste the salad. Adjust the seasoning if needed. You might want to add more salt or pepper. This step is important for the best flavor. Once seasoned, let the salad chill in the fridge. Allow it to rest for at least 30 minutes. This helps the flavors blend nicely. When you serve it, the salad will be cool and refreshing, perfect for any meal. For the complete recipe, check out the [Full Recipe]. To make the best classic broccoli salad, start with fresh ingredients. Use crisp broccoli florets. They should be bright green and firm. This keeps the texture crunchy and fun to eat. Blanch the broccoli briefly, then cool it in ice water. This step locks in the vibrant color and taste. Chilling your salad is key to enhancing flavors. After mixing, let it sit in the fridge for 30 minutes. This waiting time allows the ingredients to meld. The flavors become richer and more balanced. For a beautiful display, serve the salad in a large glass bowl. This lets the vibrant colors shine. You can also layer the ingredients for a nice effect. Garnish with extra sunflower seeds or cranberries. A sprinkle of fresh herbs adds a pop of color. This makes the salad look even more inviting. Broccoli is packed with vitamins and minerals. It has vitamin C, vitamin K, and fiber. These nutrients support your immune system and digestion. The dried cranberries add antioxidants and a touch of sweetness. To make the salad even healthier, you can use plain Greek yogurt. It adds protein without extra calories. Swap out the cheddar for a lighter cheese, or leave it out. You can also add grilled chicken or chickpeas for protein. These changes can boost the nutrition of your dish. For the full recipe, check out the Broccoli Bliss Salad 🥦. {{image_2}} You can change the recipe to fit your needs. For a dairy-free version, use alternative yogurt. There are many options like almond or coconut yogurt. They add creaminess without dairy. If you want extra protein, try adding grilled chicken or chickpeas. Grilled chicken gives a nice smoky flavor. Chickpeas add a hearty texture and are great for plant-based diets. Want a kick? Add jalapeños or sriracha for spice. These ingredients can wake up the salad and bring heat. Just a little makes a big difference. If you prefer sweetness, try diced apples or pears. They add a crunchy texture and a hint of natural sugar. This balance of sweet and savory makes the salad even better. You can mix up the dressing too. A vinegar-based dressing is a fresh alternative. Combine vinegar with olive oil for a light and tangy taste. For a creamy twist, use dressings other than Greek yogurt. You might try ranch or a creamy tahini dressing. These options can change the flavor profile while keeping it delicious. For the complete recipe, check the Full Recipe section. To keep your classic broccoli salad fresh, store it in an airtight container. This helps to lock in flavor and crunch. Always place it in the fridge right after serving. The salad stays fresh for about 3 to 5 days. Check for any signs of wilting or spoilage before eating. Freezing broccoli salad is not ideal. The texture of fresh ingredients can change when thawed. If you must freeze it, separate the dressing from the salad mix. This helps to keep the veggies crisp. When ready to eat, thaw the salad in the fridge overnight. Add the dressing just before serving to restore its taste. You can make the salad ahead of time, but store parts separately. Keep the blanched broccoli, tomatoes, and other veggies in one container. Store the dressing in another. This keeps everything fresh and tasty. Combine right before serving for the best flavor. Always chill the salad for at least 30 minutes for the flavors to blend well. For the full recipe, check out the broccoli bliss salad. You can keep classic broccoli salad in the fridge for about 3 to 5 days. The salad stays fresh if stored in an airtight container. Over time, the vegetables may soften, but it will still taste good. Yes, you can make broccoli salad in advance. I often prepare it a day ahead. This allows the flavors to blend well. Just remember to keep it in the fridge until you’re ready to serve. You can add many tasty ingredients to broccoli salad. Some favorites include: - Cooked bacon pieces - Chopped apples for sweetness - Grated carrots for crunch - Chopped nuts like almonds or walnuts - Diced bell peppers for color Feel free to mix and match based on your taste! Using frozen broccoli is okay, but I recommend using fresh for the best taste and texture. If you choose frozen, make sure to thaw and drain it well. Blanching frozen broccoli briefly can help it stay vibrant and crisp. This blog post covered how to make a fresh and tasty broccoli salad. We highlighted ingredients such as broccoli, cherry tomatoes, and cheddar cheese. The steps included blanching broccoli, mixing everything, and perfecting the dressing. Remember, chilling the salad boosts its flavor. Plus, various tips helped enhance your dish. You can customize with lots of fun add-ins. Store it well, and enjoy each bite fresh. This salad is not just tasty; it’s also good for you. Get creative and make it your own!](https://dailydishlab.com/wp-content/uploads/2025/06/c30f1a23-0ac2-43f2-95bf-3ec2b469a032-768x768.webp)
. This blog post covered how to make a refreshing cucumber melon salad. You learned about fresh ingredients like cucumbers, cantaloupe, and mint. I explained how to make a simple dressing with lemon juice and honey. I also shared tips for perfect texture and flavor. In closing, this salad is easy to make and tastes great. It’s perfect for warm days or gatherings. Experiment with different melons, nuts, or dressings. Enjoy your fresh salad today!](https://dailydishlab.com/wp-content/uploads/2025/06/ed53bf68-b888-45dc-b451-2bcae5e86f09-768x768.webp)


