Spicy Lemon Garlic Shrimp Flavorful and Zesty Dish

Are you ready to spice up your dinner? This Spicy Lemon Garlic Shrimp dish packs a punch of flavor that will tantalize your taste buds. With just a few simple ingredients and easy steps, you can create a zesty meal that’s perfect for any occasion. Let’s dive in and get cooking, so you can impress your friends and family with your culinary skills!
Ingredients
List of Ingredients
- 1 pound large shrimp, peeled and deveined
- 4 cloves garlic, minced
- 1 teaspoon red pepper flakes (adjust based on heat preference)
- 1 teaspoon smoked paprika
- 1 tablespoon extra virgin olive oil
- 2 tablespoons freshly squeezed lemon juice
- Zest of 1 lemon
- Salt and freshly ground black pepper, to taste
- Fresh parsley, finely chopped (for garnish)
- Lemon wedges, for serving
This recipe for spicy lemon garlic shrimp shines with fresh and bold flavors. You start with large shrimp, making sure they are peeled and deveined for easy eating. Garlic is key for that strong taste, so don’t skip it.
Red pepper flakes give a nice kick. You can adjust this to your liking. If you want more heat, add more flakes. Smoked paprika adds depth and a smoky flavor. It’s a great twist on this dish.
Using high-quality olive oil brings it all together. The lemon juice and zest brighten the dish. This adds that zesty punch that pairs well with shrimp.
Salt and pepper are basic but crucial for flavor. They help bring out the best in all the other ingredients. Fresh parsley adds a pop of color and freshness, making it look appealing.
Lemon wedges serve as a fun side. They let you squeeze extra lemon juice on your dish for more zing.
Step-by-Step Instructions
Preparing the Marinade
1. Start by grabbing a large mixing bowl.
2. In the bowl, add 1 pound of large shrimp, peeled and deveined.
3. Next, add 4 cloves of minced garlic.
4. Sprinkle in 1 teaspoon of red pepper flakes. Adjust this based on how spicy you like it.
5. Add 1 teaspoon of smoked paprika for depth of flavor.
6. Pour in 1 tablespoon of extra virgin olive oil.
7. Squeeze in 2 tablespoons of freshly squeezed lemon juice.
8. Zest 1 lemon and add that in too.
9. Season with salt and freshly ground black pepper to taste.
10. Toss the mixture well, making sure all the shrimp are coated.
Now, cover the bowl with plastic wrap or a lid. Place it in the refrigerator for 15-20 minutes. This time allows the shrimp to soak up all the tasty flavors.
Cooking the Shrimp
1. While the shrimp marinates, preheat a large skillet. Set it over medium-high heat until hot.
2. Once the skillet is hot, add the marinated shrimp in a single layer.
3. Sauté the shrimp for about 2-3 minutes on one side. You want them to turn a lovely pink color.
4. Carefully flip the shrimp over. Cook for another 2-3 minutes until fully cooked and opaque. Look for a slight char for extra flavor.
5. Remove the skillet from heat. Sprinkle the cooked shrimp with freshly chopped parsley for a bright finish.
6. Serve the shrimp right away, with lemon wedges on the side for that extra zesty kick.Enjoy the burst of flavor!
Tips & Tricks
Perfecting the Recipe
To make this dish just right, adjust the spice levels. If you love heat, add more red pepper flakes. For a milder taste, use less. Always taste as you go. This way, you can find the perfect balance for your palate.
Enhancing flavor with additional herbs can elevate the dish. Fresh herbs like cilantro or basil work great. They add freshness and depth. Mix them in right before serving for the best flavor.
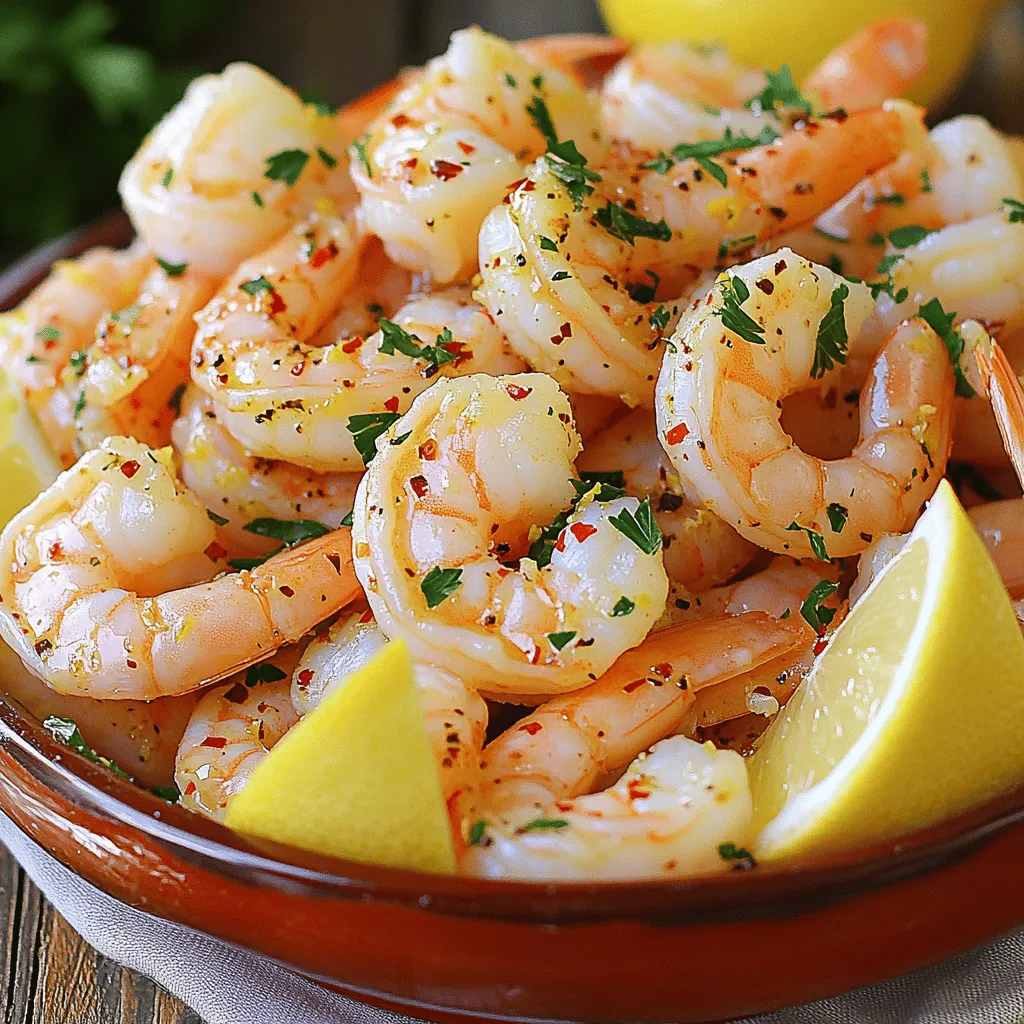
Presentation Ideas
Serving suggestions can make your meal shine. For a lovely touch, serve the shrimp on a bed of rice. A vibrant salad on the side adds color and crunch. You can also serve it with crusty bread to soak up the sauce.
Garnishing tips can make your dish pop. A sprinkle of fresh parsley adds a green touch. Add extra lemon zest on top for brightness. Lemon wedges on the side give a zesty kick.
{{image_4}}
Variations
Alternative Ingredients
You can switch shrimp with other seafood. Scallops or fish work well. For a vegetarian option, try using firm tofu or mushrooms. Each choice adds a unique flavor.
Cooking methods can change the taste too. Grilling shrimp gives them a smoky flavor. Baking keeps them juicy and tender. Both methods are easy and delicious.
Flavor Enhancements
Want to spice things up? Add cumin or cayenne pepper for extra heat. Fresh herbs like cilantro or basil bring freshness. You can also toss in cherry tomatoes for sweetness.
If you prefer a creamy dish, try adding a sauce. A splash of cream or coconut milk makes it rich. You can also blend in a bit of pesto for a twist. Get creative and find what you love!
Storage Info
Storing Leftovers
To keep your Spicy Lemon Garlic Shrimp fresh, let it cool first. Place the shrimp in an airtight container. Store it in the fridge for up to three days. If you want to keep it longer, freeze it. Wrap it tight in plastic wrap or foil, then put it in a freezer bag. This way, it can last for up to three months.
Reheating Tips
When you want to enjoy leftovers, reheating shrimp needs care. The best way is on the stove. Heat a skillet over low heat. Add a splash of olive oil or water to keep it moist. Warm the shrimp for about 2-3 minutes. Stir gently to avoid overcooking. Overcooked shrimp can get tough and rubbery, so keep an eye on it. You can also reheat it in the microwave. Use a microwave-safe dish and cover it loosely. Heat in short bursts of 30 seconds, stirring in between. Enjoy your flavorful dish again!
FAQs
Common Questions
How long does it take to cook shrimp?
Cooking shrimp is quick. It usually takes about 4 to 6 minutes. When the shrimp turns pink and curls up, it is done. Do not overcook shrimp. This can make them tough.
Can I make this dish ahead of time?
Yes, you can prep the shrimp ahead. Marinate them for up to 30 minutes. For best flavor, cook them right before serving. This keeps them fresh and tasty.
What can I serve with Spicy Lemon Garlic Shrimp?
You can serve this dish with many sides. Consider fluffy rice or a fresh salad. Garlic bread also pairs well. Lemon wedges add an extra zing.
Additional Tips
How to tell if shrimp is cooked?
Look for a pink color and a firm texture. Cooked shrimp are opaque. If they are still gray or transparent, they need more time.
Can I use frozen shrimp for this recipe?
Yes, frozen shrimp work well. Just thaw them completely first. Rinse and pat them dry before marinating. This helps to get rid of excess moisture.
This blog post covered how to make Spicy Lemon Garlic Shrimp. We talked about the ingredients needed, like fresh shrimp, garlic, and spices. I shared step-by-step instructions for marinating and cooking the shrimp. You learned tips to perfect the dish and some fun variations.
In summary, cooking shrimp can be quick and delicious. With the right ingredients and techniques, you can impress anyone at your table. Enjoy your culinary adventure!


![- 4 large onions, thinly sliced - 4 tablespoons unsalted butter - 1 tablespoon olive oil - 4 cups beef broth (or vegetable broth) - 1 teaspoon sugar - 1 sprig of fresh thyme - 1 bay leaf - 1 teaspoon salt - 1/2 teaspoon black pepper - 1 tablespoon balsamic vinegar - Optional: Fresh parsley for garnish - 4 slices of baguette, toasted - 1 ½ cups grated Gruyère cheese Classic French onion soup needs sweet, rich flavors. The onions bring that sweetness. Onions are the star. You want to slice them thinly for even cooking. Use a heavy pot to help with the caramelization. Butter and olive oil work great together. Butter adds creaminess, while olive oil gives flavor. The broth is the base. Beef broth adds depth. You can also use vegetable broth if you prefer. For seasoning, sugar helps the onions caramelize. Thyme and bay leaf bring herbal notes. Salt and pepper round out the taste. Balsamic vinegar adds a nice tang. For toppings, you need toasted baguette slices. They soak up the soup and add crunch. Gruyère cheese melts beautifully on top, creating a cheesy layer. I recommend checking out the full recipe for detailed steps to make this comforting dish. - Melt butter and oil in a pot. - Add onions and sugar, and cook until caramelized. Start with a heavy pot. I use my trusty Dutch oven for even heat. Melt 4 tablespoons of unsalted butter with 1 tablespoon of olive oil over medium heat. The blend gives a rich flavor. Next, add 4 large, thinly sliced onions and 1 teaspoon of sugar. Stir them well so they coat in the butter and oil. This sugar helps the onions turn a lovely golden brown. Cook them slowly for about 25-30 minutes. Stir often to prevent burning. Be patient, as caramelization brings out the sweet notes in the onions. - Pour in the broth and add seasonings. - Bring to a gentle simmer and cook. Once the onions are caramelized, it's time to add the broth. Pour in 4 cups of beef broth, or use vegetable broth for a lighter taste. Add 1 sprig of fresh thyme, 1 bay leaf, 1 teaspoon of salt, 1/2 teaspoon of black pepper, and 1 tablespoon of balsamic vinegar. These seasonings give depth to the soup. Bring the soup to a gentle simmer. Let it cook uncovered for about 20 minutes. This time allows the flavors to blend well together. It will smell amazing! - Preheat the oven to broil. - Prepare bowls with bread and cheese for broiling. Before finishing, preheat your oven to broil. Remove the thyme sprig and bay leaf from the soup. Ladle the soup into oven-safe bowls. For the topping, place a toasted slice of baguette on each bowl. Then, sprinkle 1 ½ cups of grated Gruyère cheese on top. The cheese should be generous; it melts beautifully and creates a rich layer. Now, place the bowls on a baking sheet and broil them for about 3-5 minutes. Watch closely to avoid burning! You want the cheese to be bubbly and golden. Take them out carefully and let them cool slightly. If you like, garnish with fresh parsley before serving. Enjoy your comforting bowl of French onion soup! For the full recipe, check out the details above. To make great French onion soup, you need to cook the onions slowly. This step is key. Start over medium heat. Stir the onions often to help them cook evenly. Add a pinch of salt to draw out moisture. Be patient. It can take 25 to 30 minutes for the onions to turn golden brown. Watch closely to avoid burning. If you notice browning too fast, lower the heat. A little sugar can help speed up caramelization, but don't let it burn. Broiling the cheese adds a perfect touch. First, preheat your oven to broil. Ladle the soup into oven-safe bowls. Place a slice of toasted baguette on top of each bowl. Then, sprinkle a generous amount of Gruyère cheese on top. Position the bowls on a baking sheet. This makes it easy to remove them from the oven. Broil for 3 to 5 minutes. Keep an eye on the cheese. You want it bubbly and golden, not burnt. Using different broths can change the flavor. Beef broth gives a rich taste, but vegetable broth works well too. For an extra kick, add a splash of white wine. It adds depth and pairs well with the onions. Feel free to experiment! You can even mix broths for a unique flavor. Adding a tablespoon of balsamic vinegar can also brighten the soup. It balances the sweetness of the onions. For more tips and a full recipe, check out the [Full Recipe]. {{image_2}} You can make a vegetarian version of French onion soup. Start by using vegetable broth instead of beef broth. This broth gives the soup a rich flavor without meat. You can also add extra vegetables. Try carrots, celery, or even leeks. These veggies add sweetness and depth to the soup. Cheese plays a big role in this dish. You can try different cheeses for fun. Gruyère is classic, but Comté or Emmental work well too. These cheeses melt nicely and add a creamy texture. Grate your cheese finely for even melting. Each cheese brings a unique flavor to the soup. You can personalize your soup with add-ins. Fresh herbs like basil or oregano can brighten the dish. Just sprinkle them in before serving. You can also add sautéed mushrooms for an umami boost. Mushrooms add earthiness and enhance the soup’s flavor. Mix and match these ideas to make your perfect bowl of comfort. Check out the Full Recipe for more tips! To keep your soup fresh, let it cool first. After it cools, pour it into a clean, airtight container. Seal the lid tightly. Store the soup in the fridge for up to five days. When you are ready to eat, heat it on the stove or in the microwave. Stir well to make sure it warms up evenly. Freezing soup is easy and convenient. First, let the soup cool completely. Then, use freezer-safe containers or bags. Pour the soup into containers, leaving some space at the top. This allows it to expand. You can freeze it for up to three months. To reheat, thaw it overnight in the fridge. Then, heat it on the stove until it’s hot. You can also add a little broth if it seems too thick. Fresh ingredients are key for great soup. Onions last about two weeks if stored in a cool, dark place. Keep them away from potatoes. Butter can last months in the fridge if sealed tight. Broth can stay good for up to a week in the fridge. Always check for any signs of spoilage before cooking. Fresh ingredients lead to the best flavors in your soup. The classic choice is Gruyère cheese. It melts well and has a rich flavor. Emmental cheese is also great. It adds a nutty taste. For a twist, try Comté or Fontina. These cheeses bring depth and creaminess. Mix different cheeses to create your own blend. Yes, you can make French onion soup ahead of time. Cook the soup and store it in the fridge. It stays fresh for about three days. Just reheat it before serving. You can also freeze it for up to three months. Thaw in the fridge overnight before reheating. A toasted baguette is the best choice for French onion soup. It adds crunch and holds the cheese well. You can also use sourdough or ciabatta. These breads give a nice flavor and texture. Avoid soft bread, as it may fall apart in the soup. Look for a deep golden-brown color in the onions. They should be soft and sweet in taste. This process takes about 25 to 30 minutes. Stir them often to avoid burning. If you see dark spots or they smell bitter, reduce the heat. Classic French onion soup combines simple ingredients for rich flavor. Using onions, butter, and broth creates a warm, comforting dish. Remember to caramelize the onions slowly for depth and to broil cheese to perfection. You can also customize the soup with different broths and cheeses for a unique twist. Whether you’re enjoying it on a cold night or sharing with friends, this soup warms the heart. Embrace your creativity and make this recipe your own!](https://dailydishlab.com/wp-content/uploads/2025/06/d4b3c813-7d13-4313-85c6-6f7cc6d3bfc5-768x768.webp)

![To make this dish, you need simple and fresh ingredients. Here’s what you'll need: - 1 whole chicken (about 4-5 lbs) - 2 lemons (one for juicing, one for slicing) - 4 tablespoons olive oil - 4 cloves garlic, minced - 1 tablespoon fresh rosemary, chopped - 1 tablespoon fresh thyme, chopped - 1 tablespoon fresh parsley, chopped - Salt and pepper, to taste - 1 large onion, quartered - 1 cup chicken broth This mix brings out bright flavors and makes the chicken delicious. The lemon juice adds zing, while the herbs give it depth. You can boost the taste with a few extra ingredients. Try adding: - 1 teaspoon paprika for a smoky touch - 1 tablespoon Dijon mustard for a hint of tang - A pinch of chili flakes for some heat These additions can personalize your dish and make it even more exciting. Pair your chicken with sides that complement its flavors. Here are some great options: - Roasted vegetables like carrots and potatoes - A green salad with a light vinaigrette - Garlic bread to soak up the tasty juices These sides create a balanced meal and make dinner feel special. For the full recipe, check out the details above. First, gather your ingredients. You need a whole chicken, lemons, olive oil, garlic, and herbs. I love using fresh rosemary, thyme, and parsley. These add great flavor. Start by preheating your oven to 425°F (220°C). Next, pat the chicken dry with paper towels. This helps the skin crisp up while roasting. Place the chicken in a roasting pan. In a bowl, mix olive oil, juice from one lemon, minced garlic, and the chopped herbs. Add salt and pepper to taste. This mix is packed with flavor! Now, rub this mixture all over the chicken. Make sure to get it under the skin. This step is key for juicy meat. Stuff the chicken's cavity with the quartered onion and sliced lemon. This adds moisture and aroma while cooking. Pour chicken broth into the roasting pan. This keeps the chicken moist. Next, tie the chicken legs together with kitchen twine. Tuck the wing tips under the bird. This helps the chicken cook evenly. Roast the chicken in your preheated oven. It should take about 1 hour and 15 minutes. Use a meat thermometer to check that it hits 165°F (74°C). Halfway through, baste the chicken with pan juices. This adds extra flavor and moisture. Once done, take the chicken out of the oven. Let it rest for 10-15 minutes before carving. This helps the juices settle. For carving, use a sharp knife. Start with the legs, then move to the breast. For a lovely presentation, place the carved chicken on a large platter. Add fresh lemon slices and sprinkle more herbs on top. Serve with sides like roasted vegetables or a green salad for a complete meal. For the full recipe, check the details above. To make your Lemon Herb Roasted Chicken burst with flavor, start with fresh herbs. Fresh rosemary, thyme, and parsley work best. They add a bright taste that dried herbs can’t match. Always rub the herb mix under the chicken skin. This step seals in the flavors. Squeeze the juice of one lemon over the chicken too. The lemon gives a nice tang and helps balance the richness of the meat. Juiciness is key to a great roasted chicken. First, make sure to pat the chicken dry. This helps the skin crisp up. Pour chicken broth into the pan before roasting. This broth creates steam, keeping the meat moist. Basting the chicken with its pan juices halfway through cooking adds flavor and moisture. Finally, let the chicken rest after roasting. This step helps the juices settle for a tender bite. One common mistake is not preheating the oven. Always preheat to 425°F (220°C) to ensure even cooking. Don’t skip the kitchen twine either. Tying the legs helps the chicken cook evenly. Avoid opening the oven too often, as this lets heat escape. Lastly, don’t rush the resting time after cooking. This time allows for a juicier chicken. For a complete guide, check out the Full Recipe. {{image_2}} You can mix up your herbs for new tastes. Instead of rosemary, try sage or dill. These herbs give a different feel to the chicken. You can also use dried herbs. They work well if you do not have fresh ones. Just use one-third of the amount. This change keeps the dish fresh and fun. You can roast this chicken in many ways. An air fryer cooks it quick and gives a nice crisp skin. Cook at 375°F for about 50 minutes. A slow cooker is another option. Cook on low for 6 to 8 hours. This method keeps the chicken super juicy and tender. Each method has its charm, making dinner easy and tasty. This lemon herb roasted chicken is already gluten-free. You can enjoy it safe without worry. For a keto diet, skip any starchy sides. Instead, serve it with a salad or steamed veggies. This keeps your meal low in carbs but high in flavor. You can enjoy a delicious meal that fits your needs! For the full recipe, check out [Full Recipe]. After enjoying your lemon herb roasted chicken, store the leftovers. Let the chicken cool first. Place it in an airtight container. Keep it in the fridge. Use the leftovers within three to four days. You can shred the meat for salads or sandwiches. This way, you avoid waste and enjoy tasty meals. If you want to save your chicken longer, freezing is a great option. Cut the chicken into portions. Wrap each piece tightly in plastic wrap. Then, place the wrapped chicken in a freezer bag. Remove as much air as possible. Label the bag with the date. When you're ready to eat, thaw it overnight in the fridge. Reheat the chicken in the oven at 350°F (175°C) until warm. This will keep it juicy and delicious. Lemon herb roasted chicken lasts in the fridge for three to four days. If frozen, it stays good for about four months. After that, the quality may drop. Always check for any off smells or changes in texture before eating. Keeping track of how long it’s been stored helps ensure your meals stay safe and tasty. You can tell when the chicken is done by checking its temperature. Use a meat thermometer to check the thickest part of the thigh. The safe internal temperature is 165°F (74°C). If the juices run clear, it is also a good sign. Always let the chicken rest after cooking. This allows the juices to spread and keeps the meat moist. Yes, you can use chicken parts. Thighs, breasts, or drumsticks work well. Just adjust the cooking time. Smaller pieces will cook faster, so keep an eye on them. They may take about 30 to 45 minutes to cook through. Ensure each piece reaches 165°F (74°C) for safety. If you don’t have fresh herbs, you can use dried ones. Use about one-third of the amount of dried herbs compared to fresh. For example, if the recipe calls for one tablespoon of fresh rosemary, use one teaspoon of dried rosemary. Dried herbs can still add great flavor. Experiment with different ones to find your favorite mix. For the complete cooking process, check out the Full Recipe. Lemon herb roasted chicken is a delightful dish you can easily make at home. We covered the key ingredients and how to prepare and roast your chicken for the best taste. I shared tips for keeping the chicken juicy and avoiding common mistakes. I also highlighted variations for unique flavors and dietary needs and provided storage information for leftovers. Remember, cooking is about enjoyment. Experiment and have fun with this recipe to make it your own. Enjoy your delicious meal!](https://dailydishlab.com/wp-content/uploads/2025/06/834e469e-ee3b-4758-a8f8-2aa538b40a90-768x768.webp)


![- 1 pound ziti pasta - 2 tablespoons olive oil - 1 onion, finely chopped - 3 cloves garlic, minced - 1 pound ground beef (or plant-based ground meat) - 1 jar (24 ounces) marinara sauce - 1 can (15 ounces) ricotta cheese - 1 egg - 2 cups shredded mozzarella cheese - 1 cup grated Parmesan cheese - 1 teaspoon Italian seasoning - Salt and pepper to taste - Fresh basil leaves for garnish (optional) For baked ziti, the ingredients are simple but full of flavor. First, you need ziti pasta as your base. I prefer the traditional ziti shape, but penne can work too. Olive oil adds richness and helps in cooking the onion and garlic. Next, the onion and garlic create a savory base for the meat sauce. You can choose ground beef for a classic taste, or use a plant-based option for a lighter meal. Marinara sauce brings the dish together, adding moisture and flavor. Ricotta cheese is a must. It adds creaminess. Mixing it with an egg binds everything together and gives a smooth texture. Mozzarella and Parmesan are essential for that cheesy top that makes baked ziti so appealing. Finally, season with Italian herbs, salt, and pepper. Fresh basil as a garnish adds a pop of color and flavor. If you want the full recipe, just check the section titled Full Recipe. 1. Preheat your oven to 375°F (190°C). This makes sure your dish cooks evenly. 2. Cook the ziti pasta according to package instructions until al dente. Drain the pasta and set it aside. Al dente means it should be firm but not hard. This helps keep the pasta from getting mushy later. 1. In a large skillet, heat the olive oil over medium heat. 2. Add the chopped onion and minced garlic. Sauté them until the onion turns translucent. This step builds flavor and aroma. 3. Next, add the ground beef to the skillet. Cook it until it is browned, breaking it apart with a spatula as it cooks. If there’s extra fat, drain it out. 4. Stir in the marinara sauce and Italian seasoning. Let the sauce simmer for about 5 minutes. This allows the flavors to mingle. Remove it from heat when done. 1. In a large mixing bowl, combine the cooked ziti with the meat sauce. Stir well to coat all the pasta with the sauce. 2. To assemble, spread half of the ziti mixture into a greased 9x13 inch baking dish. 3. Dollop half of the ricotta mixture over the pasta, spreading it gently. 4. Sprinkle half of the shredded mozzarella cheese on top. 5. Add the remaining ziti mixture on top, then dollop with the remaining ricotta. 6. Finally, sprinkle the rest of the mozzarella and Parmesan cheese over everything. 7. Cover the baking dish with aluminum foil and bake for 25 minutes. 8. Remove the foil and bake for an additional 15-20 minutes. Look for bubbly and golden brown cheese. 9. Let the baked ziti cool for about 10 minutes before serving. If you like, garnish with fresh basil leaves for a nice touch. For the full recipe, check out the detailed ingredient list above. Enjoy your delicious, comforting meal! How to avoid overcooked pasta To keep your pasta just right, cook the ziti for 2 minutes less than the package says. This way, the pasta stays firm after baking. Remember, it will cook more in the oven, so don't overdo it! Browning the cheese for extra flavor For a rich taste, broil the dish for the last few minutes. This gives the cheese a nice brown color and a crunchy bite. Just watch it closely so it doesn’t burn. Recommended herbs and spices Add freshness with basil or oregano. A pinch of red pepper flakes can give it a nice kick! Mix these in your meat sauce for a burst of flavor. Suggested cheese alternatives If you want to change things up, try goat cheese or feta instead of ricotta. They add a tangy twist. For mozzarella, fresh mozzarella balls can create a creamy texture and taste. Best sides to accompany baked ziti Serve your baked ziti with a simple green salad. A side of garlic bread goes great too! The crunch and flavors balance the creamy pasta. Pairing with wines and salads A light red wine, like Chianti, pairs well with baked ziti. If you prefer white, a crisp Pinot Grigio is also nice. For salads, a Caesar or caprese salad adds freshness to your meal. For the complete process, check the [Full Recipe]. {{image_2}} If you want a meatless option, try plant-based ground meat. This makes the dish lighter but still tasty. You can use lentils or mushrooms for a hearty feel. If you prefer, you can simply omit the meat. This gives you a delicious vegetarian baked ziti. You still get great flavor from the sauce and cheese. Cheese makes baked ziti special. Using fresh mozzarella gives a creamy and stretchy texture. Shredded mozzarella melts well, too. You can mix both types for extra flavor. Ricotta adds a nice creaminess. Try different ricotta brands or even mix in some herbs for added taste. You can make it your own with these cheese choices. Adding vegetables can boost flavor and nutrition. Spinach, zucchini, or bell peppers are great choices. Just chop them small so they blend well. Sauté them with the onion and garlic to enhance their taste. When adding veggies, balance is key. Use them with the right amount of sauce and cheese. This way, every bite stays flavorful. For more details, check the Full Recipe. To keep baked ziti fresh, cool it first. Then, place it in an airtight container. Glass or plastic containers work well for refrigeration. Make sure to seal the lid tightly to lock in moisture. When you reheat baked ziti, avoid the microwave if you can. Instead, use an oven set to 350°F (175°C). Cover it with foil to keep moisture in. Heat for about 20 minutes. If you want to freeze leftovers, let the ziti cool completely. Place it in freezer-safe containers, leaving space for expansion. Baked ziti lasts about 3 to 5 days in the fridge. If you freeze it, it can last up to 3 months. To ensure best flavor and texture, wrap it well before freezing. How long do I bake baked ziti? I bake baked ziti for about 40 to 45 minutes. First, cover it with foil and bake for 25 minutes. Then, remove the foil and bake for another 15 to 20 minutes. This method helps the cheese get nice and bubbly. Can I prepare baked ziti ahead of time? Yes, you can prepare baked ziti ahead of time. Assemble it the day before and keep it in the fridge. Just make sure to cover it well. Bake it the next day, adding a few extra minutes if it’s cold from the fridge. Gluten-free options for ziti To make a gluten-free baked ziti, use gluten-free ziti pasta. There are many brands available that taste great. Just check the package for cooking directions, as they may vary from regular pasta. Low-carb alternatives For a low-carb version, swap the ziti for spiralized zucchini or cauliflower rice. Both options are tasty and keep the dish light. Just be sure to adjust cooking times as needed. Can I replace ricotta cheese? Yes, you can replace ricotta cheese with cottage cheese or cream cheese. Both give a nice creamy texture. If you want to keep it dairy-free, use tofu blended with a little lemon juice. What to use instead of marinara sauce? If you don’t have marinara sauce, try using a homemade tomato sauce or even pesto. Both options add unique flavors to the dish. Just make sure to season them well for the best taste. [Full Recipe] Baked ziti is a classic dish that brings warmth and joy. It combines pasta, meat, and cheese into one tasty meal. Let me share how to make this comforting dish. - 1 pound ziti pasta - 2 tablespoons olive oil - 1 onion, finely chopped - 3 cloves garlic, minced - 1 pound ground beef (or plant-based ground meat) - 1 jar (24 ounces) marinara sauce - 1 can (15 ounces) ricotta cheese - 1 egg - 2 cups shredded mozzarella cheese - 1 cup grated Parmesan cheese - 1 teaspoon Italian seasoning - Salt and pepper to taste - Fresh basil leaves for garnish (optional) 1. Preheat your oven to 375°F (190°C). This ensures even cooking. 2. Cook the ziti pasta until it is al dente. Drain and set it aside. You want it firm so it holds up in the oven. 3. Heat olive oil in a large skillet over medium heat. Add the chopped onion and garlic. Cook until the onion is soft. 4. Add the ground beef to the skillet. Cook until it turns brown. Break it into small pieces as it cooks. Drain any extra fat if needed. 5. Stir in the marinara sauce and Italian seasoning. Let it simmer for about 5 minutes. This helps blend the flavors. 6. In a bowl, mix the ricotta cheese, egg, salt, and pepper. Stir until smooth. This will give creamy layers. 7. In another large bowl, combine the cooked ziti with the meat sauce. Mix well. Make sure every piece of pasta is coated. 8. Spread half of the ziti mixture into a greased baking dish. Add half of the ricotta mixture on top and sprinkle half of the mozzarella cheese. 9. Layer the rest of the ziti mixture on top. Add the remaining ricotta and sprinkle the rest of the mozzarella and Parmesan cheese. 10. Cover the dish with foil and bake for 25 minutes. This keeps it moist while cooking. 11. Remove the foil and bake for another 15-20 minutes. Look for bubbly and golden cheese on top. 12. Let it cool for about 10 minutes before serving. Garnish with fresh basil leaves if you like. With this recipe, you will create a dish that comforts and delights. Enjoy every cheesy bite! Baked ziti is a hearty dish made with simple ingredients. We covered the essential components, from pasta and sauce to cheese. I shared easy steps for cooking and assembling, plus tips for perfecting your meal. Remember, you can customize baked ziti with proteins and veggies to fit your taste. Don't forget about storage and reheating guidelines for leftovers. Enjoy this dish with friends and family, making each bite memorable!](https://dailydishlab.com/wp-content/uploads/2025/06/2fce1db0-3740-4cc6-8e4e-0aee4d2c952d-768x768.webp)