Strawberry Banana Chia Jam Flavorful and Nutritious

Welcome to the delicious world of Strawberry Banana Chia Jam! This recipe is both tasty and healthy, bringing the sweet flavors of fresh strawberries and ripe bananas into your kitchen. You’ll learn how to make this easy jam, packed with nutrients and flavor, using simple ingredients like honey and chia seeds. Ready to impress your friends and family? Let’s dive into making your new favorite spread!
Why I Love This Recipe
- Easy to Make: This jam comes together in just 30 minutes, making it a quick and simple treat to prepare.
- Natural Sweetness: The combination of fresh strawberries and ripe banana provides a delightful sweetness without the need for excessive sugar.
- Healthy Ingredients: With chia seeds packed with omega-3s and fiber, this jam is a nutritious addition to your meals.
- Versatile Use: This chia jam is perfect for spreading on toast, drizzling over pancakes, or topping your favorite yogurt.
Ingredients
Fresh Ingredients
To make this tasty Strawberry Banana Chia Jam, you need just a few fresh items:
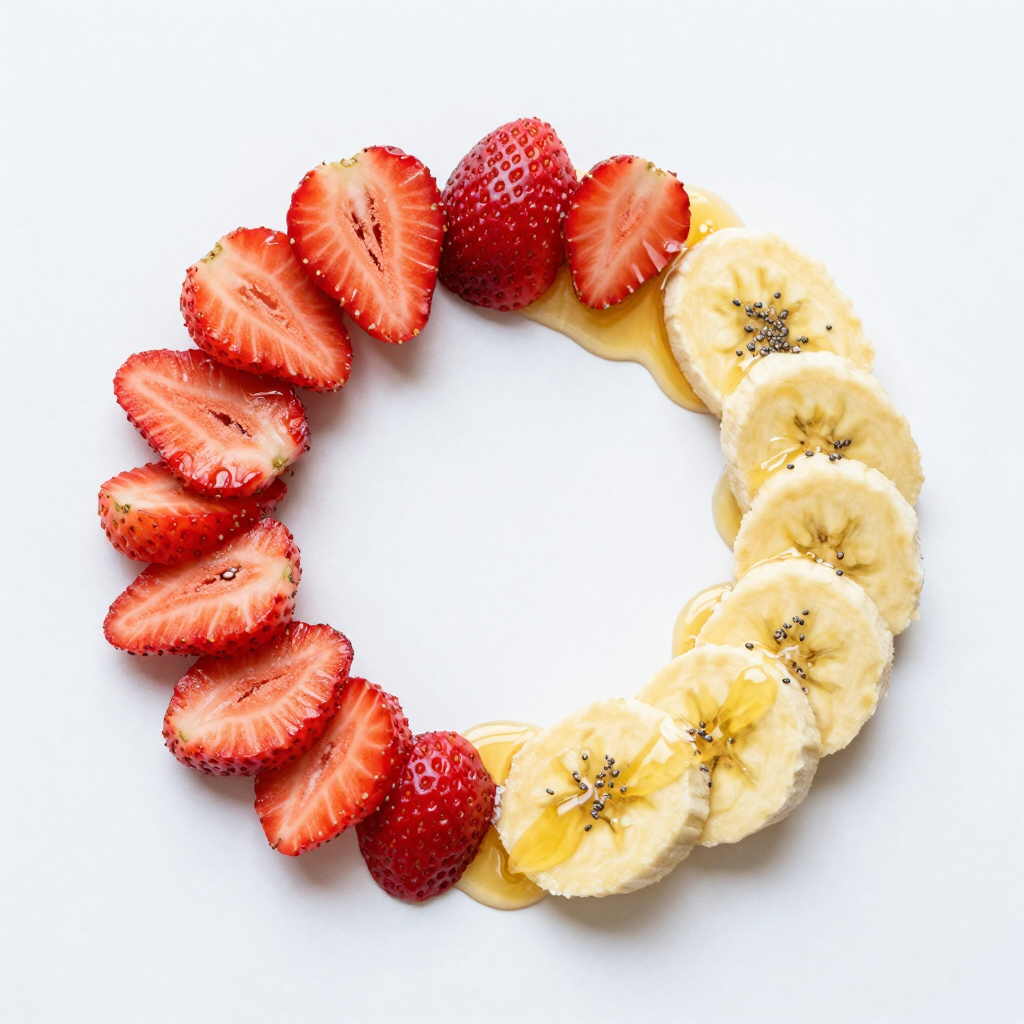
- 2 cups fresh strawberries, hulled and chopped
- 1 ripe banana, mashed
- 1/4 cup honey or maple syrup
- 2 tablespoons chia seeds
- 1 tablespoon lemon juice
- 1/2 teaspoon vanilla extract
- Pinch of salt
These ingredients come together to create a sweet, fruity jam. Fresh strawberries give a vibrant flavor. The ripe banana adds a creamy texture. Honey or maple syrup sweetens the jam nicely. Chia seeds help thicken it and add fiber. Lemon juice adds a bright kick. The vanilla rounds out the taste with warmth.
You can easily find these ingredients at your local market. Choosing ripe fruits makes a big difference in taste. Look for strawberries that are bright red, firm, and fragrant. The banana should have a few brown spots for the best sweetness.
Together, these ingredients create a delightful jam that works well on toast, pancakes, or yogurt. Plus, it’s quick to make! You just need about ten minutes of prep time. The jam will be ready in about 30 minutes. Enjoy this jam knowing it is both flavorful and nutritious!

Step-by-Step Instructions
Preparing the Strawberries and Banana
First, gather your fresh strawberries and ripe banana. Hull and chop the strawberries into small pieces. Then, mash the banana in a bowl until smooth. In a medium saucepan over medium heat, combine the chopped strawberries and mashed banana. Cook them for about 5 minutes. Stir occasionally. You want the strawberries to release their juicy goodness and soften.
Adding Sweetness and Flavor
After cooking, take the saucepan off the heat. Now, stir in 1/4 cup of honey or maple syrup, depending on your choice. Add 1 tablespoon of lemon juice and 1/2 teaspoon of vanilla extract. This will bring a lovely brightness and flavor to the jam. Mix everything well so that it blends perfectly.
Mixing in Chia Seeds
Next, add 2 tablespoons of chia seeds to the mixture. Stir them in until they are evenly distributed. This step is important because chia seeds help thicken the jam. Make sure you mix well to prevent clumps.
Thickening the Jam
Let the jam sit for about 10-15 minutes. During this time, the chia seeds will absorb the liquid and thicken the jam. Stir occasionally to help with the process. You will know it’s thick enough when it coats the back of a spoon. Once it reaches your desired thickness, transfer it to a clean jar or container. Allow it to cool completely before sealing.
Pro Tips
- Fresh Ingredients: Always use fresh, ripe strawberries and bananas for the best flavor and texture in your jam.
- Sweetness Adjustment: Adjust the amount of honey or maple syrup based on your desired sweetness and the ripeness of your fruits.
- Thickening Time: Allow the jam to sit for at least 15 minutes after adding chia seeds to achieve the perfect thick consistency.
- Storage Tips: Store your chia jam in a glass jar and ensure it’s completely cool before sealing to maintain freshness.
Tips & Tricks
Achieving the Perfect Consistency
To adjust the thickness of your jam, add more chia seeds. Start with one extra tablespoon if it seems too runny. If it’s too thick, mix in a splash of water or lemon juice. Stir well and let it sit for a few more minutes. Keep in mind that the jam will thicken as it cools.
Flavor Enhancements
You can enhance the flavor with simple additions. For a warm touch, add a pinch of cinnamon. If you like citrus, try adding some orange zest. You can also use almond extract instead of vanilla for a nutty twist. Experiment with different spices to find your favorite.
Presenting the Jam
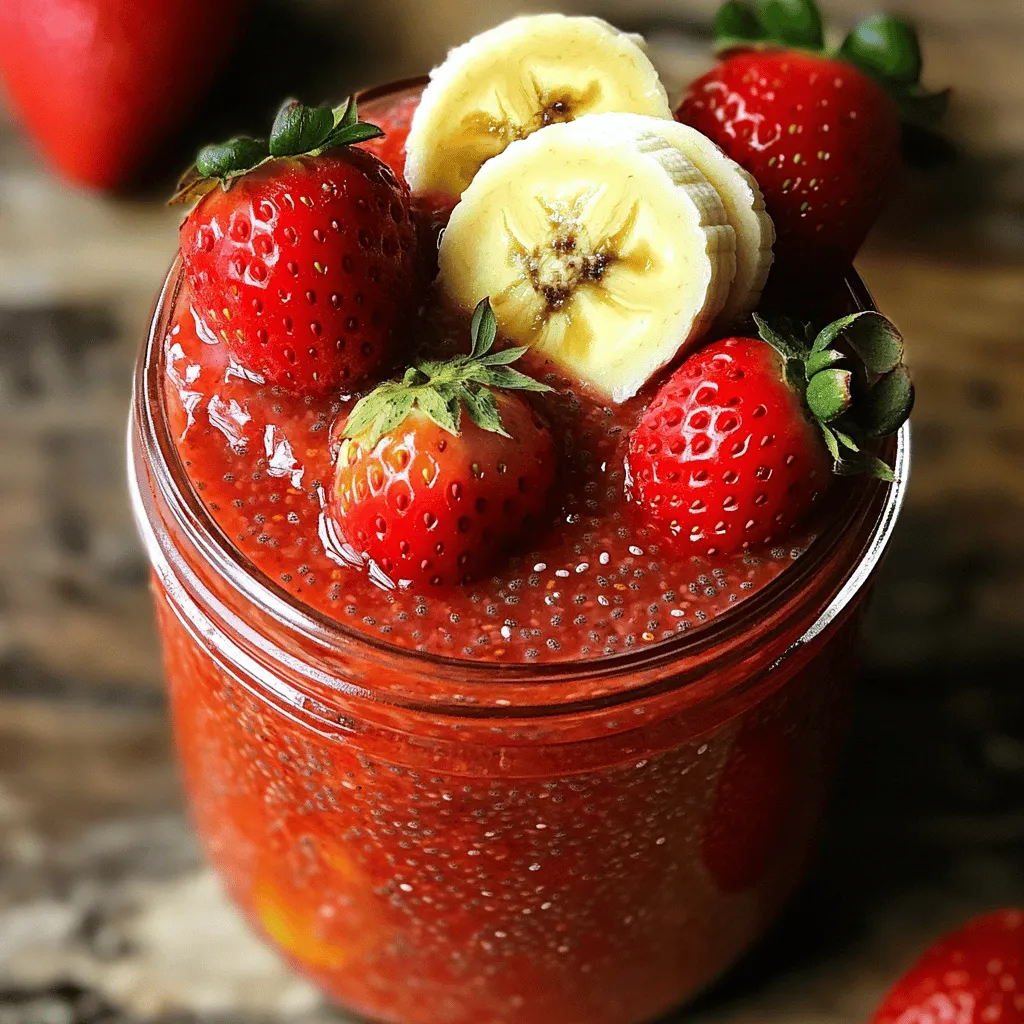
For a beautiful presentation, use a clear jar. Fill it with the jam and top it with whole strawberries or banana slices. You can also tie a ribbon around the jar for a nice touch. Serve with a small spoon for easy scooping. This makes a great gift or a tasty addition to your breakfast table.

Variations
Alternative Sweeteners
You can switch up the sweetener in this jam. If you want less sugar, try maple syrup. It gives a nice, rich flavor. You can also use agave syrup for a light taste. Coconut sugar works too, adding a caramel-like touch. Each sweetener changes the jam’s flavor slightly, so pick your favorite!
Adding Spices and Zests
Want to spice things up? Add a pinch of cinnamon for warmth. Nutmeg gives a cozy taste too. You can also add lemon or orange zest. This brightens the jam and adds freshness. Just a little zest can make a big difference!
Mix and Match Fruits
Don’t stop at strawberries and bananas. Try adding peaches for a summer twist. Blueberries bring a burst of flavor and color. Raspberries add a tart kick, balancing the sweetness. You can even mix in some apples for texture. The options are endless, so have fun exploring!
Storage Info
Refrigeration Guidelines
Your Strawberry Banana Chia Jam stays fresh in the fridge for up to one week. Store it in an airtight container to keep it tasting great. Always check for any signs of spoilage before using. If it looks or smells off, don’t eat it!
Freezing Strawberry Banana Chia Jam
You can freeze this jam for up to three months. To freeze, pour it into a freezer-safe container, leaving some space at the top. This space allows for expansion as it freezes. When you’re ready to enjoy it, thaw the jam in the fridge overnight. Stir well before serving to mix any separated liquid.
Containers for Storage
Use glass jars or plastic containers that seal tightly. Glass jars work well for storage and are eco-friendly. Choose containers that fit your needs. Make sure they are clean and dry before adding your jam. This ensures the jam stays fresh longer.
FAQs
Can I use frozen strawberries?
Yes, you can use frozen strawberries. Thaw them before cooking. This helps the fruit break down. Also, you might need a bit more cooking time. Check the texture as you go. Frozen strawberries can be just as tasty!
How do I ensure the jam sets properly?
To help your jam set, let it sit longer. Chia seeds absorb liquid. If it seems too runny, add more chia seeds. Start with one teaspoon at a time. Stir well and wait for another 10 minutes. The jam should thicken nicely!
Is this recipe suitable for canning?
This jam is not the best for canning. It does not have enough sugar. Canning needs high sugar and acidity levels. If you want to can it, consider adding more lemon juice or sugar. Always follow safe canning practices.
This guide covers all you need for making strawberry banana chia jam. We explored fresh ingredients, step-by-step instructions, and helpful tips. You can enhance flavors or try different fruits. Remember to store your jam carefully in the fridge or freeze for later use. This simple recipe can spark joy in your kitchen. Enjoy your tasty creation and share it with friends!

Strawberry Banana Chia Jam
Ingredients
2 cups fresh strawberries, hulled and chopped
1 ripe banana, mashed
1/4 cup honey (or maple syrup for a vegan option)
2 tablespoons chia seeds
1 tablespoon lemon juice
1/2 teaspoon vanilla extract
Pinch of salt
Instructions
In a medium saucepan over medium heat, combine the chopped strawberries and mashed banana. Cook for about 5 minutes, stirring occasionally until the strawberries release their juices and start to break down.
Remove the saucepan from the heat and stir in the honey (or maple syrup), lemon juice, vanilla extract, and salt. Mix well to combine.
Add the chia seeds to the strawberry-banana mixture and stir until evenly distributed.
Let the mixture sit for about 10-15 minutes to allow the chia seeds to absorb the liquid and thicken the jam. Stir occasionally.
Once the jam has reached your desired thickness, transfer it to a clean jar or airtight container. Allow it to cool completely before sealing.
Refrigerate the jam for up to 1 week.
Prep Time: 10 minutes | Total Time: 30 minutes | Servings: 1 cup
– Presentation Tips: Serve the chia jam in a beautifully jarred presentation, topped with a few whole strawberries or banana slices for garnish. Enjoy it on toast, pancakes, or as a topping for yogurt!

Strawberry Banana Chia Jam
Ingredients
- 2 cups fresh strawberries, hulled and chopped
- 1 ripe banana, mashed
- 0.25 cup honey (or maple syrup for a vegan option)
- 2 tablespoons chia seeds
- 1 tablespoon lemon juice
- 0.5 teaspoon vanilla extract
- 1 pinch salt
Instructions
- In a medium saucepan over medium heat, combine the chopped strawberries and mashed banana. Cook for about 5 minutes, stirring occasionally until the strawberries release their juices and start to break down.
- Remove the saucepan from the heat and stir in the honey (or maple syrup), lemon juice, vanilla extract, and salt. Mix well to combine.
- Add the chia seeds to the strawberry-banana mixture and stir until evenly distributed.
- Let the mixture sit for about 10-15 minutes to allow the chia seeds to absorb the liquid and thicken the jam. Stir occasionally.
- Once the jam has reached your desired thickness, transfer it to a clean jar or airtight container. Allow it to cool completely before sealing.
- Refrigerate the jam for up to 1 week.


![To create these tasty caramel apple crisp bars, you need a few key ingredients. Here’s what you’ll need: - 2 cups rolled oats - 1 cup all-purpose flour - 1/2 cup brown sugar, packed - 1/2 cup unsalted butter, melted - 1 teaspoon baking soda - 1/2 teaspoon cinnamon - 1/4 teaspoon salt - 3 cups diced apples (about 3 medium apples, peeled and cored) - 1/2 cup granulated sugar - 1 tablespoon lemon juice - 1/2 cup caramel sauce (store-bought or homemade) These ingredients blend together to make a deliciously sweet and crunchy treat. If you need to convert measurements, here are some handy tips: - 1 cup equals 8 ounces. - 1/2 cup equals 4 ounces. - 1 tablespoon equals 15 milliliters. - 1 teaspoon equals 5 milliliters. These conversions help you scale the recipe if needed. You can get creative with your bars! Here are a few optional ingredients: - 1/4 cup chopped nuts, like pecans or walnuts - 1/2 teaspoon vanilla extract - A pinch of nutmeg for warmth - A sprinkle of sea salt on top for contrast Adding these flavors can really elevate your caramel apple crisp bars. If you want, you can mix and match! For the full recipe and instructions, check out the [Full Recipe]. Start by preheating your oven to 350°F (175°C). This step is key for even baking. Next, take a 9x9-inch baking dish and line it with parchment paper. Leave some paper hanging over the edges. This helps when you remove the bars later. In a mixing bowl, combine these ingredients: - 2 cups rolled oats - 1 cup all-purpose flour - 1/2 cup brown sugar, packed - 1/2 cup unsalted butter, melted - 1 teaspoon baking soda - 1/2 teaspoon cinnamon - 1/4 teaspoon salt Stir until the mix looks crumbly. Now, take about two-thirds of this mixture and press it into the bottom of your lined dish. This forms the crust layer. Make sure it is even and compact. Next, grab another bowl and toss together: - 3 cups diced apples (about 3 medium apples, peeled and cored) - 1/2 cup granulated sugar - 1 tablespoon lemon juice Toss until the apples are well coated. Spread this apple mixture evenly over your crust. Drizzle half of the caramel sauce over the apples. This adds a sweet touch. Now, take the remaining oat mixture and crumble it over the apples and caramel. This topping will create a lovely crisp. Once you have done this, you are ready to bake! Follow the [Full Recipe] for the baking time and enjoy the delicious smell that fills your kitchen! Choosing the right apples is key. I recommend using tart apples like Granny Smith. They balance the sweet caramel well. You can also mix sweet apples, like Fuji or Honeycrisp, for extra flavor. Look for firm apples without bruises. They should feel heavy for their size. Fresh apples give a great texture in your bars. For a smooth caramel, heat it gently. If you use store-bought, warm it in a microwave. Stir it every 20 seconds until it’s easy to drizzle. If you make it at home, keep stirring to avoid burning. Let it cool slightly before drizzling. This helps it stick better to the apples and crust. You want that perfect, gooey layer. To keep your bars fresh, store them in an airtight container. This keeps them moist and tasty. You can place parchment paper between layers to avoid sticking. If you have a lot left, freeze them. Just wrap individual bars in plastic wrap, then place them in a freezer bag. They stay good for up to three months. Enjoy your delicious caramel apple crisp bars whenever you want! {{image_2}} You can try different toppings for your caramel apple crisp bars. Add chopped nuts like walnuts or pecans for crunch. You can also sprinkle some shredded coconut for a tropical twist. If you love chocolate, drizzle some melted chocolate on top. These toppings make the dessert even more fun and tasty. If you want a gluten-free crust, swap all-purpose flour with gluten-free flour. Make sure it’s a blend that works well in baking. You can also use almond flour or oat flour for a nutty taste. This way, everyone can enjoy these bars without worry. As the seasons change, so can your bars. In fall, add pumpkin spice to the apple filling. Mix cinnamon, nutmeg, and clove for a warm flavor. For summer, use peaches or berries instead of apples. Each season brings new fun to this recipe. Enjoy the Full Recipe for more ideas! Storing caramel apple crisp bars is simple. Once they cool, place them in an airtight container. You can keep them at room temperature for up to three days. If you want them to last longer, store them in the fridge. This keeps them fresh and tasty. Just make sure they are sealed well to avoid drying out. If you want to save some bars for later, freezing is a great option. First, wrap each bar in plastic wrap. Then, place them in a freezer-safe bag or container. They can stay in the freezer for up to three months. To enjoy later, just thaw them in the fridge overnight. You can also let them sit at room temperature for an hour before eating. Reheating your caramel apple crisp bars can bring back their warm, gooey goodness. To do this, preheat your oven to 350°F (175°C). Place the bars on a baking sheet and cover them with foil. Heat for about 10-15 minutes. This method keeps the bars soft and the caramel melty. You can also use a microwave, but heat them in short bursts to avoid drying them out. Enjoy them warm for a delightful treat! Yes, you can! I love using Granny Smith apples for their tartness. They balance well with the sweet caramel. Honeycrisp apples add a nice crunch and sweetness. You can also mix different types for more flavor. Just make sure the apples are firm and fresh for the best results. To make these bars vegan, swap the unsalted butter for coconut oil or a vegan butter substitute. Use brown sugar, as it is usually vegan. You can also find vegan caramel sauce or make your own. This way, everyone can enjoy the deliciousness of caramel apple crisp bars! After the bars cool, use a sharp knife to cut them. I recommend lifting the whole batch out of the pan using the parchment paper. This makes it easy. For neat squares, wipe the knife clean after each cut. You’ll get perfect pieces to share with friends and family! For the full recipe, check out the details above. Caramel apple crisp bars are simple to make. We covered key ingredients and measurements. You learned how to prepare, create layers, and perfect the caramel drizzle. I shared tips on apple selection and storage. Variations let you explore new flavors, even gluten-free options. In the end, these bars are a fun treat. They work for any season and occasion. Try making them your own! Enjoy the sweet, warm taste today.](https://dailydishlab.com/wp-content/uploads/2025/07/dc1cd077-e04f-4984-9460-89b9559f5089-768x768.webp)

