Strawberry Cheesecake Smoothie Bowl Fresh and Tasty Treat

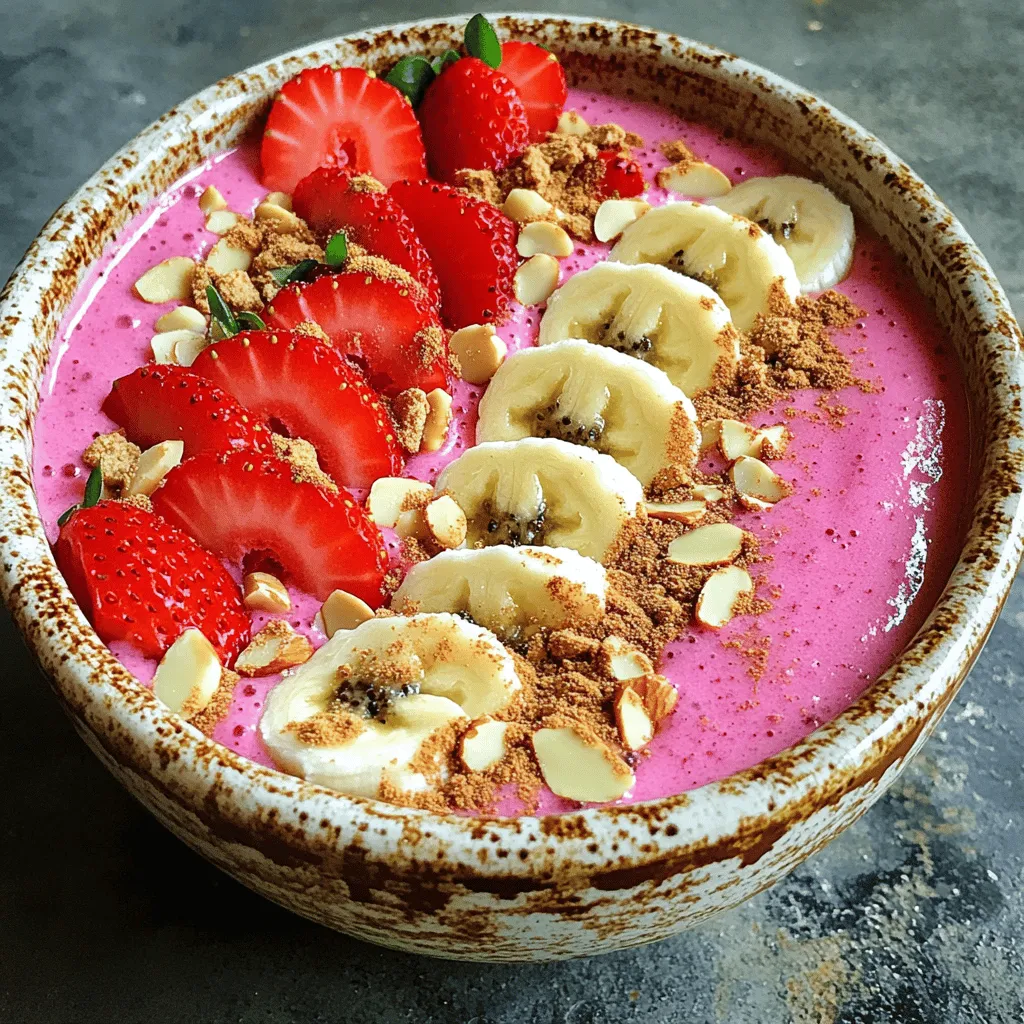
Looking for a fun and tasty way to enjoy dessert? Dive into the Strawberry Cheesecake Smoothie Bowl! This bowl blends sweet, fruity flavors with creamy goodness, making it perfect for breakfast or a snack. With simple ingredients like frozen strawberries, Greek yogurt, and a touch of honey, you’ll whip up a treat that’s healthy and satisfying. Let’s get started on this delicious recipe!
Why I Love This Recipe
- Deliciously Creamy: This smoothie bowl captures the rich and creamy texture of a traditional cheesecake while remaining refreshing and light.
- Easy to Make: In just 10 minutes, you can whip up this delightful bowl, making it a perfect option for busy mornings or a quick snack.
- Nutritious Ingredients: Packed with fruits and Greek yogurt, this smoothie bowl offers a healthy dose of vitamins and protein to fuel your day.
- Customizable Toppings: With a variety of toppings like fresh fruit, nuts, and graham cracker crumbs, you can easily tailor this recipe to your taste.
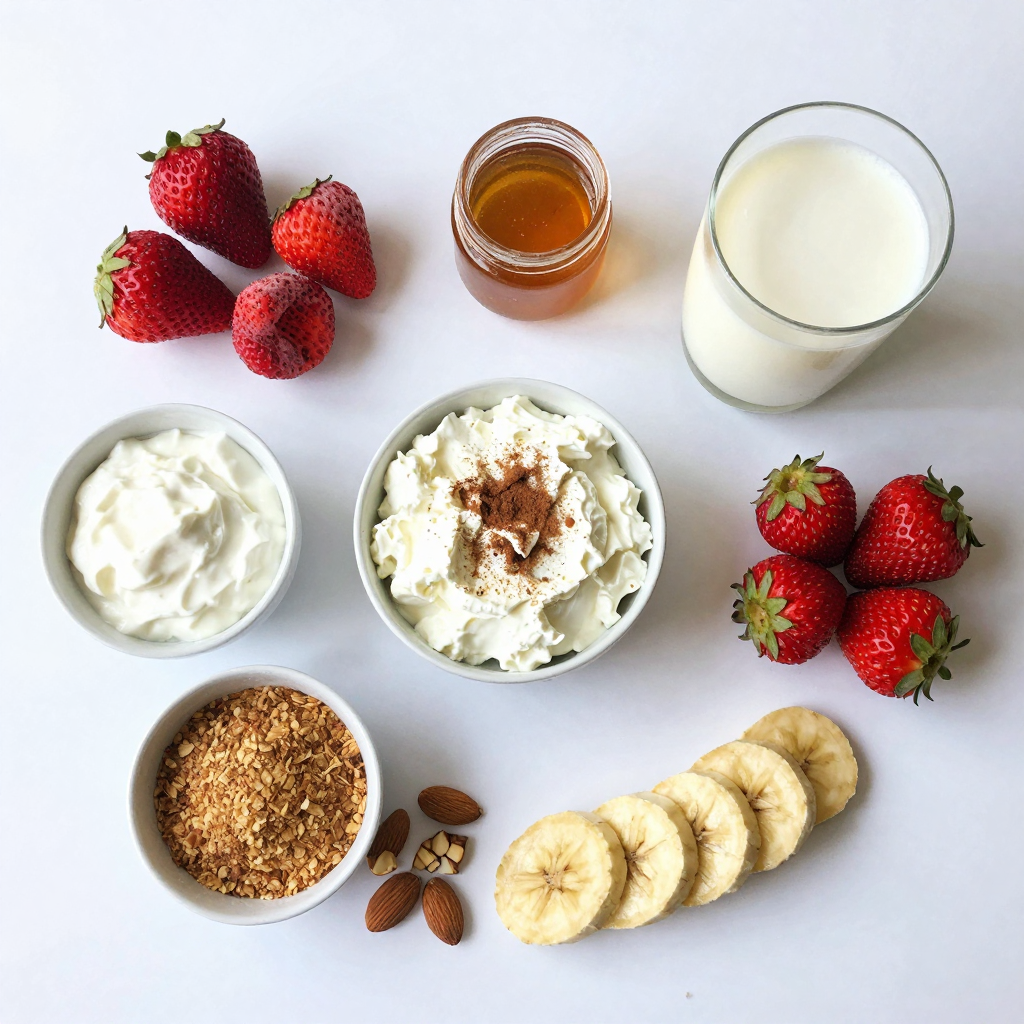
Ingredients
To make a delicious Strawberry Cheesecake Smoothie Bowl, you need a few simple ingredients. Gather the following items:
- 1 cup frozen strawberries
- 1/2 cup Greek yogurt (plain or vanilla)
- 1/4 cup cream cheese, softened
- 1 tablespoon honey or maple syrup
- 1/2 cup milk (dairy or non-dairy)
- 1 tablespoon graham cracker crumbs
- Fresh strawberries, for topping
- Sliced bananas, for topping
- Chopped nuts (almonds or walnuts), for topping
- A dusting of cinnamon, for garnish
These ingredients blend together to create a creamy and fruity base. The frozen strawberries give it a refreshing chill. Greek yogurt adds protein, while cream cheese brings that classic cheesecake taste. Honey or maple syrup sweetens the mix just right. The milk helps everything blend smoothly.
For toppings, fresh strawberries and banana slices add color and flavor. Chopped nuts add a nice crunch, making every bite enjoyable. The graham cracker crumbs on top mimic a cheesecake crust. Lastly, a sprinkle of cinnamon brings warmth and spice.
This simple list makes it easy to prepare a tasty treat that feels special. You can also mix and match toppings based on what you love or have at home.

Step-by-Step Instructions
Instructions Overview
- Prepare the ingredients
- Blend the smoothie mixture
- Assemble the smoothie bowl
Detailed Steps
- Step 1: Combine ingredients in the blender
Start by adding 1 cup of frozen strawberries, 1/2 cup of Greek yogurt, and 1/4 cup of softened cream cheese into your blender. Then, include 1 tablespoon of honey or maple syrup for sweetness. Finally, pour in 1/2 cup of milk, either dairy or non-dairy. This mix gives your smoothie that creamy texture.
- Step 2: Blend until smooth and creamy
Secure the lid on your blender and blend the mixture until it is smooth and creamy. This step usually takes about 30 seconds. Make sure there are no lumps for the best results. If you want, taste the mixture and add more honey or maple syrup for extra sweetness. Blend again briefly to mix it well.
- Step 3: Pour into a bowl and smooth the surface
Once your smoothie is perfectly blended, pour it into a bowl. Use a spatula to smooth the top. This helps create a nice base for your toppings.
- Step 4: Add graham cracker crumbs on top
Sprinkle 1 tablespoon of graham cracker crumbs evenly over the top of the smoothie. This adds a nice crunch and gives it that cheesecake flavor.
- Step 5: Arrange fresh fruit and nuts aesthetically
Now it’s time to get creative! Arrange fresh strawberries, sliced bananas, and chopped nuts on top of the smoothie bowl. Use your favorite nuts, like almonds or walnuts. Make it colorful and fun!
- Step 6: Dust with cinnamon
For the final touch, dust a pinch of cinnamon over the toppings. This adds a warm flavor that pairs well with the fruit and cheesecake taste.
Enjoy your Strawberry Cheesecake Smoothie Bowl right away with a spoon. It’s a fresh and tasty treat!
Pro Tips
- Use Frozen Strawberries: For a thicker and colder smoothie bowl, always use frozen strawberries instead of fresh ones.
- Adjust the Sweetness: Taste your smoothie before serving and feel free to adjust the sweetness with more honey or maple syrup based on your preference.
- Add Extra Creaminess: For a creamier texture, you can add a splash more of milk or substitute with coconut milk for a tropical twist.
- Garnish Creatively: Get creative with your toppings! Try adding granola, chia seeds, or even a dollop of nut butter for added flavor and nutrition.
Tips & Tricks
Tips for Perfecting Your Smoothie Bowl
- Choosing the right frozen strawberries: Use ripe, sweet strawberries. Look for ones that are bright red with no dark spots. This ensures great taste and color.
- Adjusting sweetness levels: Taste your smoothie mix before pouring it out. If it needs more sweetness, add honey or maple syrup. Blend again to mix.
- Achieving the perfect texture: Blend until smooth and creamy. If it’s too thick, add a splash of milk. If too thin, add more frozen strawberries for thickness.
Presentation Tips
- Creative topping arrangements: Arrange fresh strawberries, banana slices, and nuts in a fun pattern. This makes your bowl more inviting and fun to eat.
- Using colorful fruits for aesthetics: Add colorful fruits like blueberries or kiwi. This adds brightness and makes the dish pop.
- Serving suggestions: Use a chilled bowl for serving. This keeps your smoothie cold longer and enhances your eating experience.

Variations
Ingredient Substitutions
- Alternative sweeteners: You can swap honey or maple syrup for agave syrup or stevia. These options can help you reduce sugar if needed.
- Non-dairy yogurt options: Use coconut, almond, or soy yogurt instead of Greek yogurt. This makes the smoothie bowl vegan and just as creamy.
- Different nuts for toppings: Try pecans or hazelnuts instead of almonds or walnuts. Each nut brings its own unique flavor and crunch.
Flavor Variations
- Adding other fruits: Blueberries and raspberries blend well with strawberries. They add extra color and nutrients.
- Mixing in flavors: A splash of vanilla extract or a hint of nutmeg can enhance the taste. This small touch makes a big difference.
- Combine with protein powders: Adding protein powder boosts nutrition. It’s great for a post-workout snack or meal replacement.
Storage Info
How to Store Leftovers
If you have leftovers, you can store them in the fridge. Use an airtight container. This keeps the smoothie fresh for up to two days. If it starts to separate, just stir it before serving. Avoid leaving it out at room temperature for more than two hours. This helps prevent bacteria growth.
Here are some best practices for keeping freshness:
- Seal tightly to avoid air exposure.
- Label containers with the date.
- Keep it away from strong-smelling foods.
Freezing for Future Use
You can freeze the smoothie for later use. Pour the leftovers into freezer-safe containers or bags. Make sure to leave some space at the top. Smoothies expand when they freeze.
When you’re ready to enjoy it, thaw the smoothie in the fridge overnight. This ensures you maintain the best texture. You can also use the microwave to thaw it. Just use a low setting and stir often to avoid hot spots.
FAQs
Can I make this smoothie bowl vegan?
Yes, you can. Use non-dairy yogurt instead of Greek yogurt. Swap cream cheese for vegan cream cheese. Choose maple syrup as a sweetener. Use almond milk or oat milk for the liquid.
How can I make this smoothie bowl lower in calories?
To cut calories, use less cream cheese. You can replace honey with a sugar-free sweetener. Use a light yogurt or a lower-calorie milk. Skip the nuts or use fewer nuts for toppings.
What can I use instead of cream cheese?
If you want a creamy texture, try silken tofu. You can also use dairy-free cream cheese. Another option is to use thick cashew cream. All these choices work well in this smoothie bowl.
How long will the smoothie bowl last in the fridge?
The smoothie bowl stays fresh for about 1 day. Store it in an airtight container. The toppings may lose crunch over time. It’s best to add toppings right before eating.
Can I add vegetables to this recipe?
Yes, adding spinach or kale can boost nutrients. They blend well and add a nice green color. Use just a small amount to keep the taste sweet. You won’t even notice the veggies!
This blog post showed you how to make a yummy smoothie bowl. We covered the best ingredients, easy steps, and helpful tips to perfect your bowl. You can tweak flavors and toppings to match your tastes. Remember that fun and creativity make your smoothie bowl special. Enjoy making it your own! Keep practicing and share your delicious creations with friends and family.

Strawberry Cheesecake Smoothie Bowl
Ingredients
1 cup frozen strawberries
1/2 cup Greek yogurt (plain or vanilla)
1/4 cup cream cheese, softened
1 tablespoon honey or maple syrup
1/2 cup milk (dairy or non-dairy)
1 tablespoon graham cracker crumbs
Fresh strawberries, for topping
Sliced bananas, for topping
Chopped nuts (almonds or walnuts), for topping
A dusting of cinnamon, for garnish
Instructions
In a blender, combine the frozen strawberries, Greek yogurt, cream cheese, honey (or maple syrup), and milk. Blend until smooth and creamy, ensuring there are no lumps.
Taste the mixture and adjust the sweetness, adding more honey or maple syrup if desired. Blend again briefly to mix.
Pour the smoothie mixture into a bowl and use a spatula to smooth the top.
Sprinkle the graham cracker crumbs evenly across the surface of the smoothie.
Arrange fresh strawberries, banana slices, and chopped nuts on top of the smoothie bowl in an aesthetically pleasing pattern.
Finish by dusting a pinch of cinnamon over the toppings for an added aromatic touch.
Serve immediately with a spoon and enjoy!
Prep Time: 10 minutes | Total Time: 10 minutes | Servings: 2

Strawberry Cheesecake Smoothie Bowl
Ingredients
- 1 cup frozen strawberries
- 1/2 cup Greek yogurt (plain or vanilla)
- 1/4 cup cream cheese, softened
- 1 tablespoon honey or maple syrup
- 1/2 cup milk (dairy or non-dairy)
- 1 tablespoon graham cracker crumbs
- to taste fresh strawberries, for topping
- to taste sliced bananas, for topping
- to taste chopped nuts (almonds or walnuts), for topping
- to taste a dusting of cinnamon, for garnish
Instructions
- In a blender, combine the frozen strawberries, Greek yogurt, cream cheese, honey (or maple syrup), and milk. Blend until smooth and creamy, ensuring there are no lumps.
- Taste the mixture and adjust the sweetness, adding more honey or maple syrup if desired. Blend again briefly to mix.
- Pour the smoothie mixture into a bowl and use a spatula to smooth the top.
- Sprinkle the graham cracker crumbs evenly across the surface of the smoothie.
- Arrange fresh strawberries, banana slices, and chopped nuts on top of the smoothie bowl in an aesthetically pleasing pattern.
- Finish by dusting a pinch of cinnamon over the toppings for an added aromatic touch.
- Serve immediately with a spoon and enjoy!

![- 1 cup canned pumpkin puree - 1/2 cup granulated sugar - 1/2 cup brown sugar - 2 large eggs - 1 cup all-purpose flour To create the Snickerdoodle Pumpkin Cobbler, you need some key ingredients. Canned pumpkin puree gives the dish its warm, earthy flavor. Both granulated and brown sugars add sweetness and depth. Two large eggs help bind everything together, while all-purpose flour forms the base. - 1/2 cup chopped walnuts or pecans - 2 tablespoons cinnamon-sugar mixture (for topping) You can add chopped walnuts or pecans for a nutty crunch. A sprinkle of cinnamon-sugar on top gives it a sweet finish. This step is all about personal touch and taste. - 1 teaspoon ground cinnamon - 1/2 teaspoon ground nutmeg - 1/4 teaspoon ground ginger - 1 teaspoon baking powder - 1/2 teaspoon baking soda - 1/4 teaspoon salt Spices are crucial for flavor. Ground cinnamon adds warmth. Nutmeg and ginger offer a hint of spice. Baking powder and baking soda help the cobbler rise. A pinch of salt balances the sweetness. For the full recipe, you can check the [Full Recipe]. First, preheat your oven to 350°F (175°C). Next, grease a 9x9-inch baking dish with non-stick spray or butter. This step is crucial to prevent sticking. In a large mixing bowl, combine the pumpkin puree, granulated sugar, brown sugar, and vanilla extract. Whisk them together until the mixture is smooth. This blend adds sweetness and a lovely flavor to your cobbler. In another bowl, mix the dry ingredients. Combine the cinnamon, nutmeg, ginger, baking powder, baking soda, salt, and flour. Stir them well to ensure even distribution of the spices. Gradually add the dry mix to the wet ingredients. Alternate with the milk as you mix. Be gentle here; over-mixing can make the cobbler tough. Once just combined, stir in the melted butter. If you like, add chopped walnuts or pecans for extra crunch. Pour the batter into your prepared baking dish. Spread it evenly for a consistent bake. Before placing it in the oven, sprinkle the top with the cinnamon-sugar mixture. This adds a sweet crust that contrasts nicely with the soft filling. Bake in the preheated oven for 30-35 minutes. Check for doneness by inserting a toothpick in the center. If it comes out clean, your cobbler is ready. Let it cool slightly before serving. Enjoy it warm for the best taste, especially with a scoop of ice cream. For the complete recipe, refer to the Full Recipe above. - Not measuring ingredients accurately: Always use dry measuring cups for flour and sugar. This helps keep the balance right. A kitchen scale is your best friend for precision. - Over-mixing the batter: Mix until just combined. Over-mixing makes the cobbler tough. You want it soft and fluffy, not dense. - Resting the batter before baking: Let your batter sit for a few minutes. This helps the flavors blend well. It can also improve the texture. - Adjusting spices to personal taste: Feel free to change up the spices! If you love nutmeg, add a bit more. If you want it spicier, increase the ginger. Make it yours! - Pairing with ice cream or whipped cream: Serve warm with a scoop of vanilla ice cream. The cold ice cream contrasts nicely with the warm cobbler. Whipped cream is a great choice too! - Presentation ideas for gatherings: Cut into squares and serve in bowls. Sprinkle some cinnamon on top for a pop of color. Add a dollop of whipped cream for a lovely finish. This makes your dessert look fancy! For the full recipe, check out the Snickerdoodle Pumpkin Cobbler section above. {{image_2}} You can change the nuts in this dish or skip them. If you like walnuts, use them. Pecans work great too. If you want a nut-free option, just leave them out. For sugar, swap granulated sugar for coconut sugar or honey. These options add a different flavor and sweetness. Coconut sugar gives a rich taste, while honey adds a nice touch. Want to jazz up your cobbler? Try adding chocolate chips or butterscotch chips. These sweet bites melt and blend with the pumpkin. You can also explore spices like allspice or cloves. These spices add warmth and depth to the cobbler. Don't be afraid to mix and match your favorites to create new flavors. For gluten-free friends, use gluten-free flour. Many brands work well and keep the taste great. If you need to avoid eggs, try flaxseed or applesauce as a substitute. Each option helps to keep the cobbler moist and tasty. You can enjoy the same warm dessert while meeting your dietary needs. For the full recipe, check the link above. After enjoying your Snickerdoodle Pumpkin Cobbler, let it cool down. Then, cover it with plastic wrap or keep it in an airtight container. Store it in the fridge for up to three days. The cobbler stays tasty and fresh when stored properly. To enjoy your cobbler warm, you can reheat it. The best way is to use an oven. Preheat the oven to 350°F (175°C) and place the cobbler in for about 10-15 minutes. This keeps the texture nice and soft. If you use a microwave, heat it in short bursts of 20 seconds. Check to avoid drying it out. If you want to save some for later, freezing works well. Cut the cobbler into squares first. Wrap each piece in plastic wrap, then place them in a freezer bag. This way, you can take only what you need. For the best taste, eat it within three months. When ready to enjoy, thaw it in the fridge overnight before reheating. - Prep time: 15 mins - Total time: 50 mins - Servings: 9 Yes, you can prepare this cobbler ahead of time. Mix the batter and pour it into the greased dish. Cover it tightly with plastic wrap and store it in the fridge for up to a day. When you're ready, bake it straight from the fridge. Just add a few extra minutes to the baking time. You can serve it with a scoop of vanilla ice cream or a dollop of whipped cream. A drizzle of caramel sauce adds a nice touch, too. Fresh whipped cream garnished with a sprinkle of cinnamon works great as well. Look for a golden-brown color on top. A toothpick inserted in the center should come out clean. If it comes out with wet batter, give it a few more minutes. The edges should be slightly puffed and firm to touch. Yes, fresh pumpkin can be used instead of canned pumpkin puree. To do this, cook the pumpkin until soft, then mash it. Make sure to drain any excess water. This will give your cobbler a fresh taste and a nice texture. In this blog post, you discovered how to make a delicious Snickerdoodle Pumpkin Cobbler. We talked about essential ingredients, like canned pumpkin and sugars, and shared optional ones to enhance flavor. I provided step-by-step instructions for preparation, baking, and common mistakes to watch out for. Remember to store leftovers properly to keep them fresh. This dessert is easy to make, fun to personalize, and perfect for gatherings. Enjoy baking this delightful treat that brings warmth and sweetness to any occasion!](https://dailydishlab.com/wp-content/uploads/2025/07/2d25911d-0f51-4f98-ae6a-a9dc8136342e-768x768.webp)


