Thai Red Curry Noodles Flavorful and Easy Recipe
![- 200g rice noodles - 1 tablespoon coconut oil - 1 onion, thinly sliced - 2 garlic cloves, minced - 1 tablespoon ginger, minced - 1 red bell pepper, sliced - 1 cup broccoli florets - 1 carrot, julienned - 1 can (400ml) coconut milk - 3 tablespoons red curry paste - 2 tablespoons soy sauce - 1 tablespoon lime juice - Fresh basil leaves for garnish - Salt and pepper to taste For this recipe, you can switch up the vegetables. Try adding snap peas or zucchini for a new twist. For the best flavor, I recommend brands like Thai Kitchen for red curry paste and Chaokoh for coconut milk. These brands offer great taste and consistency. If you want to make this meal even easier, use pre-chopped vegetables. They save time and still taste fresh. Explore your local market for seasonal veggies too! They add color and flavor to your dish. For the full recipe, check the instructions above to create your own Thai Red Curry Noodles. Enjoy the process and the flavors! Start by boiling water in a large pot. Add the rice noodles and cook them based on the package instructions. Usually, it takes about 4-6 minutes. Stir gently to keep them from sticking. To avoid sticky noodles, drain them right away. Rinse them under cold water to stop the cooking process. Toss them with a little coconut oil to keep them separate. This step makes a big difference! Slice your vegetables neatly for even cooking. Use a sharp knife for best results. For the onion, cut it thinly. Mince the garlic and ginger finely. Slice the red bell pepper and julienne the carrot. Cut the broccoli into small florets. Now, let’s talk about cooking times. Sauté the onion for about 2-3 minutes until it’s soft. Then add the garlic and ginger for one more minute. After that, toss in the bell pepper, broccoli, and carrot. Cook for about 5 minutes until they are tender but still crisp. In a large skillet or wok, pour in the coconut milk. Add the red curry paste and stir well. Mix until the paste is fully dissolved in the milk. This creates a rich, creamy sauce. Next, add the cooked rice noodles. Gently fold them into the sauce. Make sure every noodle gets coated. This is key for great flavor. Let everything simmer for 2-3 minutes to heat through. Serve hot, garnished with fresh basil leaves. This adds a lovely touch to your dish and makes it even more flavorful. Enjoy every bite! For the full recipe, see above. To get the best taste, always use fresh ingredients. Fresh vegetables and herbs boost flavors. Pre-packaged items often lack depth and freshness. When it comes to balancing flavors, think about these three key elements: - Spicy: Use more red curry paste for heat. - Sweet: A teaspoon of sugar can soften strong flavors. - Salty: Soy sauce adds a nice umami kick. Adjust these as needed for your taste. For cooking, I recommend using a wok. A wok heats evenly and helps stir-fry better. If you don't have one, a large skillet works well too. When adding protein, think about these options: - Chicken: Thinly slice for quick cooking. - Tofu: Use firm tofu, cut into cubes, and sauté until golden. - Shrimp: Add shrimp last to avoid overcooking. Cook protein separately, then mix it in at the end. Pair your Thai Red Curry Noodles with side dishes like: - Steamed jasmine rice - A fresh cucumber salad - Spring rolls for a crunchy touch For a nice presentation, serve in deep bowls. Garnish with fresh basil leaves and lime wedges. This adds color and freshness, making your meal look restaurant-quality. {{image_2}} You can easily make Thai Red Curry Noodles vegan or vegetarian. Start by swapping the coconut milk for a plant-based version. Use vegetable broth if you want a lighter taste. For protein, try tofu or tempeh. Both options soak up flavors well. Thai Red Curry Noodles change across Thailand. In the north, cooks add more herbs like cilantro and mint. In the south, seafood is common. You might see shrimp or fish added to the dish. Each region has unique flavors that make the dish special. Feel free to add local veggies, like eggplant or bamboo shoots, to your version. Get creative with your Thai Red Curry Noodles! Add fresh herbs, like basil or cilantro, for a burst of flavor. You can also try different spices. A pinch of cumin or coriander can enhance the taste. If you like heat, add chili flakes or fresh peppers. Change up the recipe by adding new veggies or proteins each time you make it. The options are endless! For the complete recipe, check the [Full Recipe]. After you enjoy your Thai Red Curry Noodles, let any leftovers cool first. Place them in an airtight container. This keeps the flavors fresh. You can store them in the fridge for up to three days. If you want to keep them longer, freeze them in a freezer-safe container. They can last for up to three months in the freezer. When you reheat, avoid using high heat. This helps keep the noodles from getting mushy. The best way is to use a skillet over medium heat. Add a splash of water to help steam the noodles. You can also pop them in the microwave. Just cover the bowl to keep moisture in. To refresh the dish, add fresh basil or a squeeze of lime juice right before serving. To make meals quicker, you can prep some ingredients ahead of time. Slice your veggies like bell peppers and carrots a day before. Cook the rice noodles in advance and store them separately. When you are ready to eat, simply combine the prepped ingredients with the sauce. This way, you can whip up your Thai Red Curry Noodles in no time on busy weekdays! What can I substitute for red curry paste? You can use yellow curry paste or green curry paste. These options have different flavors but still work well. You can also make a homemade version. Just blend some dried red chilies, garlic, and spices. It may taste a bit different but still delicious. Can I make Thai Red Curry Noodles gluten-free? Yes, you can easily make this dish gluten-free. Simply use gluten-free soy sauce or tamari instead of regular soy sauce. Make sure that the rice noodles are also gluten-free. Most rice noodles are naturally gluten-free. How to make this recipe nut-free To make this recipe nut-free, ensure you don't use any nut-based oils or sauces. Coconut oil is safe. Just check your red curry paste to ensure it doesn’t contain nuts. Caloric content and nutritional breakdown This dish is rich in flavor and nutrition. A serving has about 400 calories. It includes healthy fats from coconut milk and fiber from vegetables. The rice noodles provide energy from carbohydrates. What is the origin of Thai Red Curry Noodles? Thai Red Curry Noodles come from Thailand, where curry is a staple. This dish combines the bold flavors of red curry paste with rice noodles. It’s a favorite among locals and visitors. How does this dish differ from other Thai noodle dishes? Thai Red Curry Noodles are creamier and richer than others like Pad Thai. They use coconut milk and red curry paste, giving them a unique taste. Other dishes may focus more on soy sauce or tamarind for flavor. Thai Red Curry Noodles are a delicious and flexible dish. You can choose different veggies and proteins to fit your taste. I shared tips for cooking and serving, so your meal looks and tastes great. Remember to store leftovers well and reheat them with care. These simple steps will help you enjoy this dish again. Keep exploring flavors and making it your own. Happy cooking!](https://dailydishlab.com/wp-content/uploads/2025/07/3b703aa1-219d-4915-aa03-8b54d55df68d.webp)
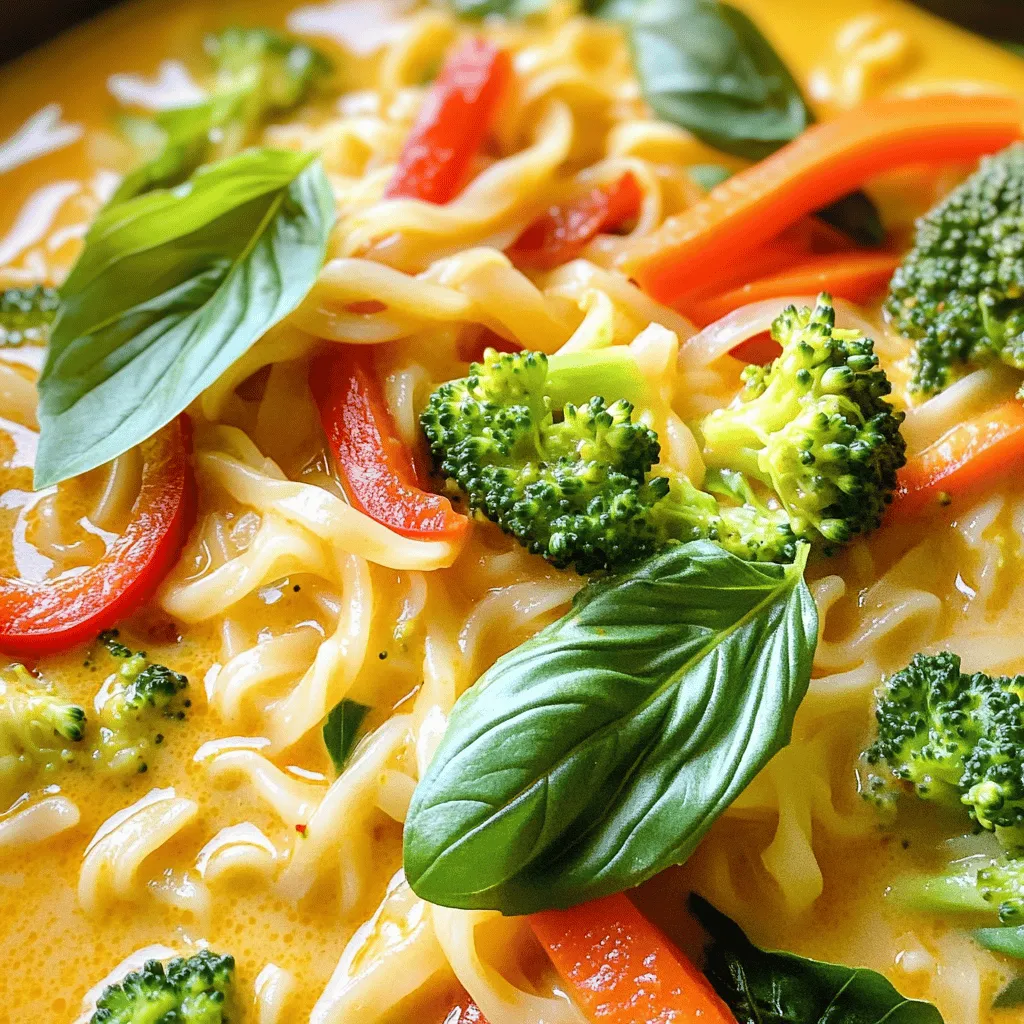
Get ready to enjoy a mouthwatering dish with my easy Thai Red Curry Noodles recipe! With tender rice noodles, vibrant veggies, and a creamy coconut base, this meal bursts with flavor. Whether you’re a curry lover or just exploring new tastes, you’ll discover how simple it is to whip up this delightful dish at home.
Why I Love This Recipe
- Quick and Easy: This recipe can be prepared in just 25 minutes, making it perfect for a weeknight dinner.
- Flavorful and Creamy: The combination of coconut milk and red curry paste creates a rich, creamy sauce that is bursting with flavor.
- Customizable: You can easily swap out vegetables or add protein to suit your taste and dietary needs.
- Healthy Ingredients: This dish is packed with colorful vegetables and wholesome ingredients, making it a nutritious choice.
Ingredients
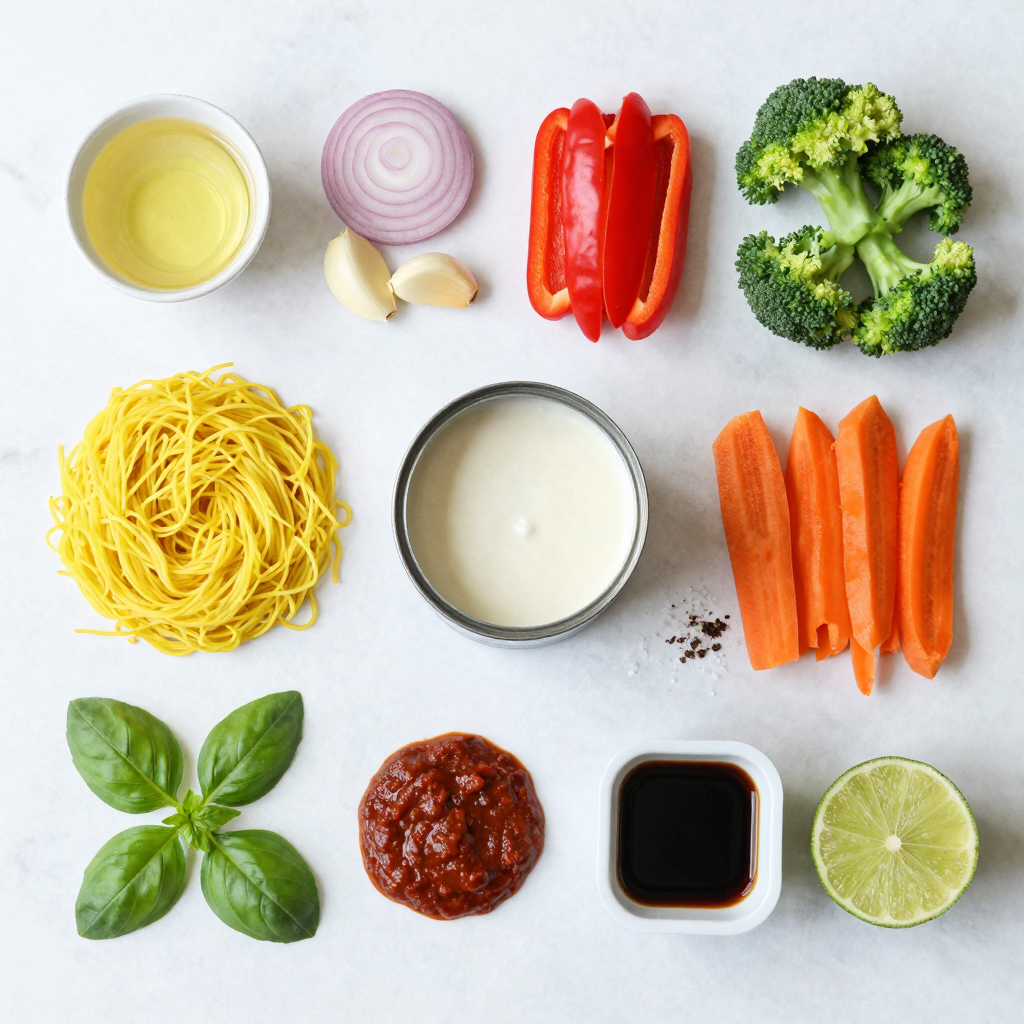
Detailed List of Ingredients
- 200g rice noodles
- 1 tablespoon coconut oil
- 1 onion, thinly sliced
- 2 garlic cloves, minced
- 1 tablespoon ginger, minced
- 1 red bell pepper, sliced
- 1 cup broccoli florets
- 1 carrot, julienned
- 1 can (400ml) coconut milk
- 3 tablespoons red curry paste
- 2 tablespoons soy sauce
- 1 tablespoon lime juice
- Fresh basil leaves for garnish
- Salt and pepper to taste
Ingredient Notes
For this recipe, you can switch up the vegetables. Try adding snap peas or zucchini for a new twist. For the best flavor, I recommend brands like Thai Kitchen for red curry paste and Chaokoh for coconut milk. These brands offer great taste and consistency.
If you want to make this meal even easier, use pre-chopped vegetables. They save time and still taste fresh. Explore your local market for seasonal veggies too! They add color and flavor to your dish.Enjoy the process and the flavors!

Step-by-Step Instructions
Cooking the Rice Noodles
Start by boiling water in a large pot. Add the rice noodles and cook them based on the package instructions. Usually, it takes about 4-6 minutes. Stir gently to keep them from sticking.
To avoid sticky noodles, drain them right away. Rinse them under cold water to stop the cooking process. Toss them with a little coconut oil to keep them separate. This step makes a big difference!
Preparing the Vegetables
Slice your vegetables neatly for even cooking. Use a sharp knife for best results. For the onion, cut it thinly. Mince the garlic and ginger finely. Slice the red bell pepper and julienne the carrot. Cut the broccoli into small florets.
Now, let’s talk about cooking times. Sauté the onion for about 2-3 minutes until it’s soft. Then add the garlic and ginger for one more minute. After that, toss in the bell pepper, broccoli, and carrot. Cook for about 5 minutes until they are tender but still crisp.
Combining Ingredients & Final Steps
In a large skillet or wok, pour in the coconut milk. Add the red curry paste and stir well. Mix until the paste is fully dissolved in the milk. This creates a rich, creamy sauce.
Next, add the cooked rice noodles. Gently fold them into the sauce. Make sure every noodle gets coated. This is key for great flavor. Let everything simmer for 2-3 minutes to heat through.
Serve hot, garnished with fresh basil leaves. This adds a lovely touch to your dish and makes it even more flavorful. Enjoy every bite!
Pro Tips
- Fresh Ingredients: Use fresh vegetables for the best flavor and texture in your curry noodles.
- Adjust Spice Level: Feel free to adjust the amount of red curry paste to suit your desired spice level.
- Perfect Noodle Texture: Rinse the cooked rice noodles under cold water to prevent them from sticking together.
- Garnish for Flavor: Fresh basil or cilantro can elevate the dish’s flavor profile; add them just before serving.
Tips & Tricks
Achieving Authentic Flavor
To get the best taste, always use fresh ingredients. Fresh vegetables and herbs boost flavors. Pre-packaged items often lack depth and freshness. When it comes to balancing flavors, think about these three key elements:
- Spicy: Use more red curry paste for heat.
- Sweet: A teaspoon of sugar can soften strong flavors.
- Salty: Soy sauce adds a nice umami kick.
Adjust these as needed for your taste.
Cooking Tips
For cooking, I recommend using a wok. A wok heats evenly and helps stir-fry better. If you don’t have one, a large skillet works well too.
When adding protein, think about these options:
- Chicken: Thinly slice for quick cooking.
- Tofu: Use firm tofu, cut into cubes, and sauté until golden.
- Shrimp: Add shrimp last to avoid overcooking.
Cook protein separately, then mix it in at the end.
Serving Suggestions
Pair your Thai Red Curry Noodles with side dishes like:
- Steamed jasmine rice
- A fresh cucumber salad
- Spring rolls for a crunchy touch
For a nice presentation, serve in deep bowls. Garnish with fresh basil leaves and lime wedges. This adds color and freshness, making your meal look restaurant-quality.

Variations
Vegan & Vegetarian Options
You can easily make Thai Red Curry Noodles vegan or vegetarian. Start by swapping the coconut milk for a plant-based version. Use vegetable broth if you want a lighter taste. For protein, try tofu or tempeh. Both options soak up flavors well.
Regional Variations
Thai Red Curry Noodles change across Thailand. In the north, cooks add more herbs like cilantro and mint. In the south, seafood is common. You might see shrimp or fish added to the dish. Each region has unique flavors that make the dish special. Feel free to add local veggies, like eggplant or bamboo shoots, to your version.
Kitchen Experiments
Get creative with your Thai Red Curry Noodles! Add fresh herbs, like basil or cilantro, for a burst of flavor. You can also try different spices. A pinch of cumin or coriander can enhance the taste. If you like heat, add chili flakes or fresh peppers. Change up the recipe by adding new veggies or proteins each time you make it. The options are endless!
Storage Info
Storing Leftovers
After you enjoy your Thai Red Curry Noodles, let any leftovers cool first. Place them in an airtight container. This keeps the flavors fresh. You can store them in the fridge for up to three days. If you want to keep them longer, freeze them in a freezer-safe container. They can last for up to three months in the freezer.
Reheating Instructions
When you reheat, avoid using high heat. This helps keep the noodles from getting mushy. The best way is to use a skillet over medium heat. Add a splash of water to help steam the noodles. You can also pop them in the microwave. Just cover the bowl to keep moisture in. To refresh the dish, add fresh basil or a squeeze of lime juice right before serving.
Meal Prep Ideas
To make meals quicker, you can prep some ingredients ahead of time. Slice your veggies like bell peppers and carrots a day before. Cook the rice noodles in advance and store them separately. When you are ready to eat, simply combine the prepped ingredients with the sauce. This way, you can whip up your Thai Red Curry Noodles in no time on busy weekdays!
FAQs
Common Questions About Thai Red Curry Noodles
What can I substitute for red curry paste?
You can use yellow curry paste or green curry paste. These options have different flavors but still work well. You can also make a homemade version. Just blend some dried red chilies, garlic, and spices. It may taste a bit different but still delicious.
Can I make Thai Red Curry Noodles gluten-free?
Yes, you can easily make this dish gluten-free. Simply use gluten-free soy sauce or tamari instead of regular soy sauce. Make sure that the rice noodles are also gluten-free. Most rice noodles are naturally gluten-free.
Dietary Considerations
How to make this recipe nut-free
To make this recipe nut-free, ensure you don’t use any nut-based oils or sauces. Coconut oil is safe. Just check your red curry paste to ensure it doesn’t contain nuts.
Caloric content and nutritional breakdown
This dish is rich in flavor and nutrition. A serving has about 400 calories. It includes healthy fats from coconut milk and fiber from vegetables. The rice noodles provide energy from carbohydrates.
General Thai Cuisine Queries
What is the origin of Thai Red Curry Noodles?
Thai Red Curry Noodles come from Thailand, where curry is a staple. This dish combines the bold flavors of red curry paste with rice noodles. It’s a favorite among locals and visitors.
How does this dish differ from other Thai noodle dishes?
Thai Red Curry Noodles are creamier and richer than others like Pad Thai. They use coconut milk and red curry paste, giving them a unique taste. Other dishes may focus more on soy sauce or tamarind for flavor.
Thai Red Curry Noodles are a delicious and flexible dish. You can choose different veggies and proteins to fit your taste. I shared tips for cooking and serving, so your meal looks and tastes great. Remember to store leftovers well and reheat them with care. These simple steps will help you enjoy this dish again. Keep exploring flavors and making it your own. Happy cooking!
![- 200g rice noodles - 1 tablespoon coconut oil - 1 onion, thinly sliced - 2 garlic cloves, minced - 1 tablespoon ginger, minced - 1 red bell pepper, sliced - 1 cup broccoli florets - 1 carrot, julienned - 1 can (400ml) coconut milk - 3 tablespoons red curry paste - 2 tablespoons soy sauce - 1 tablespoon lime juice - Fresh basil leaves for garnish - Salt and pepper to taste For this recipe, you can switch up the vegetables. Try adding snap peas or zucchini for a new twist. For the best flavor, I recommend brands like Thai Kitchen for red curry paste and Chaokoh for coconut milk. These brands offer great taste and consistency. If you want to make this meal even easier, use pre-chopped vegetables. They save time and still taste fresh. Explore your local market for seasonal veggies too! They add color and flavor to your dish. For the full recipe, check the instructions above to create your own Thai Red Curry Noodles. Enjoy the process and the flavors! Start by boiling water in a large pot. Add the rice noodles and cook them based on the package instructions. Usually, it takes about 4-6 minutes. Stir gently to keep them from sticking. To avoid sticky noodles, drain them right away. Rinse them under cold water to stop the cooking process. Toss them with a little coconut oil to keep them separate. This step makes a big difference! Slice your vegetables neatly for even cooking. Use a sharp knife for best results. For the onion, cut it thinly. Mince the garlic and ginger finely. Slice the red bell pepper and julienne the carrot. Cut the broccoli into small florets. Now, let’s talk about cooking times. Sauté the onion for about 2-3 minutes until it’s soft. Then add the garlic and ginger for one more minute. After that, toss in the bell pepper, broccoli, and carrot. Cook for about 5 minutes until they are tender but still crisp. In a large skillet or wok, pour in the coconut milk. Add the red curry paste and stir well. Mix until the paste is fully dissolved in the milk. This creates a rich, creamy sauce. Next, add the cooked rice noodles. Gently fold them into the sauce. Make sure every noodle gets coated. This is key for great flavor. Let everything simmer for 2-3 minutes to heat through. Serve hot, garnished with fresh basil leaves. This adds a lovely touch to your dish and makes it even more flavorful. Enjoy every bite! For the full recipe, see above. To get the best taste, always use fresh ingredients. Fresh vegetables and herbs boost flavors. Pre-packaged items often lack depth and freshness. When it comes to balancing flavors, think about these three key elements: - Spicy: Use more red curry paste for heat. - Sweet: A teaspoon of sugar can soften strong flavors. - Salty: Soy sauce adds a nice umami kick. Adjust these as needed for your taste. For cooking, I recommend using a wok. A wok heats evenly and helps stir-fry better. If you don't have one, a large skillet works well too. When adding protein, think about these options: - Chicken: Thinly slice for quick cooking. - Tofu: Use firm tofu, cut into cubes, and sauté until golden. - Shrimp: Add shrimp last to avoid overcooking. Cook protein separately, then mix it in at the end. Pair your Thai Red Curry Noodles with side dishes like: - Steamed jasmine rice - A fresh cucumber salad - Spring rolls for a crunchy touch For a nice presentation, serve in deep bowls. Garnish with fresh basil leaves and lime wedges. This adds color and freshness, making your meal look restaurant-quality. {{image_2}} You can easily make Thai Red Curry Noodles vegan or vegetarian. Start by swapping the coconut milk for a plant-based version. Use vegetable broth if you want a lighter taste. For protein, try tofu or tempeh. Both options soak up flavors well. Thai Red Curry Noodles change across Thailand. In the north, cooks add more herbs like cilantro and mint. In the south, seafood is common. You might see shrimp or fish added to the dish. Each region has unique flavors that make the dish special. Feel free to add local veggies, like eggplant or bamboo shoots, to your version. Get creative with your Thai Red Curry Noodles! Add fresh herbs, like basil or cilantro, for a burst of flavor. You can also try different spices. A pinch of cumin or coriander can enhance the taste. If you like heat, add chili flakes or fresh peppers. Change up the recipe by adding new veggies or proteins each time you make it. The options are endless! For the complete recipe, check the [Full Recipe]. After you enjoy your Thai Red Curry Noodles, let any leftovers cool first. Place them in an airtight container. This keeps the flavors fresh. You can store them in the fridge for up to three days. If you want to keep them longer, freeze them in a freezer-safe container. They can last for up to three months in the freezer. When you reheat, avoid using high heat. This helps keep the noodles from getting mushy. The best way is to use a skillet over medium heat. Add a splash of water to help steam the noodles. You can also pop them in the microwave. Just cover the bowl to keep moisture in. To refresh the dish, add fresh basil or a squeeze of lime juice right before serving. To make meals quicker, you can prep some ingredients ahead of time. Slice your veggies like bell peppers and carrots a day before. Cook the rice noodles in advance and store them separately. When you are ready to eat, simply combine the prepped ingredients with the sauce. This way, you can whip up your Thai Red Curry Noodles in no time on busy weekdays! What can I substitute for red curry paste? You can use yellow curry paste or green curry paste. These options have different flavors but still work well. You can also make a homemade version. Just blend some dried red chilies, garlic, and spices. It may taste a bit different but still delicious. Can I make Thai Red Curry Noodles gluten-free? Yes, you can easily make this dish gluten-free. Simply use gluten-free soy sauce or tamari instead of regular soy sauce. Make sure that the rice noodles are also gluten-free. Most rice noodles are naturally gluten-free. How to make this recipe nut-free To make this recipe nut-free, ensure you don't use any nut-based oils or sauces. Coconut oil is safe. Just check your red curry paste to ensure it doesn’t contain nuts. Caloric content and nutritional breakdown This dish is rich in flavor and nutrition. A serving has about 400 calories. It includes healthy fats from coconut milk and fiber from vegetables. The rice noodles provide energy from carbohydrates. What is the origin of Thai Red Curry Noodles? Thai Red Curry Noodles come from Thailand, where curry is a staple. This dish combines the bold flavors of red curry paste with rice noodles. It’s a favorite among locals and visitors. How does this dish differ from other Thai noodle dishes? Thai Red Curry Noodles are creamier and richer than others like Pad Thai. They use coconut milk and red curry paste, giving them a unique taste. Other dishes may focus more on soy sauce or tamarind for flavor. Thai Red Curry Noodles are a delicious and flexible dish. You can choose different veggies and proteins to fit your taste. I shared tips for cooking and serving, so your meal looks and tastes great. Remember to store leftovers well and reheat them with care. These simple steps will help you enjoy this dish again. Keep exploring flavors and making it your own. Happy cooking!](https://dailydishlab.com/wp-content/uploads/2025/07/3b703aa1-219d-4915-aa03-8b54d55df68d-300x300.webp)
Thai Red Curry Noodles
Ingredients
200g rice noodles
1 tablespoon coconut oil
1 onion, thinly sliced
2 garlic cloves, minced
1 tablespoon ginger, minced
1 red bell pepper, sliced
1 cup broccoli florets
1 carrot, julienned
1 can (400ml) coconut milk
3 tablespoons red curry paste
2 tablespoons soy sauce
1 tablespoon lime juice
Fresh basil leaves for garnish
Salt and pepper to taste
Instructions
Cook the rice noodles according to package instructions. Drain and set aside.
In a large skillet or wok, heat the coconut oil over medium heat.
Add the sliced onion, and sauté for 2-3 minutes until it becomes translucent.
Stir in the minced garlic and ginger, cooking for another minute until fragrant.
Add the red bell pepper, broccoli, and carrot to the skillet. Sauté for about 5 minutes, or until the vegetables are tender but still crisp.
Pour in the coconut milk and add the red curry paste, stirring until the paste is fully dissolved.
Once the mixture heats up, add the soy sauce and lime juice, seasoning with salt and pepper to taste.
Gently fold in the cooked rice noodles, ensuring they are evenly coated with the curry sauce.
Allow to simmer for an additional 2-3 minutes to heat everything through.
Serve hot, garnished with fresh basil leaves for an added burst of flavor.
Prep Time, Total Time, Servings: 10 mins | 25 mins | 4 servings
![- 200g rice noodles - 1 tablespoon coconut oil - 1 onion, thinly sliced - 2 garlic cloves, minced - 1 tablespoon ginger, minced - 1 red bell pepper, sliced - 1 cup broccoli florets - 1 carrot, julienned - 1 can (400ml) coconut milk - 3 tablespoons red curry paste - 2 tablespoons soy sauce - 1 tablespoon lime juice - Fresh basil leaves for garnish - Salt and pepper to taste For this recipe, you can switch up the vegetables. Try adding snap peas or zucchini for a new twist. For the best flavor, I recommend brands like Thai Kitchen for red curry paste and Chaokoh for coconut milk. These brands offer great taste and consistency. If you want to make this meal even easier, use pre-chopped vegetables. They save time and still taste fresh. Explore your local market for seasonal veggies too! They add color and flavor to your dish. For the full recipe, check the instructions above to create your own Thai Red Curry Noodles. Enjoy the process and the flavors! Start by boiling water in a large pot. Add the rice noodles and cook them based on the package instructions. Usually, it takes about 4-6 minutes. Stir gently to keep them from sticking. To avoid sticky noodles, drain them right away. Rinse them under cold water to stop the cooking process. Toss them with a little coconut oil to keep them separate. This step makes a big difference! Slice your vegetables neatly for even cooking. Use a sharp knife for best results. For the onion, cut it thinly. Mince the garlic and ginger finely. Slice the red bell pepper and julienne the carrot. Cut the broccoli into small florets. Now, let’s talk about cooking times. Sauté the onion for about 2-3 minutes until it’s soft. Then add the garlic and ginger for one more minute. After that, toss in the bell pepper, broccoli, and carrot. Cook for about 5 minutes until they are tender but still crisp. In a large skillet or wok, pour in the coconut milk. Add the red curry paste and stir well. Mix until the paste is fully dissolved in the milk. This creates a rich, creamy sauce. Next, add the cooked rice noodles. Gently fold them into the sauce. Make sure every noodle gets coated. This is key for great flavor. Let everything simmer for 2-3 minutes to heat through. Serve hot, garnished with fresh basil leaves. This adds a lovely touch to your dish and makes it even more flavorful. Enjoy every bite! For the full recipe, see above. To get the best taste, always use fresh ingredients. Fresh vegetables and herbs boost flavors. Pre-packaged items often lack depth and freshness. When it comes to balancing flavors, think about these three key elements: - Spicy: Use more red curry paste for heat. - Sweet: A teaspoon of sugar can soften strong flavors. - Salty: Soy sauce adds a nice umami kick. Adjust these as needed for your taste. For cooking, I recommend using a wok. A wok heats evenly and helps stir-fry better. If you don't have one, a large skillet works well too. When adding protein, think about these options: - Chicken: Thinly slice for quick cooking. - Tofu: Use firm tofu, cut into cubes, and sauté until golden. - Shrimp: Add shrimp last to avoid overcooking. Cook protein separately, then mix it in at the end. Pair your Thai Red Curry Noodles with side dishes like: - Steamed jasmine rice - A fresh cucumber salad - Spring rolls for a crunchy touch For a nice presentation, serve in deep bowls. Garnish with fresh basil leaves and lime wedges. This adds color and freshness, making your meal look restaurant-quality. {{image_2}} You can easily make Thai Red Curry Noodles vegan or vegetarian. Start by swapping the coconut milk for a plant-based version. Use vegetable broth if you want a lighter taste. For protein, try tofu or tempeh. Both options soak up flavors well. Thai Red Curry Noodles change across Thailand. In the north, cooks add more herbs like cilantro and mint. In the south, seafood is common. You might see shrimp or fish added to the dish. Each region has unique flavors that make the dish special. Feel free to add local veggies, like eggplant or bamboo shoots, to your version. Get creative with your Thai Red Curry Noodles! Add fresh herbs, like basil or cilantro, for a burst of flavor. You can also try different spices. A pinch of cumin or coriander can enhance the taste. If you like heat, add chili flakes or fresh peppers. Change up the recipe by adding new veggies or proteins each time you make it. The options are endless! For the complete recipe, check the [Full Recipe]. After you enjoy your Thai Red Curry Noodles, let any leftovers cool first. Place them in an airtight container. This keeps the flavors fresh. You can store them in the fridge for up to three days. If you want to keep them longer, freeze them in a freezer-safe container. They can last for up to three months in the freezer. When you reheat, avoid using high heat. This helps keep the noodles from getting mushy. The best way is to use a skillet over medium heat. Add a splash of water to help steam the noodles. You can also pop them in the microwave. Just cover the bowl to keep moisture in. To refresh the dish, add fresh basil or a squeeze of lime juice right before serving. To make meals quicker, you can prep some ingredients ahead of time. Slice your veggies like bell peppers and carrots a day before. Cook the rice noodles in advance and store them separately. When you are ready to eat, simply combine the prepped ingredients with the sauce. This way, you can whip up your Thai Red Curry Noodles in no time on busy weekdays! What can I substitute for red curry paste? You can use yellow curry paste or green curry paste. These options have different flavors but still work well. You can also make a homemade version. Just blend some dried red chilies, garlic, and spices. It may taste a bit different but still delicious. Can I make Thai Red Curry Noodles gluten-free? Yes, you can easily make this dish gluten-free. Simply use gluten-free soy sauce or tamari instead of regular soy sauce. Make sure that the rice noodles are also gluten-free. Most rice noodles are naturally gluten-free. How to make this recipe nut-free To make this recipe nut-free, ensure you don't use any nut-based oils or sauces. Coconut oil is safe. Just check your red curry paste to ensure it doesn’t contain nuts. Caloric content and nutritional breakdown This dish is rich in flavor and nutrition. A serving has about 400 calories. It includes healthy fats from coconut milk and fiber from vegetables. The rice noodles provide energy from carbohydrates. What is the origin of Thai Red Curry Noodles? Thai Red Curry Noodles come from Thailand, where curry is a staple. This dish combines the bold flavors of red curry paste with rice noodles. It’s a favorite among locals and visitors. How does this dish differ from other Thai noodle dishes? Thai Red Curry Noodles are creamier and richer than others like Pad Thai. They use coconut milk and red curry paste, giving them a unique taste. Other dishes may focus more on soy sauce or tamarind for flavor. Thai Red Curry Noodles are a delicious and flexible dish. You can choose different veggies and proteins to fit your taste. I shared tips for cooking and serving, so your meal looks and tastes great. Remember to store leftovers well and reheat them with care. These simple steps will help you enjoy this dish again. Keep exploring flavors and making it your own. Happy cooking!](https://dailydishlab.com/wp-content/uploads/2025/07/3b703aa1-219d-4915-aa03-8b54d55df68d-300x300.webp)
Thai Red Curry Noodles
Ingredients
- 200 g rice noodles
- 1 tablespoon coconut oil
- 1 unit onion, thinly sliced
- 2 cloves garlic, minced
- 1 tablespoon ginger, minced
- 1 unit red bell pepper, sliced
- 1 cup broccoli florets
- 1 unit carrot, julienned
- 1 can (400ml) coconut milk
- 3 tablespoons red curry paste
- 2 tablespoons soy sauce
- 1 tablespoon lime juice
- unit Fresh basil leaves for garnish
- unit Salt and pepper to taste
Instructions
- Cook the rice noodles according to package instructions. Drain and set aside.
- In a large skillet or wok, heat the coconut oil over medium heat.
- Add the sliced onion, and sauté for 2-3 minutes until it becomes translucent.
- Stir in the minced garlic and ginger, cooking for another minute until fragrant.
- Add the red bell pepper, broccoli, and carrot to the skillet. Sauté for about 5 minutes, or until the vegetables are tender but still crisp.
- Pour in the coconut milk and add the red curry paste, stirring until the paste is fully dissolved.
- Once the mixture heats up, add the soy sauce and lime juice, seasoning with salt and pepper to taste.
- Gently fold in the cooked rice noodles, ensuring they are evenly coated with the curry sauce.
- Allow to simmer for an additional 2-3 minutes to heat everything through.
- Serve hot, garnished with fresh basil leaves for an added burst of flavor.


![- 2 cans (15 oz each) of white beans (cannellini or great northern), drained and rinsed - 1 medium onion, chopped - 4 cloves garlic, minced - 4 cups vegetable broth - 1 cup coconut milk (or heavy cream for a richer flavor) - 2 tablespoons olive oil - 1 teaspoon dried thyme - 1 teaspoon smoked paprika - Salt and pepper to taste - Fresh parsley, chopped (for garnish) When making creamy garlic white bean soup, you need simple and fresh ingredients. White beans serve as the base. They provide creaminess and protein. I prefer cannellini or great northern beans. Both are soft and smooth. A medium onion adds depth and sweetness to the soup. Garlic brings strong flavor. I use four cloves for a nice kick. Vegetable broth adds rich taste. You can use homemade or store-bought broth. Coconut milk gives the soup its creamy texture. For a richer taste, heavy cream works well too. Olive oil is essential for sautéing the onion and garlic. Dried thyme and smoked paprika add warmth and earthiness. Season with salt and pepper to make the flavors pop. Finally, fresh parsley brightens the dish when you serve it. This soup is easy to make and very satisfying. You can find the full recipe for this dish above. This soup is not only tasty but also healthy. It is high in fiber and protein due to the beans. The coconut milk adds healthy fats. Each serving provides a good balance of nutrients. You can change some ingredients to suit your taste. If you want a different bean, try chickpeas or navy beans. Red onion works well instead of yellow. For a spicy kick, add a pinch of red pepper flakes. If you need a dairy-free option, stick with coconut milk. This soup is flexible and can fit many diets. Start by gathering all your ingredients. You need two cans of white beans, an onion, garlic, vegetable broth, coconut milk, olive oil, dried thyme, smoked paprika, salt, and pepper. Chop the onion into small pieces. Mince the garlic cloves. Drain and rinse the beans well to remove excess sodium. This prep work makes cooking quick and easy. In a large pot, heat the olive oil over medium heat. Once hot, add the chopped onion. Sauté for about five minutes or until the onion turns clear. Next, add the minced garlic. Cook it for two more minutes. This helps to release the garlic’s flavor. Stir in the drained white beans, thyme, smoked paprika, salt, and pepper. Mix everything well to coat the beans in flavor. Now, pour in the vegetable broth. Bring the mixture to a boil. When it starts to boil, lower the heat and let it simmer for 15 to 20 minutes. This time allows the flavors to blend. After simmering, it’s time to blend the soup. I recommend using an immersion blender for this. Blend until the soup is smooth and creamy. If you want some texture, blend just half of the soup. This way, you still have chunks of beans to enjoy. Stir in the coconut milk and heat the soup for another five minutes. Taste it and adjust the seasoning if needed. Serve hot and garnish with fresh parsley. For the full recipe, check out the details above. Enjoy your creamy garlic white bean soup! To make your soup nice and creamy, blend well. I use an immersion blender. This tool lets you puree the soup right in the pot. If you want some texture, blend only half. For extra creaminess, add coconut milk or heavy cream. This makes the soup rich and smooth. Good seasonings can make a big difference. I love using dried thyme and smoked paprika. These give the soup depth and warmth. You can also add a pinch of cayenne for some heat. Don't forget to taste and adjust the salt and pepper. This will bring out all the flavors. Serve your soup hot, topped with fresh parsley. This adds color and a fresh taste. You can pair it with crusty bread or a light salad. For a complete meal, try adding grilled chicken or sautéed greens. Enjoy it with friends or family for a cozy meal. Check out the Full Recipe for more tips! {{image_2}} You can easily add protein to your creamy garlic white bean soup. For a heartier meal, try adding cooked chicken or turkey. Just shred the meat and stir it in during the last few minutes of cooking. If you want a plant-based option, add cooked quinoa or chickpeas. Both will blend well with the creamy texture of the soup without overpowering its flavor. This soup is naturally vegetarian. To make it vegan, simply use coconut milk instead of heavy cream. The coconut milk gives a rich taste and keeps it creamy. You can also add nutritional yeast for a cheesy flavor without dairy. This way, you can enjoy a warm, fulfilling dish that fits your dietary needs. To boost the flavor, try adding fresh herbs like rosemary or basil. They add a nice touch and aroma. You can also play with spices. A pinch of red pepper flakes gives a nice kick. If you love a smoky flavor, add more smoked paprika. For a fresh twist, squeeze a little lemon juice right before serving. These simple changes keep the soup exciting each time you make it. For the full recipe, check out the detailed cooking steps! Store any leftover creamy garlic white bean soup in an airtight container. Make sure it is cool before sealing the lid. You can keep it in the fridge for up to four days. If you want to enjoy it later, storing it properly will keep it fresh. You can freeze this soup for longer storage. Use freezer-safe containers or bags. Leave some space at the top, as the soup will expand when it freezes. The soup can last in the freezer for up to three months. When you're ready to eat it, thaw it in the fridge overnight. To reheat the soup, pour it into a pot over medium heat. Stir it gently as it warms. You can also microwave it in a safe bowl. Heat in short bursts, stirring in between. If the soup seems too thick, add a splash of vegetable broth or water to reach your desired consistency. Enjoy it warm for a cozy meal! For the full recipe, check out the link provided. Creamy garlic white bean soup lasts about 4 to 5 days in the fridge. Keep it in a sealed container. This way, it stays fresh and safe to eat. Always check for any off smells or changes in color before enjoying leftovers. Yes, you can use dried beans. Just soak them overnight before cooking. Use about 1 cup of dried beans for this soup recipe. After soaking, cook them until tender, then follow the recipe as usual. This adds a nice texture and flavor to your soup. You can serve white bean soup with crusty bread or a fresh salad. Grilled cheese sandwiches also pair nicely. For a heartier meal, try a side of roasted vegetables. These sides can bring out the yummy garlic flavor in the soup. Yes, you can make this soup ahead of time. It tastes even better the next day as the flavors blend. Just store it in the fridge after cooking. Reheat it on the stove when ready to serve. Absolutely! This soup is packed with fiber and plant-based protein. White beans are great for your heart. The garlic adds flavor and has health benefits too. It’s a wholesome choice for any meal. Yes, this soup freezes well. Let it cool completely before transferring it to freezer-safe containers. It can last for up to 3 months in the freezer. Just thaw in the fridge overnight and reheat when ready to eat. If you want a kick, add red pepper flakes or hot sauce. Stir in these spicy additions during cooking. This will give your creamy garlic white bean soup a warm, zesty flavor that wakes up your taste buds. For a richer flavor, you can use heavy cream instead of coconut milk. This will give the soup a creamier texture. You can also add more garlic for a stronger taste. Experiment with flavors to find your perfect mix. To make the soup more filling, add diced potatoes or carrots during cooking. You can also stir in cooked grains like quinoa or rice. These options will add bulk and nutrients to your meal. Yes! Fresh parsley adds a nice touch. You can also use croutons or a drizzle of olive oil for extra flavor. Garnishing makes the soup look appealing and adds a bit of crunch. For the full recipe, check out the [Full Recipe]. This blog post covered how to make creamy garlic white bean soup. We went through ingredients, nutritional info, and cooking steps. I shared tips for a creamy texture and flavor must-haves. You learned about serving options and variations too. In summary, this soup is easy and healthy. Feel free to customize it to fit your taste. Enjoy making it for friends, family, or yourself!](https://dailydishlab.com/wp-content/uploads/2025/07/b682e594-aaaa-4098-8015-8011c3b1faa4-768x768.webp)


