
Get ready to treat your taste buds! The Ultimate Cookie Butter Cheesecake Delight is a dessert you won’t forget. With its creamy texture and rich cookie butter flavor, this cheesecake is pure bliss in each bite. I’ll guide you step-by-step to make it easy. Whether you’re a baking pro or just starting, this recipe will impress everyone at your table. Let’s dive into the delicious details!
Ingredients
List of Ingredients
– 1 ½ cups graham cracker crumbs
– ½ cup unsalted butter, melted
– 1 cup cookie butter (speculoos spread)
– 16 oz cream cheese, softened at room temperature
– 1 cup powdered sugar
– 1 teaspoon pure vanilla extract
– 2 large eggs, at room temperature
– 1 cup sour cream, room temperature
– ½ teaspoon ground cinnamon
– Whipped cream (for topping)
– Crushed cookies (for garnish)
When selecting ingredients, freshness matters. Choose high-quality cream cheese for a rich flavor. Always check the date on your cookie butter. Look for a smooth, creamy spread without added preservatives. For the best graham cracker crust, opt for plain graham crackers rather than flavored ones. This ensures a balanced taste.
Kitchen Tools Needed
– Mixing bowls
– Electric mixer
– Springform pan
– Rubber spatula
– Measuring cups and spoons
Having the right tools helps a lot. A springform pan makes it easy to remove your cheesecake later. An electric mixer speeds up mixing the cream cheese and cookie butter. If you have a rubber spatula, it helps scrape every last bit from the bowl. Optional tools like a food processor can crush graham crackers faster.
Step-by-Step Instructions
Preheating and Crust Preparation
1. Preheat your oven to 325°F (160°C). This step is key for even baking.
2. In a mixing bowl, combine 1 ½ cups of graham cracker crumbs with ½ cup of melted unsalted butter. Mix until the crumbs are fully coated.
3. Firmly press this mixture into the bottom of a greased 9-inch springform pan. Make sure it’s compact.
4. Bake the crust in the oven for 10 minutes. This gives it a nice crunch. Set it aside to cool completely.
Cheesecake Filling Process
1. In a large bowl, use an electric mixer to beat 16 oz of softened cream cheese until smooth.
2. Gradually add 1 cup of powdered sugar and 1 teaspoon of pure vanilla extract. Mix on low speed until it’s lump-free.
3. Next, add 1 cup of cookie butter, mixing until smooth and well blended.
4. Add 2 large eggs, one at a time, mixing well after each.
5. Gently fold in 1 cup of sour cream and ½ teaspoon of ground cinnamon until just combined. Be careful not to overmix.
Baking the Cheesecake
1. Pour the cheesecake filling over the cooled crust in the springform pan. Tap the pan gently on the counter to release any air bubbles.
2. Bake for 50-60 minutes. The center should be set but slightly jiggly. It will firm up as it cools.
3. Once baked, turn off the oven and crack the door open. Let it cool in the oven for 1 hour.
4. After an hour, move the cheesecake to the fridge. Chill for at least 4 hours, or overnight for the best flavor.
With these steps, your ultimate cookie butter cheesecake will shine!
Tips & Tricks
Baking Tips for Perfect Cheesecake
To get a smooth cheesecake, start with room temperature cream cheese. Cold cream cheese can make lumps. Mix it well to get a creamy texture.
To avoid cracks, don’t overmix your batter. Once you add the eggs, mix just until combined. Baking at 325°F (160°C) helps too. A lower temperature cooks the cheesecake evenly.
Cooling is key. After baking, let the cheesecake cool slowly in the oven. This helps it set and prevents cracks.
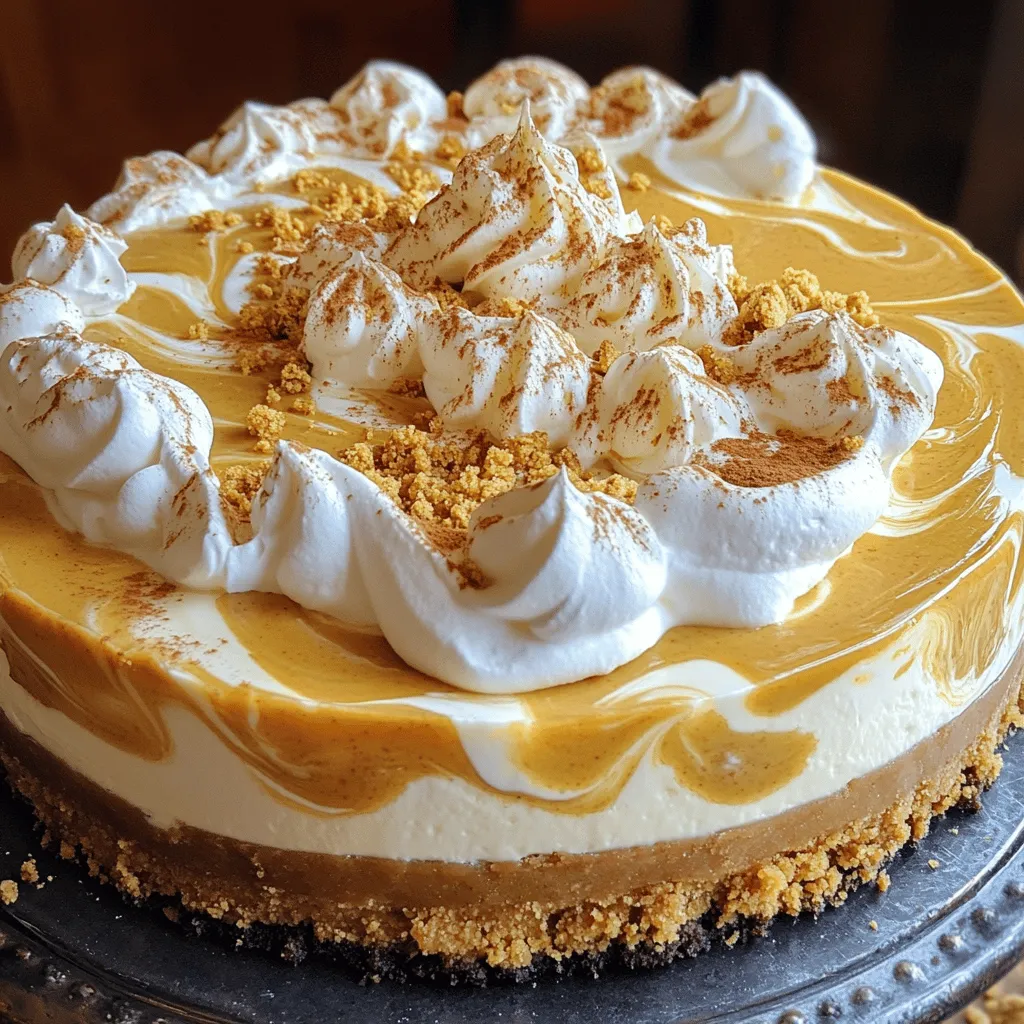
Best Ways to Serve
Garnishing makes your cheesecake shine. Top with whipped cream and crushed cookies for extra flair. A drizzle of cookie butter on top adds sweetness and beauty.
Pair this cheesecake with coffee or a glass of milk. The flavors blend well together, making each bite even better. For a fun twist, serve with a scoop of vanilla ice cream.
{{image_4}}
Variations
Flavor Enhancements
You can easily boost the flavor of your cheesecake. Try adding spices like nutmeg or ginger. They give a warm twist to the rich cookie butter taste. You can also use extracts like almond or hazelnut for a new flair.
For toppings, think beyond whipped cream. Consider chocolate ganache or a drizzle of caramel. You can sprinkle chopped nuts or even more crushed cookies on top. These options make each slice unique and fun.
Dietary Alterations
Making this cheesecake fit your diet is simple. For a gluten-free crust, swap graham crackers for almond flour or gluten-free cookies. This keeps the taste, while catering to your needs.
If you want to replace cream cheese, use a dairy-free option like cashew cream. For eggs, try unsweetened applesauce or flaxseed meal mixed with water. These swaps keep the cheesecake tasty and friendly for all diets.
Storage Info
Best Practices for Storage
To keep leftover cheesecake fresh, store it in the fridge. Use an airtight container. This helps to keep the flavors and texture intact. The cheesecake lasts up to five days in the fridge.
For long-term storage, you can freeze the cheesecake. Cut it into slices and wrap each slice tightly in plastic wrap. Then, place the wrapped slices in a freezer-safe bag. This way, it can stay fresh for up to three months.
Reheating and Serving
If you freeze your cheesecake, defrost it in the fridge overnight. This gentle process helps maintain its creamy texture. Avoid using a microwave, as it can cause the cheesecake to become soggy.
To revive the texture, let the cheesecake sit at room temperature for about 30 minutes before serving. This helps it regain its original creaminess. When ready to serve, add fresh whipped cream and crushed cookies on top for that extra touch.
FAQs
Common Questions
What is cookie butter?
Cookie butter is a spread made from crushed cookies, sugar, and oils. It has a sweet and spiced flavor, perfect for desserts. You can find it in jars at most grocery stores.
How long does cheesecake last in the fridge?
Cheesecake stays fresh in the fridge for about five to seven days. Keep it covered to prevent it from drying out.
Can I make this cheesecake in advance?
Yes, you can make this cheesecake up to two days in advance. It tastes better when chilled overnight.
What should I do if my cheesecake cracks?
If your cheesecake cracks, don’t panic! You can cover it with whipped cream or a fruit topping. This way, it will still look nice and taste great.
Baking and Serving
Can I use a different type of cookie for the crust?
Absolutely! You can use any cookie you like for the crust. Try chocolate cookies or ginger snaps for a fun twist.
How can I tell when the cheesecake is fully baked?
Check the cheesecake by gently shaking the pan. If the center jiggles slightly but the edges are set, it’s done.
Do I need to use a water bath?
No, a water bath is not necessary for this recipe. The cheesecake will bake well without it. Enjoy making this delicious dessert!
This blog post covered everything you need for a perfect cheesecake. From choosing the right ingredients to mastering the baking process, I included step-by-step instructions. You learned how to avoid cracks and achieve a creamy texture. Don’t forget the fun variations and serving tips to make it your own.
In the end, follow these tips, and you’ll impress everyone with your cheesecake! Enjoy baking and have fun with your creations.


