Triple Chocolate Mousse Cake Indulgent Dessert Recipe

If you love chocolate, you’re in for a treat! This Triple Chocolate Mousse Cake is pure bliss in every bite. It layers dark, milk, and white chocolate mousse on a rich cake base. I’ll guide you step-by-step, ensuring your cake is a showstopper for any occasion. Get ready to indulge in a dessert that will wow your friends and family! Let’s dive into the delicious details!
Why I Love This Recipe
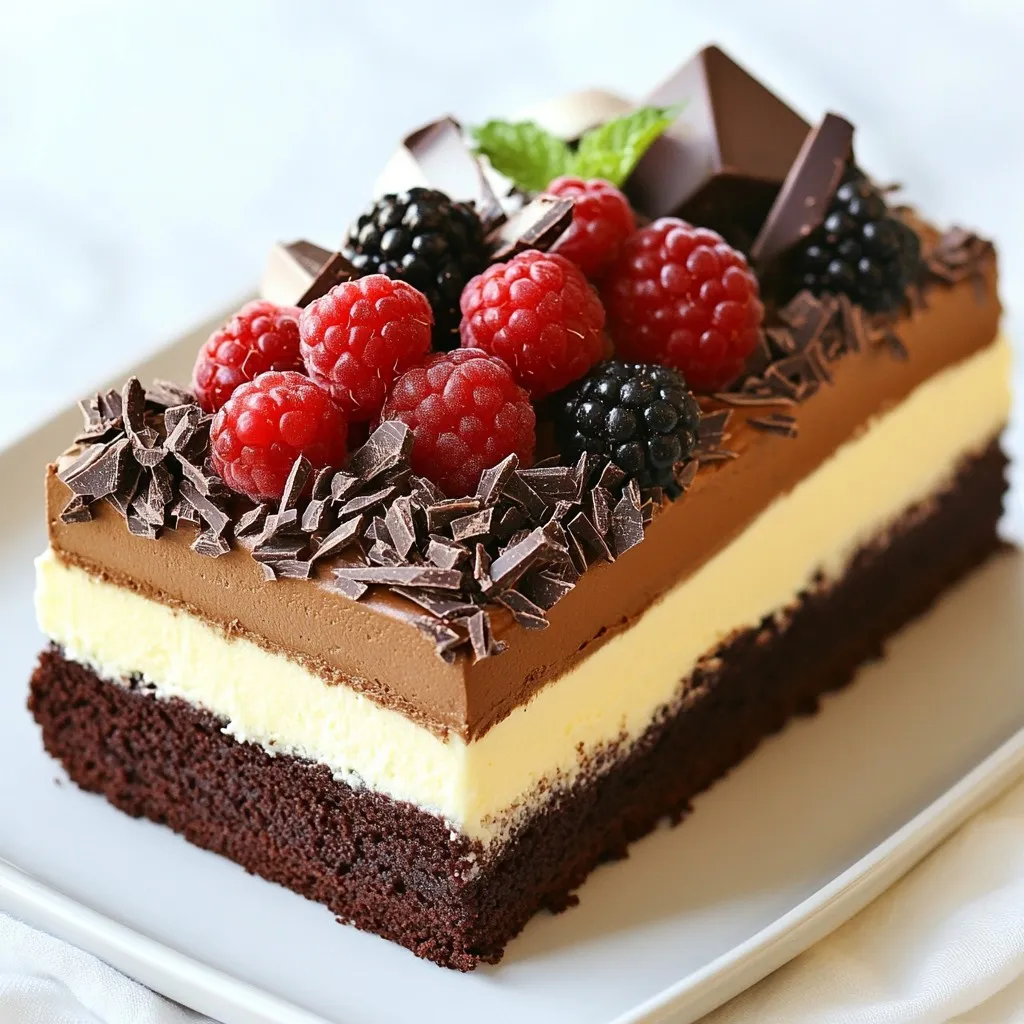
- Decadent Layers: This cake features three distinct layers of chocolate mousse, each with its own rich flavor that complements the chocolate cake base beautifully.
- Impressive Presentation: The combination of dark, milk, and white chocolate creates a stunning visual effect, making it perfect for special occasions or gatherings.
- Texture Contrast: The silky smoothness of the mousse layers contrasts perfectly with the dense chocolate cake, providing a delightful mouthfeel in every bite.
- Customizable: This recipe allows for personal touches, such as adding different garnishes or adjusting the sweetness of the mousse layers to suit your taste.
Ingredients
Cake Base Ingredients
- 1 cup all-purpose flour
- 1/2 cup unsweetened cocoa powder
- 1/2 teaspoon baking powder
- 1/4 teaspoon baking soda
- 1/4 teaspoon salt
- 1/2 cup unsalted butter, softened
- 1 cup granulated sugar
- 2 large eggs
- 1 teaspoon vanilla extract
- 1/2 cup milk
Dark Chocolate Mousse Ingredients
- 4 ounces dark chocolate (70% cocoa), chopped
- 1 cup heavy whipping cream
- 2 tablespoons granulated sugar
- 1/2 teaspoon vanilla extract
- 1/2 teaspoon gelatin (optional for stability)
Milk Chocolate Mousse Ingredients
- 4 ounces milk chocolate, chopped
- 1 cup heavy whipping cream
- 2 tablespoons granulated sugar
- 1/2 teaspoon vanilla extract
White Chocolate Mousse Ingredients
- 4 ounces white chocolate, chopped
- 1 cup heavy whipping cream
- 2 tablespoons granulated sugar
- 1/2 teaspoon vanilla extract
Garnish Ingredients
- Chocolate shavings
- Fresh berries (optional)
In this recipe, you create layers of flavor and texture. The cake base gives a rich, chocolatey foundation. The dark, milk, and white chocolate mousses add lightness and creaminess. Each mousse layer brings its own unique taste. This combination makes each bite a treat!

Step-by-Step Instructions
Preparing the Cake Base
Start by preheating your oven to 350°F (175°C). Grease a 9-inch springform pan. In a medium bowl, sift together 1 cup of all-purpose flour, 1/2 cup of unsweetened cocoa powder, 1/2 teaspoon of baking powder, 1/4 teaspoon of baking soda, and 1/4 teaspoon of salt. In a large mixing bowl, cream together 1/2 cup of softened unsalted butter and 1 cup of granulated sugar until light and fluffy. Beat in 2 large eggs one at a time, then add 1 teaspoon of vanilla extract. Gradually stir in the dry mix, alternating with 1/2 cup of milk, until just combined. Pour the batter into the pan and bake for 25-30 minutes. Check with a toothpick; it should come out clean. Let the cake cool completely in the pan.
Making the Dark Chocolate Mousse
To make the dark chocolate mousse, melt 4 ounces of dark chocolate in a heatproof bowl over simmering water or in the microwave. In a separate bowl, whip 1 cup of heavy whipping cream, 2 tablespoons of sugar, and 1/2 teaspoon of vanilla extract until soft peaks form. If you want a sturdier mousse, dissolve 1/2 teaspoon of gelatin in 1 tablespoon of warm water and mix it into the melted chocolate after it cools slightly. Fold the whipped cream into the chocolate mixture gently until combined.
Making the Milk Chocolate Mousse
Repeat the steps for the milk chocolate mousse. Melt 4 ounces of milk chocolate in the same way. Whip 1 cup of heavy cream, 2 tablespoons of sugar, and 1/2 teaspoon of vanilla extract until soft peaks form. Fold the whipped cream into the melted milk chocolate until well combined.
Making the White Chocolate Mousse
For the white chocolate mousse, melt 4 ounces of white chocolate and whip 1 cup of heavy cream, 2 tablespoons of sugar, and 1/2 teaspoon of vanilla extract until soft peaks form. Since white chocolate is sweet, adjust the sugar if needed. Fold the whipped cream into the melted white chocolate until fully combined.
Assembling the Cake
Now it’s time to assemble! Place the cooled chocolate cake base at the bottom of your springform pan. Pour the dark chocolate mousse over the cake and spread it evenly. Chill in the fridge for about 1 hour until set. Next, layer the milk chocolate mousse over the dark chocolate layer, then chill for another hour. Finally, add the white chocolate mousse on top, smoothing the surface. Refrigerate for at least 4-6 hours or overnight for the best results.
Serving Suggestions
Once set, carefully remove the springform pan. Transfer the cake to a serving platter. You can garnish it with chocolate shavings and fresh berries if you like. Enjoy each rich layer of chocolate goodness!
Tips & Tricks
How to Ensure a Fluffy Mousse
To make your mousse light and airy, focus on whipping the cream well. Start with cold cream, as it whips better. Use a large bowl for more space. Whip until you see soft peaks. This means the cream holds a shape but is not too stiff. Then, gently fold it into the melted chocolate. Use a spatula and take your time. This helps keep the air in and your mousse fluffy.
Common Mistakes to Avoid
Many people rush the melting process. If you melt chocolate too fast, it can seize. Always melt chocolate slowly over simmering water or in short bursts in the microwave. Another mistake? Overmixing the mousse. Fold until combined, but don’t stir too much. You want to keep it light. Lastly, make sure your cake base is cool before adding mousse. A warm cake can melt the mousse.
Best Practices for Cake Baking
Start with room temperature ingredients. This helps the batter mix evenly. Preheat your oven to the right temperature. Use an oven thermometer if needed. When baking, don’t open the oven door too soon. This lets heat escape and can cause your cake to sink. Test for doneness with a toothpick. It should come out clean or with just a few crumbs. Let your cake cool completely before adding mousse for the best results.
Pro Tips
- Use Room Temperature Ingredients: Make sure your butter, eggs, and any dairy are at room temperature for a smoother batter and better incorporation of ingredients.
- Chill Between Layers: Allow each mousse layer to set properly in the refrigerator before adding the next. This ensures clean layers and a beautiful presentation.
- Quality Chocolate Matters: Use high-quality chocolate for the best flavor. The chocolate is the star of the mousse, so choose brands you love.
- Garnish for Appeal: Adding chocolate shavings and fresh berries not only enhances the look but also adds a contrasting flavor and texture to the cake.

Variations
Different Chocolate Combinations
You can switch up the chocolates for fun flavors. Use dark, milk, and white chocolate. Or try semi-sweet chocolate for a richer taste. For a fruity twist, add raspberry or orange zest to the dark chocolate. You can even mix in some mint extract for a fresh flavor. Each combo brings a new experience to your mousse cake.
Alternative Garnishes
Garnishes can change the look of your cake. Instead of just chocolate shavings, try crushed nuts for a nice crunch. Fresh fruits like strawberries or raspberries add color and tartness. You can also drizzle caramel or chocolate sauce on top for extra sweetness. Experiment with different toppings to find your favorite.
Gluten-Free Version
Want a gluten-free cake? Use almond flour or a gluten-free flour mix instead of regular flour. This change keeps your cake moist and delicious. Make sure to check all chocolate labels for gluten. Some brands might add ingredients that contain gluten. With these swaps, you can enjoy this treat without worries.
Storage Info
Proper Storage Methods
To keep your Triple Chocolate Mousse Cake fresh, store it in the fridge. Use an airtight container or cover it tightly with plastic wrap. This helps maintain its creamy texture and rich flavor. Make sure to avoid placing it near strong-smelling foods, as it can absorb odors.
How Long Can It Last?
When stored properly, this cake can last up to five days in the fridge. After the third day, the texture may change slightly. If you notice the mousse becoming less fluffy, it’s still safe to eat. Just be aware that it may not taste as fresh.
Freezing Instructions
You can freeze the cake for later enjoyment. Wrap each slice in plastic wrap, then place in a freezer-safe bag. This helps prevent freezer burn. The cake can be frozen for up to three months. When ready to eat, thaw it overnight in the fridge before serving. Enjoy your delightful cake even after some time!
FAQs
Can I make this cake in advance?
Yes, you can make this cake ahead of time. The mousse layers need time to set. You can prepare the cake base a day earlier. Just let it cool completely before storing it in the fridge. Assemble the mousse layers the day you plan to serve it. This way, it stays fresh and tasty.
Is it possible to use different types of chocolate?
Absolutely! Feel free to mix and match chocolates. You can use dark, milk, or white chocolate as you like. Try using flavored chocolates too, like caramel or hazelnut. Just remember, each chocolate will change the taste of your mousse.
How can I prevent my mousse from deflating?
To keep your mousse fluffy, follow a few simple tips. First, whip your cream until soft peaks form, but don’t over-whip. Gently fold it into the chocolate mixture. This keeps air in and makes it light. If you use gelatin, it helps the mousse hold its shape, too.
What can I serve with Triple Chocolate Mousse Cake?
You can serve it with a few tasty additions. Fresh berries add a nice tartness that balances the sweetness. Chocolate shavings make a great garnish and look fancy. A scoop of vanilla ice cream can also pair well. Try drizzling some raspberry sauce on the plate for extra flair.
We explored how to create a delicious Triple Chocolate Mousse Cake. You learned about the key ingredients for each layer and how to make them. I shared step-by-step instructions and helpful tips to ensure your mousse is fluffy and your cake is a success. Don’t forget the variations for personal touches. Follow the storage tips to keep your cake fresh. Dive into this cake adventure, and enjoy sharing your tasty creation with friends and famil

Triple Chocolate Mousse Cake
Ingredients
- 1 cup all-purpose flour
- 1/2 cup unsweetened cocoa powder
- 1/2 teaspoon baking powder
- 1/4 teaspoon baking soda
- 1/4 teaspoon salt
- 1/2 cup unsalted butter, softened
- 1 cup granulated sugar
- 2 large eggs
- 1 teaspoon vanilla extract
- 1/2 cup milk
- 4 ounces dark chocolate (70% cocoa), chopped
- 1 cup heavy whipping cream
- 2 tablespoons granulated sugar
- 1/2 teaspoon vanilla extract
- 1/2 teaspoon gelatin (optional for stability)
- 4 ounces milk chocolate, chopped
- 4 ounces white chocolate, chopped
- 1 cup heavy whipping cream
- 2 tablespoons granulated sugar
- 1/2 teaspoon vanilla extract
- 1 cup heavy whipping cream
- 2 tablespoons granulated sugar
- 1/2 teaspoon vanilla extract
- 1 cup chocolate shavings
- 1 cup fresh berries (optional)
Instructions
- Preheat your oven to 350°F (175°C) and grease a 9-inch springform pan.
- In a medium bowl, sift together flour, cocoa powder, baking powder, baking soda, and salt.
- In a large mixing bowl, cream together the softened butter and sugar until light and fluffy.
- Beat in the eggs, one at a time, followed by the vanilla extract.
- Gradually stir in the dry ingredients, alternating with milk, until just combined.
- Pour the batter into the prepared pan and bake for 25-30 minutes or until a toothpick comes out clean.
- Allow to cool completely in the pan before removing.
- Melt dark chocolate in a heatproof bowl over simmering water (or microwave in 20-second increments).
- In a separate bowl, whip the heavy cream, sugar, and vanilla until soft peaks form.
- If using gelatin, dissolve it in 1 tablespoon of warm water and mix it into the melted chocolate once it has cooled slightly.
- Fold the whipped cream into the chocolate mixture until well combined and fluffy.
- Repeat the same melting and whipping process with the milk chocolate as mentioned for dark chocolate mousse.
- Fold whipped cream into the milk chocolate until combined.
- Melt white chocolate and repeat the whipping process. Since white chocolate is sweeter, adjust sugar according to taste.
- Fold whipped cream into white chocolate until combined.
- Place the cooled chocolate cake base at the bottom of the springform pan.
- Pour dark chocolate mousse over the cake and spread evenly.
- Chill in the refrigerator for about 1 hour until set.
- Next, layer the milk chocolate mousse over the dark chocolate layer and chill for another hour.
- Finally, add the white chocolate mousse on top and smooth the surface.
- Refrigerate for at least 4-6 hours or overnight for best results.
- Carefully remove the springform pan from the cake and transfer to a serving platter.
- Garnish with chocolate shavings and fresh berries if desired.


![- 1 cup ricotta cheese - 2 large eggs - 1/4 cup granulated sugar - Zest of 1 lemon - 1/4 cup fresh lemon juice I love using ricotta cheese in these pancakes. It makes them soft and creamy. The eggs add richness and help the pancakes rise. Granulated sugar gives just the right hint of sweetness. Zest and juice from the lemon bring a bright, fresh flavor. - 1 cup all-purpose flour - 2 teaspoons baking powder - 1/4 teaspoon salt All-purpose flour gives the pancakes structure. Baking powder lifts the batter and keeps it light. A pinch of salt balances the sweetness and enhances the lemon's flavor. - 1/4 cup milk (or a dairy-free alternative) - Butter or oil for cooking Milk helps adjust the batter's consistency. You can use dairy-free milk if you prefer. Butter or oil is essential for cooking the pancakes. It prevents sticking and adds a nice golden color. For the full recipe, check out the details above. To start, grab a large mixing bowl. Add 1 cup of ricotta cheese, 2 large eggs, and 1/4 cup of granulated sugar. Use a whisk to mix these until smooth. It's important to blend well so your pancakes turn out fluffy. Next, add the zest of 1 lemon and 1/4 cup of fresh lemon juice. The zest gives a bright flavor, while the juice adds a nice tang. Mix again until everything is well combined. Now, take another bowl for the dry mix. Combine 1 cup of all-purpose flour, 2 teaspoons of baking powder, and 1/4 teaspoon of salt. Stir until it looks even. This blend helps the pancakes rise and stay light. Gradually add the dry mix to the wet mix. Use a spatula to fold the ingredients together. Be careful not to over-mix; some lumps are okay. If the batter seems too thick, pour in 1/4 cup of milk. This will help reach the right consistency for pouring. It's time to cook! Preheat a non-stick skillet over medium heat. Lightly grease it with butter or oil. Pour about 1/4 cup of batter for each pancake onto the skillet. Cook for 2-3 minutes. You'll see small bubbles form on the surface when they're ready to flip. Carefully turn the pancakes and cook for another 2-3 minutes until golden brown and fluffy. Repeat this with the remaining batter. Enjoy your Lemon Ricotta Pancakes warm! For the full recipe, check the section above. To make the best Lemon Ricotta Pancakes, start with the right skillet temperature. Preheat your non-stick skillet over medium heat. This helps the pancakes cook evenly and become fluffy. If the skillet is too hot, the pancakes can burn on the outside while staying raw inside. Next, avoid over-mixing your batter. Gently fold the wet and dry ingredients together until just combined. A few lumps are okay. Over-mixing can make the pancakes tough instead of light and airy. When it comes to toppings, get creative! Fresh fruit like berries or sliced bananas pairs well with the zesty lemon flavor. You can also drizzle maple syrup or honey on top for added sweetness. For an appealing look, stack the pancakes high on a plate. Add a dollop of whipped cream and sprinkle powdered sugar on top. This adds a nice touch and makes them even more tempting. If you need a gluten-free option, swap out the all-purpose flour for a gluten-free blend. Many brands offer good alternatives that work just as well. For a dairy-free version, use a plant-based ricotta and a non-dairy milk. Almond or oat milk works great here. These changes still keep the pancakes tasty and fluffy. For the full recipe, check the previous section. {{image_2}} You can make these pancakes even better with some fun additions. Try adding blueberries or chocolate chips to the batter before cooking. This small change adds bursts of flavor and sweetness to each bite. Another option is to switch up the citrus flavor. Instead of lemon, you can use orange zest. This will give your pancakes a bright and fresh taste, perfect for a sunny breakfast. Garnishing your pancakes can take them to the next level. Fresh fruits like strawberries, bananas, or raspberries pair nicely. Just slice them up and place them on top for a colorful look. Drizzling maple syrup or honey adds a nice touch of sweetness. You can also add a dollop of whipped cream for some extra creaminess. It makes your pancakes look fancy and taste even better. You can serve these pancakes in different ways. Stacking them high on a plate looks impressive and makes for a fun meal. Don’t forget to add your favorite toppings! If you want to try something new, consider a pancake waffle hybrid. Use the batter in a waffle maker instead. This gives you a crispy outside and fluffy inside, making for a great breakfast treat. For the full recipe, check out the detailed steps above. Enjoy these tasty lemon ricotta pancakes! To keep your pancakes fresh, follow these steps: - Refrigeration: Place leftover pancakes in an airtight container. They stay good for 3-4 days in the fridge. You can also stack them with parchment paper between layers to prevent sticking. - Freezer Tips: For long-term storage, freeze pancakes in a single layer first. Then, transfer them to a freezer bag or container. They can last up to 2 months. Label the bag with the date for easy tracking. You have a couple of options for reheating: - Microwave: This method is quick. Just place a pancake on a microwave-safe plate. Heat for 20-30 seconds. Add a damp paper towel on top to keep them moist. - Stovetop Reheating: This keeps the texture better. Heat a skillet over low heat. Add a small amount of butter or oil, then place the pancake in the skillet. Heat for about 1-2 minutes on each side until warm. To maintain the fluffy texture, avoid overheating. Check often to prevent drying out. Enjoy your pancakes warm! To make Lemon Ricotta Pancakes from scratch, you need simple ingredients. Here’s what you need: - 1 cup ricotta cheese - 2 large eggs - 1/4 cup granulated sugar - 1 teaspoon vanilla extract - Zest of 1 lemon - 1/4 cup fresh lemon juice - 1 cup all-purpose flour - 2 teaspoons baking powder - 1/4 teaspoon salt - 1/4 cup milk (or a dairy-free alternative) - Butter or oil for the skillet Start by whisking the ricotta, eggs, sugar, vanilla, lemon zest, and juice until smooth. In another bowl, mix the flour, baking powder, and salt. Combine the wet and dry ingredients gently to keep the batter light. If the batter is thick, add milk until it feels right. For the cooking, heat a skillet, pour the batter, and cook until fluffy. Check the [Full Recipe] for exact steps! Yes, you can substitute ricotta cheese. Some good options include: - Cottage cheese (blend for a smoother texture) - Cream cheese (soften it first) - Greek yogurt (adds protein and tang) These alternatives will change the flavor slightly but can still taste great. You can make Lemon Ricotta Pancakes even better with fun mix-ins and toppings. Consider these ideas: - Fresh blueberries or raspberries - Chocolate chips for sweetness - Chopped nuts for crunch - Honey or maple syrup for drizzling You can also top them with whipped cream, fresh fruit, or a sprinkle of powdered sugar. To keep your pancakes fluffy, follow these tips: - Avoid over-mixing the batter; lumps are okay. - Use a light hand when folding in the dry ingredients. - Ensure your skillet is at the right temperature; too hot can burn them. - Let the batter rest for a few minutes before cooking. These steps will help you achieve fluffy and light pancakes every time. In this post, we covered how to make delicious Lemon Ricotta Pancakes. You learned about the key ingredients, like ricotta, eggs, and sugar, and how to prepare them. I shared tips on cooking, serving, and even storing leftover pancakes. You can mix in fruits or switch up flavors to make them your own. Remember, with the right cooking methods, you can create light and fluffy pancakes every time. Enjoy your cooking adventure; these pancakes are sure to impress!](https://dailydishlab.com/wp-content/uploads/2025/06/08a6d73f-3236-4643-afc4-ab19070334e6-768x768.webp)

