Vegan Chocolate Chip Cookie Dough Dip Delightful Treat

If you love the taste of cookie dough but want a vegan twist, you’re in for a treat! This Vegan Chocolate Chip Cookie Dough Dip is easy to make and oh-so-delicious. Perfect for parties or a cozy night in, you’ll crave this dip long after your first bite. Get ready to enjoy creamy, sweet goodness with simple ingredients that satisfy your sweet tooth. Let’s dive into the delight that is cookie dough dip!
Why I Love This Recipe
- Quick and Easy: This dip comes together in just 10 minutes, making it a perfect last-minute dessert or snack.
- Healthy Ingredients: Using almond flour and oats, this dip is not only delicious but also packed with nutrients.
- Customizable: You can easily adapt this recipe by adding your favorite mix-ins like nuts or dried fruit.
- Perfect for Sharing: This dip is great for parties and gatherings, served with fresh fruit or pretzels for everyone to enjoy.
Ingredients
Primary Ingredients for Vegan Chocolate Chip Cookie Dough Dip
To make this dip, you need a few simple items. Here’s what you’ll need:
- 1 cup almond flour
- 1/2 cup rolled oats
- 1/4 cup maple syrup
- 1/4 cup almond butter (or peanut butter)
- 1/4 cup dairy-free chocolate chips
- 1 teaspoon vanilla extract
- 1/4 teaspoon salt
These ingredients create a tasty, sweet base for your dip. Almond flour gives a nice texture. Rolled oats add a bit of chewiness. Maple syrup sweetens it, while almond butter lends creaminess.
Optional Ingredients for Enhanced Creaminess
If you want your dip to be even creamier, consider these options:
- 2 tablespoons coconut oil, softened
Adding coconut oil makes the dip smooth and rich. It helps blend everything together. If you skip it, your dip will still taste great, just a bit less creamy. You can mix it in with the other wet ingredients.
Substitutions for Common Allergens
Need to avoid certain foods? Here are some easy swaps:
- Use sunflower seed butter instead of almond butter for nut allergies.
- Swap almond flour for oat flour or coconut flour if you prefer.
- Maple syrup can be replaced with agave syrup or honey for sweetness.
These substitutions keep your dip safe and delicious. Always check labels for allergens in store-bought items.

Step-by-Step Instructions
Mixing the Dry Ingredients
First, grab a medium bowl. Add 1 cup of almond flour and 1/2 cup of rolled oats. Stir them well with a spoon. This mix gives your dip a nice base. Almond flour makes it creamy, and oats add texture. Make sure there are no lumps so it blends smoothly.
Incorporating Wet Ingredients
Next, add in the wet stuff. Pour in 1/4 cup of maple syrup. Then, add 1/4 cup of almond butter. You can use peanut butter if you prefer. Add 1 teaspoon of vanilla extract and 1/4 teaspoon of salt for flavor. Mix all these together until a dough starts to form. It should feel sticky and smooth, just like cookie dough!
Finishing Touches with Chocolate Chips
Now for the best part—chocolate chips! Gently fold in 1/4 cup of dairy-free chocolate chips. Make sure they spread evenly throughout the dough. If you want it extra creamy, you can add 2 tablespoons of softened coconut oil. Mix it all well. Finally, place the dip in the fridge for at least 30 minutes. This helps the flavors blend and the dip to firm up a bit. Serve it with fresh fruit or graham crackers for a tasty treat!
Pro Tips
- Storage Solution: Keep the dip in an airtight container in the refrigerator for up to one week for optimal freshness.
- Texture Adjustment: For a creamier dip, blend the mixture in a food processor until smooth before adding chocolate chips.
- Flavor Variations: Experiment by adding spices like cinnamon or nutmeg for a unique flavor profile.
- Serving Suggestions: Pair with a variety of dippers, such as apple slices, pretzels, or even graham crackers to cater to different tastes.
Tips & Tricks
How to Achieve the Best Texture
To get the perfect texture for your dip, use almond flour. It gives a fine base. Combine it well with rolled oats. This mix provides a chewy feel. When you add the almond butter, make sure it’s smooth. If you want extra creaminess, add softened coconut oil. This step is optional but worth it. Mix until it is sticky and smooth. Let it chill for at least 30 minutes. This helps the dip firm up nicely.
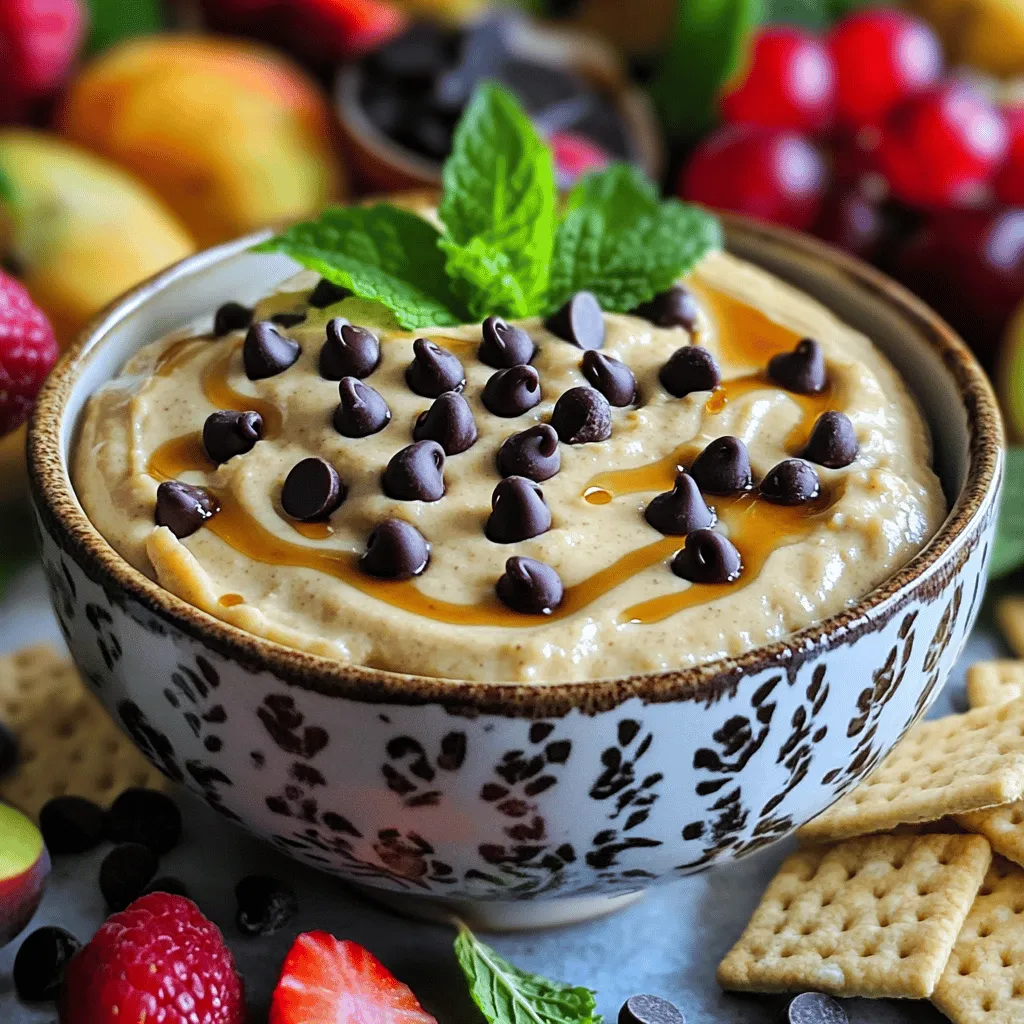
Presentation Ideas for Serving
Serving your dip right makes it more fun. Use a cute bowl to hold the dip. Sprinkle some extra chocolate chips on top for a sweet touch. Fresh mint leaves add a pop of color. You can also use fun dippables. Try fresh fruit, graham crackers, or pretzels. This mix makes a great party treat.
Adjusting Sweetness to Your Preference
If you like your dip sweeter, add more maple syrup. Start with a little bit, then taste it. This way, you can find the perfect level of sweetness. If you want less sweet, cut back on the syrup. You can also use different sweeteners if you prefer. Just make sure to mix it well. This way, your dip will be just right for you.

Variations
Gluten-Free Option
You can easily make this dip gluten-free. Just use certified gluten-free oats. Almond flour is already gluten-free. This way, everyone can enjoy it!
Flavor Enhancements (e.g., Nut Butters, Extracts)
For a twist, add different nut butters. Try cashew or sunflower seed butter! You can also add flavors like hazelnut or almond extract. A little extra vanilla can make it even better.
Serving Suggestions with Dippables
This dip pairs well with many dippables. I love using fresh fruit like apples or bananas. Graham crackers are a classic choice. Pretzels add a nice salty crunch. You can also use rice cakes for a lighter option. Just have fun with it!
Storage Info
How to Store Leftovers Properly
To keep your vegan chocolate chip cookie dough dip fresh, store it in a sealed container. A glass jar or plastic container works well. Place the container in the fridge. This dip stays good for about five days. Make sure to use clean utensils when scooping from the container. This helps keep it fresh longer.
Freezing Tips for Long-Term Storage
Want to save some for later? You can freeze the dip! Use a freezer-safe container. Leave some space at the top. The dip may expand when frozen. It can stay frozen for up to three months. When you want to enjoy it again, move it to the fridge to thaw overnight.
Best Practices for Reheating
This dip is best enjoyed cold or at room temperature. If you want to warm it slightly, do so gently. Place it in a bowl and microwave it for 10 to 15 seconds. Stir and check the temperature. Avoid overheating, as this can change the texture. Enjoy your dip with fresh fruit or crackers!
FAQs
Can I Make This Dip Ahead of Time?
Yes, you can make this dip ahead of time. I often prepare it the night before. Just store it in an airtight container in the fridge. Letting it sit helps the flavors blend. When you’re ready to serve, just take it out and enjoy!
What Can I Use Instead of Almond Flour?
You can use oat flour or all-purpose flour instead. Both options work well in this recipe. If you want a nut-free version, stick with oat flour. It gives a nice texture and taste without nuts.
Is There a Non-Vegan Version of This Recipe?
Yes, you can make a non-vegan version. Just swap out the almond butter for regular butter. You can also use regular chocolate chips instead of dairy-free ones. The taste will change slightly, but it will still be delicious!
This blog post covered vegan chocolate chip cookie dough dip in detail. We explored key ingredients, mixing methods, and tips for perfect texture. Variations let you customize flavors, while storage tips help keep it fresh.
You can easily make this dip at home, whether for a party or a snack. Enjoy the fun of creating, sharing, and savoring this tasty treat with your loved ones.

Vegan Chocolate Chip Cookie Dough Dip
Ingredients
1 cup almond flour
1/2 cup rolled oats
1/4 cup maple syrup
1/4 cup almond butter (or peanut butter)
1/4 cup dairy-free chocolate chips
1 teaspoon vanilla extract
1/4 teaspoon salt
2 tablespoons coconut oil, softened (optional, for creaminess)
Instructions
In a medium mixing bowl, combine the almond flour and rolled oats, stirring well to combine.
Add in the maple syrup, almond butter, vanilla extract, and salt. Mix until a dough forms; it should be sticky and smooth.
If using, add in the softened coconut oil to enhance the creaminess and mix again until fully incorporated.
Gently fold in the dairy-free chocolate chips until evenly distributed throughout the dough.
Refrigerate the dip for at least 30 minutes to allow the flavors to meld and the texture to firm up slightly.
Serve the dip with fresh fruit, graham crackers, or pretzels for dipping.
Prep Time: 10 minutes | Total Time: 40 minutes | Servings: 6
– Presentation Tips: Serve the dip in a cute bowl and sprinkle some extra chocolate chips on top for a delightful touch. Garnish with fresh mint leaves for added color and freshness.

Vegan Chocolate Chip Cookie Dough Dip
Ingredients
- 1 cup almond flour
- 1/2 cup rolled oats
- 1/4 cup maple syrup
- 1/4 cup almond butter (or peanut butter)
- 1/4 cup dairy-free chocolate chips
- 1 teaspoon vanilla extract
- 1/4 teaspoon salt
- 2 tablespoons coconut oil, softened (optional, for creaminess)
Instructions
- In a medium mixing bowl, combine the almond flour and rolled oats, stirring well to combine.
- Add in the maple syrup, almond butter, vanilla extract, and salt. Mix until a dough forms; it should be sticky and smooth.
- If using, add in the softened coconut oil to enhance the creaminess and mix again until fully incorporated.
- Gently fold in the dairy-free chocolate chips until evenly distributed throughout the dough.
- Refrigerate the dip for at least 30 minutes to allow the flavors to meld and the texture to firm up slightly.
- Serve the dip with fresh fruit, graham crackers, or pretzels for dipping.


![To make Chocolate Swirl Banana Ice Cream, you will need: - 4 ripe bananas, sliced and frozen - 1 cup coconut milk (or any milk of choice) - 2 tablespoons maple syrup (adjust for sweetness) - 1 teaspoon vanilla extract - 1/4 cup cacao powder (or unsweetened cocoa powder) - A pinch of sea salt These ingredients come together to create a creamy and rich treat. The ripe bananas give sweetness, while the cacao powder adds that lovely chocolate flavor. If you have dietary needs, there are easy swaps. For dairy-free options, use almond milk or oat milk instead of coconut milk. You can replace maple syrup with agave syrup or honey for sweetness. Those who avoid sugar may use a sugar substitute like stevia. For the cacao powder, you can use carob powder for a different taste. This ice cream is not only tasty but also has some health benefits. Each serving contains: - Calories: Around 150 - Protein: 2g - Carbohydrates: 30g - Sugar: 12g (natural sugars from bananas) - Fat: 4g This treat is a great way to enjoy dessert while getting some nutrients from the bananas. It’s a fun way to cool down and feel good about what you eat. For the complete recipe, check out the [Full Recipe]. Start by gathering all your ingredients. You will need: - 4 ripe bananas, sliced and frozen - 1 cup coconut milk (or any milk of choice) - 2 tablespoons maple syrup (adjust for sweetness) - 1 teaspoon vanilla extract - 1/4 cup cacao powder (or unsweetened cocoa powder) - A pinch of sea salt Make sure your bananas are ripe. This will make your ice cream sweet and tasty. Slice the bananas and freeze them for a few hours. Now, let's blend! Take the frozen bananas and put them in a blender. Add the coconut milk, maple syrup, vanilla extract, and sea salt. Blend until everything is smooth and creamy. You may need to stop and scrape down the sides of the blender. This helps everything mix well. Once you see a creamy texture, transfer the banana mix to a big bowl. In a different bowl, mix the cacao powder with a splash of coconut milk. Stir until you make a smooth chocolate sauce. If it is too thick, add a little more milk until it is pourable. Now, drizzle the chocolate sauce over the banana mix in the large bowl. Use a spatula to gently swirl the chocolate into the banana mixture. Create those pretty marbled patterns! Once you finish swirling, transfer the mix into an airtight container. Smooth the top with your spatula and cover it tightly. Freeze it for 2-4 hours until it is firm enough to scoop. For the best experience, let the ice cream sit out for about 5 minutes before serving. This makes it easier to scoop. Enjoy the delightful taste of your homemade Chocolate Swirl Banana Ice Cream! Check out the Full Recipe for more details. To get the right texture, freeze your bananas well. I slice them and freeze them overnight. This gives a creamy base. When blending, add coconut milk slowly. Start with a little, then add more if needed. Blend until smooth, but don’t overdo it. If it's too soft, freeze it longer. You can easily boost the flavor of your ice cream. Try adding a pinch of cinnamon. It adds warmth and depth. You can also swap maple syrup for honey or agave. Each sweetener gives a unique taste. For a nutty twist, mix in some almond extract. This brings a fun twist to the classic flavor. Serve your ice cream in chilled bowls. This keeps it cold longer. Scoop it out after letting it sit for five minutes. This makes scooping easier. Top with fresh banana slices and a drizzle of chocolate sauce. For extra crunch, sprinkle cacao nibs on top. This adds texture and looks pretty too. For the full recipe, check the main article. {{image_2}} If you want a dairy-free treat, use coconut milk. It adds creaminess and a light flavor. You can also try almond milk or oat milk. Both work well in this recipe. Just make sure to pick a milk that you enjoy. You can make your ice cream even better with mix-ins. Try adding chopped nuts or shredded coconut. Chocolate chips are also a fun choice. For toppings, fresh fruit, crushed cookies, or granola add texture and flavor. Drizzle extra chocolate sauce on top for a sweet touch. Feel free to get creative with flavors. Add peanut butter for a rich taste. You might also try adding berries like strawberries or raspberries for a fruity twist. A pinch of cinnamon gives a warm note. Each of these options makes your chocolate swirl banana ice cream unique! Remember, you can find the full recipe above. Enjoy making your ice cream! To keep your chocolate swirl banana ice cream fresh, you need to store it right. Here are some tips to help you. First, always let your ice cream cool to room temperature. This helps to avoid ice crystals. After mixing, transfer it to a container. Make sure it’s airtight. This keeps the air out and prevents freezer burn. If you want to enjoy it later, freeze it for up to a month. Use a sturdy container for your ice cream. Glass and plastic containers work well. Make sure the lid fits tightly. This keeps the ice cream safe from other smells in the freezer. If you want to scoop easily, choose a shallow container. It makes it simple to reach every part of the ice cream. Chocolate swirl banana ice cream stays fresh for about two weeks. After that, it can lose flavor and texture. It’s best to eat it within this time frame for the best taste. If it sits too long, it might become icy. Now, you can enjoy your delightful chocolate swirl banana ice cream, knowing how to store it right! For the full recipe, check out the earlier section. To make chocolate swirl banana ice cream, start by blending frozen bananas, coconut milk, maple syrup, vanilla extract, and sea salt. Blend until smooth. Next, mix cacao powder with some coconut milk to create a chocolate sauce. After blending, transfer the banana mix to a bowl. Drizzle the chocolate sauce over it and gently swirl it in. Finally, put the mixture in an airtight container and freeze it for 2-4 hours. For the full recipe, check out the details above. Yes, you can use any milk you like. Almond milk, soy milk, or oat milk work well too. Each type will give a slightly different taste and texture. Choose the milk that fits your diet or taste. Store homemade ice cream in an airtight container. This keeps it fresh and prevents ice crystals. Make sure to smooth the top before sealing to avoid air pockets. It stays fresh in the freezer for about 1-2 weeks. This blog post covered how to make chocolate swirl banana ice cream. We talked about the right ingredients, step-by-step instructions, and helpful tips. You learned how to customize the recipe with different flavors and toppings. I shared storage advice to keep your ice cream fresh. Now you can enjoy a tasty treat that fits your diet. Get ready to impress your friends and family with your new skills!](https://dailydishlab.com/wp-content/uploads/2025/07/482899ed-90ac-4dc0-8cba-52d6130bf4d8-768x768.webp)
