
If you crave a cozy meal that bursts with flavor, you’ll love this Vegan Thai Red Curry Soup. It’s a warm, comforting dish filled with fresh veggies and rich spices. In this post, I’ll guide you through easy steps to make this delightful soup at home. You’ll even find tips to tweak the recipe to your tastes. Ready to dive into a bowl of comfort? Let’s get started!
Why I Love This Recipe
- Quick and Easy: This soup takes just 30 minutes to prepare, making it perfect for busy weeknights.
- Flavor Explosion: The combination of coconut milk and red curry paste creates a rich, creamy base that is bursting with flavor.
- Nutritious and Filling: Packed with vegetables and chickpeas, this soup is both healthy and satisfying.
- Customizable: You can easily adjust the spice level and add your favorite vegetables to make it your own.
Ingredients
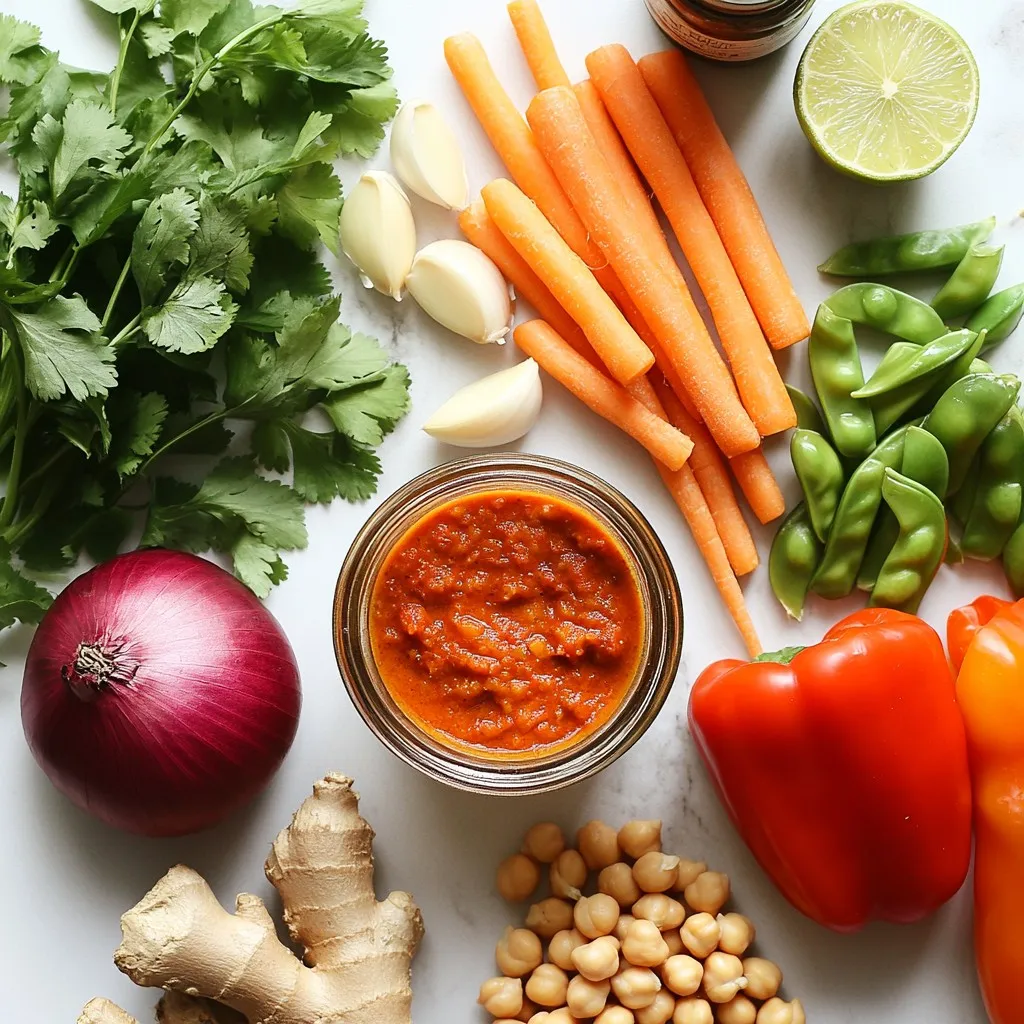
List of Ingredients
– 1 tablespoon coconut oil
– 1 medium onion, chopped
– 3 cloves garlic, minced
– 1 tablespoon ginger, grated
– 2 tablespoons red curry paste (adjust for spice preference)
– 1 can (400ml) coconut milk
– 4 cups vegetable broth
– 2 cups mixed vegetables (bell peppers, carrots, and snap peas)
– 1 cup canned chickpeas, drained and rinsed
– 2 tablespoons soy sauce or tamari
– Juice of 1 lime
– Fresh cilantro, for garnish
– Salt and pepper to taste
Notes on Quality and Substitutions
When making vegan Thai red curry soup, always choose fresh ingredients. Fresh vegetables add flavor and nutrition. You can use frozen vegetables if fresh ones are not available. For the red curry paste, look for a brand that is vegan. Some may contain fish sauce. If you want less spice, start with one tablespoon of red curry paste. You can always add more later. Coconut milk can be swapped with almond milk for a lighter soup, but it will change the flavor. If you want a creamier texture, use full-fat coconut milk.
Nutritional Information (per serving)
Each serving of this soup is rich in nutrients. It contains about:
– Calories: 320
– Protein: 8g
– Carbohydrates: 36g
– Fiber: 9g
– Fat: 16g
– Sodium: 600mg
This soup is a great source of healthy fats from coconut milk and fiber from chickpeas and veggies. It provides a warm and filling meal that is sure to please.
Step-by-Step Instructions
Preparation Steps
1. Gather all your ingredients. This makes cooking easy and fun.
2. Chop your onion into small pieces. This adds a nice taste.
3. Mince the garlic and grate the ginger. Fresh flavors are best.
4. Measure out your red curry paste. You can adjust this for spice.
5. Drain and rinse your chickpeas. This removes extra salt.
Cooking Method
1. Heat coconut oil in a large pot over medium heat.
2. Add the chopped onion. Sauté it for about 5 minutes until it turns clear.
3. Stir in the minced garlic and grated ginger. Cook for one minute for great aroma.
4. Add the red curry paste. Cook for 2-3 minutes while stirring to release the flavors.
5. Pour in the coconut milk and vegetable broth. Bring this to a simmer.
6. Mix in the vegetables and chickpeas. Cook for 10-12 minutes until the veggies are soft but bright.
7. Stir in the soy sauce or tamari and lime juice. Season with salt and pepper to taste.
8. Take the pot off the heat. Let it rest for a few minutes to blend the flavors.
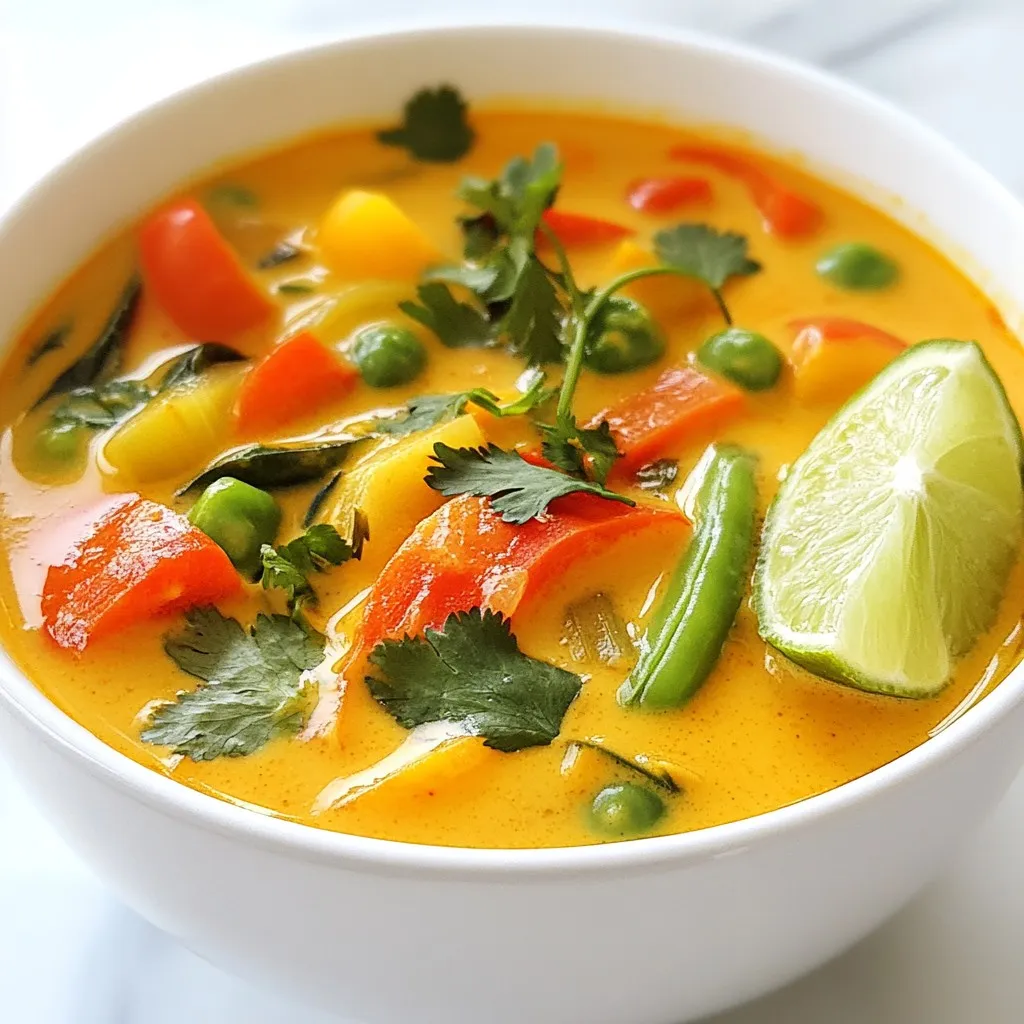
9. Serve hot, topped with fresh cilantro and lime wedges.
Tips for Enhancing Flavor
– Use fresh herbs like basil or mint for a lively touch.
– Try adding a dash of lime zest for a bright kick.
– Experiment with different vegetables based on your taste.
– If you like heat, toss in some sliced chili peppers. They add a great kick.
Tips & Tricks
How to Perfect Your Vegan Thai Red Curry Soup
To make your soup shine, use fresh ingredients. Fresh ginger and garlic add zest. Adjust the red curry paste to match your spice level. Start with a tablespoon and add more if you like heat.
When cooking, let the coconut milk and broth simmer gently. This method helps the flavors blend well. Stir often to avoid burning at the bottom.
Common Mistakes to Avoid
One common mistake is overcooking the vegetables. They should stay bright and crisp. Cook them just until tender, usually about 10-12 minutes.
Another mistake is not seasoning enough. Always taste before serving. Add salt and pepper as needed for balance.
Serving Suggestions and Pairings
Serve your soup hot. Fresh cilantro on top adds color and flavor. Lime wedges are a nice touch too; they brighten each bite.
Pair this soup with rice or noodles for a complete meal. You can also enjoy it with crusty bread to soak up the broth.
For drinks, a light tea or coconut water works well. This adds a fresh twist to your meal.
Pro Tips
- Adjust Spice Level: If you prefer a milder soup, start with less red curry paste and gradually add more to taste.
- Fresh Ingredients: Using fresh vegetables will enhance the flavor and texture of your soup, making it more vibrant.
- Substitutions: Feel free to substitute chickpeas with tofu or lentils for a different protein option.
- Make it Ahead: This soup can be made ahead of time and stored in the fridge for up to 3 days, flavors will deepen as it rests.
Variations
Gluten-Free Adjustments
This Vegan Thai Red Curry Soup is already gluten-free! The main ingredients, like coconut milk and vegetable broth, do not contain gluten. Just make sure to use tamari instead of soy sauce. Tamari is a great gluten-free option that adds deep flavor.
Protein Additions or Alternatives
If you want more protein, add some tofu. Firm tofu works well. You can cube it and add it in the last few minutes of cooking. Tempeh is another great choice; it has a nice texture and nutty flavor. For a heartier soup, you can toss in cooked lentils or more chickpeas.
Vegetable Substitutions
Feel free to mix up the veggies! If you don’t have snap peas, use green beans or zucchini. Carrots can be swapped for sweet potatoes for a sweeter taste. Broccoli or cauliflower can also add great texture and flavor. Just make sure to cut them into small pieces so they cook evenly.
Storage Info
How to Store Leftovers
To store your vegan Thai red curry soup, let it cool first. Then, transfer it to an airtight container. You can keep it in the fridge for up to four days. If you want to enjoy it later, consider freezing it.
Reheating Tips
When you are ready to eat the leftovers, simply pour the soup into a pot. Heat it over medium-low heat, stirring often. This way, it warms evenly. You can also use a microwave. Just place it in a safe bowl and heat in short bursts, stirring in between.
Freezing Instructions
If you want to freeze the soup, make sure it’s completely cool. Pour it into freezer-safe containers, leaving room for expansion. The soup can last for three months in the freezer. To serve, thaw it in the fridge overnight before reheating. Enjoy it hot!
FAQs
Can I make this soup ahead of time?
Yes, you can make this soup ahead of time. It stores well in the fridge. I often make a batch and keep it in an airtight container. When you’re ready to enjoy, just reheat it on the stove. The flavors blend even more as it sits.
What can I substitute for coconut milk?
If you want a different taste, use almond milk or soy milk. For creaminess, try cashew cream or oat milk. Each option gives a unique flavor but may change the soup’s texture a bit. Choose what fits your taste best.
Is it possible to make this recipe spicier?
Absolutely! To add heat, increase the red curry paste. You can also add sliced fresh chili peppers or chili flakes. Start small and taste as you go. Adjust until it reaches your preferred spice level.
How do I make it nut-free?
To keep this soup nut-free, stick with coconut milk. Avoid any nut milk options. Ensure other ingredients, like soy sauce, are nut-free as well. This way, you can enjoy the soup without worry.
In this blog post, we explored how to make Vegan Thai Red Curry Soup. You learned about the key ingredients and tips for ensuring quality. We covered step-by-step cooking methods and ways to enhance flavor. I shared mistakes to avoid and how to serve this dish. Lastly, we discussed storage and answered common questions.
Cooking can be fun and rewarding. This soup is tasty and healthy, making it great for everyone. Enjoy experimenting with different flavors and ingredient


