Zesty Ranch Chicken Tenders Crispy and Flavorful Meal

Are you ready to elevate your dinner game? My Zesty Ranch Chicken Tenders are crispy, flavorful, and sure to please everyone at your table. With simple ingredients and easy steps, you’ll whip up a meal that feels special without the fuss. Whether you want spicy, baked, or classic fried, this recipe has you covered. Let’s dive into the magic of these tasty tenders and make tonight’s dinner unforgettable!
Why I Love This Recipe
- Flavorful Marinade: The combination of buttermilk and ranch dressing creates a tangy and rich flavor that penetrates the chicken, making every bite deliciously juicy.
- Crispy Coating: The mixture of flour and cornmeal gives the chicken tenders a perfectly crispy texture that contrasts beautifully with the tender meat inside.
- Quick and Easy: This recipe is simple to prepare, requiring minimal ingredients and just a few steps, making it perfect for a weeknight dinner.
- Customizable: You can easily adjust the seasoning in the breading or try different dipping sauces to suit your taste preferences.
Ingredients
List of Required Ingredients
To make your zesty ranch chicken tenders, gather these simple ingredients:
- 1 lb chicken tenders
- 1/2 cup buttermilk
- 1/2 cup ranch dressing
- 1 cup all-purpose flour
- 1/2 cup cornmeal
- 2 teaspoons paprika
- 1 teaspoon garlic powder
- 1 teaspoon onion powder
- 1 teaspoon dried parsley
- Salt and pepper to taste
- Oil for frying
These ingredients come together to create a crispy and flavorful meal.
Substitutions and Alternatives
If you need alternatives, here are some ideas:
- No buttermilk? Use regular milk mixed with a bit of vinegar.
- No ranch dressing? Try a yogurt-based dressing for a lighter twist.
- For gluten-free options, substitute all-purpose flour with almond flour or a gluten-free blend.
- You can replace cornmeal with crushed crackers for a different crunch.
These swaps still keep the dish tasty and enjoyable!
Nutritional Information
Each serving of zesty ranch chicken tenders provides a satisfying meal. On average, you get:
- Calories: 380
- Protein: 30g
- Carbohydrates: 30g
- Fat: 18g
- Fiber: 1g
These values are based on four servings. Adjustments in ingredients may change these numbers slightly. Always check your labels for the best information.Enjoy cooking!

Step-by-Step Instructions
Marinating the Chicken
First, grab a large bowl. Combine 1/2 cup of buttermilk and 1/2 cup of ranch dressing. Stir well until mixed. Next, add 1 pound of chicken tenders. Make sure they are fully covered in the marinade. Cover the bowl with plastic wrap. Place it in the fridge for at least 30 minutes. For even more flavor, you can marinate them for up to 2 hours. This step helps the chicken soak up all the zesty goodness.
Preparing the Breading Mixture
While the chicken marinates, prepare your breading mixture. In another bowl, mix together 1 cup of all-purpose flour and 1/2 cup of cornmeal. Add 2 teaspoons of paprika, 1 teaspoon of garlic powder, and 1 teaspoon of onion powder. Then, mix in 1 teaspoon of dried parsley. Don’t forget to season with salt and pepper to taste. This mixture will give your chicken tenders a crispy and tasty coating.
Frying the Chicken Tenders
Now it’s time to fry! Heat about 1/2 inch of oil in a large skillet over medium heat. After the oil is hot, take the chicken tenders out of the marinade. Let any extra liquid drip off. Dredge each tender in the breading mixture. Press gently so the coating sticks well. Carefully add the breaded chicken tenders to the skillet. Fry them for about 3-4 minutes on each side. Look for a golden brown color and an internal temperature of 165°F (75°C) to know they are done. Once cooked, place the chicken on a paper towel-lined plate to drain excess oil. Repeat with the remaining tenders. Serve them warm with extra ranch dressing for a tasty dip. Enjoy your meal!
Pro Tips
- Marinate for Maximum Flavor: Allow the chicken tenders to marinate for the full 2 hours to enhance the flavor and tenderness of the meat.
- Press the Coating: When breading the chicken, gently press the flour mixture onto the tenders to ensure a thick, even coating that will stay on during frying.
- Oil Temperature is Key: Use a thermometer to check the oil temperature, aiming for around 350°F (175°C) for perfectly crispy chicken without absorbing too much oil.
- Rest After Frying: Let the cooked chicken tenders rest on a paper towel-lined plate for a few minutes before serving to help retain their crispiness.
Tips & Tricks
How to Achieve the Best Flavor
To get the best flavor, marinate your chicken tenders well. Use buttermilk and ranch dressing for this. I like to let them soak for at least 30 minutes. If you have time, marinate them for up to 2 hours. This helps the flavors really sink in. You can also add extra spices to the marinade, like cayenne pepper for heat.
Recommended Cooking Oil
For frying, I recommend using vegetable oil or canola oil. Both oils have high smoke points. This means they can handle high heat without burning. If you like a richer flavor, you can try peanut oil. Just be careful if you have nut allergies. Always heat the oil to the right temperature before adding the chicken.
Ensuring Crispy Coating
To get a crispy coating, use a mix of flour and cornmeal. The cornmeal adds crunch. Make sure you press the breading onto the chicken. This helps it stick better. Fry in batches to avoid overcrowding the pan. Overcrowding can cause the oil temperature to drop. This leads to soggy chicken instead of crispy goodness. For the best texture, drain the cooked tenders on a paper towel-lined plate. This keeps them crispy until you serve them.

Variations
Spicy Zesty Ranch Chicken Tenders
You can spice up your zesty ranch chicken tenders. Add hot sauce to your marinade for extra heat. You can use cayenne pepper in the breading mix. This gives a nice kick. Adjust the spice level to fit your taste. Enjoy the extra flavor in each bite.
Baked vs. Fried Options
You can choose to bake or fry your chicken tenders. Frying gives a crispy texture, while baking is healthier. For baked tenders, preheat your oven to 400°F (200°C). Place breaded tenders on a baking sheet. Spray them with cooking oil for crispiness. Bake for 20-25 minutes until golden brown. Both methods are tasty and satisfying.
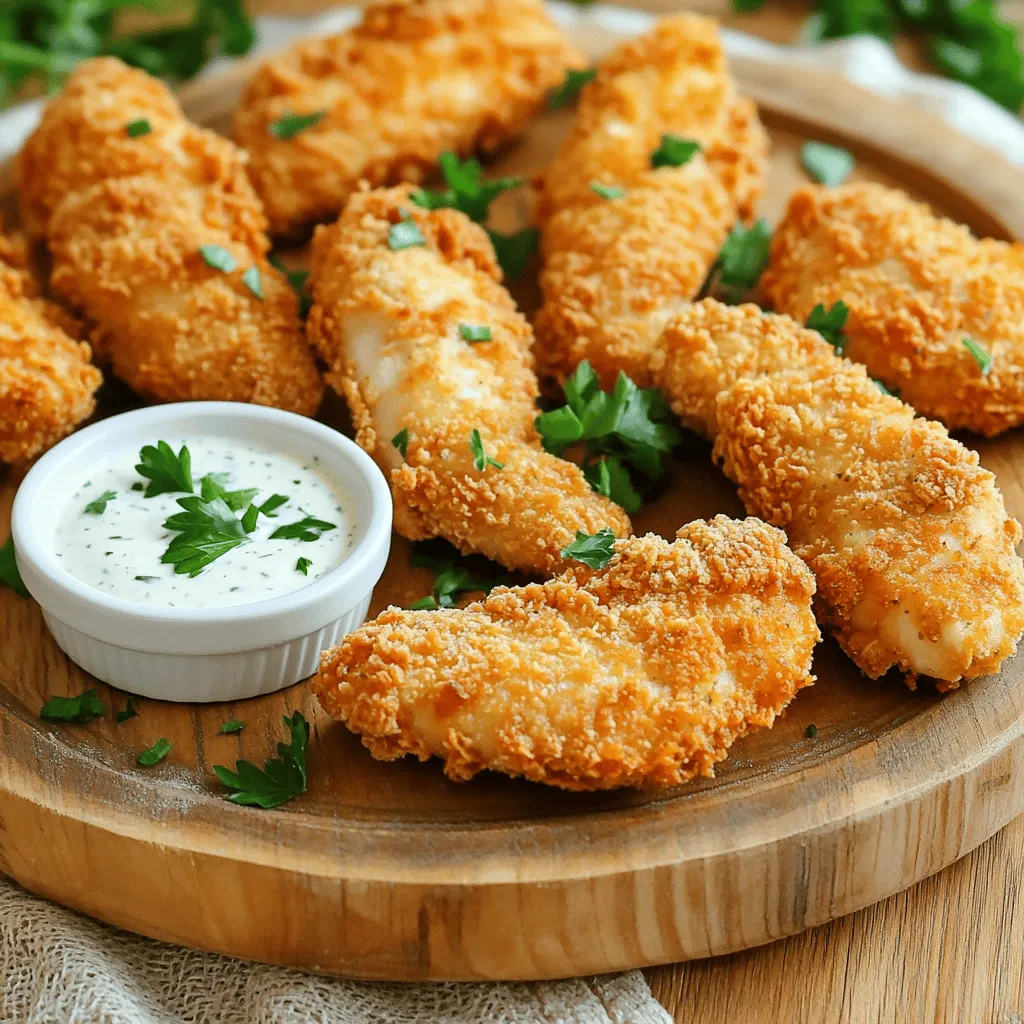
Serving Suggestions
Serve your zesty ranch chicken tenders with sides for a complete meal. Fresh veggies or a simple salad work well. Pair them with fries or mashed potatoes for comfort food. Don’t forget extra ranch dressing for dipping. You can even make a fun platter for sharing. These options make your meal fun and flavorful.
Storage Info
How to Store Leftovers
After enjoying your zesty ranch chicken tenders, store any leftovers in an airtight container. Place them in the fridge. They will stay fresh for up to three days. Make sure to let them cool before sealing. This helps keep them crispy and tasty.
Reheating Instructions
To reheat chicken tenders, use an oven or an air fryer. Preheat the oven to 350°F (175°C). Place the tenders on a baking sheet. Heat them for about 10-15 minutes. In an air fryer, set it to 350°F and cook for 5-7 minutes. This keeps them crispy and warm without drying them out.
Freezing Recommendations
You can freeze the chicken tenders for later use. Let them cool completely before freezing. Place them in a freezer-safe bag or container. They can last up to three months in the freezer. To cook from frozen, reheat them in the oven or air fryer, adding a few extra minutes to the time.
FAQs
How long to marinate chicken tenders?
You should marinate chicken tenders for at least 30 minutes. This time allows the flavors to soak in. For more taste, marinate them for up to 2 hours. Keeping the chicken in buttermilk and ranch dressing makes it juicy and full of flavor.
Can I use different cuts of chicken?
Yes, you can use other cuts of chicken. Chicken breasts or thighs work well. Just make sure they are cut into similar sizes for even cooking. Adjust the cooking time if you use thicker pieces. Thicker cuts may need a few extra minutes in the oil.
What to serve with zesty ranch chicken tenders?
You can serve zesty ranch chicken tenders with many sides. Try crispy fries or a fresh salad. They also pair well with veggies like carrots or celery sticks. For a fun twist, add some garlic bread or a creamy coleslaw. For the full experience, don’t forget extra ranch dressing for dipping.
In this post, I covered how to make tasty chicken tenders. We discussed the key ingredients, smart substitutions, and nutritional facts. You learned easy steps to marinate, bread, and fry the chicken.
I shared tips for the best flavor and perfect crispiness. Lastly, I offered variations and storage tips for leftovers.
With these insights, you can enjoy delicious chicken tenders any time. Happy cooking!

Zesty Ranch Chicken Tenders
Ingredients
1 lb chicken tenders
1/2 cup buttermilk
1/2 cup ranch dressing
1 cup all-purpose flour
1/2 cup cornmeal
2 teaspoons paprika
1 teaspoon garlic powder
1 teaspoon onion powder
1 teaspoon dried parsley
Salt and pepper to taste
Oil for frying
Instructions
In a large bowl, combine the buttermilk and ranch dressing. Add the chicken tenders, ensuring they are fully submerged. Cover and marinate in the refrigerator for at least 30 minutes, or up to 2 hours for extra flavor.
In another bowl, mix together the flour, cornmeal, paprika, garlic powder, onion powder, dried parsley, salt, and pepper. This will be your breading mixture.
Heat about 1/2 inch of oil in a large skillet over medium heat.
Remove the chicken tenders from the marinade, allowing any excess liquid to drip off. Dredge each tender in the breading mixture, pressing gently to ensure the coating adheres well.
Once the oil is hot, carefully add the breaded chicken tenders to the skillet in batches, avoiding overcrowding. Fry for about 3-4 minutes on each side, or until golden brown and cooked through, with an internal temperature of 165°F (75°C).
Transfer the cooked chicken tenders to a paper towel-lined plate to drain excess oil, then repeat with the remaining tenders.
Serve the zesty ranch chicken tenders warm with extra ranch dressing for dipping.
Prep Time, Total Time, Servings: 30 mins (marinating) | 20 mins | 4 servings

Zesty Ranch Chicken Tenders
Ingredients
- 1 lb chicken tenders
- 0.5 cup buttermilk
- 0.5 cup ranch dressing
- 1 cup all-purpose flour
- 0.5 cup cornmeal
- 2 teaspoons paprika
- 1 teaspoon garlic powder
- 1 teaspoon onion powder
- 1 teaspoon dried parsley
- to taste salt and pepper
- as needed oil for frying
Instructions
- In a large bowl, combine the buttermilk and ranch dressing. Add the chicken tenders, ensuring they are fully submerged. Cover and marinate in the refrigerator for at least 30 minutes, or up to 2 hours for extra flavor.
- In another bowl, mix together the flour, cornmeal, paprika, garlic powder, onion powder, dried parsley, salt, and pepper. This will be your breading mixture.
- Heat about 1/2 inch of oil in a large skillet over medium heat.
- Remove the chicken tenders from the marinade, allowing any excess liquid to drip off. Dredge each tender in the breading mixture, pressing gently to ensure the coating adheres well.
- Once the oil is hot, carefully add the breaded chicken tenders to the skillet in batches, avoiding overcrowding. Fry for about 3-4 minutes on each side, or until golden brown and cooked through, with an internal temperature of 165°F (75°C).
- Transfer the cooked chicken tenders to a paper towel-lined plate to drain excess oil, then repeat with the remaining tenders.
- Serve the zesty ranch chicken tenders warm with extra ranch dressing for dipping.


![- 2 pounds baby potatoes - 4 tablespoons unsalted butter, melted - 4 cloves garlic, minced - 1 tablespoon fresh parsley, chopped - 1 teaspoon sea salt - ½ teaspoon black pepper - ¼ teaspoon smoked paprika (optional) - Lemon zest (from 1 lemon) - Large pot - Baking sheet - Parchment paper - Measuring cup - Fork or potato masher Gather these ingredients to make your smashed potatoes shine. The baby potatoes are key; they cook evenly and have a great texture. The garlic brings a rich taste, while the butter adds a smooth finish. Fresh parsley not only brightens the dish but also adds color. You’ll also need some basic tools. The large pot helps cook the potatoes, and the baking sheet is perfect for roasting. Parchment paper prevents sticking, making cleanup easy. A measuring cup ensures you get the butter just right. Lastly, a fork or masher helps you smash the potatoes to the perfect flatness without breaking them apart. For a full experience, check the [Full Recipe] for step-by-step guidance. - Preheat your oven to 450°F (230°C). - Fill a large pot with water and add a pinch of salt. - Bring the pot to a boil over high heat. - Add 2 pounds of baby potatoes to the pot. - Cook the potatoes until fork-tender, about 15-20 minutes. - Drain the potatoes and let them cool for about 5 minutes. - Line a baking sheet with parchment paper. - Place the cooled potatoes on the sheet. - Use the bottom of a measuring cup or a fork to smash each potato gently. - In a small bowl, mix 4 tablespoons of melted butter with 4 minced garlic cloves. - Add 1 teaspoon of sea salt and ½ teaspoon of black pepper. - If you want, add ¼ teaspoon of smoked paprika. - Brush or drizzle this garlic butter over each smashed potato. - Bake the potatoes in the preheated oven for 20-25 minutes. - Keep an eye on them until they are golden and crispy on the edges. - Remove from the oven and sprinkle with fresh parsley and lemon zest before serving. - You can find the Full Recipe for more details. To get the best crispy texture, adjust your baking time. Bake the smashed potatoes for 20-25 minutes. If you want them crispier, leave them in for a few more minutes. Just keep an eye on them! The size of the potatoes also plays a big role. Use baby potatoes for even cooking. Smaller potatoes smash well and bake faster. For more flavor, try adding different spices. Smoked paprika adds a nice smoky taste. You can also sprinkle in some onion powder or chili flakes for heat. When it comes to garlic, fresh garlic gives the best taste. I recommend using whole cloves and mincing them yourself. This ensures the garlic flavor is strong and fresh. Presentation is key! Serve your smashed potatoes on a big white platter. Drizzle any leftover garlic butter over the top. Garnish with fresh parsley for a pop of color. Fresh herbs like chives or thyme also look great and add flavor. This makes your dish not only tasty but also beautiful to serve. {{image_2}} You can switch up your potato choice for smashed potatoes. While baby potatoes work great, try red or yellow potatoes for a different taste. These potatoes add creaminess and a slight sweetness. If you want to swap butter, olive oil is a fantastic choice. It brings a rich flavor and is a bit healthier. You can also use coconut oil for a unique twist. Adding cheese can elevate your smashed potatoes. Grated Parmesan adds a salty, nutty taste. For a creamier option, use cheddar cheese. Just sprinkle it on top before the final bake. You can also play with spices. Try adding rosemary or thyme for an earthy flavor. Smoked paprika adds warmth and a hint of smokiness. Experiment with different spices to find your favorite combo. Want to make this dish vegan? Simply replace butter with a plant-based butter. Use a neutral oil, like canola, for the garlic mixture. If you need low-sodium options, cut back on salt. Use fresh herbs instead to boost flavor. Lemon juice can also add brightness without extra salt. For more details, check out the Full Recipe. To keep your smashed potatoes fresh, store them in the fridge. Place leftovers in an airtight container. This helps prevent moisture loss. Use a glass or plastic container with a tight lid. They will stay good for about 3 to 5 days. If you want to keep them longer, consider freezing instead. When it's time to enjoy your leftovers, you have several options. The best way to reheat smashed potatoes is in the oven. Preheat your oven to 350°F (175°C). Place the potatoes on a baking sheet and cover them with foil. This keeps them moist. Bake for about 15 minutes. If you want a crispy finish, remove the foil for the last 5 minutes. To avoid soggy potatoes, do not microwave them. Microwaving can make the texture mushy. For longer storage, freezing is a great option. Cool the smashed potatoes completely before freezing. Place them in a freezer-safe bag or container. Make sure to squeeze out any extra air. They can last up to 2 months in the freezer. When you’re ready to eat them, thaw in the fridge overnight. Reheat them in the oven for the best texture. Avoid thawing in the microwave to keep them from getting soggy. To make your smashed potatoes extra crispy, I suggest two key steps. First, ensure your oven is hot, around 450°F (230°C). This helps achieve that golden crunch. Second, after smashing the potatoes, brush them well with garlic butter. This adds flavor and helps crisp up the edges. Yes, you can prepare the garlic butter ahead of time. Simply melt the butter and mix in minced garlic and other ingredients. Store it in the fridge for up to a week. This way, your cooking process becomes quicker when you’re ready to make the potatoes. Smashed potatoes pair well with many dishes. They go great with roasted chicken, grilled steak, or even a fresh salad. You can also serve them with a dip or sauce for added flavor. Feel free to get creative! Absolutely! While parsley is a classic choice, you can use other herbs too. Fresh chives, thyme, or rosemary work wonderfully. This gives your smashed potatoes a unique twist and flavor profile. Smashed potatoes can last in the fridge for about 3 to 5 days. Store them in an airtight container to keep them fresh. When ready to eat, just reheat them in the oven for the best texture. - [Explore the complete Garlic Butter Smashed Potatoes recipe here.](#) This post covered how to make Garlic Butter Smashed Potatoes. We discussed ingredients, steps, tips, and variations. You learned how to prepare, smash, and bake potatoes for a crispy treat. I shared ways to enhance flavor and provided storage advice. With this recipe, you can impress anyone at your next meal. Enjoy experimenting and making it your own!](https://dailydishlab.com/wp-content/uploads/2025/07/1cd4206a-28a3-462f-8de7-03118f6b2243-768x768.webp)


