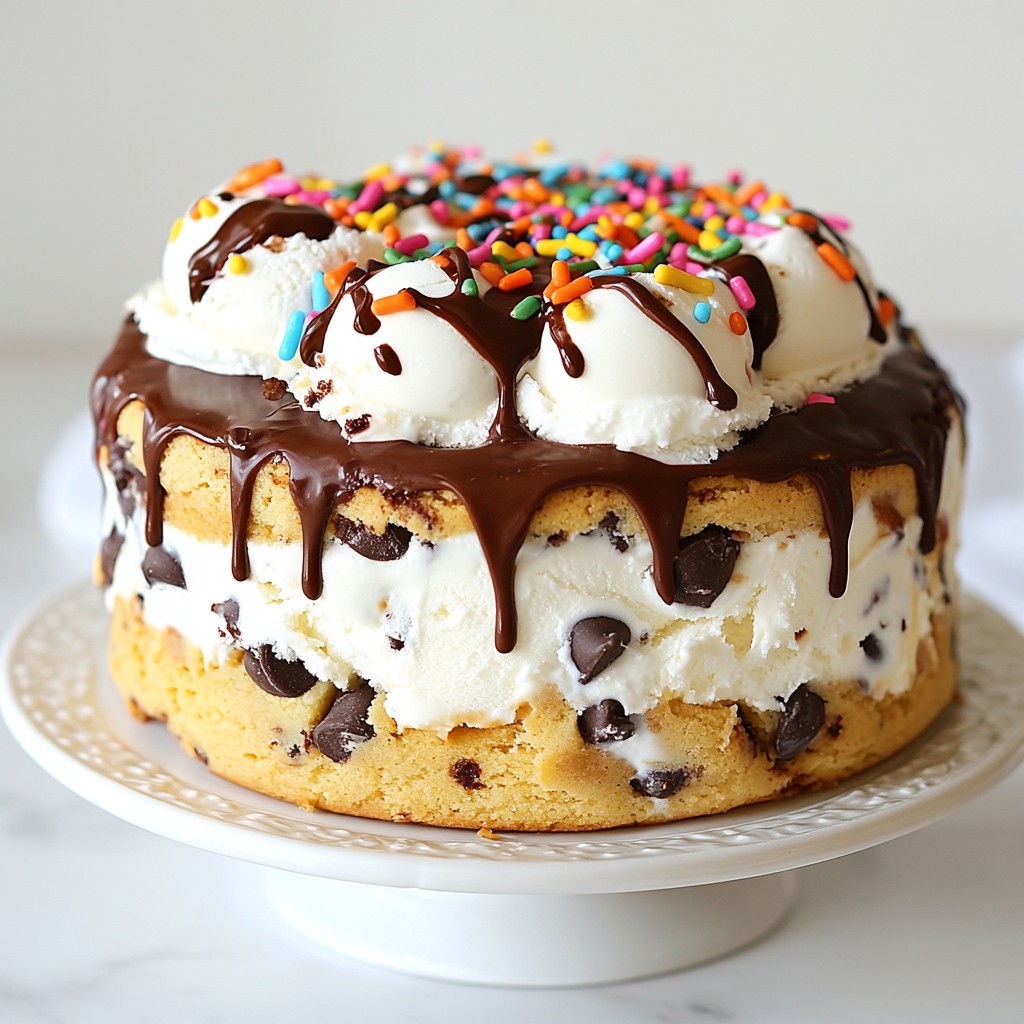
If you love chocolate chip cookies and ice cream, you're in for a treat! This Chocolate Chip Cookie Ice Cream Cake is the perfect blend of both worlds. With simple steps, you can create a dessert that impresses everyone. I’ll guide you through each part, from picking the best ingredients to perfecting your cake. Get ready to make a delightful dessert that will have everyone asking for seconds!
Why I Love This Recipe
- Decadent Layers: This cake combines the chewy goodness of chocolate chip cookies with creamy vanilla ice cream for an indulgent dessert experience.
- Customizable Toppings: You can easily personalize this cake with your favorite toppings, like nuts, fruits, or different sauces, making it versatile for any occasion.
- Perfect for Celebrations: Whether it’s a birthday or a summer gathering, this cake is sure to impress and satisfy guests of all ages.
- Easy to Make Ahead: With a little prep time, you can make this cake in advance and store it in the freezer, so it's ready whenever you need a sweet treat.
Ingredients
List of Ingredients
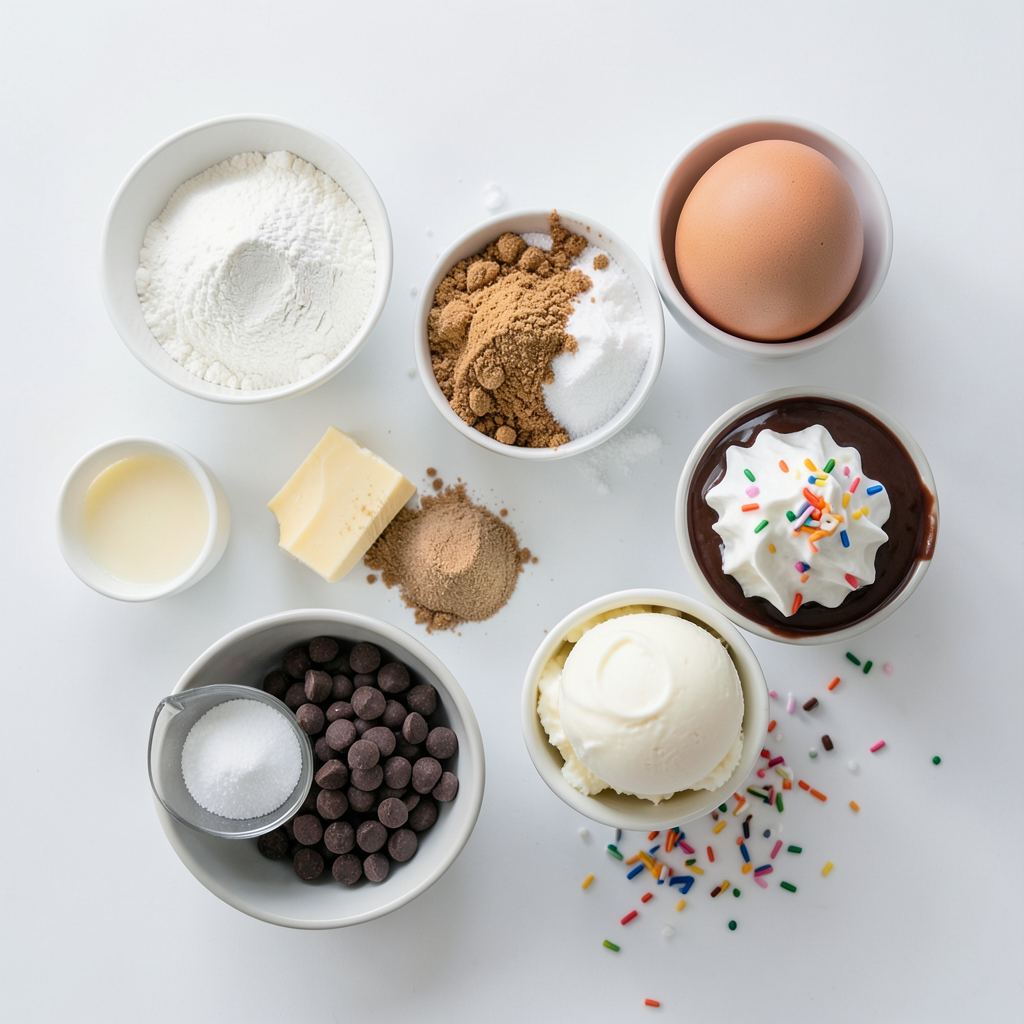
To make this delicious Chocolate Chip Cookie Ice Cream Cake, you will need:
- 2 cups all-purpose flour
- 1/2 teaspoon baking soda
- 1/2 teaspoon salt
- 3/4 cup unsalted butter, softened
- 3/4 cup brown sugar, packed
- 1/4 cup granulated sugar
- 1 teaspoon vanilla extract
- 1 large egg
- 1 cup semi-sweet chocolate chips
- 1.5 quarts of vanilla ice cream, softened
- 1/2 cup chocolate sauce (for drizzling)
- Whipped cream (for topping)
- Sprinkles (optional, for decoration)
Ingredient Substitutions
If you need to change some ingredients, here are some easy swaps:
- Use coconut oil instead of butter for a dairy-free option.
- Substitute almond flour for a gluten-free version.
- You can use brown sugar only if you want a richer taste.
- Swap vanilla ice cream for any flavor you love, like mint or cookies and cream.
Tips for High-Quality Ingredients
Using good quality ingredients makes a big difference. Here are my tips:
- Always use unsalted butter for control over salt levels.
- Choose high-quality chocolate chips for the best flavor.
- Fresh eggs make the batter rich and fluffy.
- Buy pure vanilla extract, not imitation, for a deeper taste.
These choices lead to a cake that tastes amazing and looks great. Enjoy making your Chocolate Chip Cookie Ice Cream Cake!
Step-by-Step Instructions
Preparation of Cookie Base
First, we need to make the cookie base. Preheat your oven to 350°F (175°C). In a large bowl, whisk together 2 cups of all-purpose flour, 1/2 teaspoon of baking soda, and 1/2 teaspoon of salt. This mix will help the cookies rise and taste great. Set it aside for now.
Next, we will cream the butter and sugars. In another bowl, use a mixer to beat 3/4 cup of softened unsalted butter, 3/4 cup of packed brown sugar, and 1/4 cup of granulated sugar. Mix it until it looks light and fluffy, about 2 to 3 minutes. Then, add in 1 teaspoon of vanilla extract and 1 large egg. Mix again until everything is smooth.
Now, it’s time to combine the wet and dry ingredients. Gradually add the flour mix to the butter mix. Use low speed on your mixer so you don’t overmix. When it’s just combined, gently fold in 1 cup of semi-sweet chocolate chips. This gives our cookies that tasty chocolate flavor.
Baking the Cookie Layers
Now we will bake the cookie layers. Divide the cookie dough into two equal parts. Spread each part evenly into two 9-inch round cake pans lined with parchment paper. Bake these in your preheated oven for about 12 to 15 minutes. You want the edges to be lightly golden. Once baked, let them cool completely in the pans. This step is key for a good ice cream cake.
Assembling the Ice Cream Cake
After the cookie layers have cooled, carefully take them out of the pans. Place one cookie layer on a serving platter. Then, spread a thick layer of softened vanilla ice cream on top, about 3/4 inch thick. Now, place the second cookie layer on top of the ice cream.
For the final touches, add another layer of ice cream on top of the second cookie. Smooth it out nicely. Drizzle some chocolate sauce over the top. You can also add whipped cream around the edges if you like. For a fun touch, sprinkle colorful sprinkles on top!
Finally, place the whole cake in the freezer for at least 4 hours to firm up. For the best results, let it freeze overnight. When you’re ready to serve, cut into slices using a knife dipped in warm water for clean cuts. Enjoy the deliciousness!
Tips & Tricks
How to Perfect the Cookie Layers
To get the best cookie layers, follow these steps. Start by mixing your dry ingredients well. This helps the baking soda spread evenly. Make sure your butter is soft but not melted. Cream it with the sugars until it looks fluffy. This step adds air and helps the cookies rise.
When you add the egg and vanilla, mix just until combined. Overmixing can lead to tough cookies. Divide the dough evenly and spread it smoothly in the cake pans. Bake until the edges are golden. Let them cool completely before stacking. This way, your layers stay perfect.
Serving Suggestions
When it’s time to serve, slice the cake with a warm knife. This keeps the ice cream from melting too fast. You can add extra chocolate sauce on top. Whipped cream and sprinkles also make it fun. Try to make it colorful and inviting. Serve it with fresh fruit for a nice twist.
You can even create a dessert bar. Let guests add their own toppings. This makes the treat more interactive and fun. Everyone can find a way to enjoy it.
Best Practices for Slicing
For easy slicing, dip your knife in hot water before cutting. Wipe it clean after each slice. This helps keep the edges neat. If the cake is too hard, let it sit for a few minutes. This softens the ice cream slightly, making it easier to cut.
Consider cutting the cake into smaller squares. This way, you can serve more people. It also makes it easier to grab and enjoy. Remember, the goal is to have fun while eating this delicious treat!
Pro Tips
- Use Room Temperature Ingredients: Ensuring your butter and eggs are at room temperature helps create a smoother batter, resulting in a more tender cookie base.
- Don’t Overbake: To maintain a chewy texture, remove the cookie layers from the oven when they are just lightly golden around the edges. They will continue to cook as they cool.
- Customize Your Ice Cream: Feel free to experiment with different flavors of ice cream or add mix-ins like nuts or cookie crumbles for added texture and flavor.
- Slice with Warm Water: For perfect slices, dip your knife in warm water before cutting. This helps the knife glide through the ice cream without sticking.
Variations
Flavor Variations
You can change the ice cream flavor to mix things up. Try chocolate, mint, or cookies and cream. Each choice offers a new taste. You can also layer different flavors in the cake. This gives each slice a fun surprise.
Additional Toppings
Toppings add flair to your ice cream cake. Consider adding crushed cookies on top. They add texture and crunch. You can also sprinkle chopped nuts for a nutty flavor. If you want more sweetness, drizzle caramel sauce along with chocolate sauce. Fresh fruit like strawberries or bananas are tasty too.
Alternative Cookie Bases
While chocolate chip cookies are classic, you can play with other bases. Try using oatmeal cookies for a chewy texture. Peanut butter cookies can add a rich taste. You can even use brownies for a fudgy base. Each option gives a unique twist to your cake.
Storage Info
How to Properly Store the Cake
To keep your chocolate chip cookie ice cream cake fresh, wrap it tightly. Use plastic wrap or aluminum foil. This helps to prevent freezer burn. You can also place it in an airtight container for extra care. If you store it right, the cake stays tasty and moist.
Freezing Tips for Leftovers
If you have leftover cake, cut it into slices. Wrap each slice in plastic wrap. Then, place the wrapped slices in a freezer bag. This method makes it easy to grab a piece later. It also helps keep the cake fresh. Just remember to squeeze out any extra air from the bag.
How Long Can It Last in the Freezer?
The cake can last in the freezer for up to two months. After that, it may lose some taste and texture. To enjoy it at its best, eat it within this time frame. Always check for any signs of freezer burn before serving. If the cake looks good, it should taste great!
FAQs
Can I make this recipe ahead of time?
Yes, you can make this cake ahead of time. Prepare the ice cream cake and freeze it. You can store it in the freezer for up to a week. This makes it great for parties. Just take it out when you are ready to serve.
What can I substitute for the egg?
If you need an egg substitute, try using applesauce. Use 1/4 cup of applesauce for one egg. You can also use a mashed banana or flaxseed meal. Mix 1 tablespoon of ground flaxseed with 2.5 tablespoons of water. Let it sit for a few minutes to thicken.
How do I prevent the ice cream from melting too quickly?
To keep the ice cream from melting fast, work quickly when assembling. Use softened ice cream, but not too soft. Chill your serving plates and utensils. Serve in a cool area and limit the time out of the freezer. Enjoy your cake quickly for the best taste!
This blog post covered key steps for making an amazing ice cream cake. We looked at choosing the right ingredients, preparing the cookie base, and baking the layers. Plus, I shared tips for perfect layers and serving ideas. Remember to explore different flavors and toppings for variety. Lastly, proper storage is key to keeping your cake fresh. Enjoy the process, and don’t be afraid to get creative!